Chapters
Guide › Manage the business
For partners and installers
Partners are POS dealers, IT firms and consultants who set Sofrito up for restaurants and look after them. The partner portal is where you add a restaurant for a client in about a minute, hand the owner their sign-in details, put your own brand on the restaurants you add, share your referral code, and see which restaurants are busy and which have gone quiet. This chapter is for partners and installers.
Before you start
- The partner portal is part of Sofrito Cloud, at go.sofritopos.app/partners. A Sofrito Hub runs one restaurant on site and has no partner portal: its /partners page says "The partner portal is on Sofrito Cloud" and offers Open Sofrito Cloud.
- Your partner account is separate from any restaurant's back office. To sign in to a restaurant, use the restaurant's own sign-in page (see Support a restaurant).
Become a partner
- Open go.sofritopos.app/partners in your browser.
- Select Become a partner.
- Type your Company name, your Email and a Password of at least 10 characters.
- Select Create partner account.
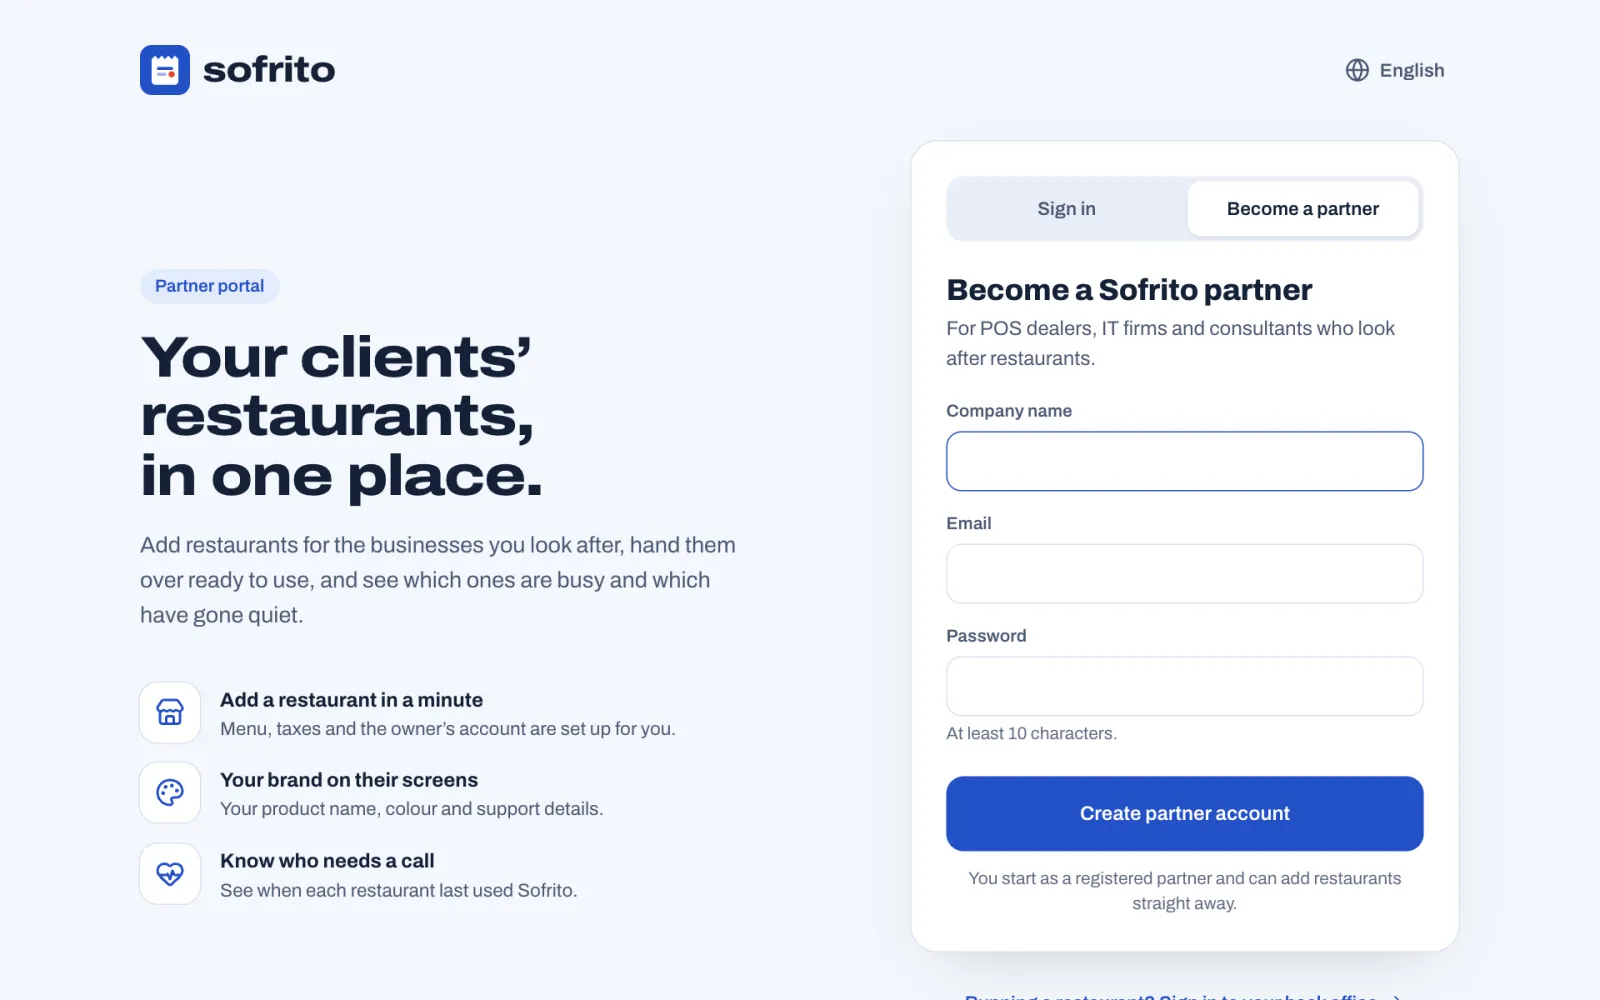
You start as a Registered partner and can add restaurants straight away. Your company name and partner level show at the top right of every page.
Next time, select Sign in, type your email and password, and select Sign in. You stay signed in on that browser for 30 days. After that, the portal says "Your partner session has ended. Please sign in again." Select Sign out at the top right when you use a shared computer. The globe button at the top switches the portal between English, Portuguese, Spanish and French.
See your restaurants
Restaurants opens first. It lists the restaurants you set up for your clients, and those that signed up with your referral code.
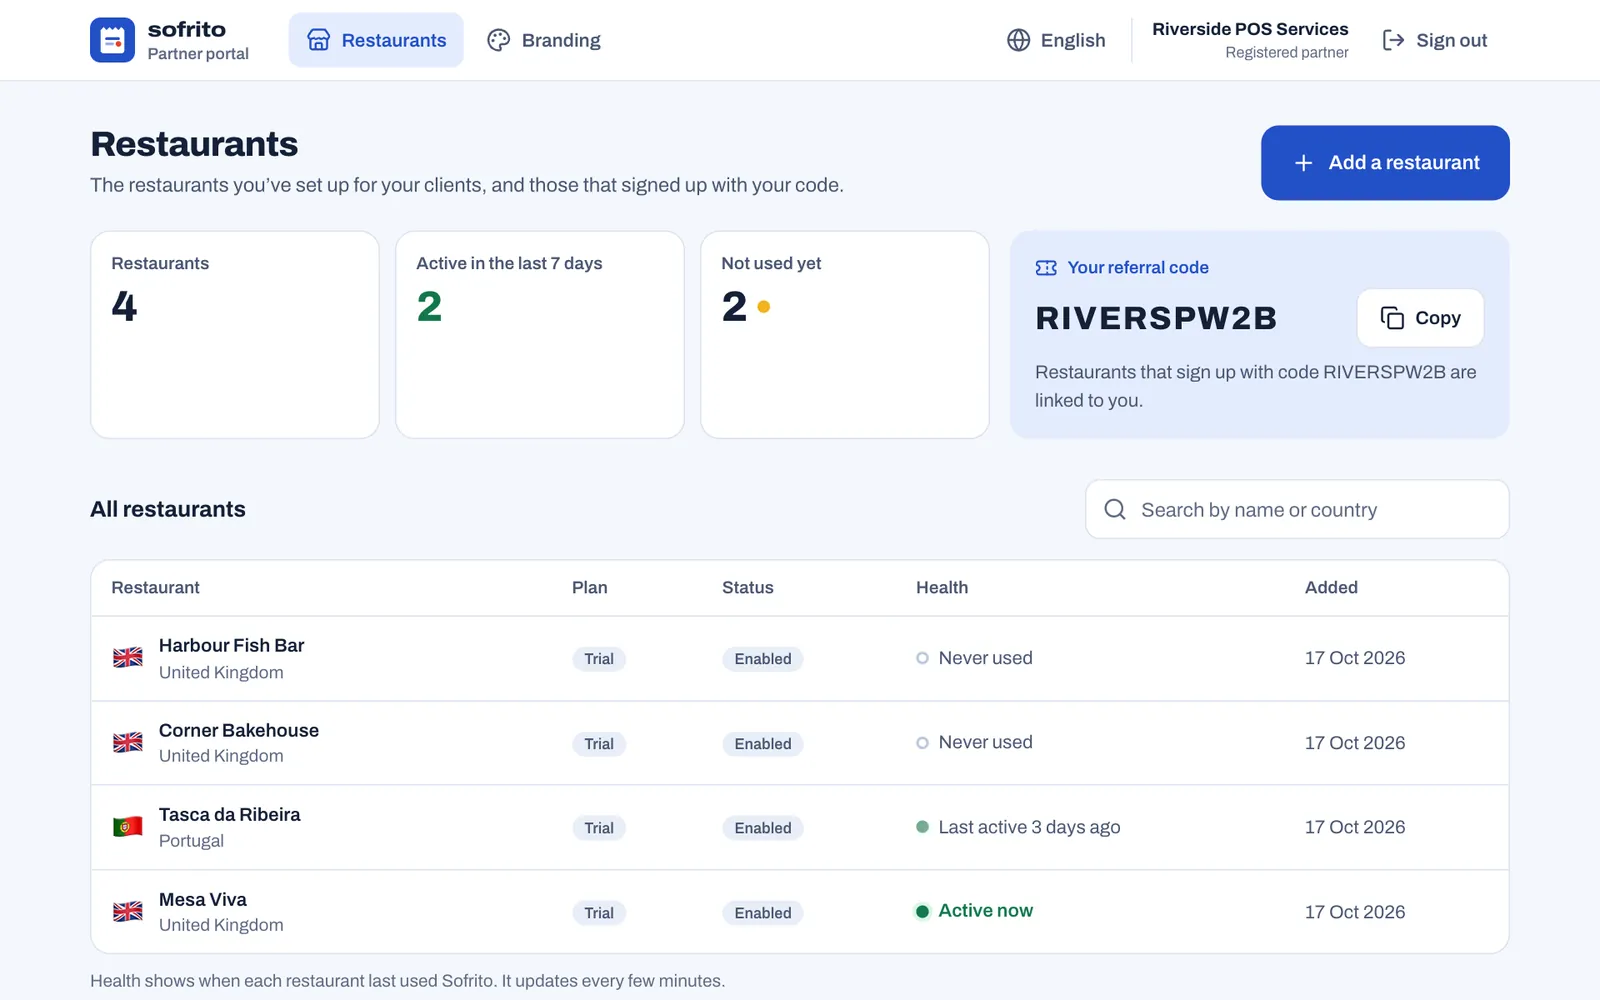
- Restaurants: how many restaurants are linked to you.
- Active in the last 7 days: how many used Sofrito in the past week.
- Not used yet: how many have never been used since you added them.
- Your referral code, with a Copy button (see Link restaurants with your referral code).
The list shows each restaurant's country, Plan, Status (Enabled, Suspended or Closed), Health and the date it was Added. Search by name or country.
Health shows when each restaurant last used Sofrito:
| Health | Means |
|---|---|
| Active now (green) | Someone used Sofrito there in the last 15 minutes. |
| Last active (green dot) | Used within the last week, for example "Last active 3 days ago". |
| Last active (yellow dot) | Nobody has used Sofrito there for more than a week. |
| Never used | Nobody has signed in since you added it. |
Health updates every few minutes while the page is open.
Add a restaurant for a client
- On Restaurants, select Add a restaurant.
- Type the Restaurant name.
- Choose the Country. It sets the currency, taxes and receipts.
- Under How do they serve?, choose Table service, Counter service, Café or bakery, Bar or Food truck or kiosk. It sets the order types and how the till works.
- Under Owner, type the owner's First name, Last name and Owner's email. The owner signs in with this email.
- Optional: turn on Add a sample menu and team, for a demo or training. It can be removed in one step later, even after practice sales.
- Select Add restaurant.
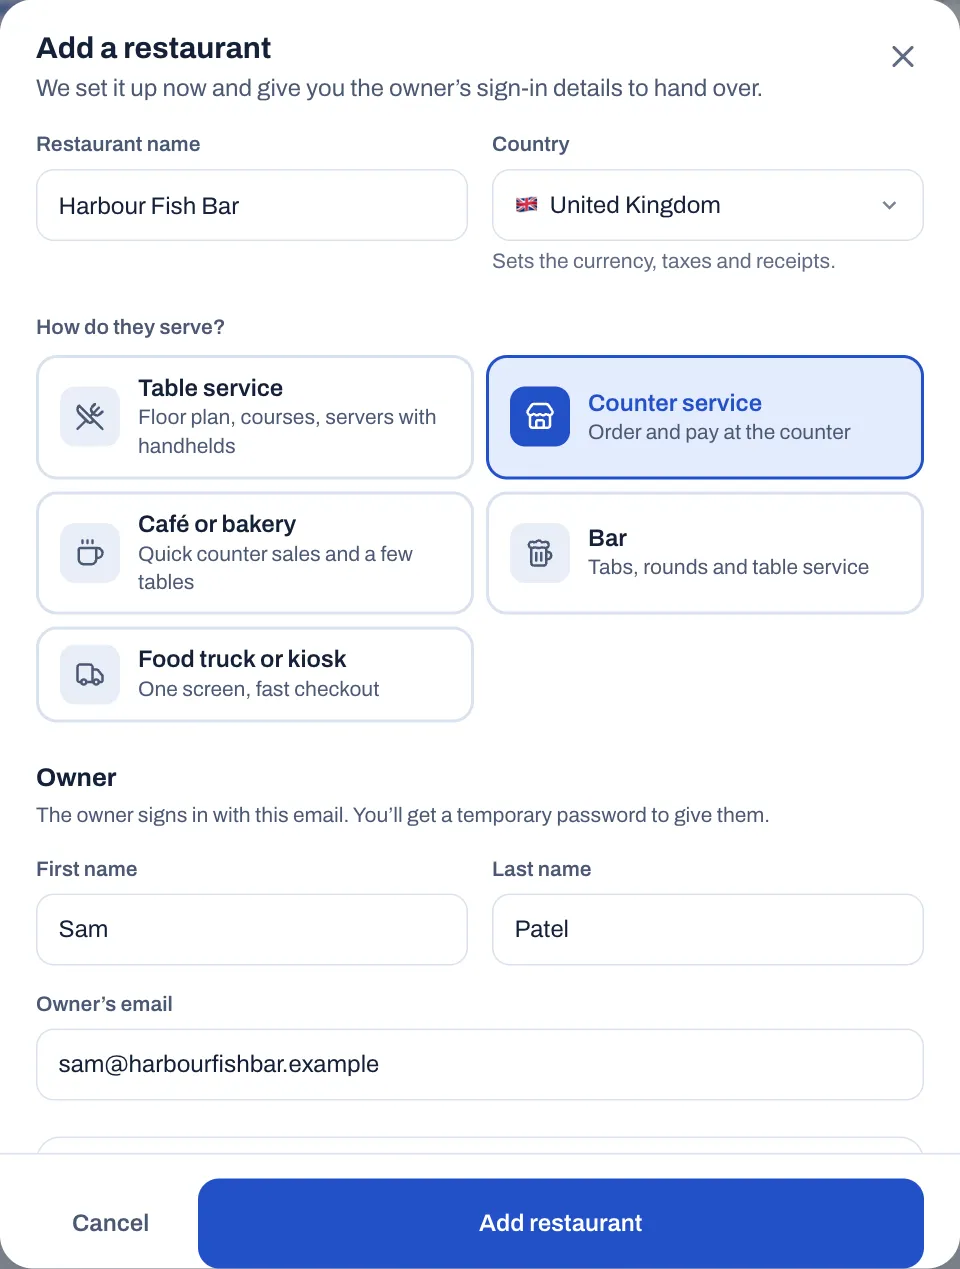
Sofrito Cloud sets the restaurant up as if the owner had done it: the country's taxes, receipts and payment methods, the service style, and the owner's account with a temporary password and a PIN. Your branding is applied (see Put your brand on your restaurants).
Hand the restaurant over
As soon as the restaurant is ready, the window shows the owner's sign-in details:
| Detail | What it is |
|---|---|
| App address | Where the owner signs in: the Sofrito Cloud address. |
| Owner's email | What the owner signs in with. |
| Temporary password | For the owner's first sign-in to the back office. |
| PIN | Unlocks the tills for the owner. |
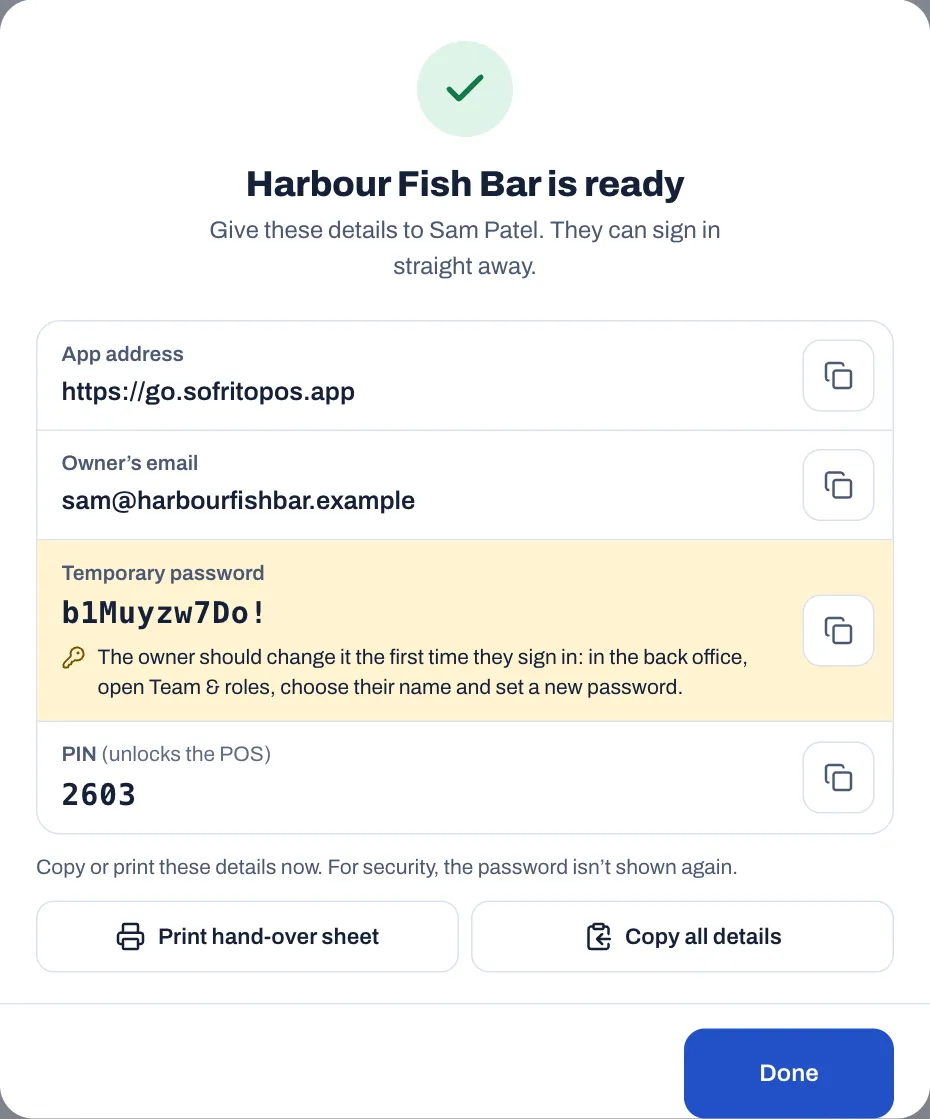
- Select Print hand-over sheet to print a page for the owner, or Copy all details to paste them into a message. Each detail also has its own copy button.
- Select Done.
The printed sheet carries your brand, your company name and your support email and phone, and walks the owner through their first sign-in:
- Open the app address in the browser of a computer or tablet.
- Choose Sign in to the back office and sign in with the email and the temporary password.
- Change the password straight away: open Team & roles, choose your name and set a new one.
- At the till, unlock with the PIN.
Ask the owner to keep the sheet safe and throw it away once they have changed the password. The restaurant now shows in your list as Never used until the owner signs in.
Put your brand on your restaurants
White label puts your product name and colour on the restaurants you add, in place of Sofrito's.
- Select Branding.
- Type your Product name, up to 40 characters. Leave it empty to keep Sofrito.
- Under Primary colour, select a colour, select the last circle to choose another, or type its code, such as #0F766E, in the box under the colours. It is used for the logo and the main buttons. If the colour is light, Sofrito warns that white text on it may be hard to read.
- Type your Support email and Support phone.
- Select Save branding. To go back to what you had, select Undo changes.
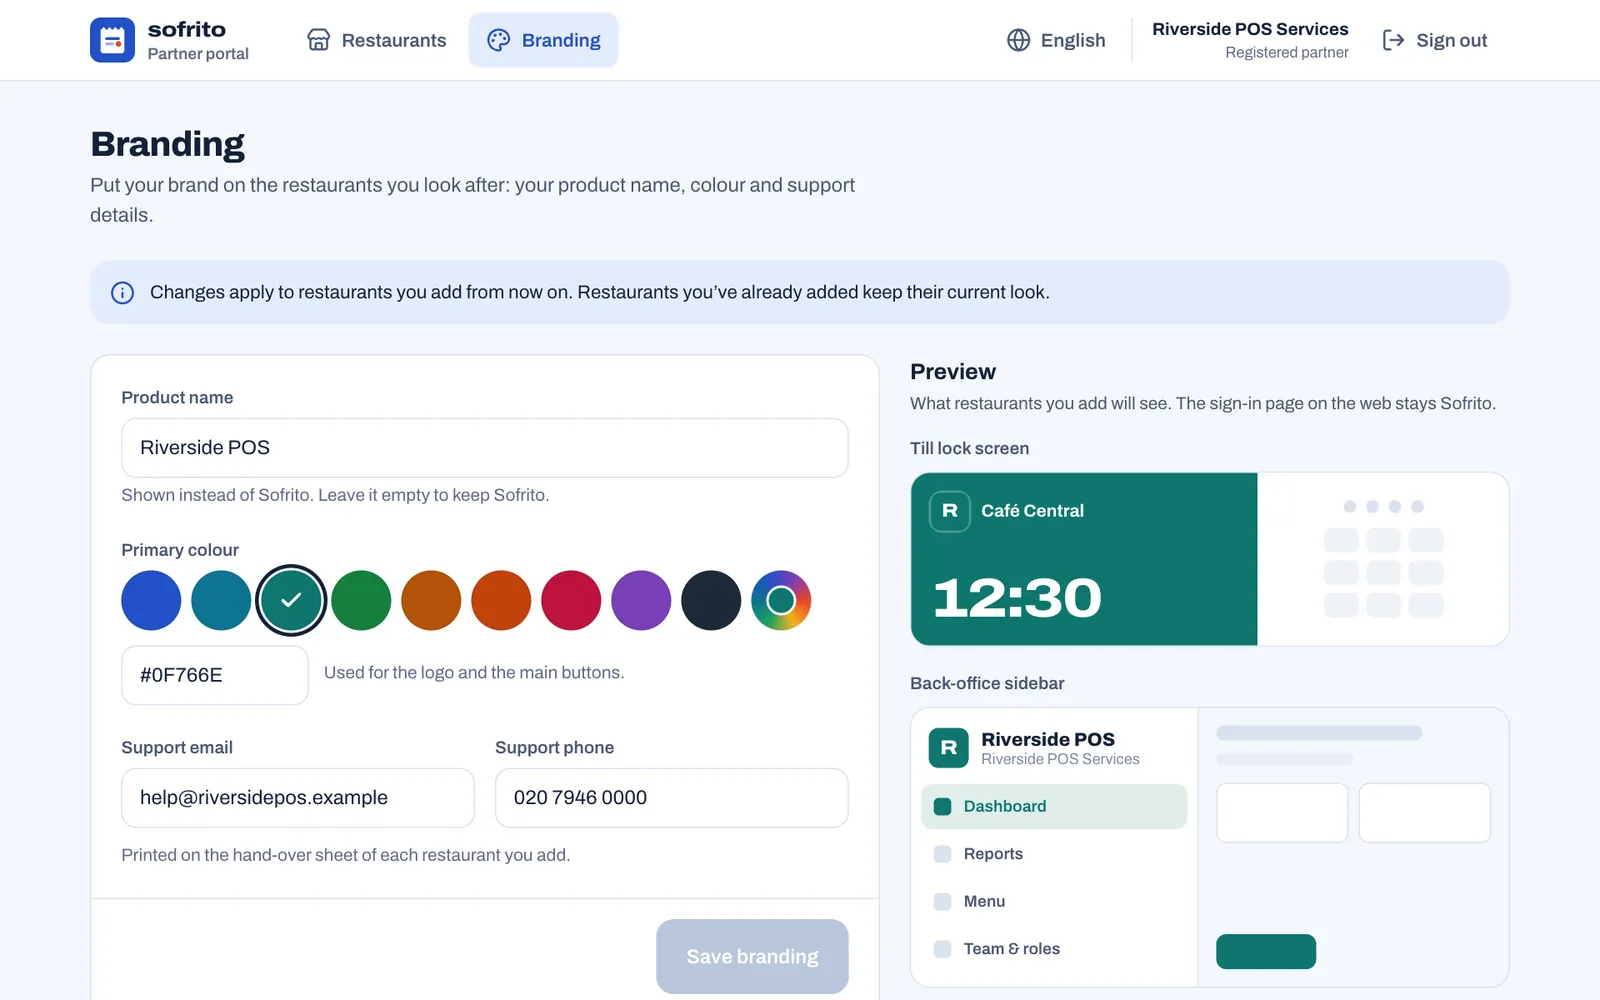
Branding applies to restaurants you add from now on. Restaurants you added before keep the look they had, and restaurants that sign up with your referral code keep the Sofrito look.
The Preview on the right shows what restaurants you add will see: the Till lock screen, the Back-office sidebar and the Printed hand-over sheet. In a restaurant you add, the owner and staff see:
- on the till's lock screen, your colour, with the first letter of your product name as the logo;
- at the top of the back-office sidebar, your product name and its first letter on your colour, with your company name under it;
- your colour instead of Sofrito's blue for the main buttons and highlights, in the back office and on the tills.
Guests never see your product name: the customer display and the pickup board show the restaurant's own logo, or its first letter, and its name. Your support email and phone are printed on the hand-over sheet. The restaurant's sign-in page on the web keeps the Sofrito look, because it opens before the restaurant is known.
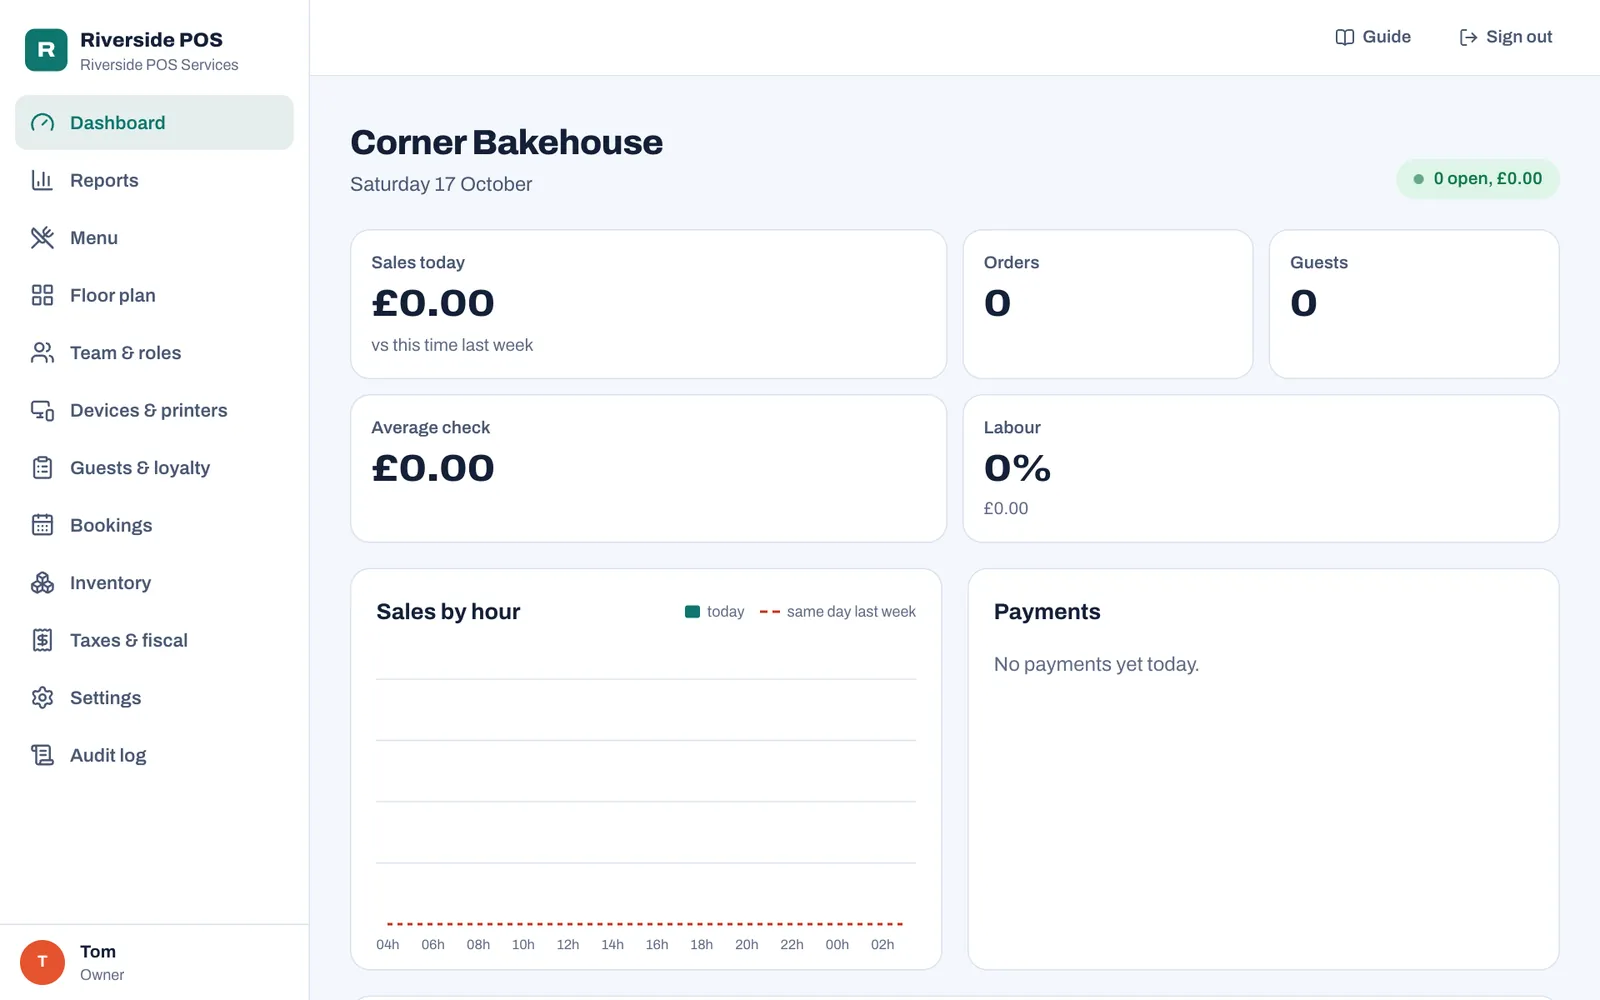
Even without branding, restaurants you add show your company name at the top of their back-office sidebar.
Link restaurants with your referral code
Some restaurants prefer to create their own account. Your referral code links them to you, so they appear in your list.
- On Restaurants, select Copy next to Your referral code.
- Give the code to the restaurant. When they create their restaurant on Sofrito Cloud, they type it in Partner code (optional), on the last step.
Or send a link that fills the code in for them: add ?partner= and your code to the Sofrito Cloud address, for example https://go.sofritopos.app/?partner=RIVERSPW2B. Sofrito keeps the code while the visitor looks around, and fills it in when they create their restaurant.
Restaurants linked this way show in your list with their health, like the ones you add. They keep the Sofrito look. The code only works when the restaurant is created on Sofrito Cloud. For creating a restaurant, see Create your restaurant.
Support a restaurant
- Watch Health. A restaurant still Never used a few days after the hand-over needs a call to get started. A yellow dot means nobody has used Sofrito there for over a week.
- Work in their back office. The portal doesn't sign you in to a restaurant. Ask the owner to add you to their team in Team & roles, with a role that can open the back office, your email and a password. Then sign in on the restaurant's sign-in page, Sign in to the back office. The owner can remove you at any time by archiving you. See Your team, roles and PINs.
- Several restaurants, one email. If you are on the team of several restaurants with the same email, Sofrito Cloud asks which one to open when your password works for more than one: select it under Choose a restaurant. With a different password for each, Sofrito opens the restaurant whose password you type.
- Common problems. Most questions from restaurants are answered in Troubleshooting and questions.
Before you hand over
- Set up the menu, floor plan, team, devices, printers, payment methods and taxes with the owner, or check what they did. Most set-up chapters of this guide end with a list of what to check before going live.
- If you added the sample menu and team, select Remove sample data in the banner at the top of the back office, before the first sale. See Remove the sample data.
- Set every card payment method to Separate terminal: staff confirm the payment. See Payment methods, tips and service charge.
- Take a test order and payment on each till, and check the receipt and the kitchen ticket.
- Print the hand-over sheet, and stay with the owner while they sign in and change their password.