Chapters
Guide › Run service
Counter, takeaway and pickup
This chapter is for cashiers and anyone who serves at the counter or the bar. It covers quick sales, takeaway orders called out by name, the Orders list, handing orders over when they are ready, and the two screens that face your guests: the pickup board and the customer display.
Before you start
- Your payment methods are set up: see Payment methods, tips and service charge.
- The pickup board, the customer display and any label printer are paired or added: see Devices, printers and stations.
- The cash drawer is open: see Open for service. If it isn't, the till asks for the starting cash at the first cash payment.
Ring up a quick sale
- Tap Quick sale. In a restaurant without tables the button is called New order, and the till opens on it.
- Check the order type at the top, for example Takeaway. To change it, tap another one, such as Delivery.
- If a box at the top says Called out when ready, type the guest's name (see the next section).
- Tap the dishes and drinks. Options and notes work as at a table: see Choose options and add a note.
- Tap Pay and take the payment. See Taking payment.
- On Payment complete, tap Print or No receipt. With some receipt settings the only button is Done: see Print or skip the receipt.
A new, empty order opens, ready for the next guest, with an empty name box. The items went to the kitchen when the order was paid in full (Send to the kitchen on payment in Back office › Settings › Service, on in a new restaurant).
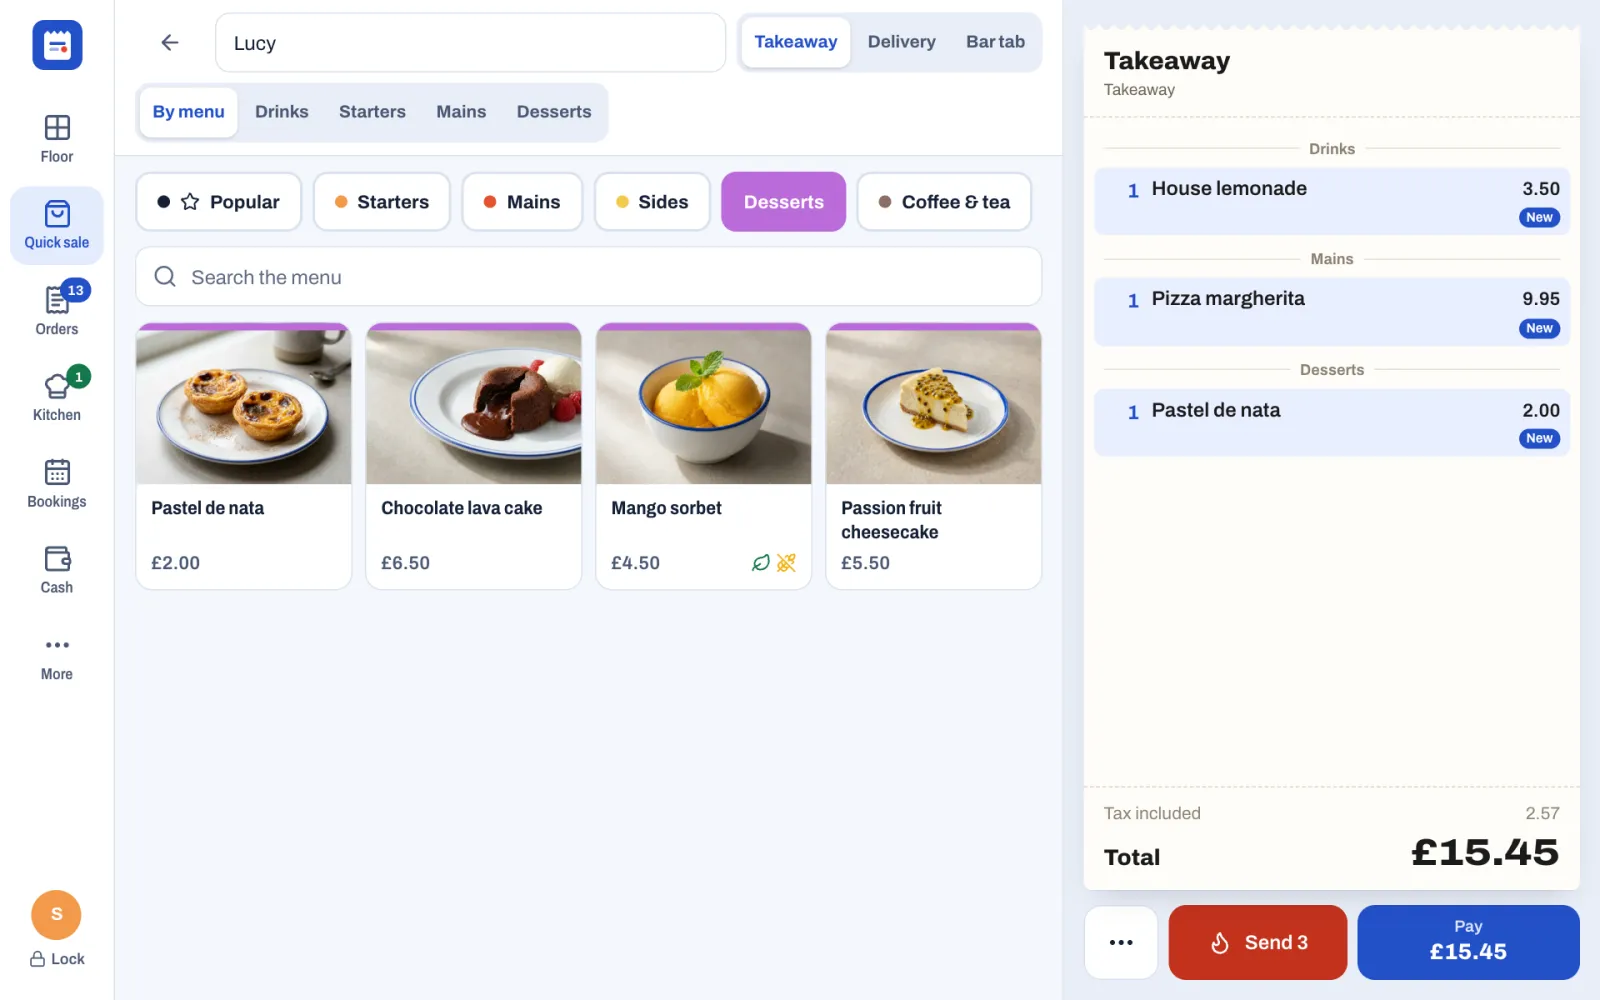
A new order starts as the first order type your restaurant offers, leaving out Dine in: Takeaway in the demo. The other order types turned on in Back office › Settings › Service show next to it, for example Delivery and Bar tab. Dine in is offered here only in restaurants without tables; elsewhere, dine-in checks open from the floor plan. If your restaurant has takeaway prices, the dish buttons, the check and Pay all show them.
If the guest pays when they collect, tap Send instead of Pay. The order goes to the kitchen and stays open in Orders until it is paid.
Take a takeaway order with a name
Sofrito asks for a name on the order types chosen in Back office › Settings › Service under Ask for the guest's name on. In the demo these are takeaway, counter and bar tab orders.
- Type the name in the box at the top, Called out when ready, before you tap Send or Pay.
- Add the items and carry on as for a quick sale.
The name appears on the kitchen tickets and the kitchen display, in the Orders list, on the pickup board when the order is ready, and in the message the order's server gets, for example "Lucy (#14) is ready". To add or change the name of an order that is still open, tap ••• › Rename on its check.
Labels for takeaway bags
If the restaurant has a label printer (a printer whose Prints is Labels), every takeaway and delivery item gets its own sticky label when it is sent to the kitchen. Each label shows the order number and the item's place in the order (for example 2/3), the guest's name or the order type, the dish with its options and notes, its allergens in reverse print, and the time. Dine-in and counter orders get no labels. See Devices, printers and stations.
Find an order in the Orders list
Tap Orders. The number on the button is how many orders are open.
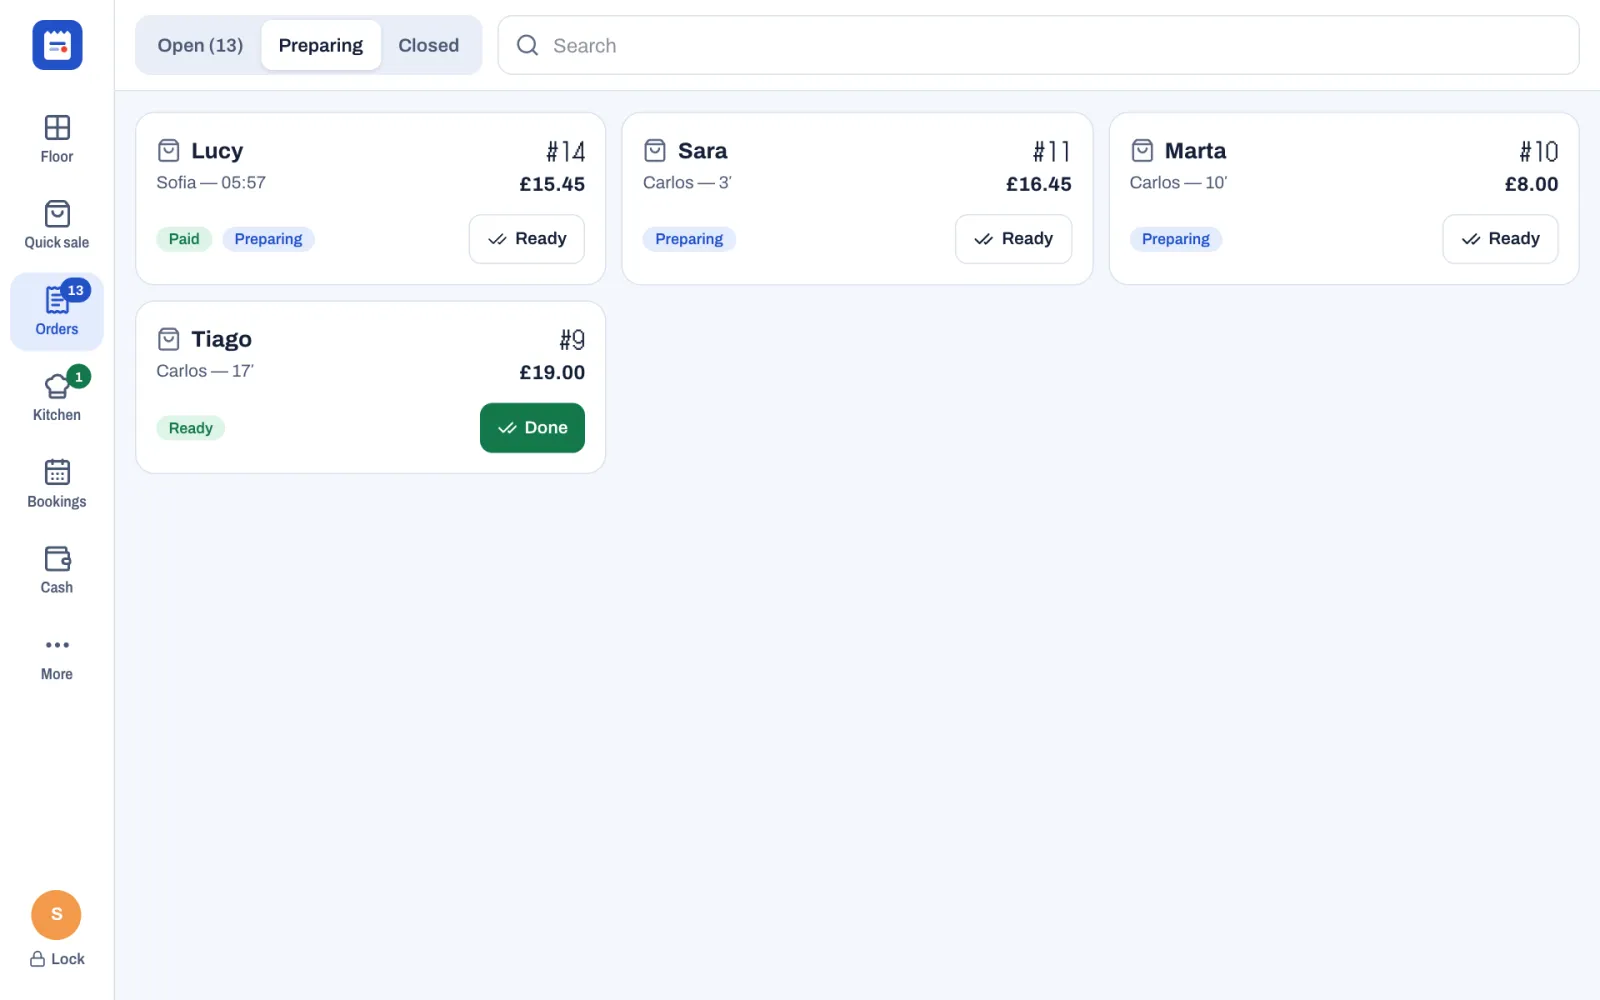
The three tabs at the top:
- Open, with the number of open orders, for example Open (13): every open order, newest first, from tables, takeaway and bar tabs.
- Preparing: today's takeaway, delivery and counter orders that are being prepared or are ready to collect, paid or not.
- Closed: orders that are paid, and orders that were voided, newest first. Checks merged into another or split into new ones are not listed. Orders from earlier days show their date as well as the time.
Each card shows an icon for the kind of order, the table or the guest's name, who took it, how long it has been open (or when it was paid), the order number and the total. Badges say more: Paid, Paid with an amount when part of the bill is paid, Voided, Preparing and Ready.
Type in Search to find an order by number, table, name or guest. Tap a card to open the order. A paid order opens its receipt view: see What a closed order shows. A voided order shows its items crossed out, with no buttons.
Hand over an order when it's ready
When the kitchen marks every ticket of the order ready on the kitchen display, the order becomes Ready by itself. It moves to Ready on the pickup board with a chime, and the person who took it gets a message.
If the kitchen works from printed tickets only, because the order's stations aren't shown on any kitchen display, mark the order ready yourself:
- Tap Orders.
- Tap Preparing.
- Tap Ready on the order.
When the guest collects the order, tap Done on it in the same list. The order leaves the Preparing tab and the pickup board. If the guest has not paid yet, tap the order's card and take the payment with Pay.
Show order numbers on the pickup board
The pickup board is a large screen your guests can see while they wait, such as a TV.
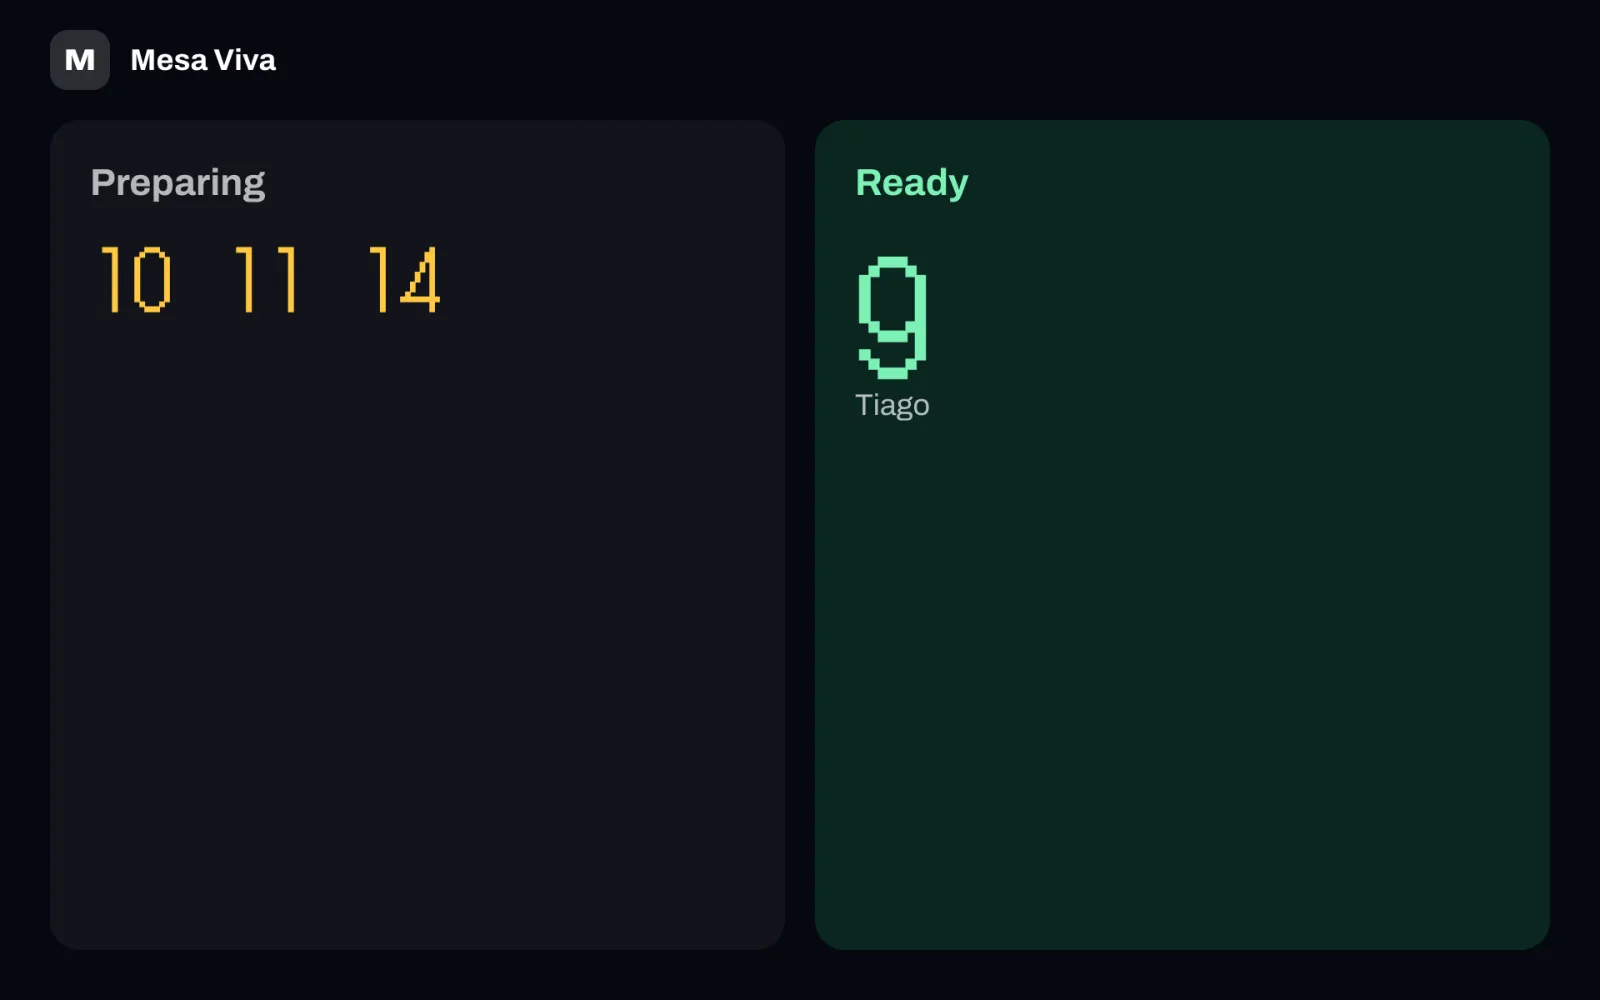
- At the top, the restaurant's logo and name. The logo is the one in Back office › Settings › Business details; without one, the board shows the restaurant's first letter.
- Preparing shows the numbers of the orders the kitchen is working on, in yellow.
- Ready shows the orders to collect, in green, with the guest's name. The newest is the largest. The board chimes when an order becomes ready.
A number leaves Ready when staff tap Done in Orders, or after 15 minutes. The board shows counter, takeaway and delivery orders of the last 12 hours, never table orders. In a new restaurant, order numbers start again at 1 every day (Restart order numbers every day in Back office › Settings › Service).
To set it up, pair the screen as a Pickup board in Back office › Devices & printers: see Devices, printers and stations. Or turn a paired till into a pickup board:
- A manager unlocks the till with their PIN.
- Tap More.
- Under Use this screen as, tap Pickup board.
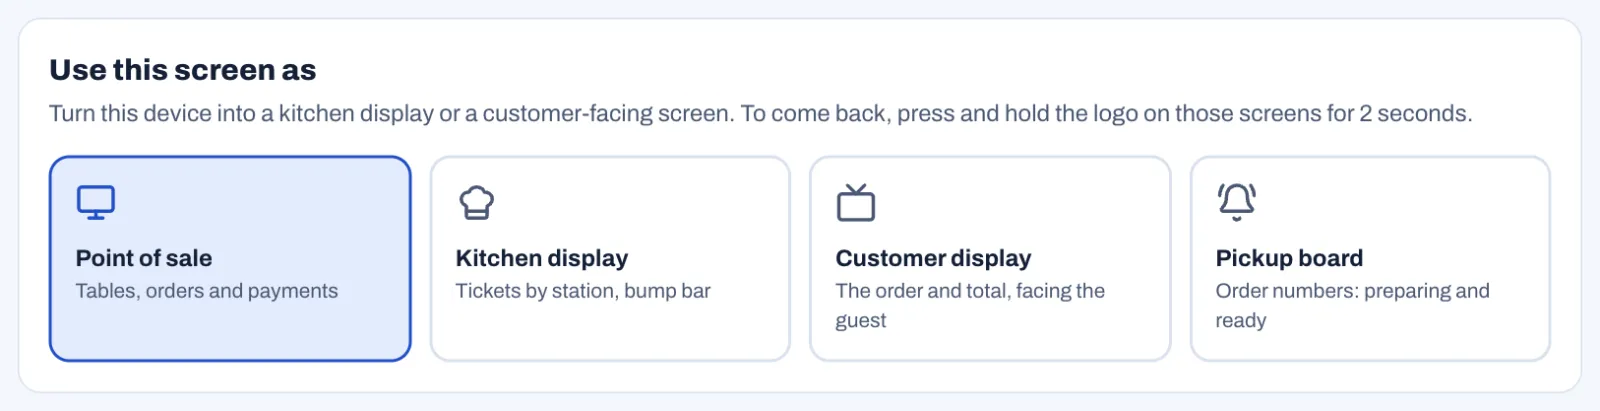
The board has no buttons. To turn it back into a till, press and hold the logo at the top left for 2 seconds. Use this screen as shows only to people whose role has Manage devices and printers.
Show the order on the customer display
The customer display faces the guest at a till, so they can check their order and the total. Each customer display faces one till or handheld, and shows only the order open on it.
- Between orders, it shows the restaurant's logo, your welcome message and the restaurant's name, over a photo of one of your dishes when the menu has photos. Change the message in Back office › Settings › Service under Welcome message.
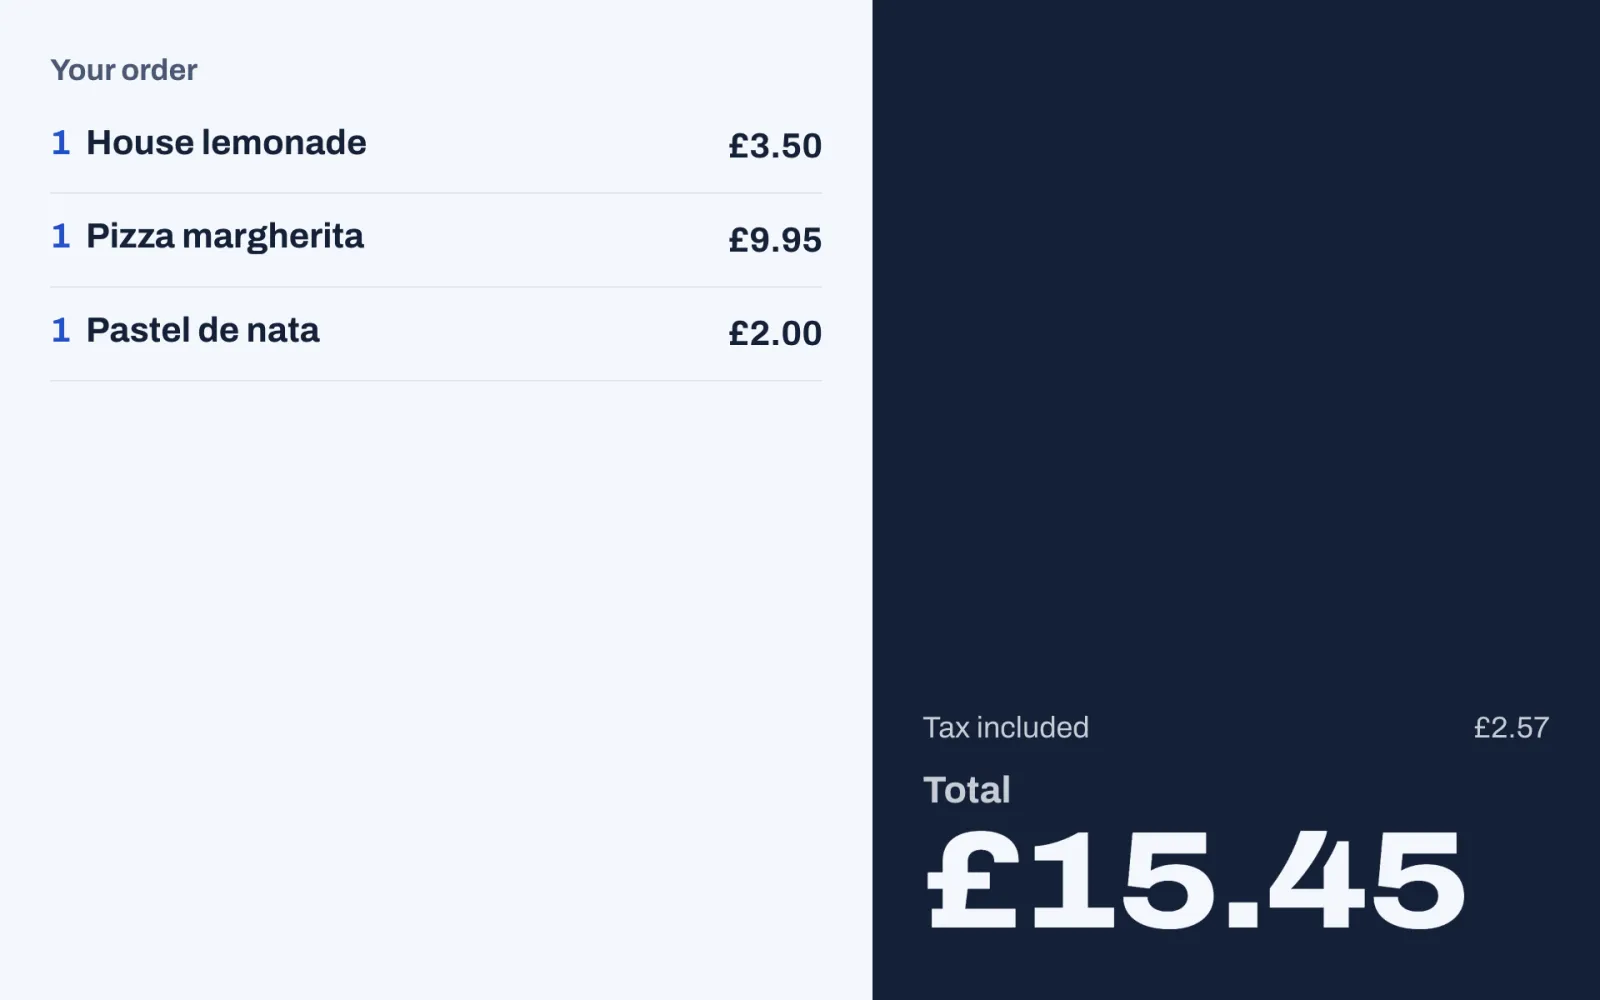
- While an order is open on its till, it shows Your order: each item with its options and price (On the house for free items), any discount, the tax (Tax included where your prices include tax) and the Total still to pay.
- Once the order is paid, it shows "Thank you!" and the restaurant's name for a few seconds.
The display shows items once they are saved: after you tap Send or Pay, not while you are still tapping dishes.
To set it up:
- Place a tablet or a screen facing the guest, and pair it as a Customer display in Back office › Devices & printers. See Devices, printers and stations.
- Choose the till it faces. In Back office › Devices & printers, select the display and choose the till under Faces the till. Or, on the display itself, tap the till under "Which till does this screen face?".
A manager can also turn a paired till into a customer display: unlock it, tap More, and under Use this screen as, tap Customer display. The screen then asks which till it faces.
The display has no buttons. On its welcome screen, press and hold the restaurant's logo for 2 seconds. Two choices appear: Choose another till, and Use this screen as a point of sale to turn it back into a till.
Good practice at the counter
- Ask for the name before the first item, and type it straight away.
- Tap Pay, then let the guest check the order on the customer display before you charge.
- Tap Done as soon as an order is collected, so the pickup board shows only orders still waiting.
- At a till shared by several people, turn on Lock after each payment in Back office › Settings › Security, so every sale is under the right name.