sofrito
The Sofrito guide
How to set up and run a restaurant with Sofrito: from planning the hardware and building the menu to a full night of service and the close of the day.
sofritopos.app/guide/
How Sofrito works
Sofrito runs a restaurant from the front door to the kitchen and the office: the till, the servers' phones, the kitchen display, the screens guests see, the receipts and the back office. This chapter explains the pieces and how they fit together, so you can plan your setup and train your team. It is for everyone: owners, managers, staff and the partners who install Sofrito.
#Know the screens
Sofrito is one app. Each device you connect to your restaurant is paired as one kind of screen and shows only what that screen needs. A manager can change what a device is used for at any time.
| Screen | Where it goes | What it is for |
|---|---|---|
| The till | At the counter or the bar | Tables, orders, payments, the cash drawer and bookings |
| Handheld | In a server's pocket | Orders and payments at the table |
| Kitchen display | In the kitchen or behind the bar | The tickets each station has to make |
| Customer display | On the counter, facing the guest | The order open on the till it faces, and the total to pay |
| Pickup board | Where takeaway guests wait | Order numbers being prepared and ready |
| Back office | Any computer, tablet or phone | Menu, team, devices, settings and reports |
Sofrito works in English, Portuguese, Spanish and French. You choose the language on the first screen, and each person can change it on a till under More.
#The till
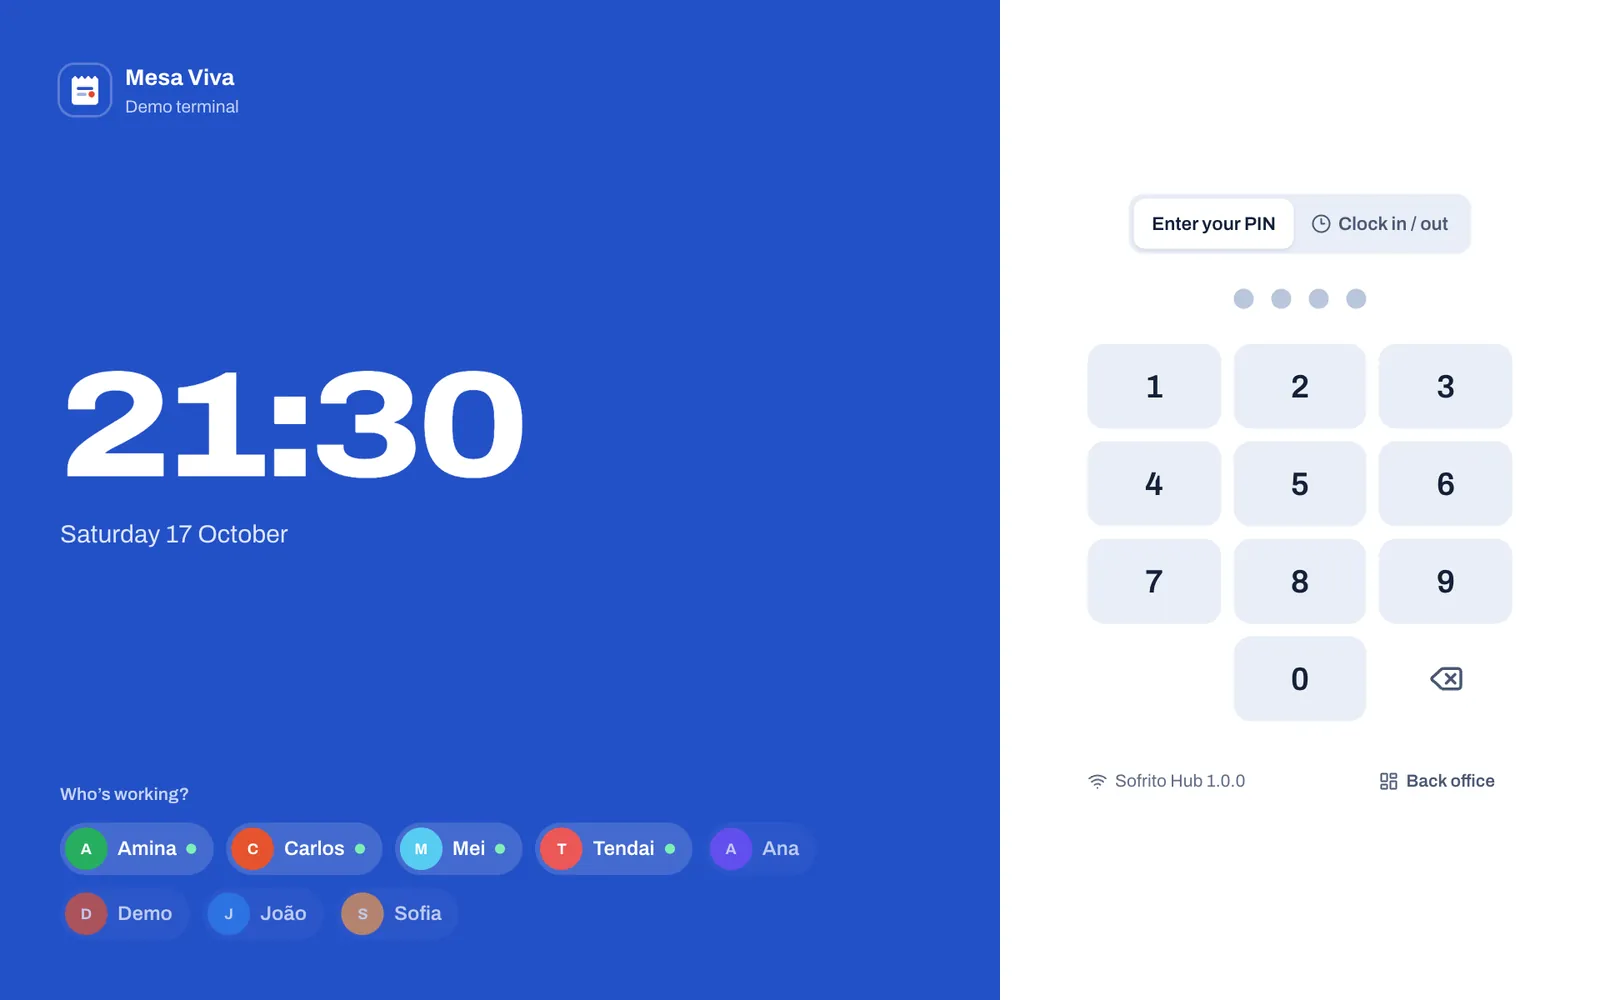
The till is a POS terminal: a tablet or a touch screen computer at the counter or the bar. It starts on the lock screen. Each person unlocks it with their own PIN, so Sofrito knows who took every order and payment. The same screen has Clock in / out for the time clock, and Back office, which asks for the PIN of someone allowed into the back office.
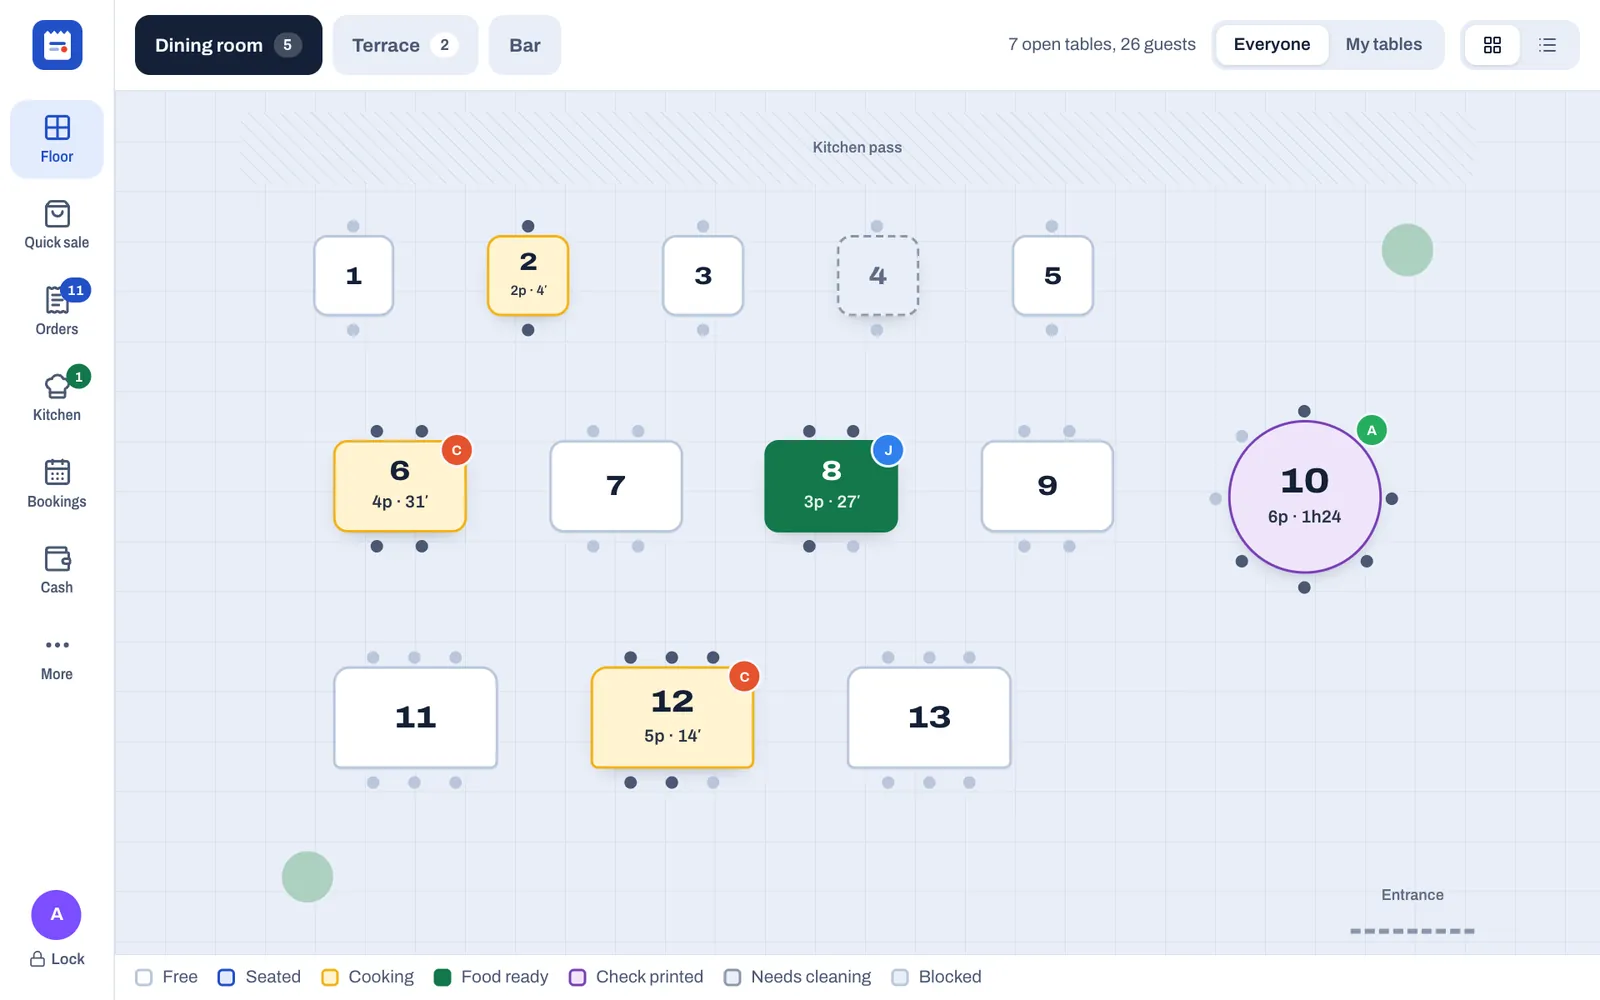
Once unlocked, the till opens on the floor plan. Each table shows its state: Free, Seated, Cooking, Food ready, Check printed, Needs cleaning or Blocked, with the number of guests and how long they have been there. The bar on the side has:
- Floor: your tables and areas.
- Quick sale: an order without a table, for the counter or takeaway.
- Orders: every open order.
- Kitchen: what the kitchen is making and what is ready.
- Bookings: today's bookings and the waitlist.
- Cash: the cash drawer, the shift report and the close of the day.
- More: your shift, breaks and cash tips, gift cards, language, printers, the back office and, for managers, what this screen is used for.
By default the till locks itself after 90 seconds without a touch, so the next person signs in with their own PIN.
#Handhelds
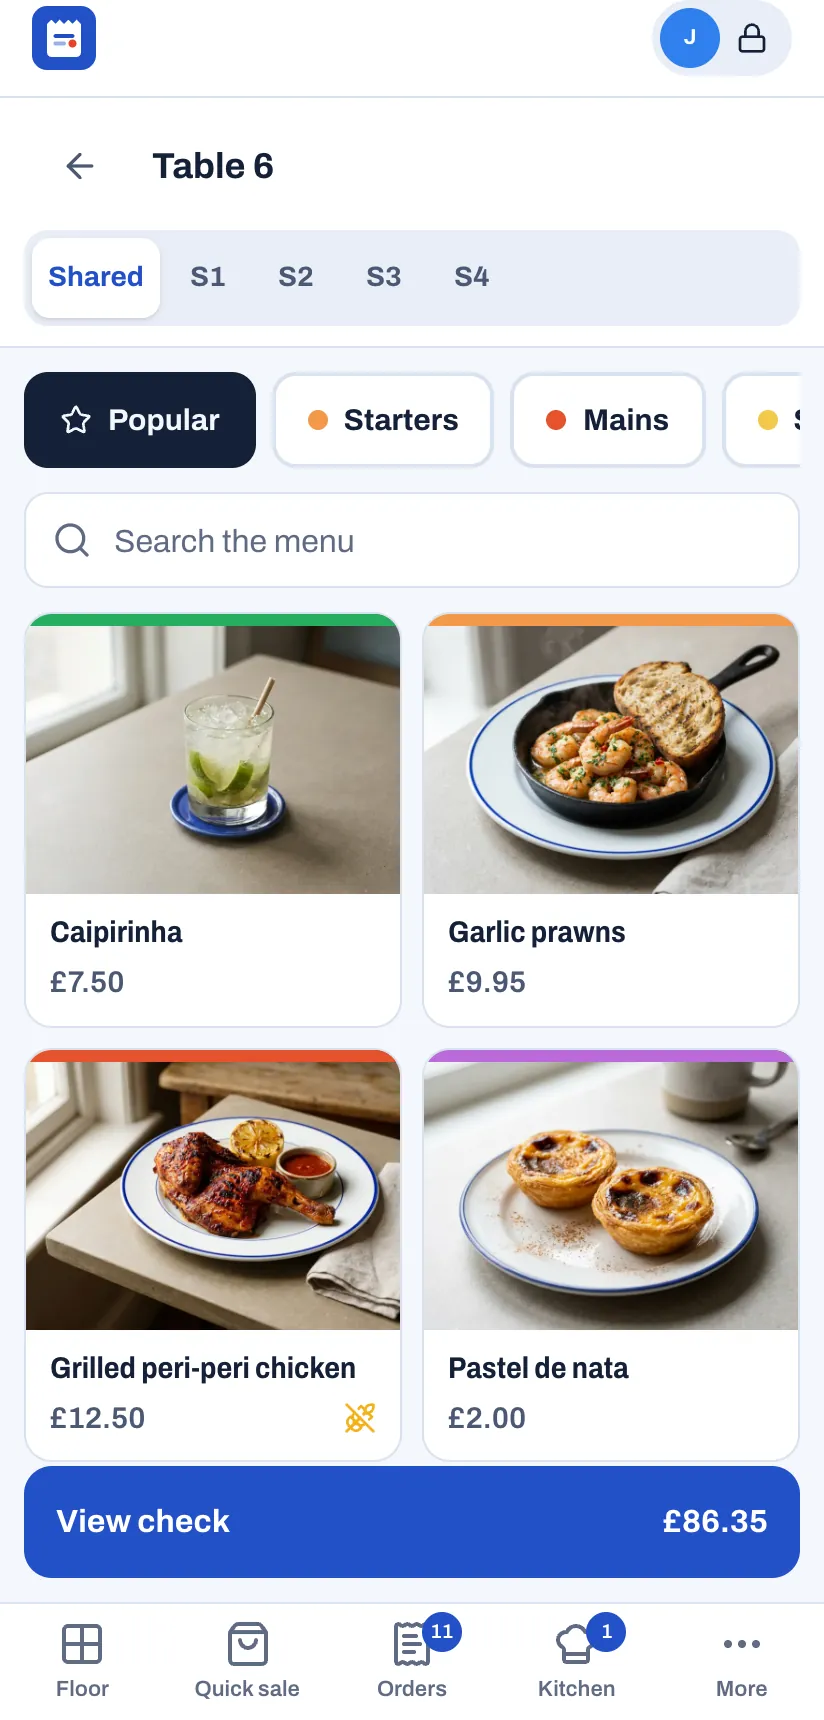
A handheld is a server's phone or small tablet, or a rugged handheld terminal. It runs the same app as the till. Servers open a table, take the order by seat and course, send it to the kitchen and take payment without walking back to the counter. When the kitchen marks a dish ready, the server's phone chimes and shows which table it is for. On a phone, the bar at the bottom shows the first four sections, such as Floor, Quick sale, Orders and Kitchen, and More, which is always there. More lists the other sections, such as Bookings and Cash, as buttons at the top.
#The kitchen display
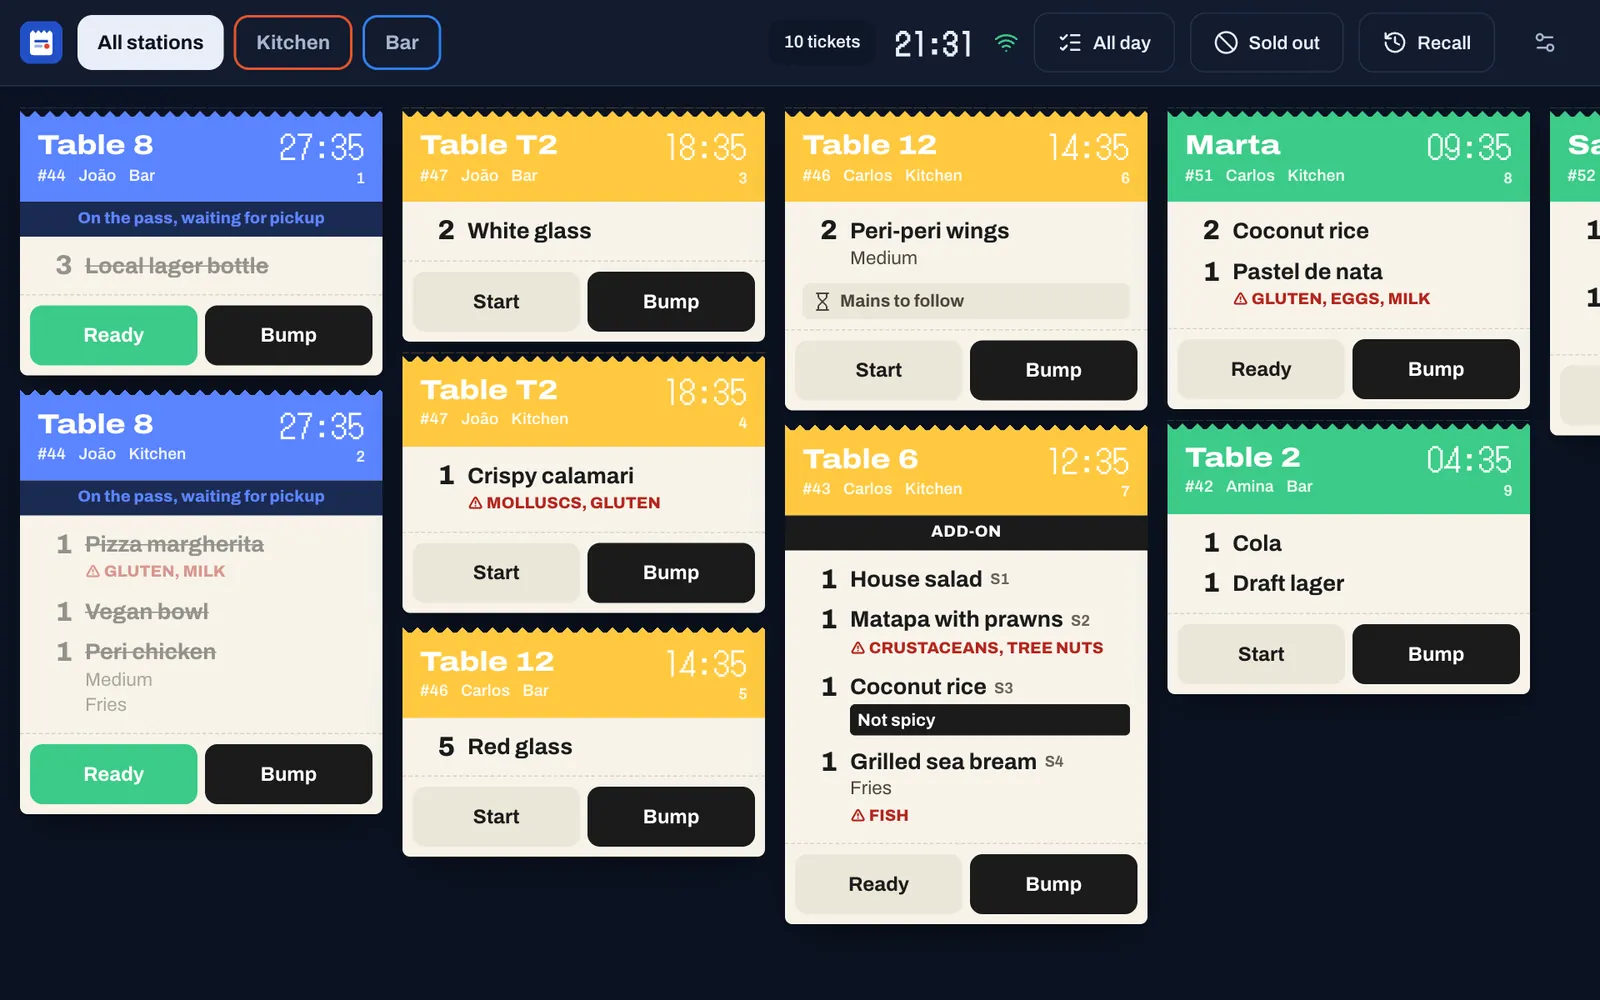
The kitchen display shows the tickets for each station, such as the kitchen and the bar, the moment a server sends them. Each ticket shows the table, the server, the dishes with their options and allergens, and a timer, with the guest's allergies in a red band when they are on the guest's profile. The ticket turns yellow, then red, as it gets late. Cooks tap Start when they begin and Ready when the food is on the pass, then Bump to clear it. All day totals how many of each dish are on order, Sold out lists the dishes to take off or put back on sale, and Recall brings back a ticket bumped by mistake.
A kitchen printer can print the same tickets on paper. A station that no kitchen display shows only prints its tickets, and they close as they print, so a restaurant without kitchen screens has nothing to bump.
#The customer display
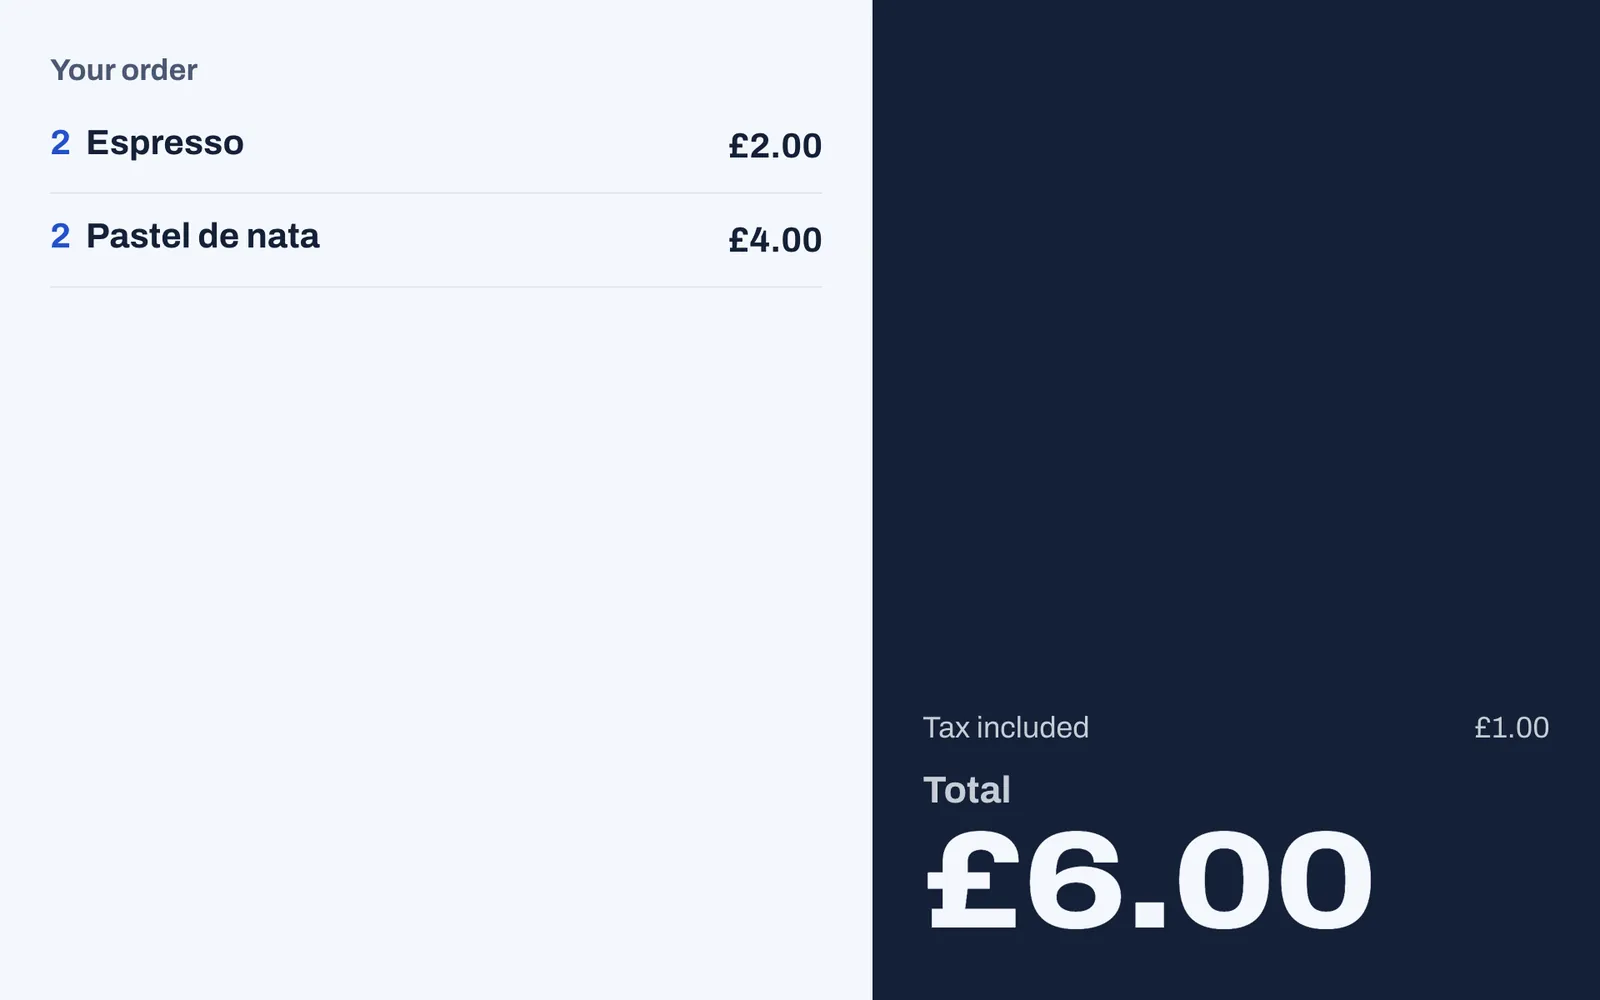
The customer display faces the guest at the counter. Each one faces one till or handheld, chosen in the back office or on the display itself, and shows the order open on that till: the dishes as they are rung up, the tax included and the total to pay, then Thank you! once it is paid. Dishes appear once the till saves the order, for example when the cashier taps Send or Pay. Between orders it shows the restaurant's logo, or the first letter of its name, with a welcome message and the restaurant's name.
#The pickup board
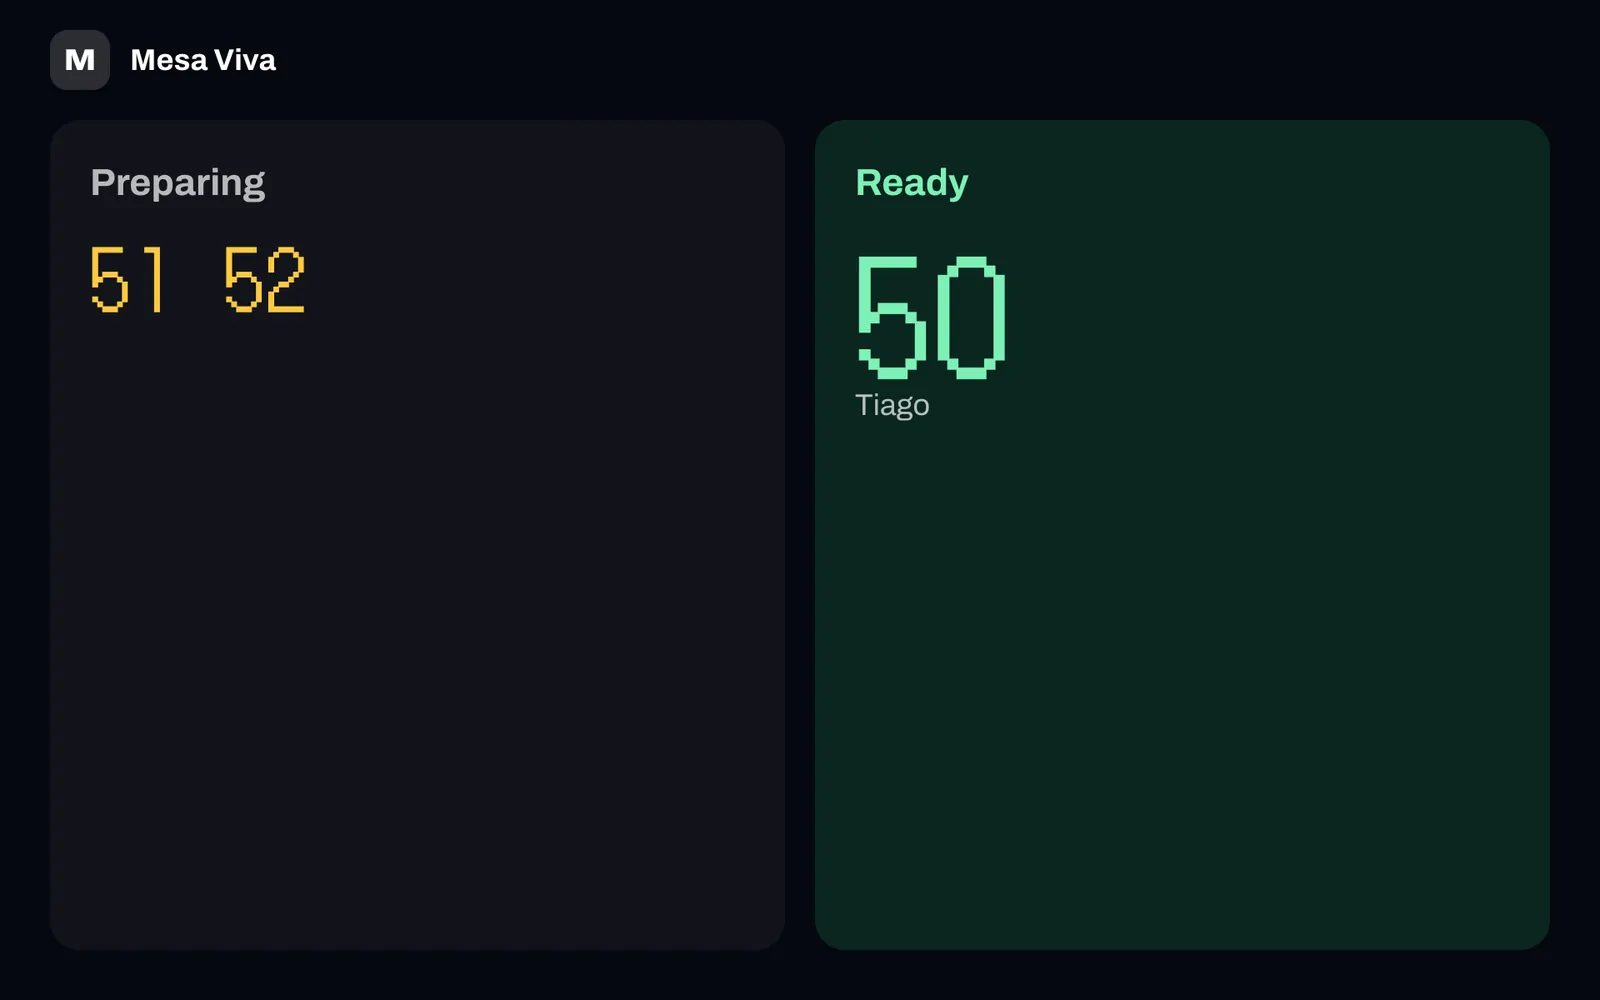
The pickup board is a television or large screen where takeaway and counter guests wait. Under the restaurant's logo and name, it shows order numbers in two columns, Preparing and Ready, with the guest's name when the order has one. Table orders do not appear.
#The back office
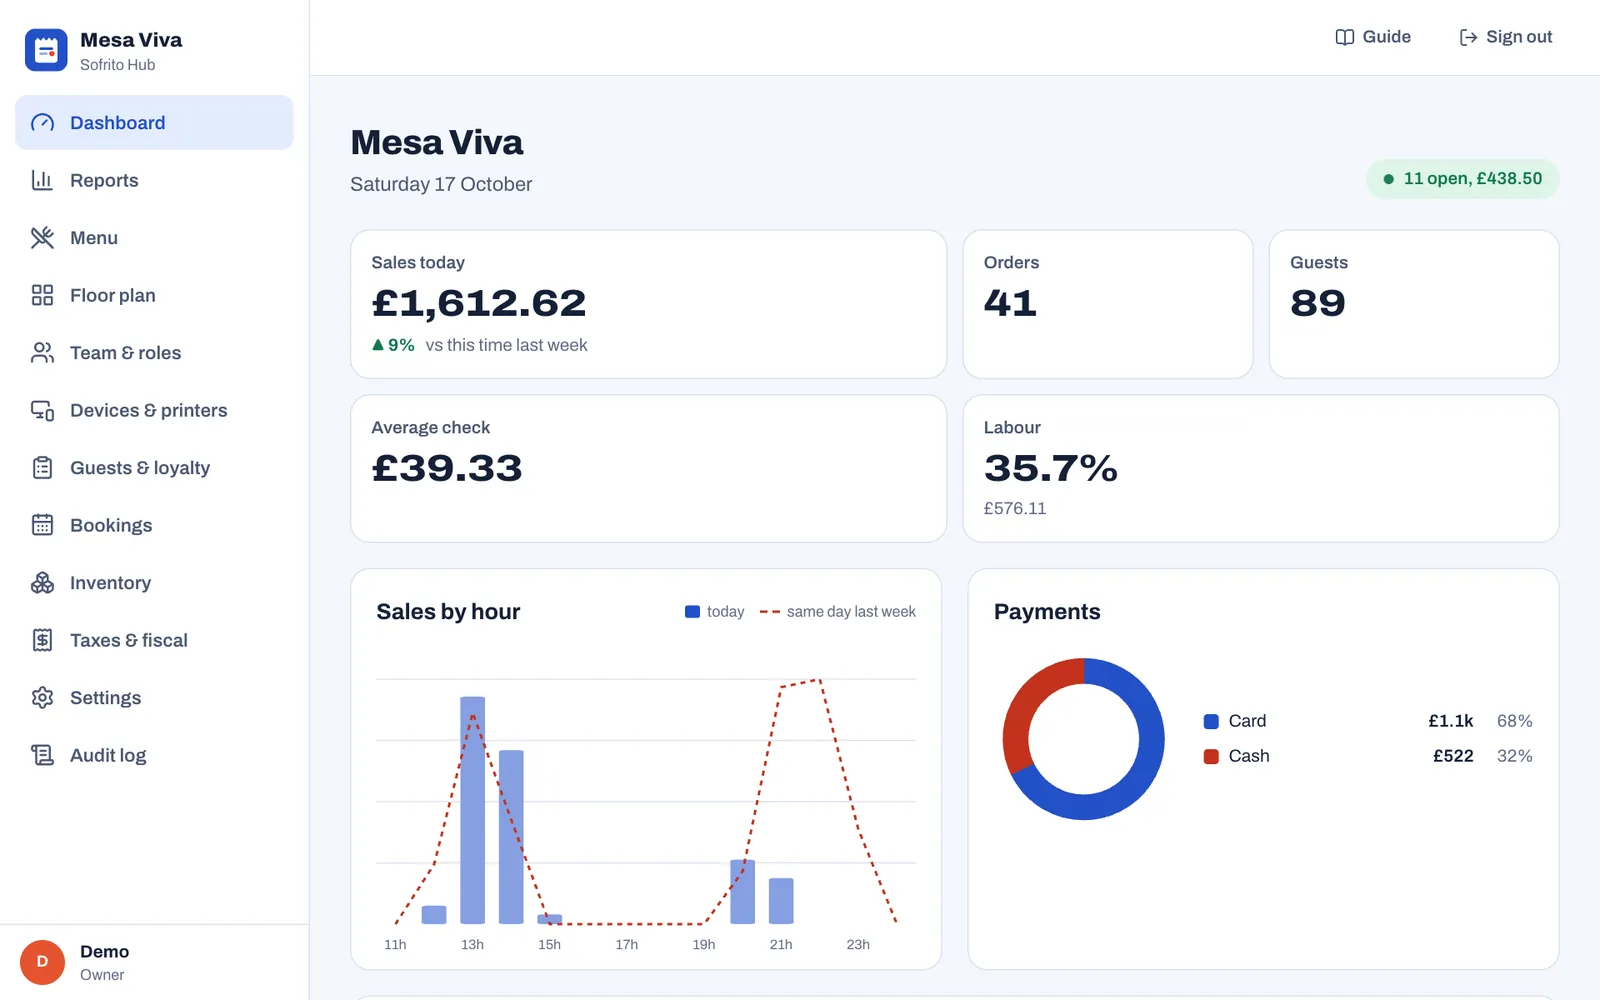
The back office is where owners and managers set up and run the restaurant: Dashboard, Reports, Menu, Floor plan, Team & roles, Devices & printers, Guests & loyalty, Bookings, Inventory, Taxes & fiscal, Settings and Audit log. On a computer, open it in a browser and sign in with your email and password. On a till, tap Back office on the lock screen, or More › Back office once you have unlocked it: only someone whose role can open the back office gets in, and the back office locks again with the till. The Guide button at the top of every page opens the chapter of this guide about that page.
#Printers
Sofrito prints receipts and checks at the till, tickets at each kitchen station, and sticky labels for takeaway bags. A new restaurant starts with three virtual printers that show tickets on screen only, so you can try everything before the real printers arrive. With Sofrito Cloud, network printers print through a print bridge: a computer in the restaurant that runs the Sofrito desktop app and sends each ticket to its printer. See Devices, printers and stations.
#Choose Sofrito Cloud or Sofrito Hub
Sofrito runs in two places. The screens and the way you work are the same in both. What changes is where your restaurant's data lives and what happens when the internet stops.
- Sofrito Cloud runs on the internet. You open go.sofritopos.app in a browser, or the Sofrito app, and every device connects to it over the internet. There is no server to install or look after. To print on network printers, one computer in the restaurant runs the Sofrito desktop app as a print bridge.
- Sofrito Hub runs on a computer in your restaurant: the main till, or a small computer in the office. Every device connects to it over the restaurant's own network, so service carries on when the internet is down.
| Sofrito Cloud | Sofrito Hub | |
|---|---|---|
| Where it runs | On the internet, at go.sofritopos.app | On one computer in your restaurant |
| What you install | Nothing, or the Sofrito app on each device. For network printers, the Sofrito desktop app on one computer, as a print bridge | Sofrito on that computer |
| How devices connect | Over the internet | Over the restaurant's Wi-Fi or network cables |
| When the internet stops | Devices cannot send orders, take payments or print until it is back | Service carries on as normal |
| Back office from home | Yes, from any browser | No, only on the restaurant's network |
| Printers | Network printers (cable or Wi-Fi) through a print bridge, Star CloudPRNT printers, printers built into handhelds, a computer's print dialog | Network printers (cable or Wi-Fi), printers built into handhelds, a computer's print dialog |
| Backups | Sofrito Cloud stores your data for you | The hub saves a copy every day at 04:00 on its computer |
| Updates | Automatic | You install each new version |
Choose before you start trading: Sofrito has no tool to move a restaurant, its orders and its receipts from one to the other later. Plan your setup helps you decide, and Sofrito Hub and working offline explains what keeps working when the internet drops.
#Know who uses what
Everyone has their own PIN and a role. The role decides what they can do on the till and whether they can open the back office. Sofrito creates these roles with every restaurant, and you can change them or add your own (see Your team, roles and PINs).
| Role | What they do | Where they work |
|---|---|---|
| Owner | Everything, including roles and the account | Back office, any till |
| Manager | Everything except roles and billing: menu, team, devices, reports, voids, refunds, closing the day | Back office, the till |
| Server | Tables, orders, payments, discounts, bookings and guests | A handheld or the till |
| Bartender | The same as a server, at the bar | The till at the bar |
| Cashier | Orders, payments, gift cards and the cash drawer | The till at the counter |
| Host | Bookings, the waitlist, seating guests and looking up guests | The till or a tablet at the door |
| Kitchen | Works on the kitchen display, which needs no PIN, and marks dishes sold out there; uses their PIN to clock in on a till | The kitchen display |
When someone needs to do something their role does not allow, such as voiding a dish already sent to the kitchen, the till asks a manager to approve it with their PIN. Sofrito records who asked and who approved. See Voids, discounts, refunds and approvals.
#Follow a day of service
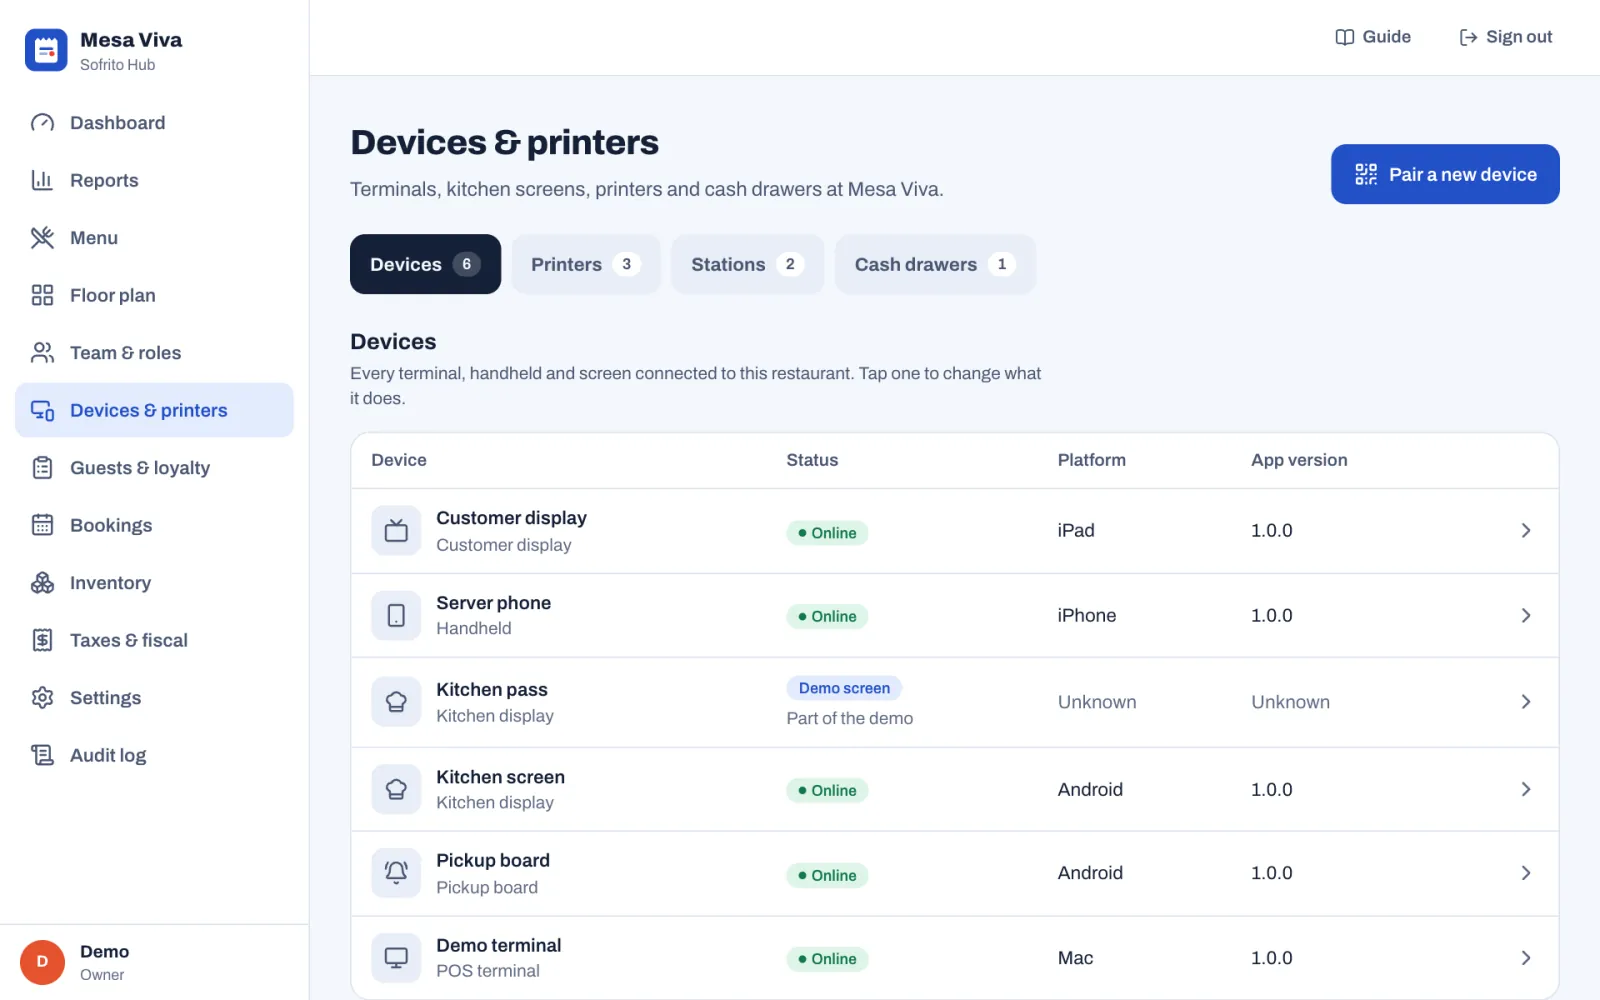
- Before opening. The manager switches on the till, the printers and the kitchen display, and the hub computer if you use Sofrito Hub, or the print bridge computer if you print through one. They check that every device shows Online in Back office › Devices & printers, and open the cash drawer with the starting cash. See Open for service.
- Staff arrive. Each person taps Clock in / out on the till's lock screen and enters their PIN.
- Guests arrive. The host seats them from Bookings, the waitlist or a free table on the floor plan. See Bookings and the waitlist.
- Orders. Servers open the table on their handheld, add dishes by seat and course, and tap Send. Counter and takeaway orders start from Quick sale. See Table service and Counter, takeaway and pickup.
- The kitchen. Tickets appear on the kitchen display for the stations it shows, and print at the station's printer. Cooks start, finish and bump them, and the server's phone chimes when a table's food is ready. See The kitchen display.
- Payment. The server taps Print check, then Pay: they can split the bill, add a tip and take cash, card or another method. Sofrito issues the receipt your country requires. See Taking payment.
- Closing. The manager counts and closes the cash drawer, prints the shift report and closes the day. Staff clock out, and declare their cash tips when Sofrito asks. See Close the day.
- Next morning. The owner reads the dashboard and the reports. See Dashboard and reports.
Plan your setup
This chapter helps you decide what to buy and how to connect it, before you spend money. It is for owners and for the partners and installers who set Sofrito up. Sofrito runs on screens many restaurants already own, so check what you have first.
Before you start
- Read How Sofrito works to know the screens and the difference between Sofrito Cloud and Sofrito Hub.
#Decide between Sofrito Cloud and Sofrito Hub
Answer these questions:
- Does your internet drop during service? With Sofrito Cloud, devices cannot send orders, take payments or print while the internet is down. With Sofrito Hub, service carries on.
- Do you want network printers in the kitchen? Ordinary thermal printers on a network cable or Wi-Fi work with both. With Sofrito Hub, the hub sends them the tickets. With Sofrito Cloud, a computer next to the printers runs the Sofrito desktop app as a print bridge, and it must be on whenever you trade. Star CloudPRNT printers and handhelds with a built-in printer need no print bridge.
- Do you want the back office away from the restaurant? Sofrito Cloud opens in any browser, anywhere. A hub's back office opens only on the restaurant's network.
- Can one computer stay on all day? Sofrito Hub needs a computer in the restaurant that is on whenever you trade. It can be the main till.
If the internet is reliable and you want no server to look after, choose Sofrito Cloud. If you must keep trading when the internet fails, choose Sofrito Hub.
#Choose the screens for your kind of restaurant
When you create the restaurant, Sofrito asks how you serve and sets itself up to match (see Create your restaurant). Use the same answer to plan the hardware.
| Kind of restaurant | Till | Handhelds | Kitchen | Guests see | Printers |
|---|---|---|---|---|---|
| Café or counter | 1 at the counter | None | A kitchen display or a kitchen printer, if food is made out of sight | A customer display (optional) | 1 receipt printer with a cash drawer |
| Full service, about 40 seats | 1 at the bar or the pass | 1 per server on the floor, for example 3 phones | 1 kitchen display and 1 kitchen printer | Nothing | 1 receipt printer with a cash drawer |
| Full service, 120 seats or two kitchens | 2 | About 6 | 1 kitchen display and 1 printer per kitchen, each printer with a backup, and a bar printer | Nothing | 1 receipt printer with a cash drawer per till |
| Bar | 1 at the bar, for tabs and rounds | 1 or 2 if you serve tables | A kitchen display or printer if you serve food | Nothing | 1 receipt printer with a cash drawer |
| Takeaway | 1 at the counter | None | 1 kitchen display | A pickup board, and a customer display at the counter | 1 receipt printer with a cash drawer, 1 label printer for bags |
For Sofrito Hub, add the computer that runs it, unless the main till runs it (see Choose a computer for Sofrito Hub). For Sofrito Cloud with network printers, add the computer that will be the print bridge.
A kitchen display shows tickets only for the stations it is set to show. A station that no kitchen display shows only prints its tickets, so a kitchen that works from paper needs no screen.
#Choose devices that run Sofrito
| Screen | Works well | Notes |
|---|---|---|
| The till | A Windows 10 or 11, macOS or Linux touch computer; an iPad (10th generation or newer); an Android tablet with Android 10 or newer and 4 GB of memory | 10 to 15 inches, used in landscape |
| Handheld | An iPhone with iOS 16 or newer; an Android phone with Android 8 or newer; a rugged handheld such as Zebra, Sunmi, Senraise or Urovo | Handhelds with a built-in printer can print their own receipts with the Sofrito app for Android |
| Kitchen display | Any screen with a current Chrome or Edge: a television with a stick PC, an Android tablet, an all-in-one computer | Mount it away from heat. A bump bar that types digits works: 1 to 9 bump that ticket, R brings back the last one |
| Customer display or pickup board | A second monitor, a television or a tablet facing the guests | |
| Print bridge (Sofrito Cloud with network printers) | A Windows, macOS or Linux computer that runs the Sofrito desktop app, on the same network as the printers | It must stay on, with Sofrito open, whenever you trade |
Every device needs the Sofrito app or a current Chrome, Edge, Safari or Firefox. Phones and tablets are better on a charger stand during service, because Sofrito keeps the screen on.
#Check an Android device
On Android, Sofrito runs inside a part of the system called Android System WebView. It must be version 111 or newer. Check every second-hand or older device before you rely on it:
- Open Settings on the device.
- Open Apps and find Android System WebView. On some devices you need to show system apps first.
- Read the version. The first number must be 111 or higher.
- If it is lower, open Google Play and update Android System WebView and Google Chrome.
- Restart the device.
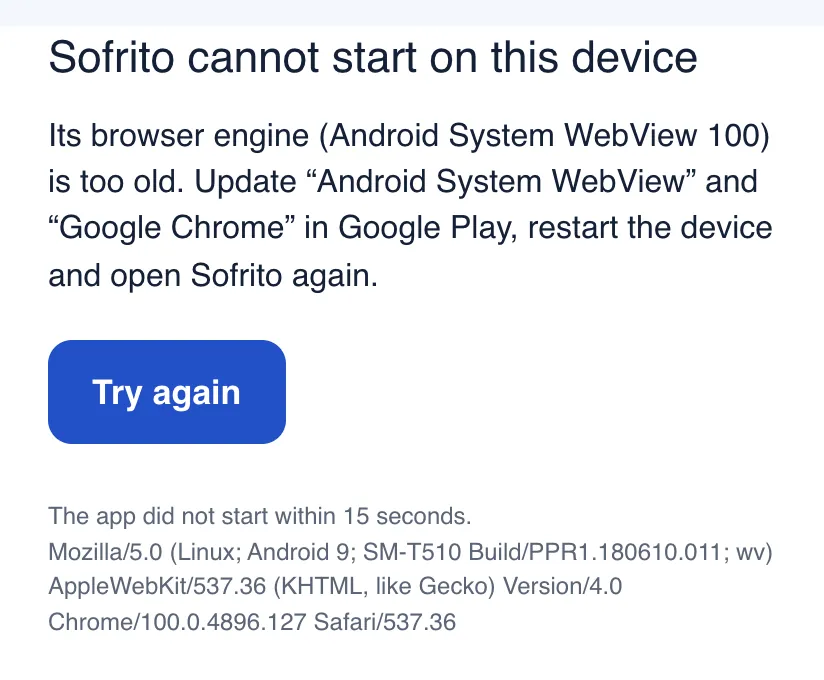
If the engine is too old, Sofrito does not start. It shows this message instead, with the version it found:
#Choose a computer for Sofrito Hub
Skip this section if you use Sofrito Cloud only.
| Option | Good for |
|---|---|
| The main till, running the Sofrito desktop app as the restaurant's main computer | Small restaurants: one machine is both the till and the hub |
| A mini PC (Intel N100 class, 8 GB of memory, an SSD) with Windows or Linux | Most restaurants. Keep it in the office, on a UPS |
| An existing Linux server or NAS that runs Docker | Groups and sites with their own IT |
| A Raspberry Pi 5 (8 GB) with an SSD | Food trucks and kiosks |
Whichever you choose, the computer must stay on and awake whenever the restaurant trades, and it needs a fixed address on your network (see Plan the network and Wi-Fi). See Sofrito Hub and working offline for how to install it.
#Choose printers and a cash drawer
Sofrito prints to thermal receipt and kitchen printers that use ESC/POS, the command language of almost every receipt printer. Plan one receipt printer for each till, one printer for each kitchen station that wants paper tickets, and a label printer if you pack takeaway orders.
How a printer connects depends on where Sofrito runs:
| Printer | With Sofrito Hub | With Sofrito Cloud |
|---|---|---|
| Network thermal printer (network cable or Wi-Fi) | Yes: the hub sends the tickets | Yes, through a print bridge: a computer in the restaurant with the Sofrito desktop app sends the tickets |
| Star CloudPRNT printer | Not offered | Yes: the printer collects its tickets over the internet |
| Printer built into a handheld or terminal (Sunmi, Senraise, or a paired Bluetooth printer) | Yes, with the Sofrito app for Android | Yes, with the Sofrito app for Android |
| Any printer a computer already uses (USB or AirPrint) | Yes, through that computer's print dialog | Yes, through that computer's print dialog |
A print bridge sends to printers on the network only, not to USB printers. One print bridge can serve every network printer in the restaurant. See Devices, printers and stations to set one up.
Models that work well:
- Network: Epson TM-T20III or TM-T20IV, Epson TM-m30III, Star TSP143IV LAN, Bixolon SRP-350plusV, Xprinter XP-Q200, Rongta RP326.
- Star CloudPRNT: Star mC-Print3, TSP100IV, mC-Print2.
- Hot, greasy kitchens: an impact printer such as the Epson TM-U220.
- Labels: any ESC/POS printer loaded with 58 mm labels, for example the Epson TM-L90.
When you choose:
- Prefer a network cable for kitchen printers. Wi-Fi printers drop off in hot, busy kitchens.
- Choose the paper width: 80 mm paper fits 48 characters a line, 58 mm fits 32.
- Buy a second kitchen printer if a stopped printer would stop your kitchen. While a printer is offline, Sofrito sends its tickets to its backup, and goes back to the printer once it prints again.
- A kitchen printer with a buzzer can beep for each new ticket.
The cash drawer plugs into the receipt printer's drawer port with an RJ11 or RJ12 cable, and Sofrito opens it for cash payments. Buy a drawer made for receipt printers (24 V).
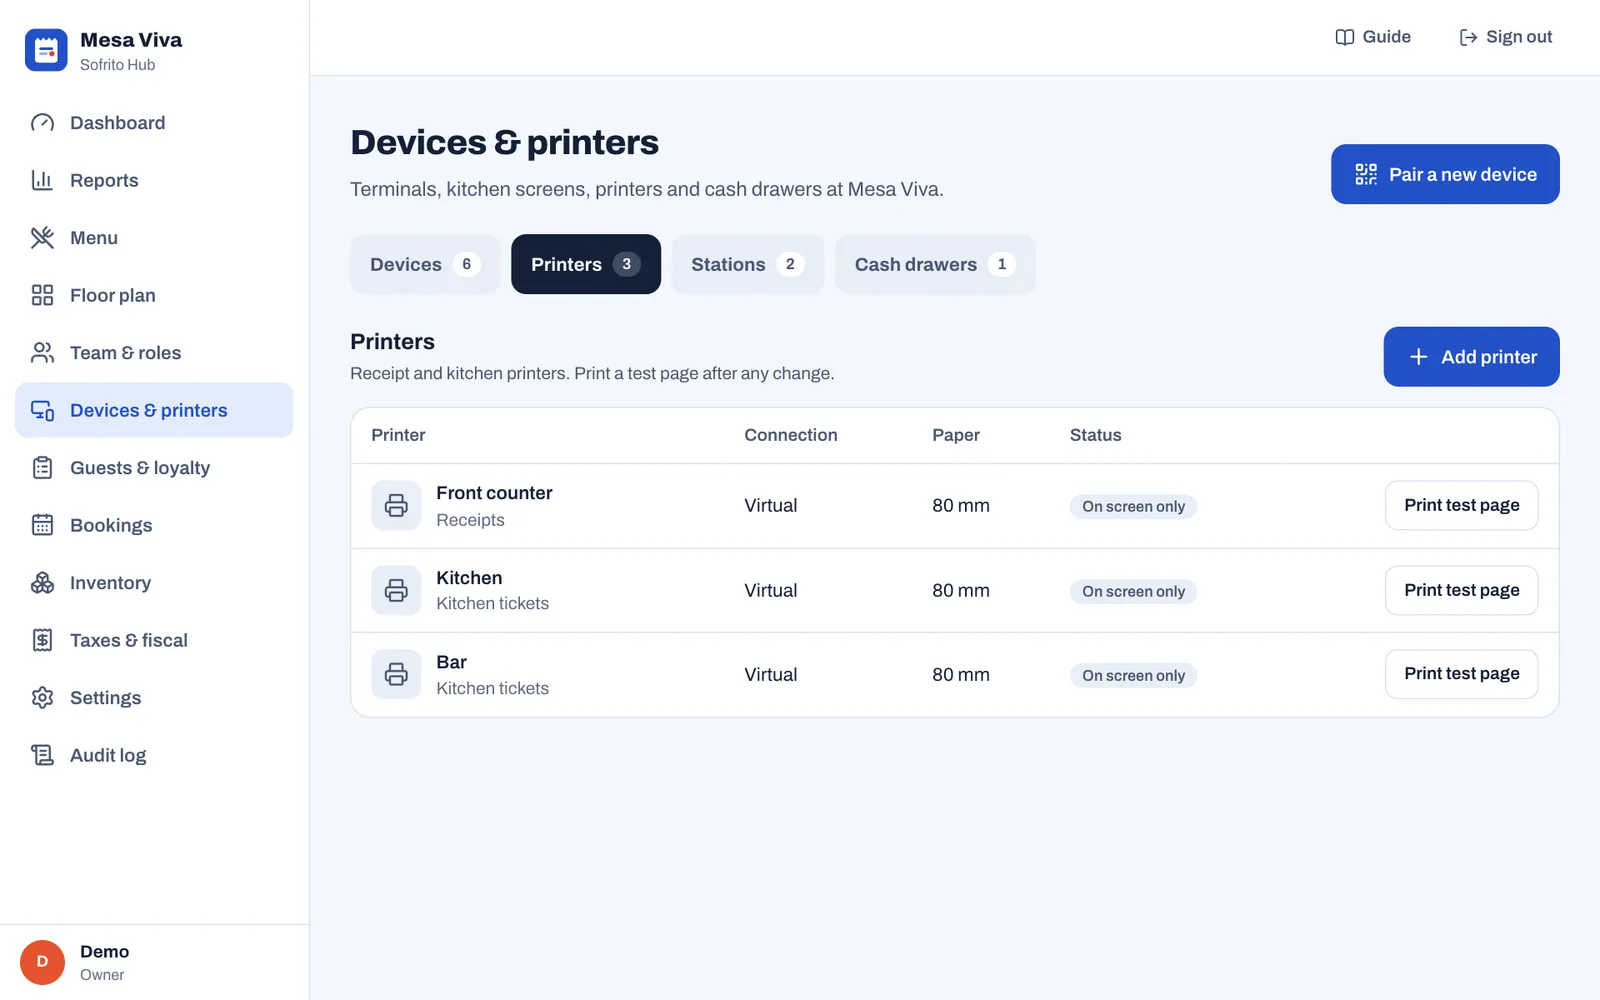
Until your printers arrive, a new restaurant prints to three virtual printers that show each ticket on screen:
#Plan card and mobile payments
Sofrito records card payments taken on your own card terminal, from any bank or provider. The cashier charges the amount on the terminal, waits for it to show "Approved", then confirms the payment in Sofrito. Mobile money, such as M-Pesa or MB WAY, is recorded with its transaction reference. See Payment methods, tips and service charge.
Card terminals need their own connection, usually mobile data or the restaurant's Wi-Fi. A terminal on mobile data keeps taking cards when the restaurant's internet is down.
#Plan the network and Wi-Fi
- Use one router for the restaurant, with a staff Wi-Fi for Sofrito and a separate guest Wi-Fi.
- Turn off "client isolation" (sometimes called "AP isolation") on the staff Wi-Fi, so devices can reach each other and the hub.
- Put the hub computer, or the print bridge computer, and the printers on a wired switch, with network cables.
- Give the hub computer and every network printer a fixed address, with a DHCP reservation in the router. Devices and printers then always find each other.
- Walk the dining room, the terrace and the kitchen with a phone on the staff Wi-Fi. Check the signal at every table, and add access points where it is weak.
If your IT team separates devices into different networks, allow devices to reach the hub on TCP port 7420 and the hub to reach the printers on TCP port 9100. A print bridge needs to reach the printers on TCP port 9100 and Sofrito Cloud over the internet.
#Plan internet and power
- Sofrito Cloud: every device needs the internet all the time, and so does the print bridge computer. If your line drops, add a second connection, such as a router with a mobile data backup, or choose Sofrito Hub.
- Sofrito Hub: the internet is needed only for things outside the restaurant, such as Cloud sync and card terminals that use your Wi-Fi. Service itself runs on your network.
- Put the hub computer, the router and the switch on a small UPS (a battery backup). Short power cuts then do not stop service. Tablets and phones run on their own batteries.
- Set the hub computer, or the print bridge computer, never to sleep, and to switch on again after a power cut if its settings allow it.
#Buying checklist
- The choice of Sofrito Cloud or Sofrito Hub.
- Tills: how many, and that each meets the requirements above.
- Handhelds: one for each server on a busy shift, plus a spare, with cases and chargers.
- Android devices checked for Android 8 or newer and Android System WebView 111 or newer.
- Kitchen displays: screens, wall mounts, and a stick PC or tablet for each. A bump bar if your cooks want one.
- A customer display for each till where guests pay, and a pickup board, if you serve at a counter or do takeaway.
- For Sofrito Hub: the computer that runs it, and a UPS.
- For Sofrito Cloud with network printers: a computer near the printers for the print bridge.
- Printers: a receipt printer for each till, a kitchen printer for each station that wants paper, backups for the busiest stations, and a label printer for takeaway. Paper rolls in the right width.
- A cash drawer and its cable for each till that takes cash.
- Card terminals from your bank or provider, with their own connection.
- Network: router, staff and guest Wi-Fi, access points, a switch and network cables.
- Power sockets near every till, printer and kitchen display.
Create your restaurant
You create your restaurant once, with a short wizard: the restaurant, its country, and your own account. Sofrito then sets up taxes, payment methods, printers, roles and a floor plan to match. This chapter is for the owner, or the partner who sets Sofrito up for them. It takes about ten minutes.
Before you start
- Decide between Sofrito Cloud and Sofrito Hub. See Plan your setup.
- Have ready: the restaurant's name, its legal name and tax number, your email address, a password of at least 8 characters, and a 4-digit PIN.
- If a Sofrito partner is helping you, ask them for their partner code.
#Create your restaurant on Sofrito Cloud
You can do this on a computer, a tablet or a phone. The device you use becomes your restaurant's first till.
- Open go.sofritopos.app in the browser. In the Sofrito app, tap Use Sofrito Cloud on the first screen.
- Choose your language: English, Português, Español or Français.
- Select Set up a restaurant.
- Complete the three steps below: Restaurant, Country & taxes and Your account. Select Continue after each one, or Back to return to the one before.
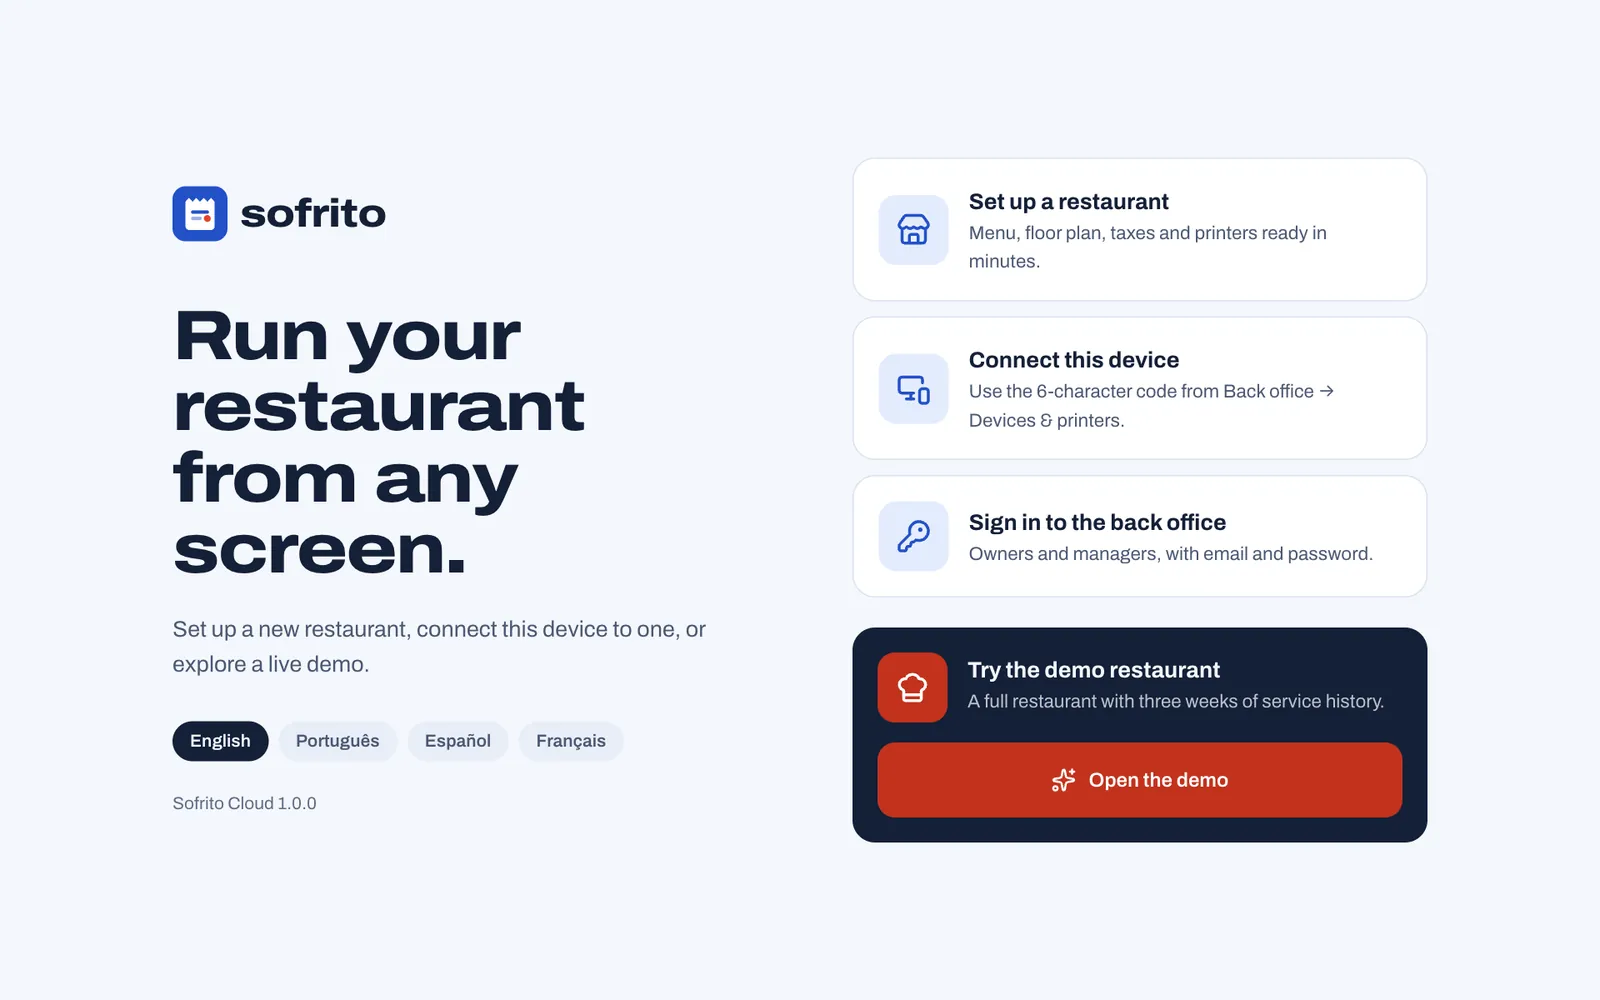
#Name the restaurant and choose how you serve
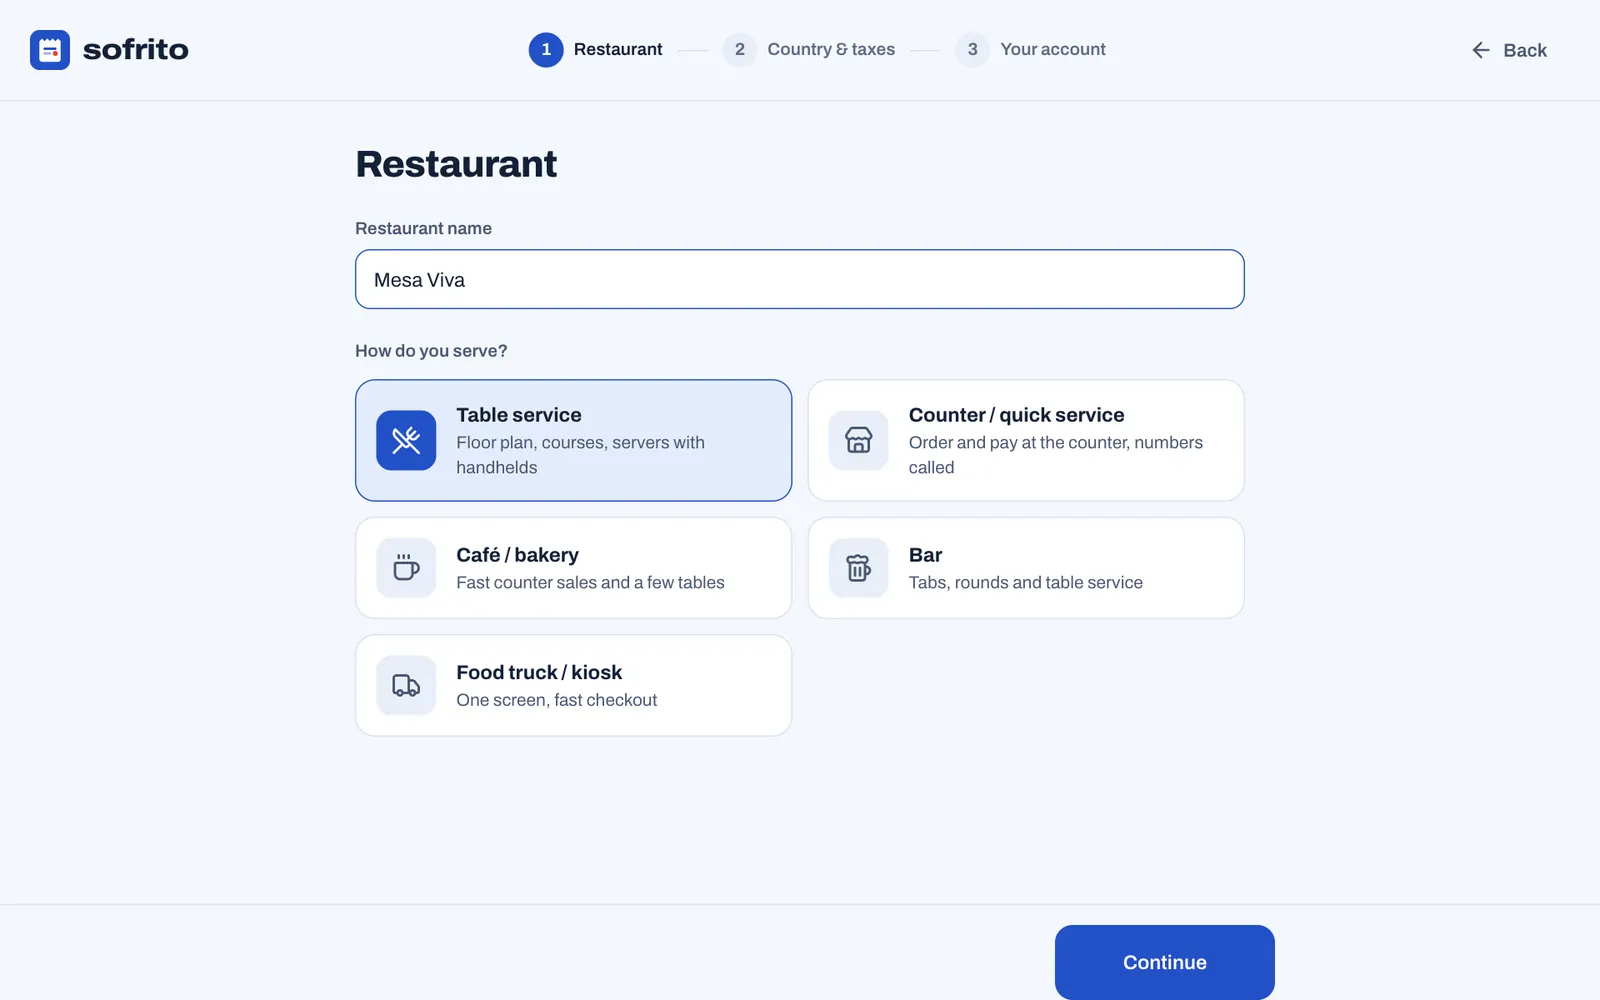
- In Restaurant name, type the name your guests know. It is shown on every device and printed in large letters on receipts.
- Under How do you serve?, select the choice closest to your restaurant. It decides how Sofrito starts, and you can change all of it later in the back office.
- Select Continue.
| Choice | What Sofrito sets up |
|---|---|
| Table service | A floor plan with a dining room, a terrace and a bar. Orders start at a table, with the number of guests, seats and courses. Takeaway, delivery and bar tabs are on too. |
| Counter / quick service | Counter, takeaway and delivery orders, without a floor plan, seats or courses. The till locks after each payment and prints every receipt. |
| Café / bakery | Counter orders first, plus eat-in and takeaway, with a dining room floor plan. No seats or courses. |
| Bar | Bar tabs first, plus table and counter orders, with a dining room, a terrace and a bar. No seats or courses. |
| Food truck / kiosk | Counter and takeaway orders only, without a floor plan. The till locks after each payment. |
#Choose your country and taxes
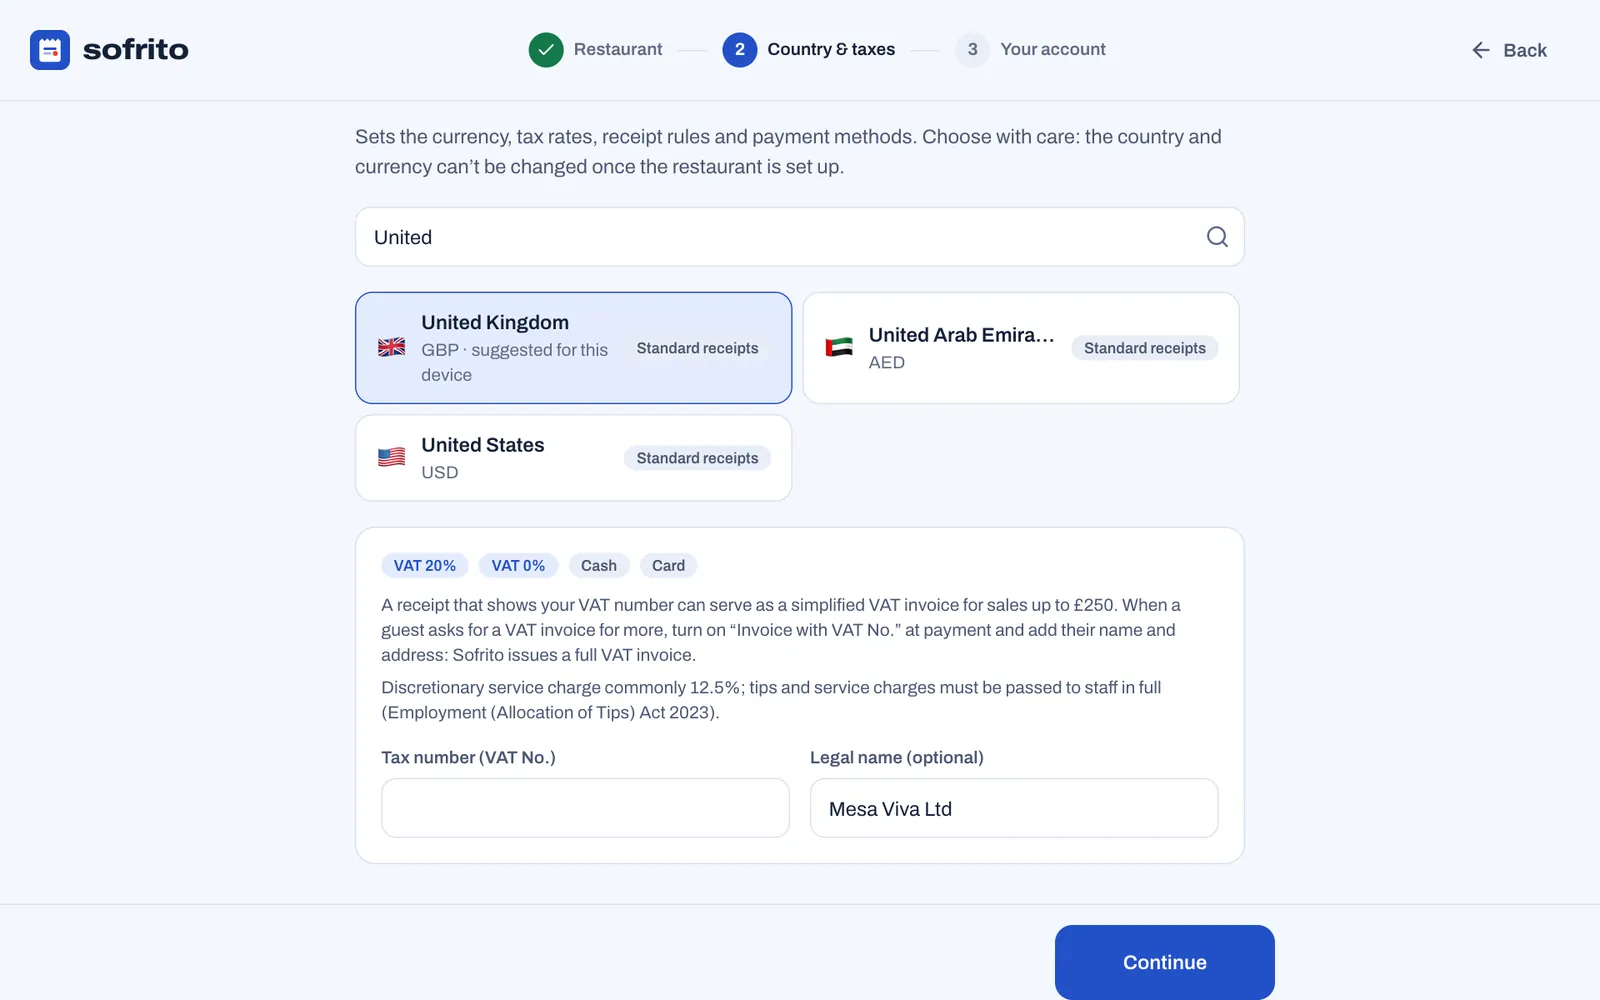
Nothing is selected when this step opens, and Continue stays off until you choose a country.
- Search for your country, in English or in its own language, then select it. Countries are listed by their own
name, such as España, and the country this device seems to be in comes first, marked suggested for this
device. Each country shows its currency and one of these labels:
- Fiscal rules built in: Sofrito follows your country's rules for receipts, invoices and their numbering.
- Fiscal rules partly built in: Sofrito numbers and prints documents the way the law describes, but does not send records to the tax authority. Spain has this label.
- Certified add-on required: your country requires a certified fiscal device or service. Talk to your Sofrito partner before you trade.
- Standard receipts: Sofrito prints ordinary receipts.
- Check the panel below the list. It shows the tax rates and payment methods Sofrito will create, and notes about your country's rules, in the language you chose.
- Type your Tax number. The label shows its local name, for example Tax number (VAT No.) in the United Kingdom. You can leave it empty and add it later in Back office › Settings › Business details.
- Type your company's Legal name (optional) if it is different from the restaurant's name.
- Select Continue.
#Create your account
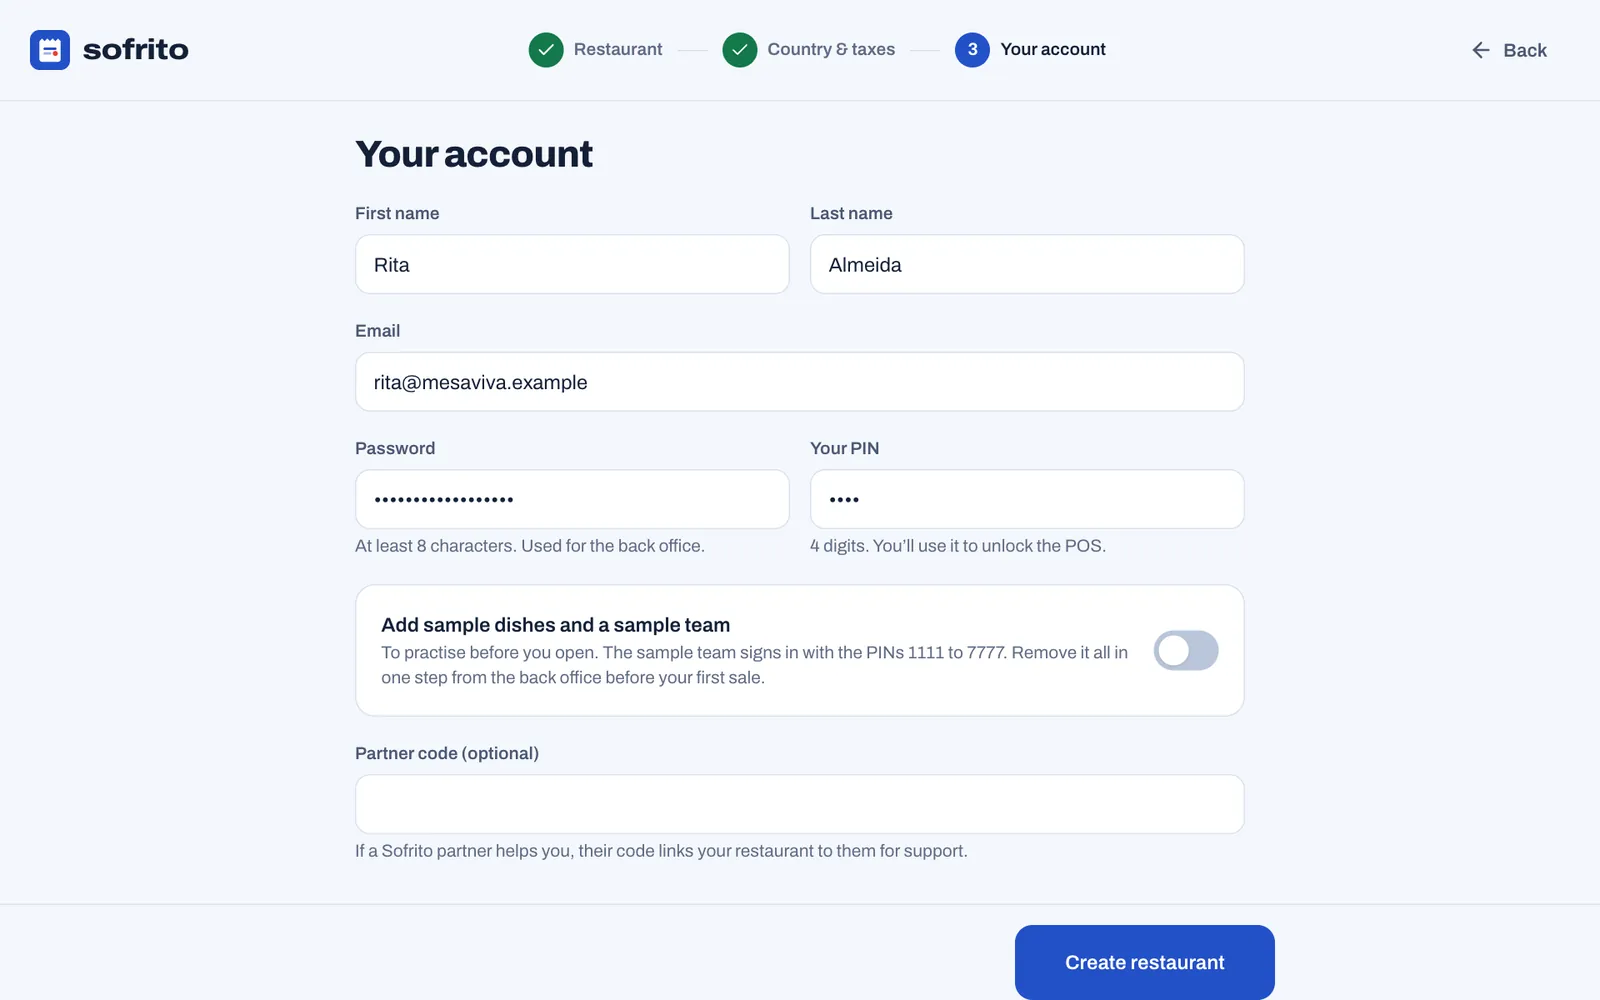
- Type your First name and Last name.
- Type your Email and a Password of at least 8 characters. You use them to sign in to the back office.
- Type Your PIN: 4 digits. You use it to unlock the tills.
- Leave Add sample dishes and a sample team off to start with an empty menu and only yourself on the team. Turn it on to practise before you open: you get sample dishes, a sample team, guests, stock and bookings, which you remove in one step before you open (see Remove the sample data).
- On Sofrito Cloud, type the Partner code (optional) if a Sofrito partner is helping you. It links your restaurant to them for support. A link from your partner fills it in for you.
- Select Create restaurant.
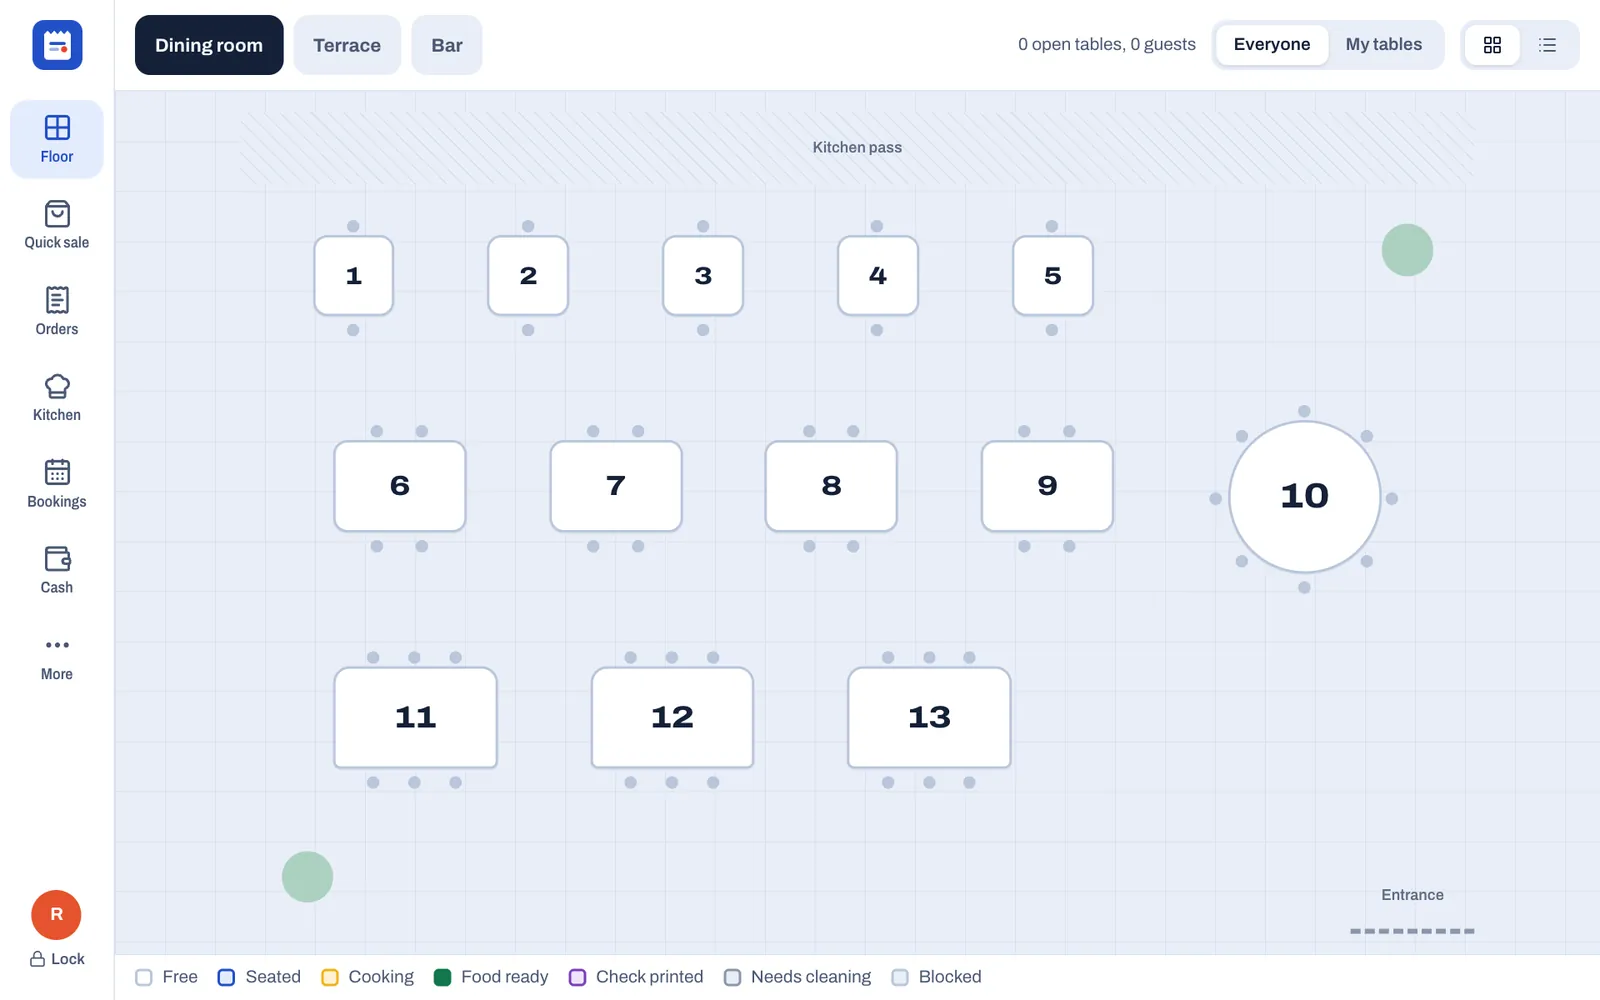
After a few seconds the device becomes your first till, called Main terminal, signed in as you. It opens on the floor plan, or on a new order if you serve at a counter. Once it locks, everyone, you included, unlocks it with their PIN.
#Check what Sofrito created
Everything below is ordinary data: you can rename, change or delete it in the back office.
- Your restaurant, with the currency and language of your country, and this device's time zone when the device is in that country (otherwise the country's main one). Check it in Back office › Settings › Language and region.
- You, as the owner, with your email, password and PIN.
- Seven roles: Owner, Manager, Server, Bartender, Cashier, Host and Kitchen. See Your team, roles and PINs.
- Taxes from your country pack. In the United Kingdom: VAT 20% and VAT 0%, with tax categories for food, cold takeaway food, soft drinks and alcohol. See Taxes, receipts and legal documents.
- Payment methods from your country pack, plus Gift card. In the United Kingdom: Cash and Card. See Payment methods, tips and service charge.
- Three printers, all virtual, which show tickets on screen: Front counter for receipts, Kitchen and Bar for kitchen tickets. Replace them with your real printers when they arrive. See Devices, printers and stations.
- Two stations, Kitchen and Bar, each printing its tickets on its printer. Their tickets also wait on a kitchen display once you pair one that shows them.
- A cash drawer, Main drawer, opened by the Front counter printer.
- A floor plan, if you serve at tables: a dining room with tables 1 to 13. Table service and Bar also get a terrace (T1 to T8) and a bar (B1 to B8 at the counter, H1 to H3). See Draw your floor plan.
- Courses: Drinks, Starters, Mains and Desserts.
- Discounts: Staff meal, Manager 10%, Friends & family 20% and Loyalty reward, and a 10% service charge added automatically for tables of 8 or more.
- Reasons staff choose from when they void, give away or discount an item, refund, or take cash in or out.
- This device, as your first till, called Main terminal.
With Add sample dishes and a sample team on, you also get a menu with photos, options and allergens (in Portuguese, Spanish or French when your country speaks it, otherwise in English), a happy hour price for cocktails and beer on weekdays from 17:00 to 19:00, seven team members, a few guests with loyalty points switched on, a supplier with stock items and recipes, and some bookings for today.
#Remove the sample data
The sample team signs in with simple PINs: 1111, 2222, 3333 and so on up to 7777. Remove the sample data before your first real sale. While it is there, a banner at the top of the back office says so.
- In the back office, select Remove sample data in the banner at the top.
- Select Tap again to remove.
Sofrito archives the sample team, so their PINs stop working at once, and removes the sample dishes, guests and bookings. Sample stock items and the supplier are archived. Anything you changed, or now use with your own dishes, stays. You need Restaurant settings to see the banner. Loyalty stays switched on: turn it off in Back office › Settings › Loyalty if you don't want it.
Sofrito refuses while orders are open ("Close or void the open orders first."). Once something has been sold, even a practice sale, the banner adds "Removing it now archives it, so the sales already made with it stay in your reports." The sample dishes, categories, options, price level and guests are then archived instead of removed, so every sale and report keeps what it names.
#Sign in to the back office
On any computer, tablet or phone:
- Open go.sofritopos.app, or your hub's address on the restaurant network.
- Select Sign in to the back office.
- Type your Email and Password.
- Select Sign in to the back office.
If your email and password open more than one restaurant on Sofrito Cloud, Sofrito shows Choose a restaurant: select the one you want.
In the Sofrito app, first tap Use Sofrito Cloud or type your hub's address on the app's first screen. You do not need the Server address link on the sign-in screen.
On a computer, tablet or phone that isn't paired as one of your restaurant's devices, you stay signed in for 30 days. To sign out, select Sign out at the top of the back office.
On a till or handheld, tap Back office on the lock screen, or More › Back office once you have unlocked it with your PIN. The back office never stays signed in there:
- Back office on the lock screen opens a PIN pad: "Someone with back-office access enters their PIN." Type a PIN whose role can open the back office, or select Use email and password instead. A server's PIN gets "Your role can't open the back office."
- It locks again when the till locks, and after 5 minutes without a touch, whatever the till's own lock time. Sign out locks the till.
- The POS button at the top of the back office takes you back to the till.
#Connect your first device
Each till, handheld and screen is connected once, with a pairing code. Here is the short version; see Devices, printers and stations for every option.
In the back office:
- Select Devices & printers.
- Select Pair a new device.
- Choose what the device will be: POS terminal, Handheld, Kitchen display, Customer display, Pickup board, or Print bridge for a computer that sends print jobs to network printers.
- Type a Device name if you like, for example "Terrace handheld".
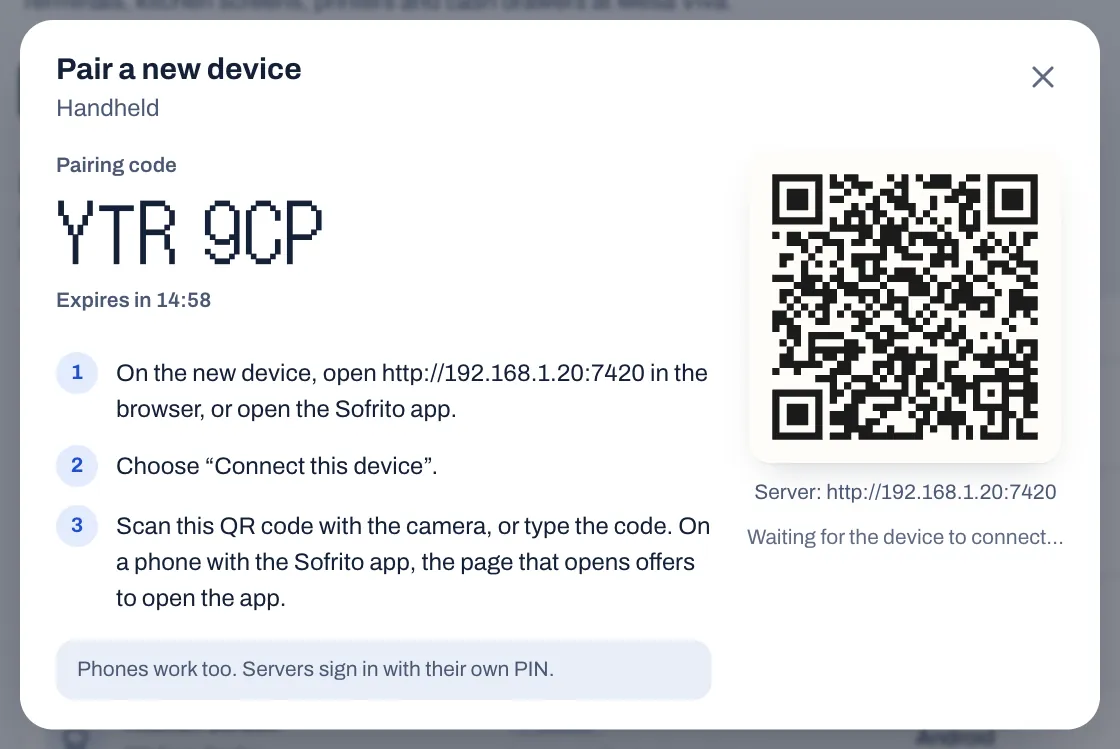
- Select Create pairing code. A 6-character code and a QR code appear. The code works once and expires after 15 minutes.
On the new device:
- Open Sofrito the same way: go.sofritopos.app in the browser, the Sofrito app, or your hub's address.
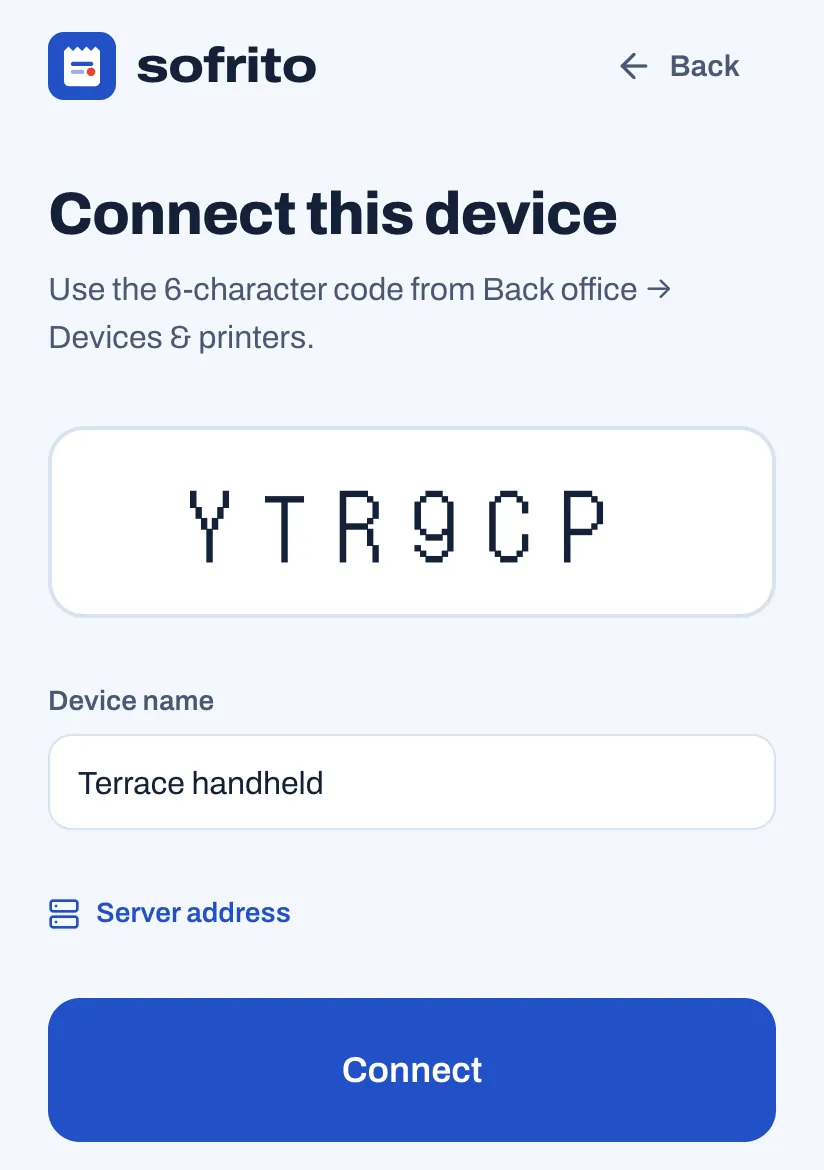
- Tap Connect this device.
- Type the 6-character code, and a Device name if you did not give one.
- Tap Connect.
Or scan the QR code with the device's camera instead. On a computer, the page it opens connects the device at once. On a phone or tablet, the page offers Open in the Sofrito app, for a phone where the app is installed; tap Connect on that page to use the browser instead.
A till or handheld then shows its lock screen, and the back office says it is connected. Staff now unlock it with their PIN.
#Try the demo restaurant
The demo is a full restaurant, Mesa Viva, with a menu, a floor plan, a team and three weeks of service history. Use it to learn Sofrito or to train staff without touching your own restaurant.
- Open go.sofritopos.app. In the Sofrito app, tap Use Sofrito Cloud.
- Under Try the demo restaurant, select Open the demo.
- The device becomes a till called Demo terminal, signed in as the demo's owner. Once it locks, unlock it with a PIN: 1234 for the owner, 1111 for the manager, 2222 or 3333 for the servers, 4444 for the bartender, 5555 for the cashier and 7777 for the host. 6666 is the kitchen's PIN, for clocking in: the kitchen display needs no PIN.
The demo uses your own country when Sofrito has a pack for it, so prices, taxes and receipts look like yours. It has a kitchen display called Kitchen pass, so its tickets wait on kitchen screens like a real service. Devices & printers shows it as Demo screen, Part of the demo: no device connects to it. Sofrito Cloud deletes demo restaurants after 7 days.
To leave the demo:
- Unlock the till with 1234 and tap More.
- Under This is the demo restaurant, tap Leave the demo, then Tap again to leave.
On Sofrito Cloud, the device leaves the demo, signs out of the demo's back office and goes back to the welcome screen.
#Create your restaurant on Sofrito Hub
Most restaurants run the hub on their main till or an office computer, with the Sofrito desktop app. Sofrito, or your Sofrito partner, sends you the installer for Windows, macOS or Linux. To run the hub as a background service on a server instead, see Sofrito Hub and working offline.
- On the computer that will run the hub, install the Sofrito desktop app and open it.
- On Connect to your restaurant, under This is the restaurant's main computer, select Run Sofrito Hub on this computer.
- The welcome screen shows Sofrito Hub at the bottom. Select Set up a restaurant.
- Complete the wizard as described in Create your restaurant on Sofrito Cloud. There is no partner code on a hub.
This computer is now your restaurant's server and its first till.
#Open Sofrito on other devices
Every device must be on the restaurant's staff Wi-Fi or network.
- On the hub computer, open Back office › Devices & printers, select Pair a new device, choose the kind of device and select Create pairing code.
- Under the QR code, the sheet shows the hub's address, for example Server: http://192.168.1.20:7420.
- On the other device, open that address in the browser. In the Sofrito app, type the address in Server address, for example 192.168.1.20, and tap Connect: Sofrito adds the rest.
- Tap Connect this device, type or scan the code, and tap Connect.
Once the hub is set up, its welcome screen offers only Connect this device and Sign in to the back office.
#Use the desktop app
The Sofrito desktop app runs on Windows, macOS and Linux computers: touch tills, office computers, the hub computer and the computer that serves as a print bridge. The first time it opens, it shows Connect to your restaurant:
- To connect to a hub, type its address in Server address, for example 192.168.1.20, and select Connect.
- To use Sofrito Cloud, select Use Sofrito Cloud.
- To make this computer the restaurant's hub, select Run Sofrito Hub on this computer.
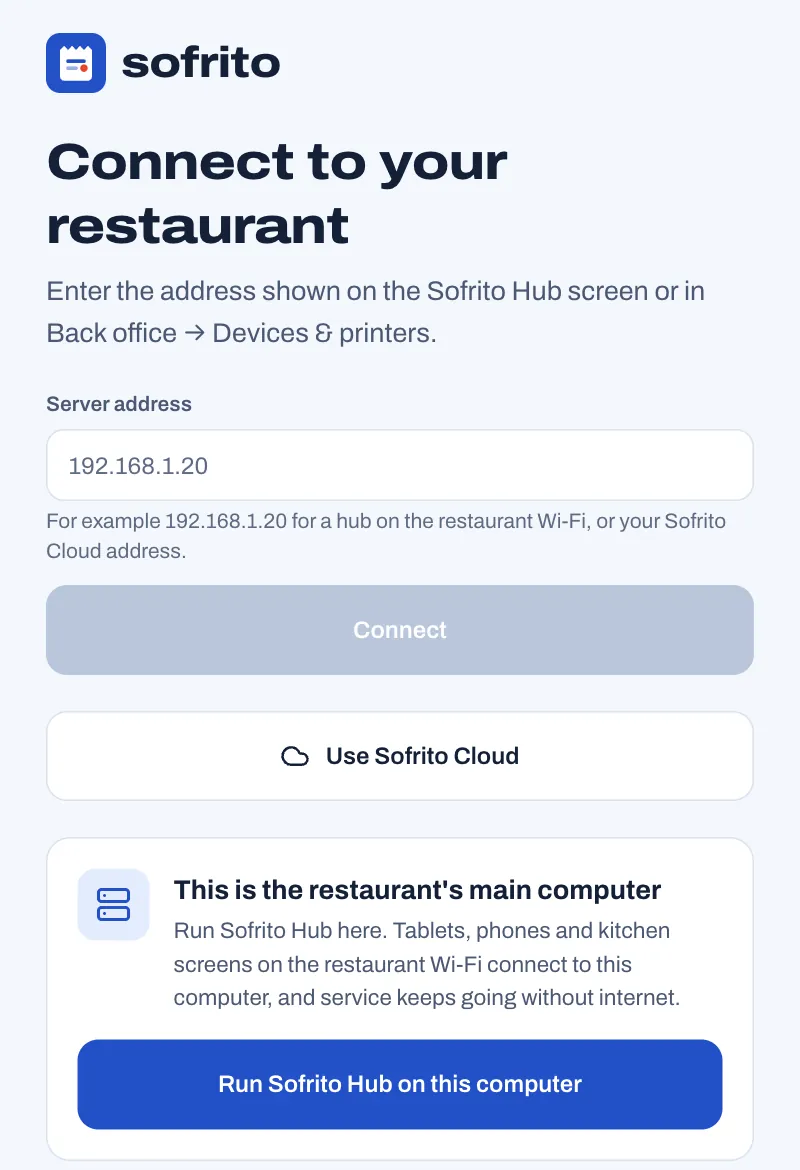
The app remembers your choice and opens straight on your restaurant next time. It always shows the version of Sofrito that your hub or Sofrito Cloud runs.
The Sofrito menu has:
- Reload: loads the screen again (Ctrl+R, or Cmd+R on a Mac).
- Full screen: fills the screen (F11).
- Kiosk mode (start full screen): opens Sofrito full screen, without the window's borders, every time it starts. Use it on a dedicated till. Choose it again to turn it off.
- Connect to a different server…: goes back to the first screen to choose again. If this computer runs the hub, the hub stops, but its data stays on the computer.
- Quit Sofrito (Ctrl+Q, or Cmd+Q on a Mac).
When this computer runs the hub and other devices are connected to it, Quit Sofrito and closing the window ask first: Quit Sofrito? says how many devices are connected. Select Keep Sofrito open, or Quit anyway to stop the hub. Quitting from the Dock on a Mac, or shutting the computer down, does not ask.
#Before you go further
Your restaurant is ready to set up. Work through these chapters in order:
Build your menu
Your menu is what staff tap on the till and the handhelds, what the kitchen reads on its tickets and screens, and what guests see on their receipt. This chapter takes you through it in the order most restaurants work: categories first, then dishes, then options, allergens, kitchen routing and prices. You build the menu in the back office, with a role that can edit it (usually the owner or a manager). Marking a dish sold out is also for servers, bartenders and cashiers on the till, and for the kitchen on the kitchen display.
Before you start
- Create your restaurant. See Create your restaurant.
- Sofrito starts you with two stations, Kitchen and Bar. If some dishes are made somewhere else, such as a pizza oven or a grill, add those stations first. See Devices, printers and stations.
#Open the menu editor
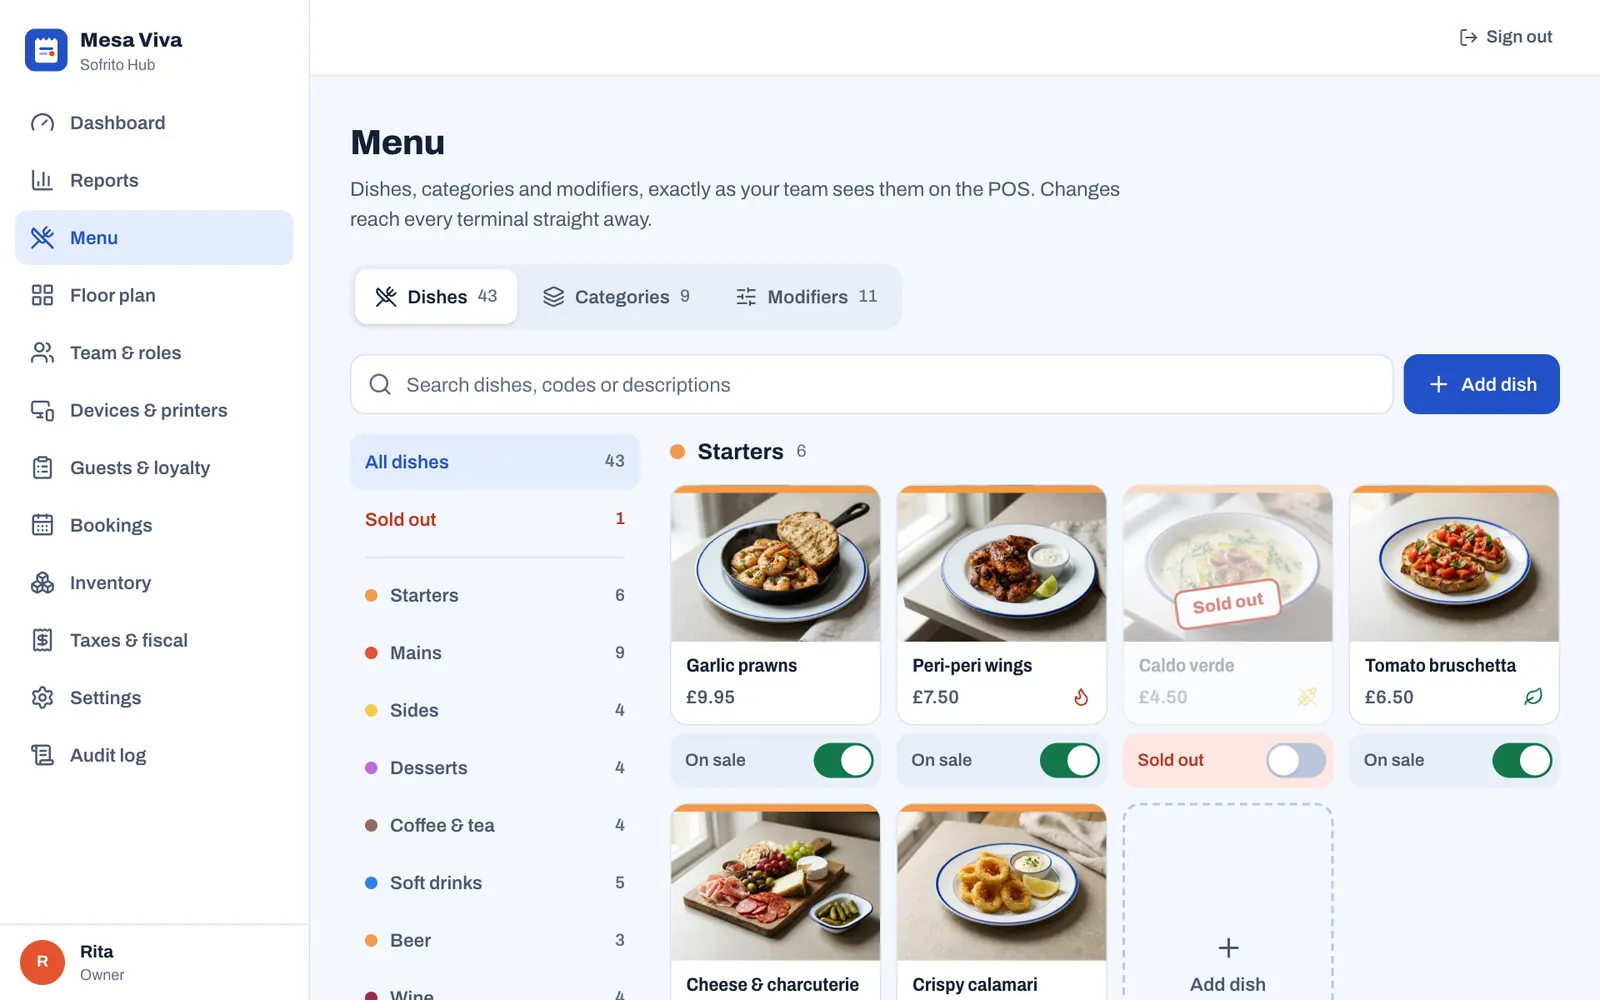
- In the back office, select Menu.
- Select a tab: Dishes, Categories or Modifiers.
Dishes shows every dish exactly as staff see it on the till, with an On sale switch under each one. Categories are the tabs along the top of the till's menu. Modifiers are the questions the till asks when a dish is ordered, such as how a steak is cooked. Every change you save reaches all tills and handhelds straight away.
If your role can look at the menu but not change it, a message at the top says so. Ask the owner to give your role Edit the menu (see Your team, roles and PINs).
#Clear the sample menu
If you turned on Add sample dishes and a sample team when you created your restaurant, your menu holds the dishes of a sample restaurant. The quickest way to clear it is the banner at the top of the back office: select Remove sample data, then Tap again to remove. In one step, Sofrito removes the sample dishes and guests, archives the sample team, and removes the sample categories, options and price level that none of your own dishes uses. Once something has been sold, even a practice sale, it archives them instead, so the sales already made with them stay in your reports. Anything you changed stays. See Remove the sample data.
To keep some of the sample dishes, change them before you remove the sample data: anything you changed stays. Or clear the menu by hand, here in the menu. Deleting a category deletes its dishes too.
- Select Menu › Categories.
- Select a category you don't need.
- Select Delete category.
- Select the button again to confirm. It now says Tap again to delete it and its 6 dishes, with your number of dishes.
- Repeat for each category you don't need.
- Select Modifiers.
- Select a group you don't need.
- Select Delete modifier group.
- Select the button again to confirm.
The sample menu also has a Happy hour price level. To remove it, see Set special prices with price levels.
#Add your categories
Categories are the tabs staff tap on the till, such as Starters, Mains or Drinks. Every dish belongs to one category and takes its colour, course, stations and tax, unless you change them on the dish.
- Select Menu › Categories.
- Select Add category.
- In Name, type the name staff should see, for example “Starters”.
- Under Colour, select a colour, or leave Automatic.
- Under Course, choose when these dishes are served, for example Drinks for a drinks category.
- Under Stations, tick where these dishes are made, for example Kitchen or Bar.
- Under Tax, choose the tax category for these dishes.
- Select Add category.
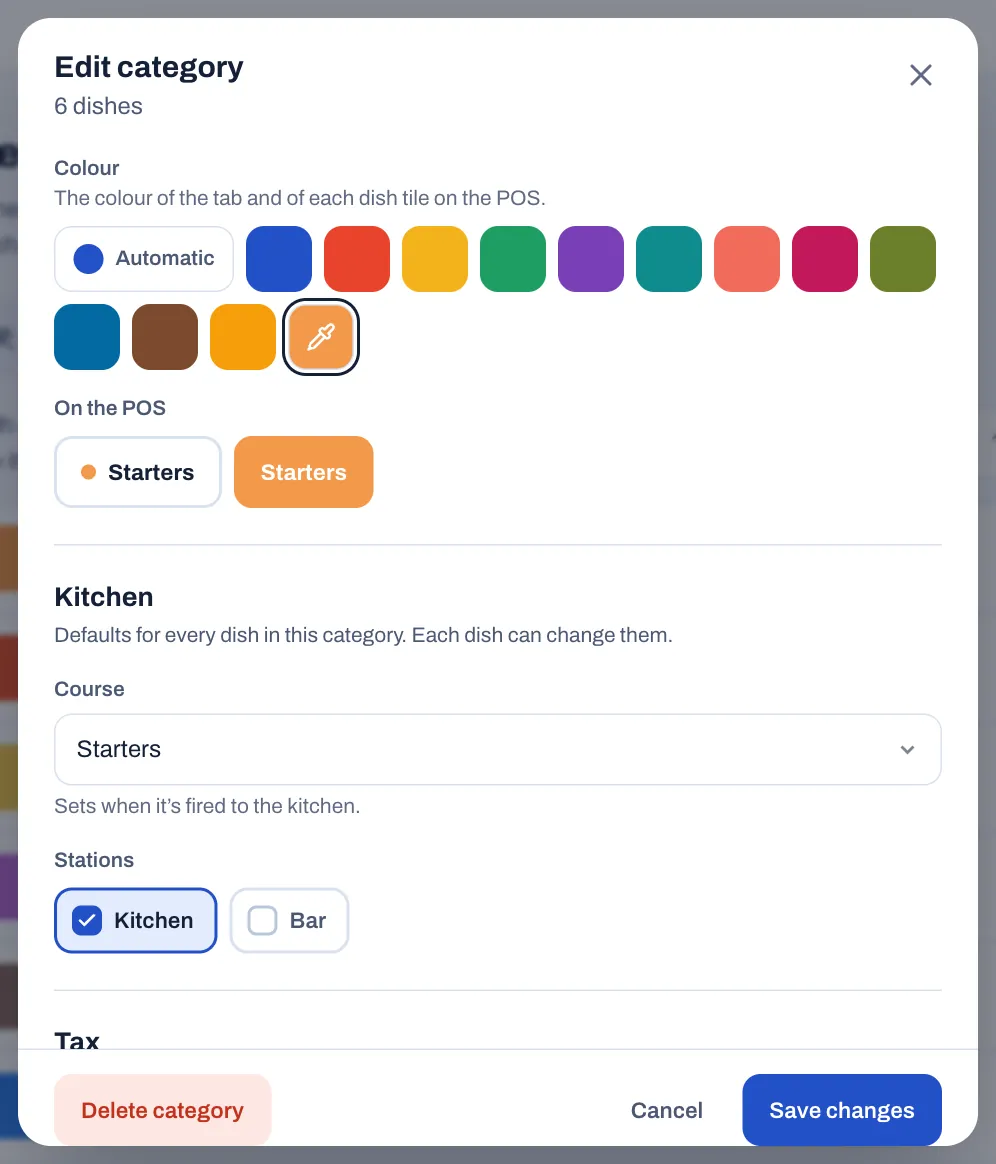
- The colour fills the category's tab on the till and runs along the edge of each of its dish buttons. Automatic takes the next colour of Sofrito's palette. For a colour of your own, select the pipette swatch at the end. On the POS shows how the tab will look.
- If you leave Course on Default (Starters), the dishes count as Starters. Set drinks categories to Drinks, and so on.
- With no station ticked, the category's dishes are never sent to the kitchen, unless a dish has stations of its own. That suits things staff serve themselves, such as bottled water.
#Put categories and dishes in order
The till shows categories and dishes in the order you set here. The till's first tab is always Popular (see Mark allergens and diet labels).
To change the order of the categories:
- Select Menu › Categories.
- Select Rearrange.
- Use the arrows to move each category up or down.
- Select Save positions.
To change the order of the dishes in a category:
- Select Menu › Dishes.
- In the list on the left, select the category.
- Select Rearrange.
- Use the arrows to move each dish earlier or later.
- Select Save positions.
#Add a dish
- Select Menu › Dishes.
- Select Add dish. To add a dish straight into a category, select the Add dish button at the end of that category instead.
- In Name, type the dish's name as it is on your printed menu. The receipt shows this name.
- If the name is long, type a shorter Kitchen name, for example “Burger” for Mesa smash burger. Kitchen tickets and the kitchen display show it instead. Leave it empty to use the full name.
- Check the Category.
- In Description, write the ingredients and how the dish is served. Staff can read it on the till.
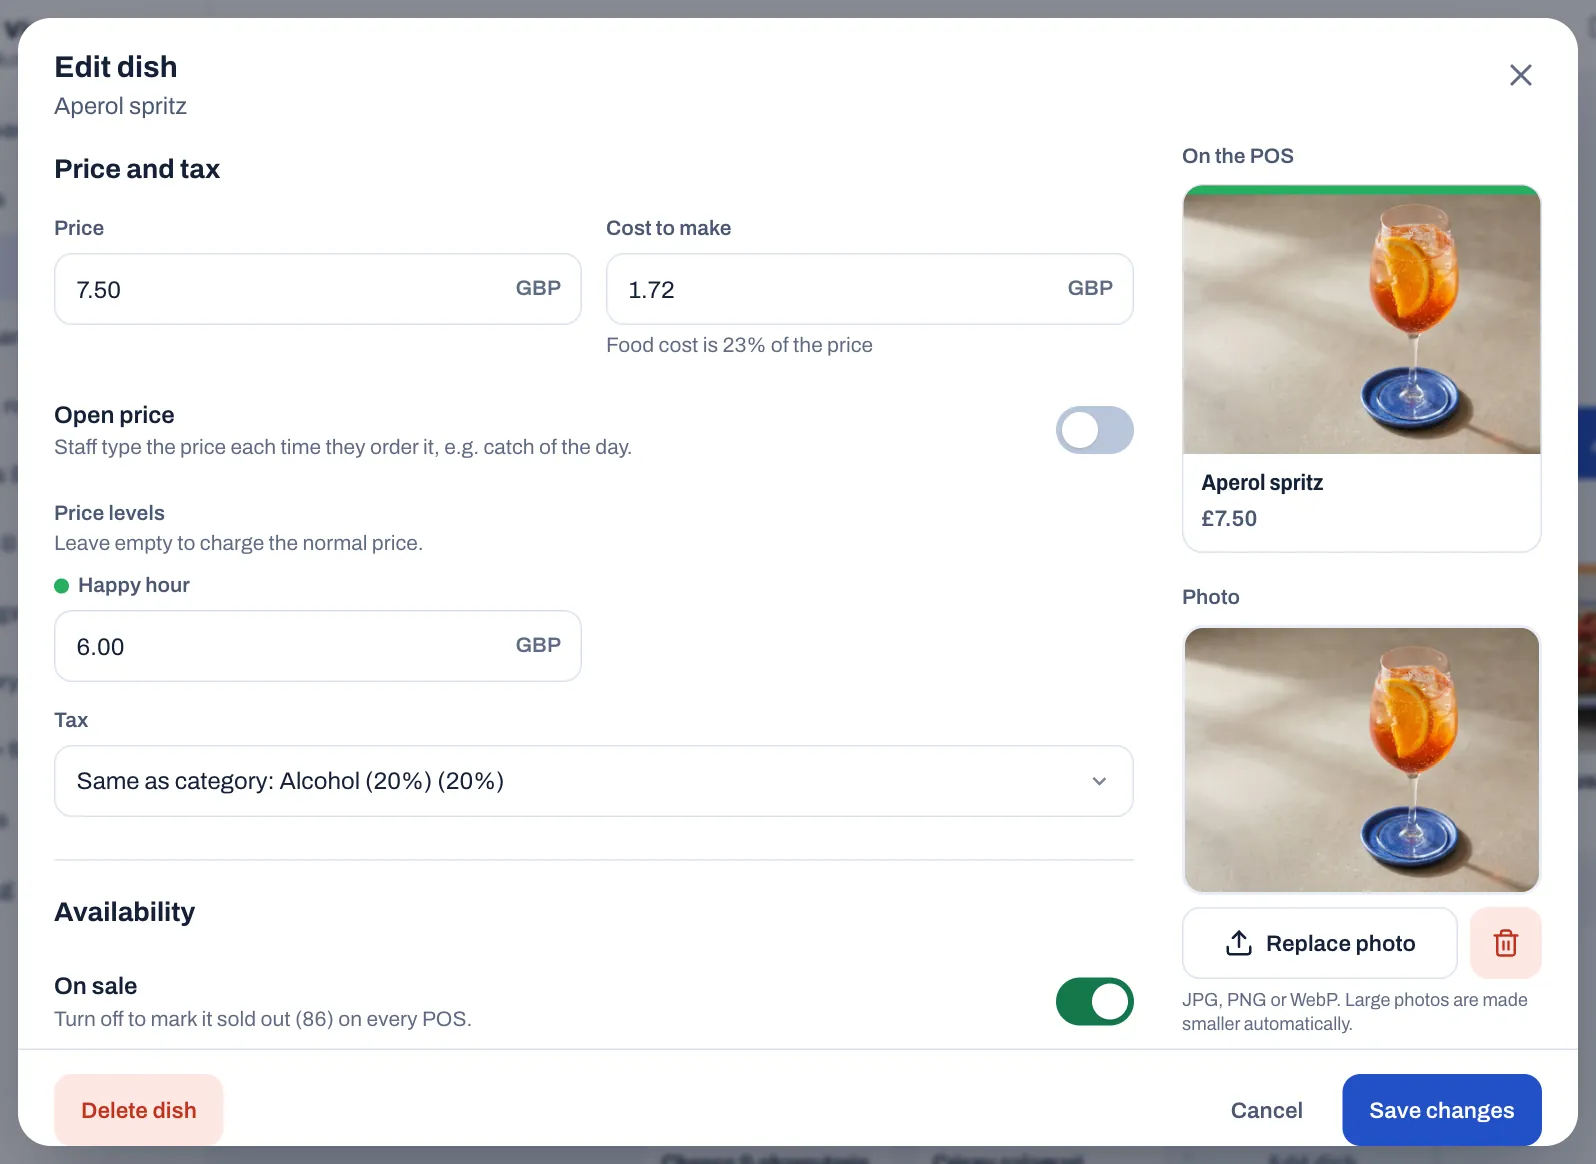
- Under Price and tax, type the Price.
- If you know it, type the Cost to make. Sofrito shows the food cost as a share of the price and uses it in food cost reports.
- Add a photo (see Add dish photos).
- Select Add dish. To go straight on to the next dish in the same category, select Save and add another instead.
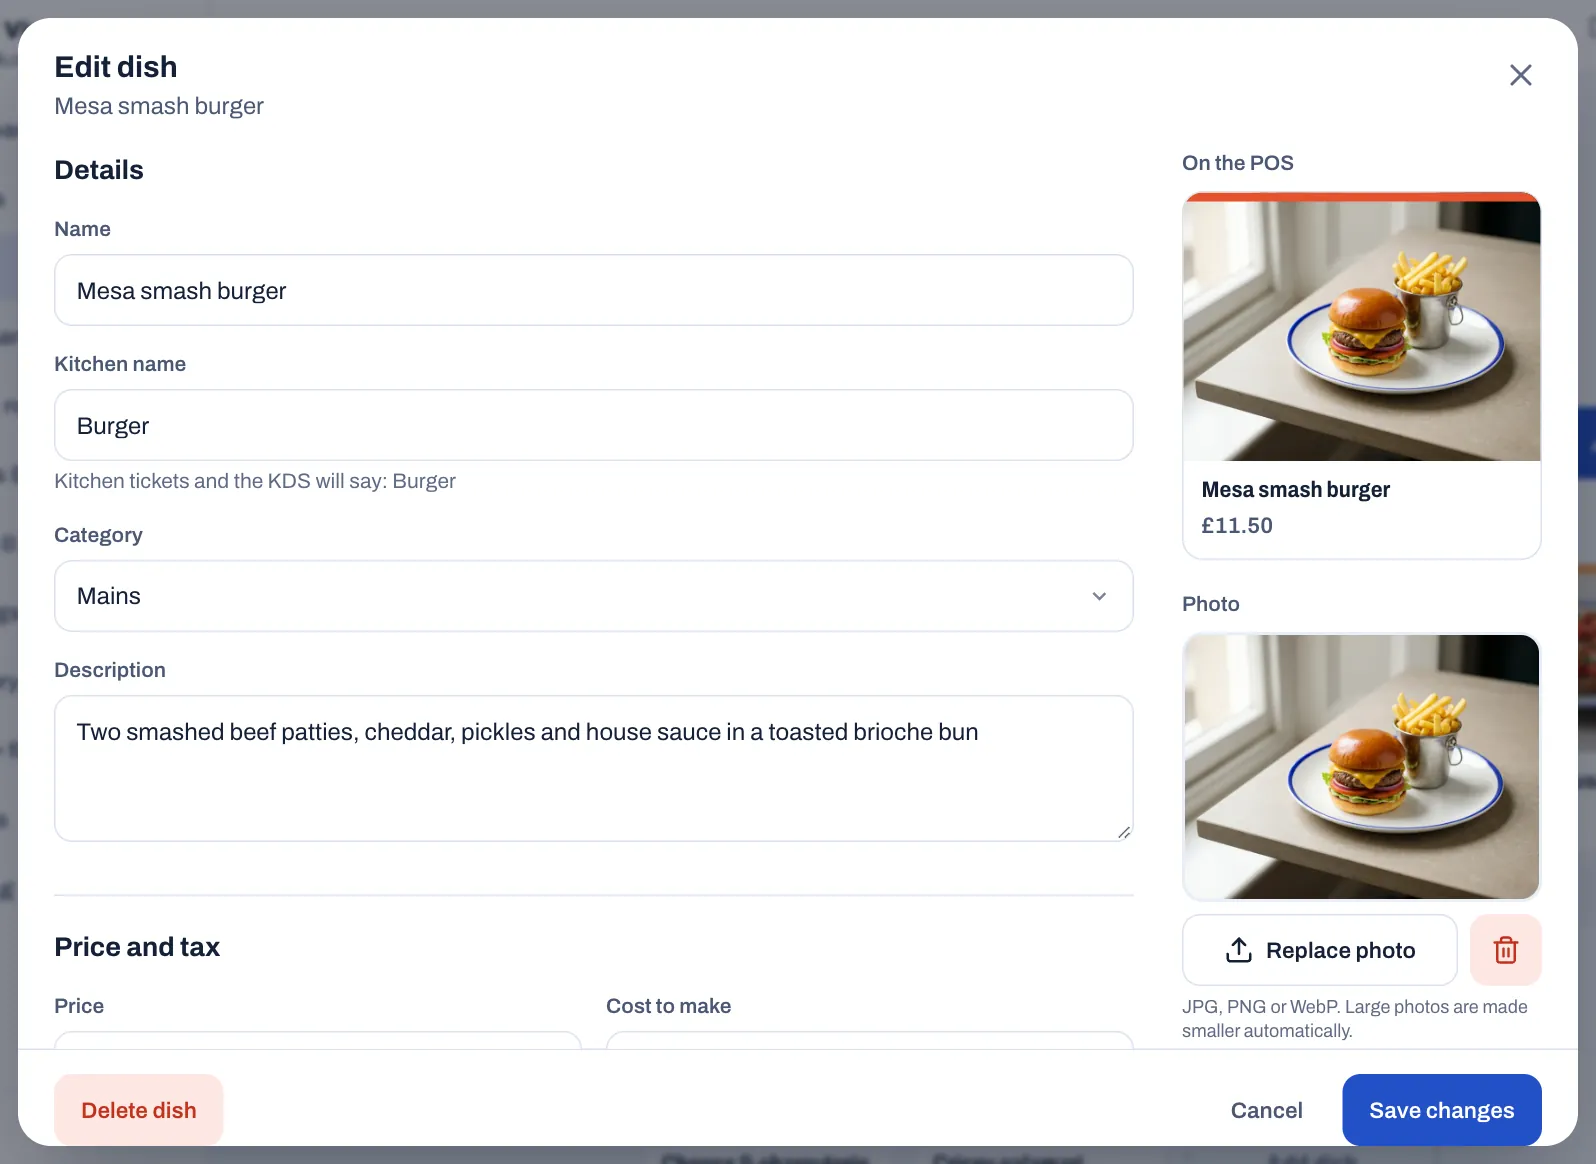
On the POS, on the right of the sheet, shows the dish button exactly as staff will see it. The rest of the sheet, from Price levels to Codes, is explained in the sections below. Fields you leave alone follow the category.
#Add dish photos
Photos help staff find dishes faster. They show on the dish buttons, when staff choose options, and when they touch and hold a dish.
- Open the dish in Menu › Dishes.
- Under Photo, select Add photo, or drag a photo file onto the box.
- Wait until the photo appears.
- Select Save changes.
To change the photo, select Replace photo. To take it off, select the bin button next to it.
- Use JPG, PNG or WebP files. Sofrito makes large photos smaller before it uploads them. If a photo is still too large, choose a smaller one.
- Dish buttons show photos in landscape (4:3) and crop them to fill the space.
- The till shows photos only while Show dish photos on the POS is on, in Settings › Service. It is on unless you turn it off. Without photos, the buttons are smaller and more dishes fit on the screen.
#Ask for options with modifier groups
A modifier group is a question the till asks when a dish is ordered: how the steak is cooked, which side, which extras. You make each group once and add it to every dish that needs it.
- Select Menu › Modifiers.
- Select Add modifier group.
- In Name, type a name your team will recognise in lists, for example “Burger cooking point”.
- In Question on the POS, type the question staff should see, for example “How would you like it cooked?”. If you leave it empty, the till shows the name.
- Under Rules, select Must choose one, May choose one or May choose any.
- For any other rule, set At least and At most yourself. At most at zero means No limit.
- To give some options away, set Free choices. For example, with 1, the first sauce chosen is free.
- For things like extra shots or double cheese, turn on Allow the same option more than once.
- Under Options, type the first option in Option.
- If the option costs more, type the extra in Price change. For an option that lowers the price, type a minus sign first.
- Select Add option for each further option.
- If most guests choose the same option, tick Selected by default on it.
- Under Dishes, tick every dish that should ask this question. To find a dish, type in Find a dish.
- Select Add modifier group.
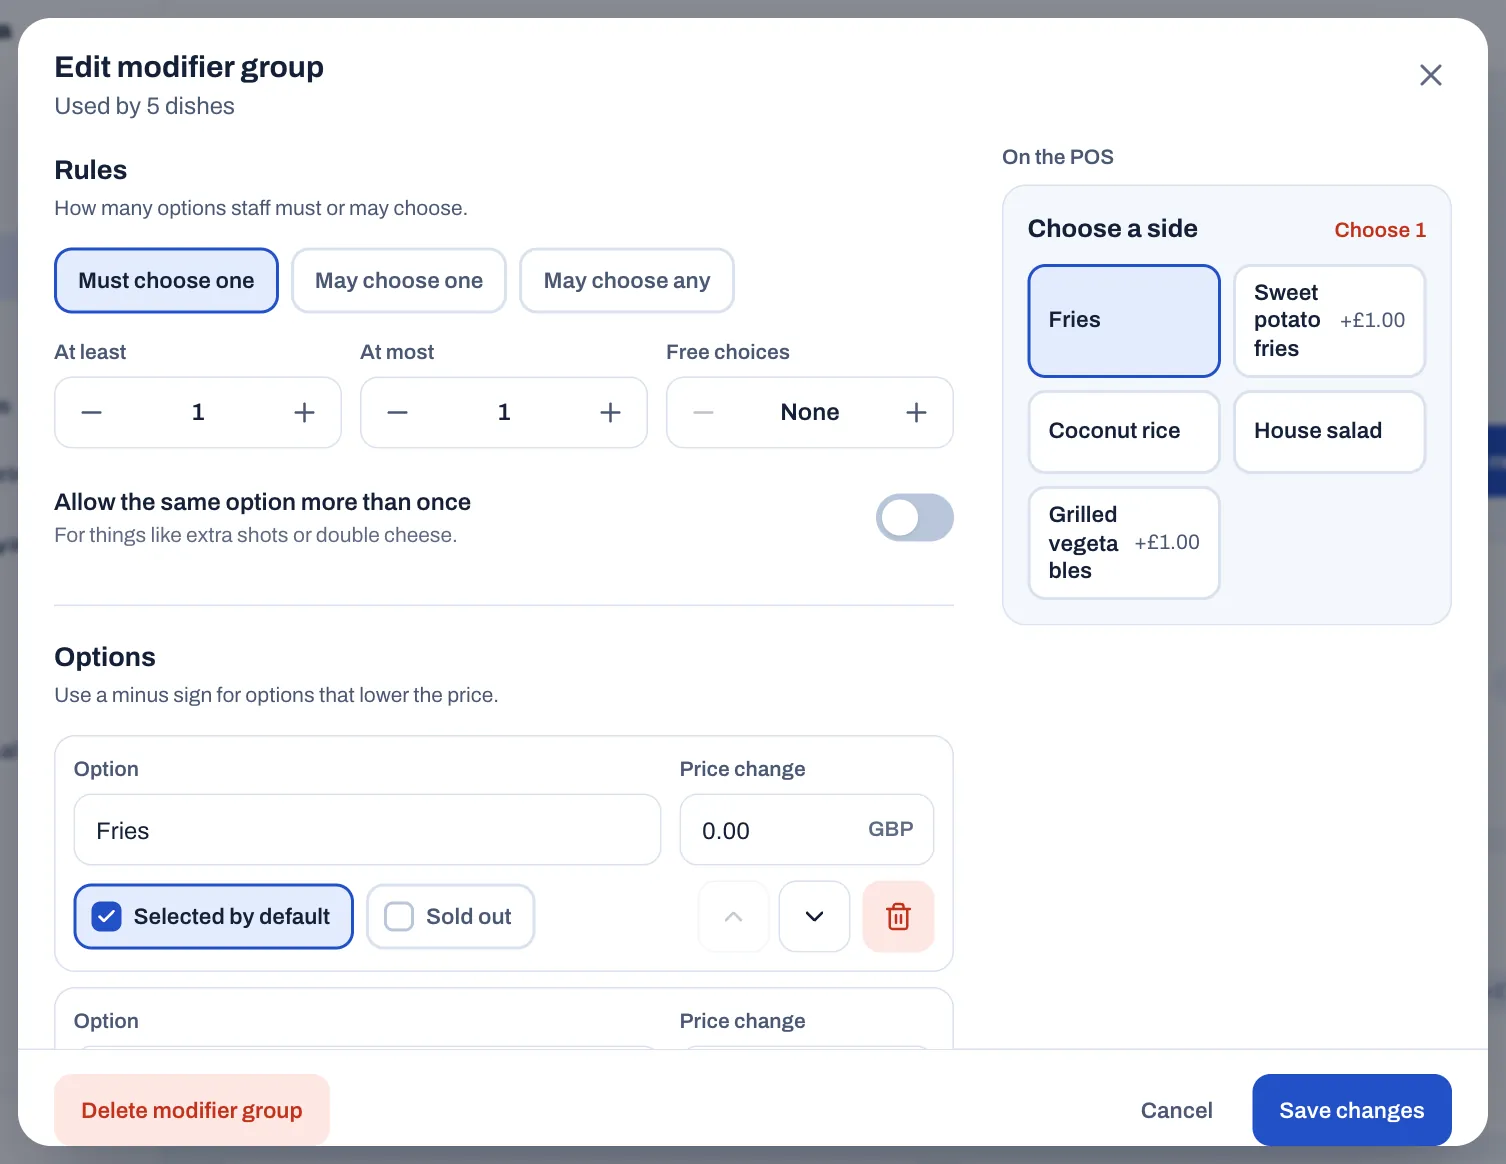
On the till, tapping a dish with modifier groups opens its options. Options selected by default are already chosen, so the usual order takes one tap. A group staff must answer shows its rule in red, for example Choose 1, and Add to order stays unavailable until they answer it. Price changes are added to the dish price, and the options print under the dish on kitchen tickets.
To change which questions a dish asks:
- Open the dish in Menu › Dishes.
- Under Modifiers, select a group under Add a modifier group to add it.
- Use the arrows to change the order the till asks the questions in.
- To stop asking a question, select the cross next to its group.
- Select Save changes.
#Mark allergens and diet labels
- Open the dish in Menu › Dishes.
- Under Dietary and allergens, tick the Tags that apply.
- Under Allergens, tick every allergen the dish contains.
- Select Save changes.
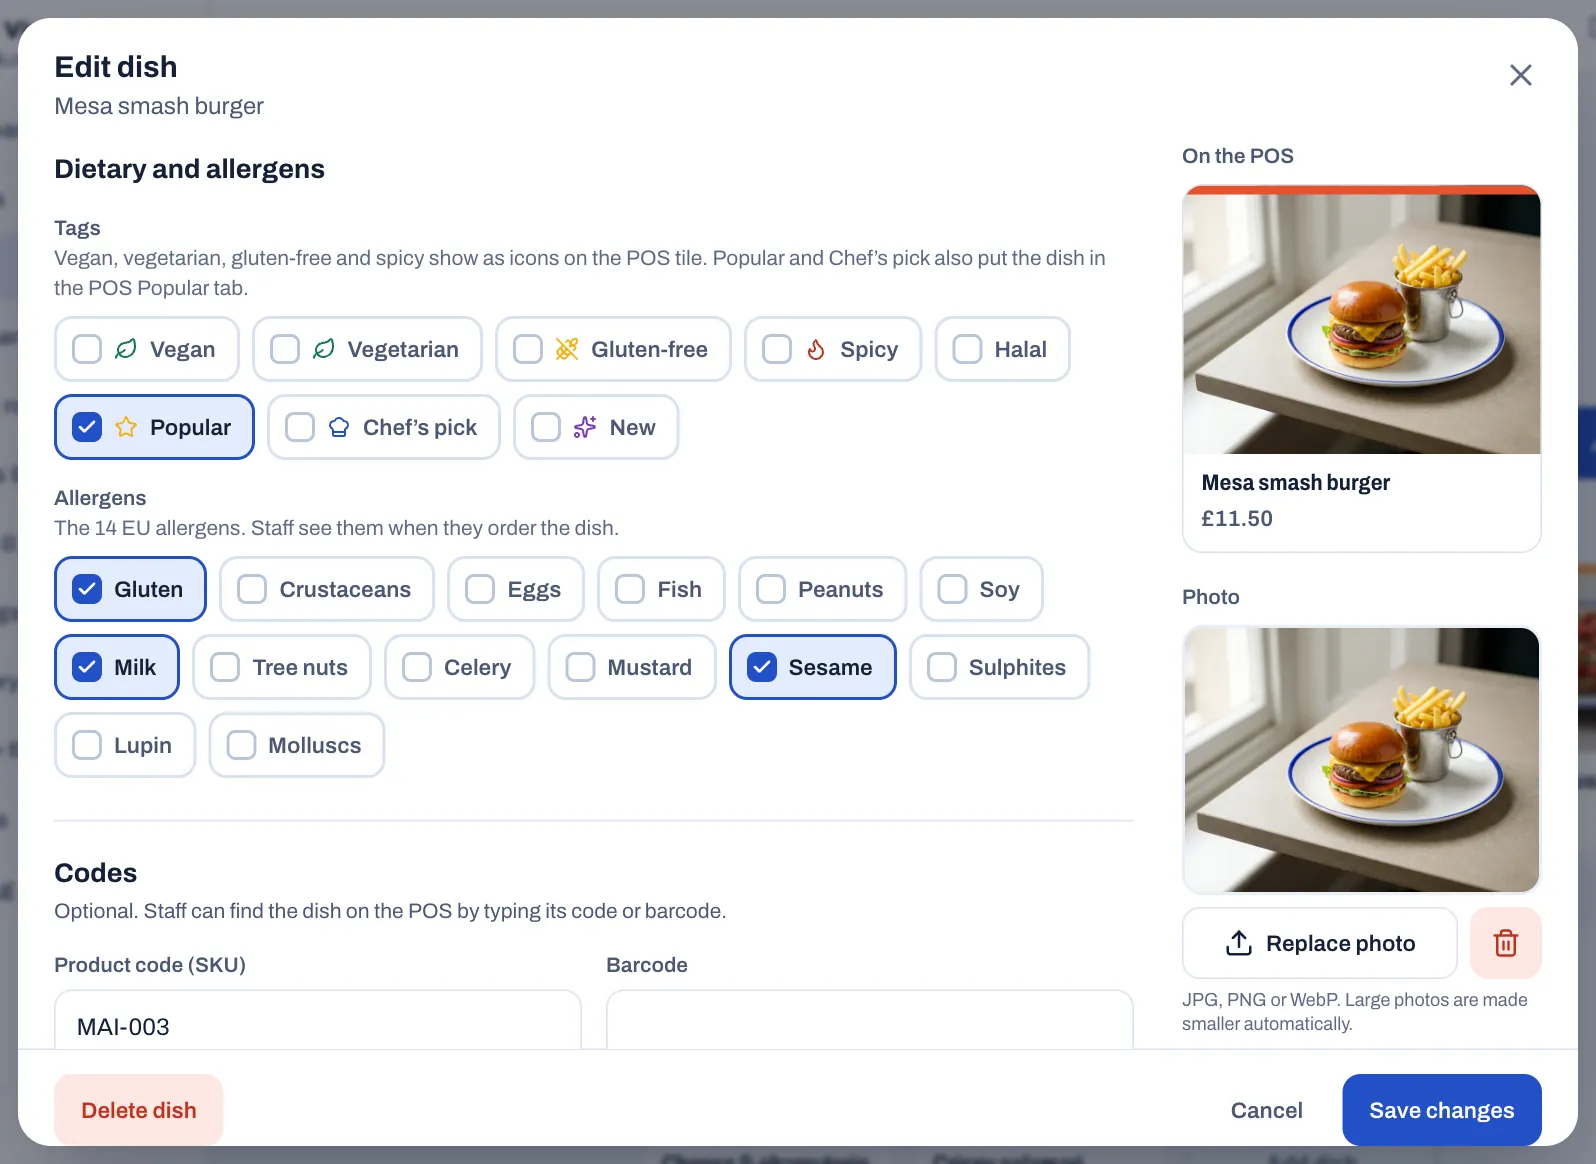
The Allergens list holds the 14 allergens that EU and UK law name: gluten, crustaceans, eggs, fish, peanuts, soy, milk, tree nuts, celery, mustard, sesame, sulphites, lupin and molluscs. Staff see a dish's allergens when its options open on the till, and whenever they touch and hold the dish. The kitchen display and printed kitchen tickets show them next to the dish.
The Tags work like this:
- Vegan, Vegetarian, Gluten-free and Spicy show as small icons on the dish button, up to two per dish.
- Popular and Chef's pick put the dish in the till's Popular tab, the first tab staff see. If no dish has either tag, that tab shows the first dishes on your menu.
- Between orders, the customer display shows the photo of a Chef's pick dish behind your welcome message.
- Halal and New are saved with the dish but don't show on the till.
#Set the course
Courses group dishes on the order and on kitchen tickets, so the kitchen knows what goes out first. The courses are Drinks, Starters, Mains and Desserts unless you rename them in Settings › Service.
- Open the category in Menu › Categories.
- Under Course, choose the course for its dishes.
- Select Save changes.
To give one dish a different course, open the dish and change Course under Kitchen. Same as category follows the category. Staff can still choose another course when they order; see Table service. If courses are turned off in Settings › Service, the field says so.
#Send each dish to the right station
A station is a place where food or drinks are made, such as the kitchen or the bar. The stations you tick decide which printer prints a dish's ticket and which kitchen display shows it. You set up stations, their printers and their screens in Back office › Devices & printers › Stations (see Devices, printers and stations).
To choose the stations for a whole category, tick them under Stations in the category (see Add your categories). To send one dish somewhere else:
- Open the dish in Menu › Dishes.
- Under Kitchen, turn off Use the category's stations. While it is on, Currently shows the category's stations.
- Tick the stations for this dish.
- Select Save changes.
- A dish can go to more than one station. Each station gets its own ticket.
- A dish with no station ticked is never sent to the kitchen.
- A station's tickets wait on a kitchen display only when the station's Show on kitchen screens is on and a paired kitchen display shows it. Otherwise they only print, and the dishes show Served on the check as soon as they are sent. See The kitchen display.
#Set the tax for categories and dishes
Each dish needs a tax category, which decides the tax rate on the receipt. Sofrito creates the tax categories for your country when you create the restaurant. You can see and change them in Back office › Taxes & fiscal (see Taxes, receipts and legal documents).
- Open the category in Menu › Categories.
- Under Tax, choose its tax category.
- Select Save changes.
For a dish taxed differently from its category, open the dish and choose another Tax under Price and tax. Same as category follows the category. A tax category can charge a different rate by order type, for example for takeaway.
#Let staff type the price
For dishes whose price changes, such as the catch of the day, staff can type the price each time.
- Open the dish in Menu › Dishes.
- Under Price and tax, turn on Open price. You can leave Price empty.
- Select Save changes.
On the till, the dish button shows a dash instead of a price. When staff tap it, the till asks them to Enter price on a keypad before they can add it.
#Set special prices with price levels
A price level is a second set of prices for the same dishes: happy hour, takeaway prices, terrace prices. You create the level once, then give each dish its price at that level. Dishes without a price at the level keep their normal price.
To create a price level:
- In the back office, select Settings › Price levels.
- Select Add price level.
- Type a Name, for example “Happy hour”.
- Select a Colour.
- Under Order types, select the order types it is for, for example Takeaway. Leave them all off for every order type.
- To limit it to certain times, select Add times.
- Select the days, or leave the days off for every day.
- Set From and To.
- Select Add price level.
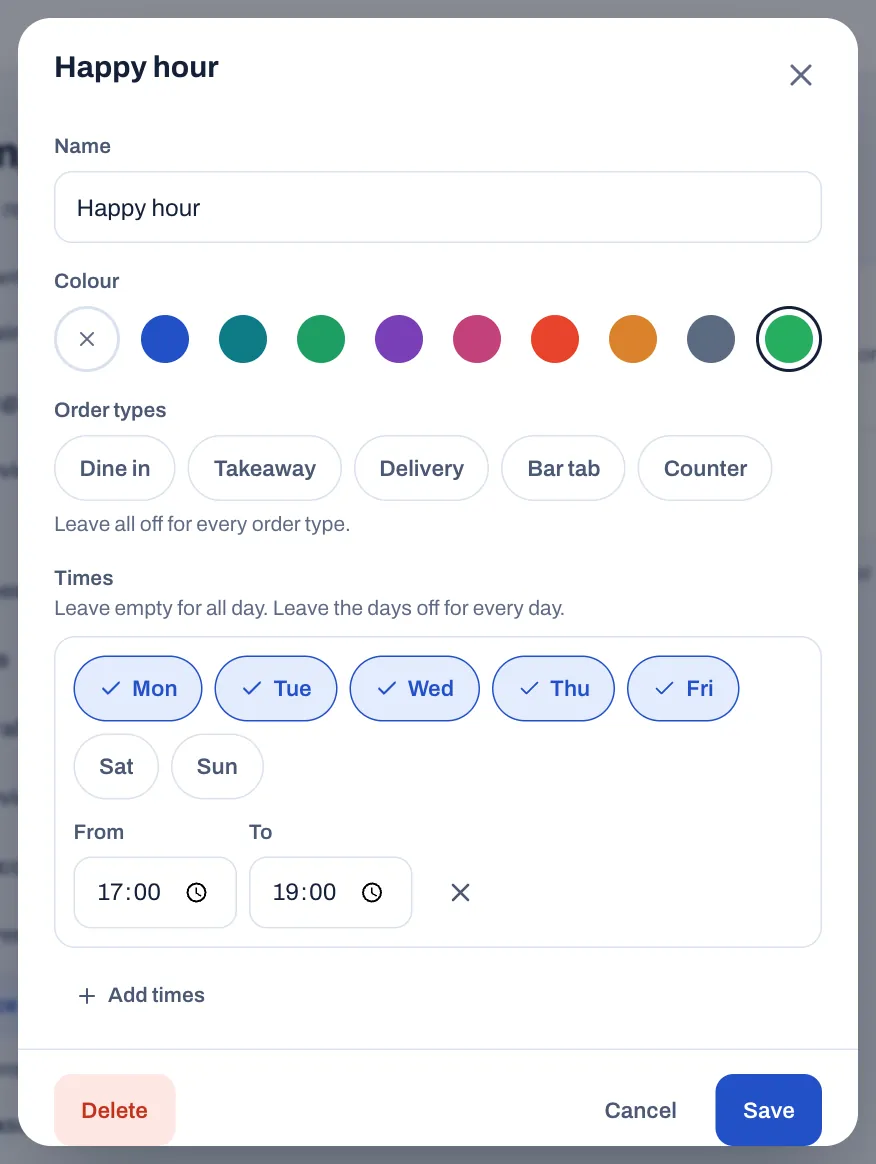
To price dishes at the level:
- Select Menu › Dishes.
- Select a dish.
- Under Price levels, type the dish's price at each level. Leave a level empty to charge the normal price.
- Select Save changes.
How the till chooses the prices:
- A level with order types or times applies by itself when both match: for example every takeaway order, or weekdays from 17:00 to 19:00. If two levels match, the one higher in the list wins.
- A level with neither applies only to the tables of a floor area that uses it. Choose it as the area's Price level (see Draw your floor plan). Orders on those tables always use that price level, even during happy hour.
- While a level applies, the dish buttons on the till show its prices and the order shows its name at the top.
- Each dish keeps the price it had when staff sent it, so a round sent at 18:55 keeps its happy hour price after 19:00.
To change a level, select it in Settings › Price levels. To delete it, select Delete, then select it again to confirm.
#Count how many are left
For dishes you only have a few of, such as a daily special, Sofrito can count down what is left.
- Open the dish in Menu › Dishes.
- Under Availability, turn on Count stock.
- In How many are left, type how many you have.
- Select Save changes.
The count goes down each time staff send the dish. When 5 or fewer are left, the dish button on the till shows how many, for example 3 left. Staff can't order more than are left, and at zero the dish shows as sold out. To sell it again, change How many are left. The kitchen and the till can change the count too, without the back office: see Mark a dish as sold out.
This is a simple count for one dish. To track ingredients and recipes, see Stock, recipes and suppliers.
#Mark a dish as sold out
When the kitchen runs out of a dish, mark it sold out (86 it). Every till and handheld shows it as sold out straight away, and nobody can order it until it is back on sale. Owners, managers, servers, bartenders and cashiers can do this unless you change their roles (the permission is Mark dishes as sold out), and so can every kitchen display.
From the back office:
- Select Menu › Dishes.
- Find the dish.
- Under the dish, turn off On sale. The switch now says Sold out.
To put it back on sale, turn the switch on again. Sold out, in the list on the left, shows every dish that is sold out.
From the till or a handheld:
- Touch and hold the dish for about half a second. With a mouse, right-click it. The dish's details open, with the price the check will charge.
- Tap Mark sold out.
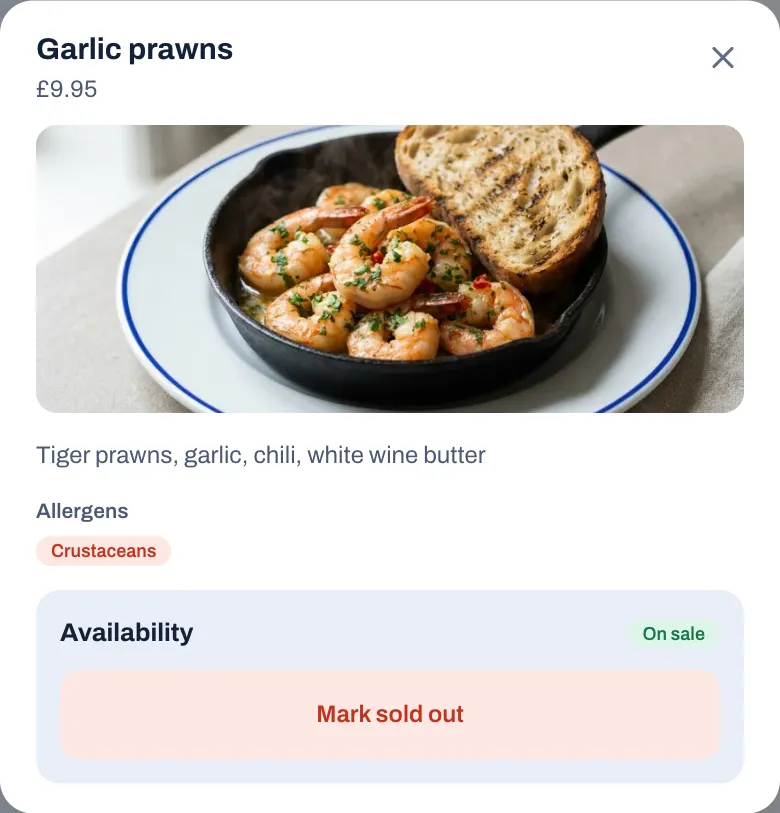
To put it back on sale, touch and hold the dish again and tap Put back on sale.
For a dish whose stock is counted, the same window shows How many are left. Change the number with − and +, or type it, and tap Save count. When none are left, type how many you have and tap Put back on sale.
From the kitchen display:
- Tap Sold out at the top of the screen. The number next to it is how many dishes are sold out.
- Find the dish in the list, or type part of its name in Find a dish. The list shows the dishes this screen's stations make, with the sold-out ones first.
- Tap the dish, then tap Mark sold out, Put back on sale or Save count, as on the till.
When one option runs out, such as sweet potato fries, open its group in Menu › Modifiers, tick Sold out on that option and select Save changes. The till greys the option out.
Closing the day puts every dish marked sold out back on sale, so each day starts with the full menu. Dishes whose stock is counted keep their count. To keep sold-out dishes off the menu overnight, turn off Put sold-out dishes back on sale each day in Settings › Service.
#Find dishes by code
If you use product codes or barcodes, add them to each dish.
- Open the dish in Menu › Dishes.
- Under Codes, type the Product code (SKU).
- Type the Barcode.
- Select Save changes.
On the till, staff can type the full code or barcode in Search the menu to find the dish. In the back office, the search box finds dishes by name, description or code.
#Change or delete dishes
- To change a dish, select it in Menu › Dishes, make your changes and select Save changes. To move it to another category, change its Category.
- To add a dish like one you already have, open it and select Duplicate. A new dish opens with the same settings and a name such as Garlic prawns (copy), but without the product code, barcode or stock count. Change what differs and select Add dish. Save any changes to the original first: Duplicate waits until you have.
- If you close a dish with unsaved changes, Sofrito asks whether to Keep editing or Discard changes.
- To delete a dish, open it, select Delete dish, then select the button again (Tap again to delete). The dish disappears from every till. Orders already taken keep it as it was sold.
- Deleting a category deletes all its dishes (see Clear the sample menu).
- If you have more than one location, a Locations section on each dish lets you choose where it is sold.
- New dishes and price changes are recorded in Back office › Audit log, and so is every dish marked sold out or back on sale, wherever it was done, and the dishes put back on sale when the day is closed. See Security, the audit log and your data.
#Good practice
Names
- Use the names on your printed menu, so staff and guests recognise them on the till and the receipt.
- Keep names short. A dish button shows two lines of text.
- Add a Kitchen name when the menu name is long: Burger is quicker to read at the pass than Mesa smash burger.
- Name options the way staff say them out loud. Start removals with NO in capitals, as in NO onion, so they stand out on the kitchen ticket.
- Give each modifier group a clear Name for your team and a friendly Question on the POS for the till.
- Make one modifier group per question and reuse it: a single Choose a side group can serve every main course.
Photos
- Shoot in landscape and keep the dish in the middle: the till crops photos to 4:3.
- Use the same plate, background and light for every dish, so the menu looks like one set.
- Photograph the real portion, so staff know what they are selling.
Before you go live
- Open each category and check the price, tax, station, course and allergens of every dish.
- On the till, order one dish of each kind and check where its ticket prints or shows.
- Check that Sold out in Menu › Dishes is empty.
Draw your floor plan
The floor plan is the map of your restaurant on the till and the handhelds. Staff tap a table on it to open that table's check, and the table's colour shows how it is doing. You draw the plan in the back office, one area at a time: a dining room, a terrace, a bar. Owners and managers draw it; the last section, on what the colours mean, is for everyone who works the floor.
Before you start
- Create your restaurant with Dine in as one of its order types. See Create your restaurant. If you chose Table service, Café / bakery or Bar, Sofrito has already drawn a starter floor plan: a Dining room with 13 tables and, for table service and bars, a Terrace and a Bar. Change it to match your room.
- If an area needs its own prices or its own service charge, create the price level or the service charge first. See Build your menu and Payment methods, tips and service charge.
#Open the floor plan editor
- In the back office, select Floor plan.
- At the top, select the area you want to change, for example Dining room.
The editor draws the area the way servers see it on the till. On the right, Add a table and Add to the room add things to the area. When you select a table, the same panel shows that table's details. Everything you change stays a draft until you select Save layout at the bottom.
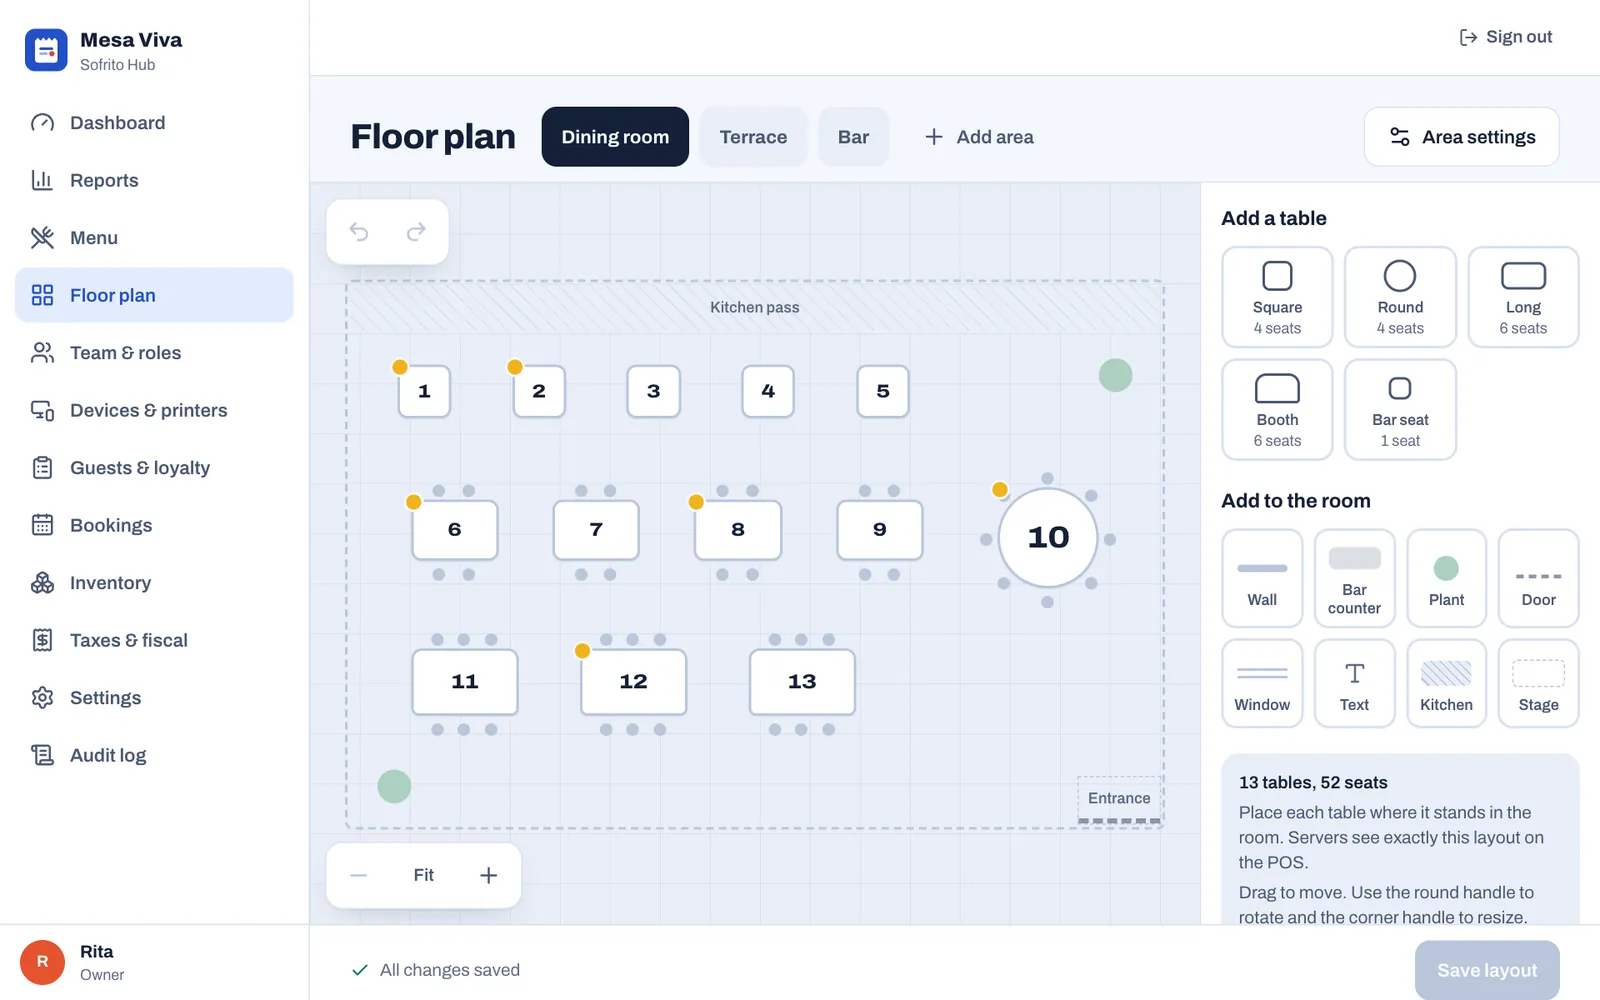
A yellow dot on a table means it has an open order right now. You can move that table, but you can't remove it until the order is closed.
#Add an area
Make one area for each room, terrace or bar that has its own tables. Each area becomes a tab on the till's floor.
- Select Add area.
- In Area name, type the name staff use, for example “Terrace”.
- Select Create area. The new area opens, empty.
- Add its tables (see Add tables).
- Select Save layout.
A new area starts the same size as the area you were looking at, and its tab comes last on the till. To change the order of the tabs, see Put the areas in order.
#Set the size, prices and service charge of an area
- Select the area's tab.
- Select Area settings.
- Change the Area name if you need to.
- Set the Width and Height of the room, from 300 to 5,000 floor units. A table for four is about 90 units wide.
- To charge different prices on these tables, choose it under Price level. Standard prices charges your normal prices.
- To add a service charge to every order on these tables, choose it under Service charge.
- Select Done.
- Select Save layout.
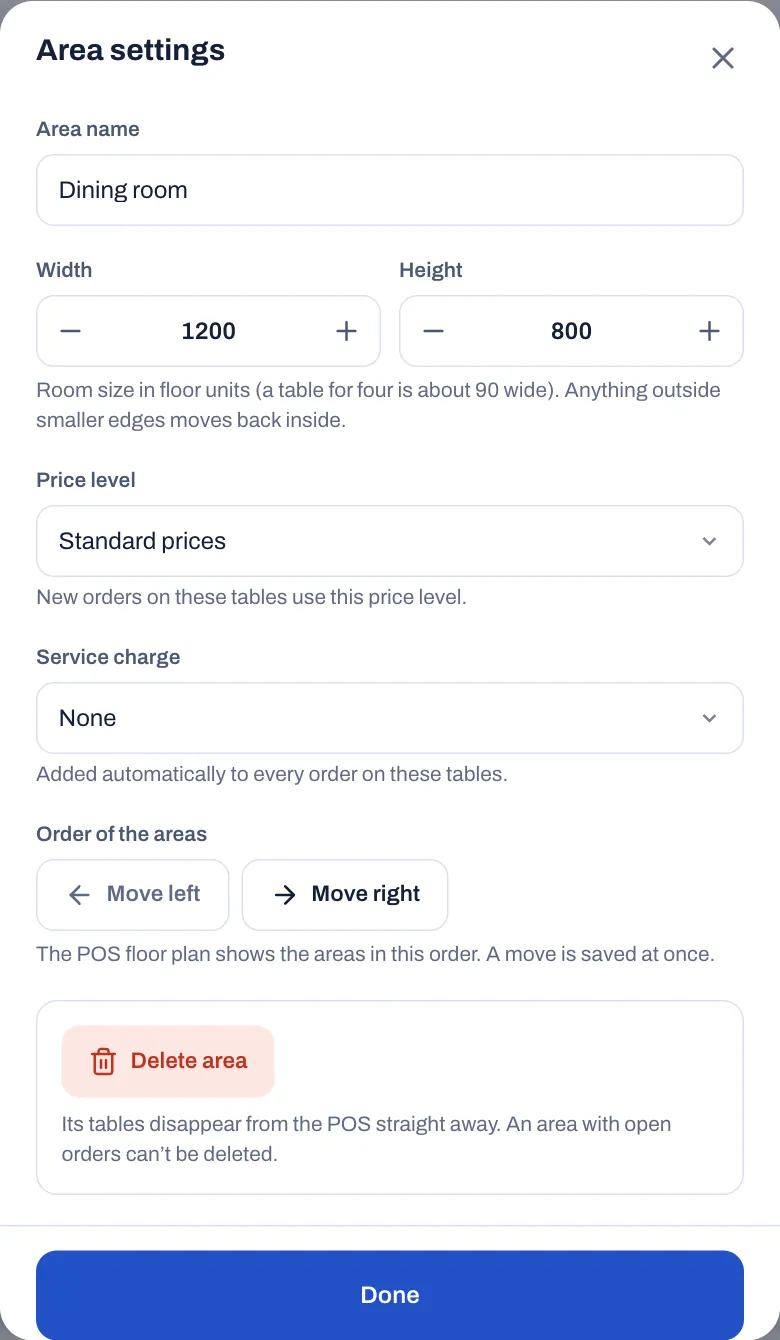
- Draw the area roughly the shape of the real room. If you make it smaller, tables and other things outside the new edges move back inside.
- Price level shows the price levels you created in Settings › Price levels. New orders on these tables use the area's price level, even during happy hour.
- Service charge shows the service charges that are available on the POS in Settings › Service charges. See Payment methods, tips and service charge.
#Put the areas in order
The till shows one tab for each area, in the order you set here. Put the area your servers use most first.
- Select the area's tab.
- Select Area settings.
- Under Order of the areas, select Move left or Move right. Each move is saved straight away, and Sofrito shows "Order of the areas saved".
- Select Done.
A new area must be saved with Save layout before you can move it. Until then, the sheet says "Save this new area first, then put it in order." Each till opens on the first area, unless that device has its own Area shown first (see Devices, printers and stations).
#Add tables
- Select the area's tab.
- Under Add a table, select a shape: Square (4 seats), Round (4 seats), Long (6 seats), Booth (6 seats) or Bar seat (1 seat).
- Drag the new table into place. It appears in a free spot with the next number, already selected.
- Repeat for each table.
- Select Save layout.
On a phone or a small tablet, select Add at the bottom right to see the same choices.
To add several tables of the same kind, select a table and select Duplicate. The copy appears next to it with the next number. An area holds up to 300 tables.
#Name and seat each table
- Select the table.
- In Table name, type its name or number, for example “12” or “T4”. Names can be up to 20 characters long.
- Under Shape, change the shape if you need to.
- Set Seats to the number of guests the table usually takes.
- Select Save layout.
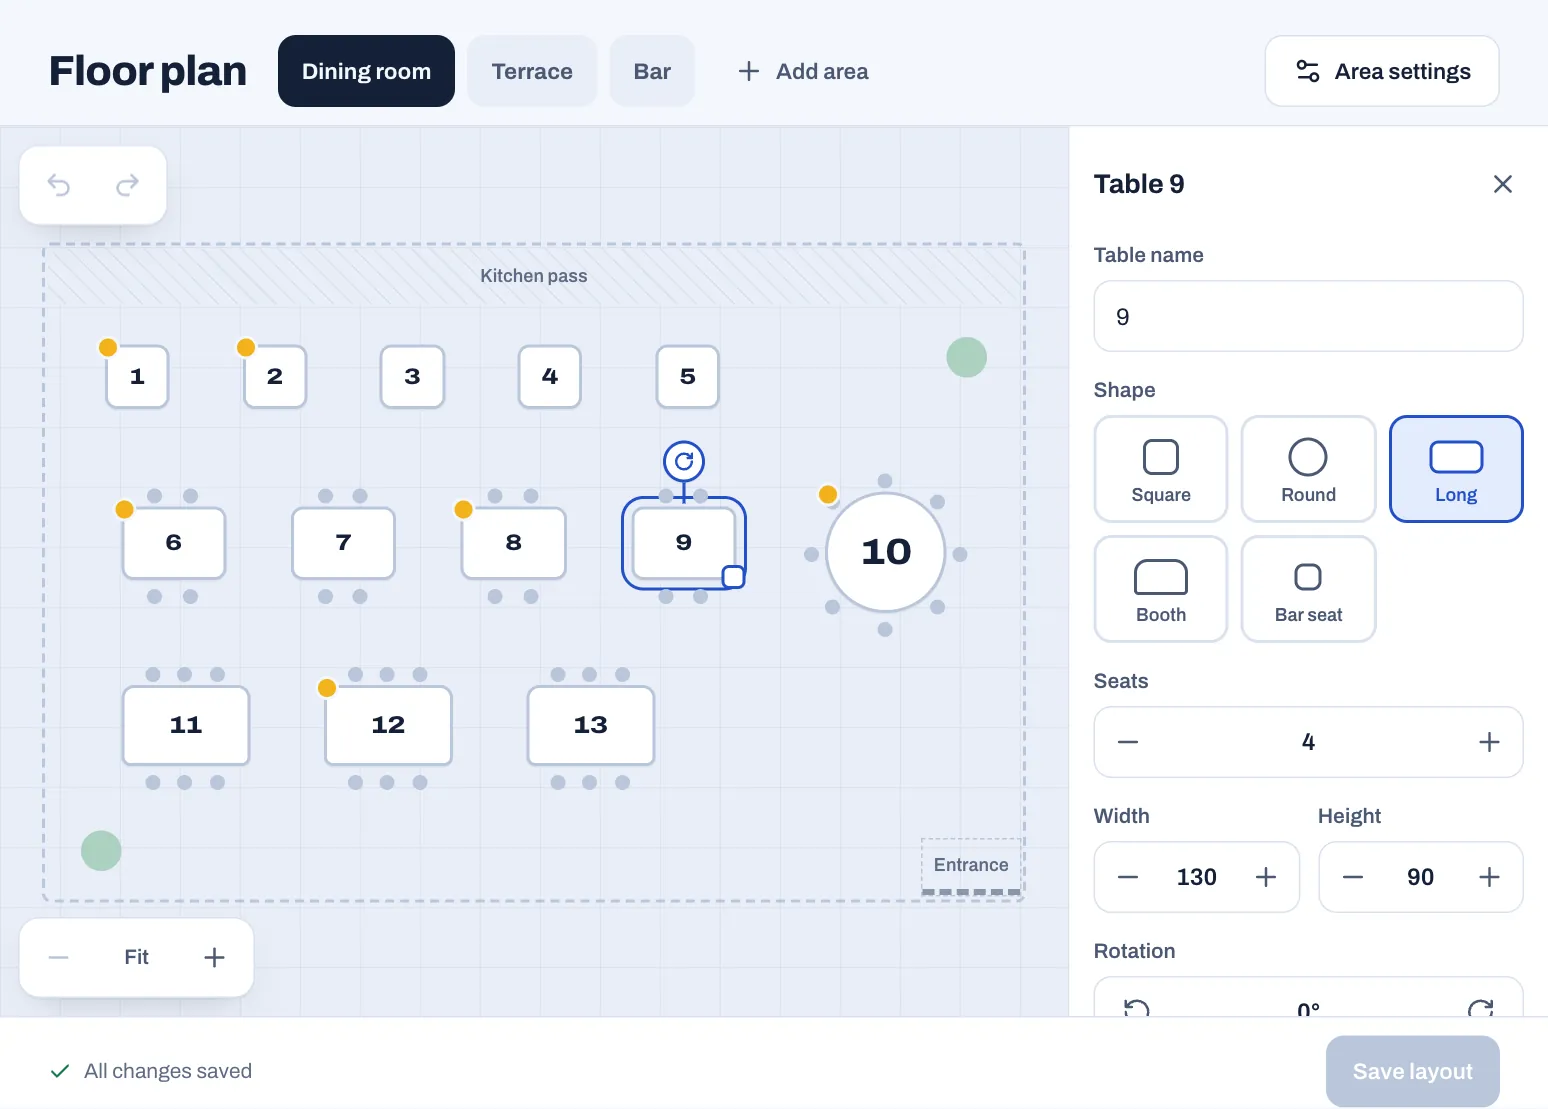
- Every table needs a name. If two tables share a name, Sofrito warns you, because servers find tables by name.
- New tables follow your numbering: after 11 comes 12, and after T4 comes T5.
- Seats draws the chairs around the table on the till, for tables of up to 12 seats. When staff open the table, the till suggests this number of guests.
#Move, resize and rotate tables
- Move: drag the table. It snaps to a grid of 10 units and always stays inside the room.
- Resize: drag the square handle at the table's corner, or change Width and Height in the panel. Round tables keep their shape.
- Rotate: drag the round handle above the table, or use the arrows under Rotation. Tables turn in steps of 15°.
- Change the shape: switching between Square and Round keeps the size. Any other shape gives the table that shape's usual size.
- Zoom: use − and + at the bottom left. Fit shows the whole area again. When you are zoomed in, drag the background to look around.
- Undo: the arrows at the top left undo and redo your last changes in this area.
#Add walls, the bar and other things
Draw what guests and staff walk around, so the plan is easy to read: walls, the bar, the doors.
- Under Add to the room, select Wall, Bar counter, Plant, Door, Window, Text, Kitchen or Stage.
- Drag it into place.
- Resize and rotate it the same way as a table.
- In Text on the floor, type the words servers should see on it, for example “Entrance” or “Garden side”.
- Select Save layout.
To turn it into something else, for example a wall into a window, choose another Type.
#Remove a table or an area
To remove a table, or anything else in the room:
- Select it.
- Select Remove.
- Select Save layout.
Right after you remove something, a message offers Undo for a few seconds. You can't remove a table that has an open order: close the order, or move it to another table, first (see Table service).
To delete a whole area:
- Select the area's tab.
- Select Area settings.
- Select Delete area.
- Select the button again to confirm. It now says Tap again to delete.
The area and its tables disappear from every till straight away, without Save layout. You can't delete an area while any of its tables has an open order.
#Save your changes
- Save layout saves every area you changed. Until you save, the bar at the bottom says Unsaved changes in, followed by the areas, and a dot marks each changed area's tab.
- Saved changes reach every till and handheld straight away.
- Discard changes throws away everything since you last saved. Select it again to confirm.
- If you leave the page with unsaved changes, Sofrito asks whether to Save and leave, Leave without saving or Keep editing.
#Read the floor on the till
On the till and the handhelds, Floor shows your floor plan, one tab per area. Each table's colour shows how it is doing, and the key along the bottom of the till's screen repeats the colours.
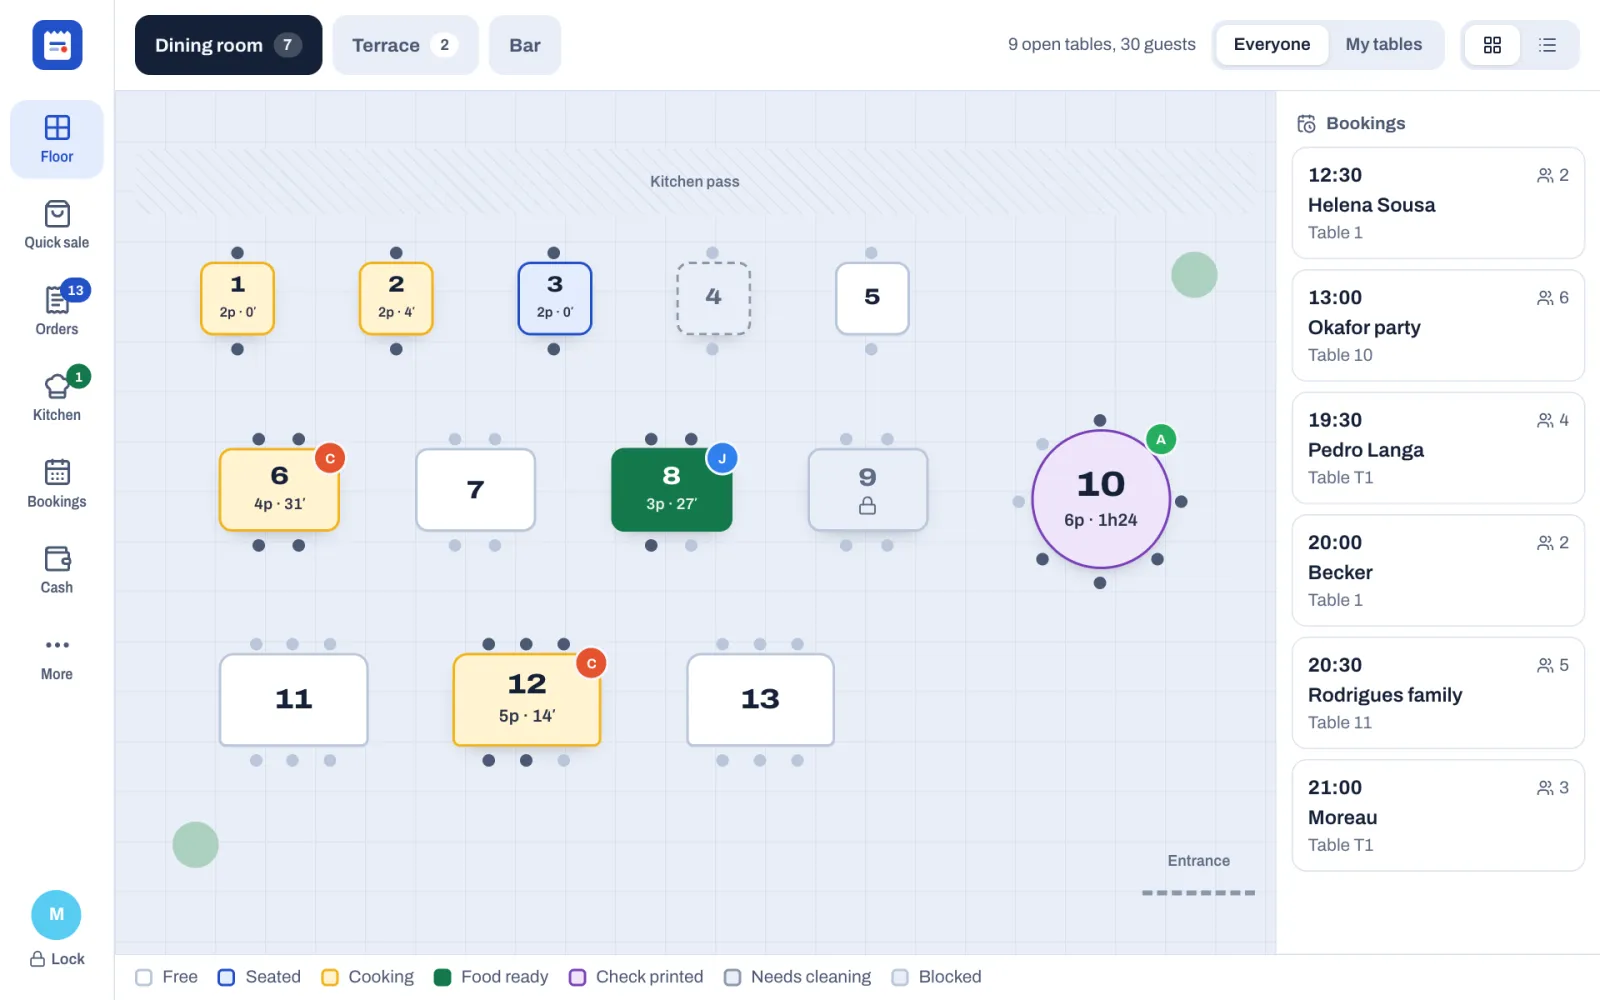
| Colour | Name on the key | What it means |
|---|---|---|
| White | Free | No open order. |
| Light blue | Seated | The table is open, and nothing is waiting in the kitchen. |
| Yellow | Cooking | Something the table ordered is being prepared. |
| Green | Food ready | The kitchen has marked something ready. Take it to the table. |
| Purple | Check printed | The table's check has been printed. |
| Grey, dashed | Needs cleaning | The check is paid. Tap the table, then tap Mark as clean when it is ready for the next guests. |
| Grey, with a padlock | Blocked | Staff have kept the table free. Nobody is seated there until someone unblocks it. See Keep a table free. |
There is more on each table:
- A red border that pulses means something has waited in the kitchen longer than Late after, in Settings › Kitchen (20 minutes unless you change it).
- A purple dashed border with a time means a booking for that table is due: from Hold the table minutes before its time (30 unless you change it in Settings › Bookings) until 30 minutes after.
- A busy table shows its guests and how long it has been open, for example 4p · 41′. Larger tables also show the initials of the server who opened them. Dark chairs are seated guests.
- The number on each area tab counts its open tables.
- My tables fades out every table except the ones you opened. In the list, it shows only yours.
- The grid and list buttons at the top right switch between the plan and a list of tables in the same colours. Handhelds open on the list.
- On wide screens, the day's next bookings are listed on the right of the plan, for staff whose role can see bookings. With Take bookings off in Settings › Bookings, the plan shows no bookings and no reserved tables.
Tables turn grey after payment only while Mark tables for clearing is on, in Settings › Service. It is on unless you turn it off. To choose the area a till opens on, set Area shown first for that device (see Devices, printers and stations). For opening tables and the rest of service, see Table service.
#Good practice
- Draw the room as it is, so new staff can find table 14 on their first night.
- Number tables the way staff say them. Give each area its own letter, such as T1 on the terrace and B1 at the bar, so names never repeat.
- Keep names short. The name is written in the middle of the table, and kitchen tickets print it too.
- Set Seats to the usual number of guests, not the most you can squeeze in.
- Add the bar, the doors and the walls. They make the plan easy to read at a glance.
- Change the plan before or after service. During service, tables with open orders can move but can't be removed.
- After you save, check the plan on a till and on a handheld.
Your team, roles and PINs
Everyone who works with Sofrito has their own PIN. They type it to unlock a till or a handheld, to clock in and out, and, for managers, to approve something another person may not do alone. Every action is recorded under the name of the person who did it. What each person may do depends on their role. The owner and managers set up the team and the roles in the back office. The sections on signing in, the time clock and manager approval are for everyone.
Before you start
- Create your restaurant. See Create your restaurant.
- To change people, your role needs Manage the team. To change roles, it needs Manage roles and permissions. A new restaurant gives both to the Owner role. The Manager role has the first but not the second.
#Open the team list
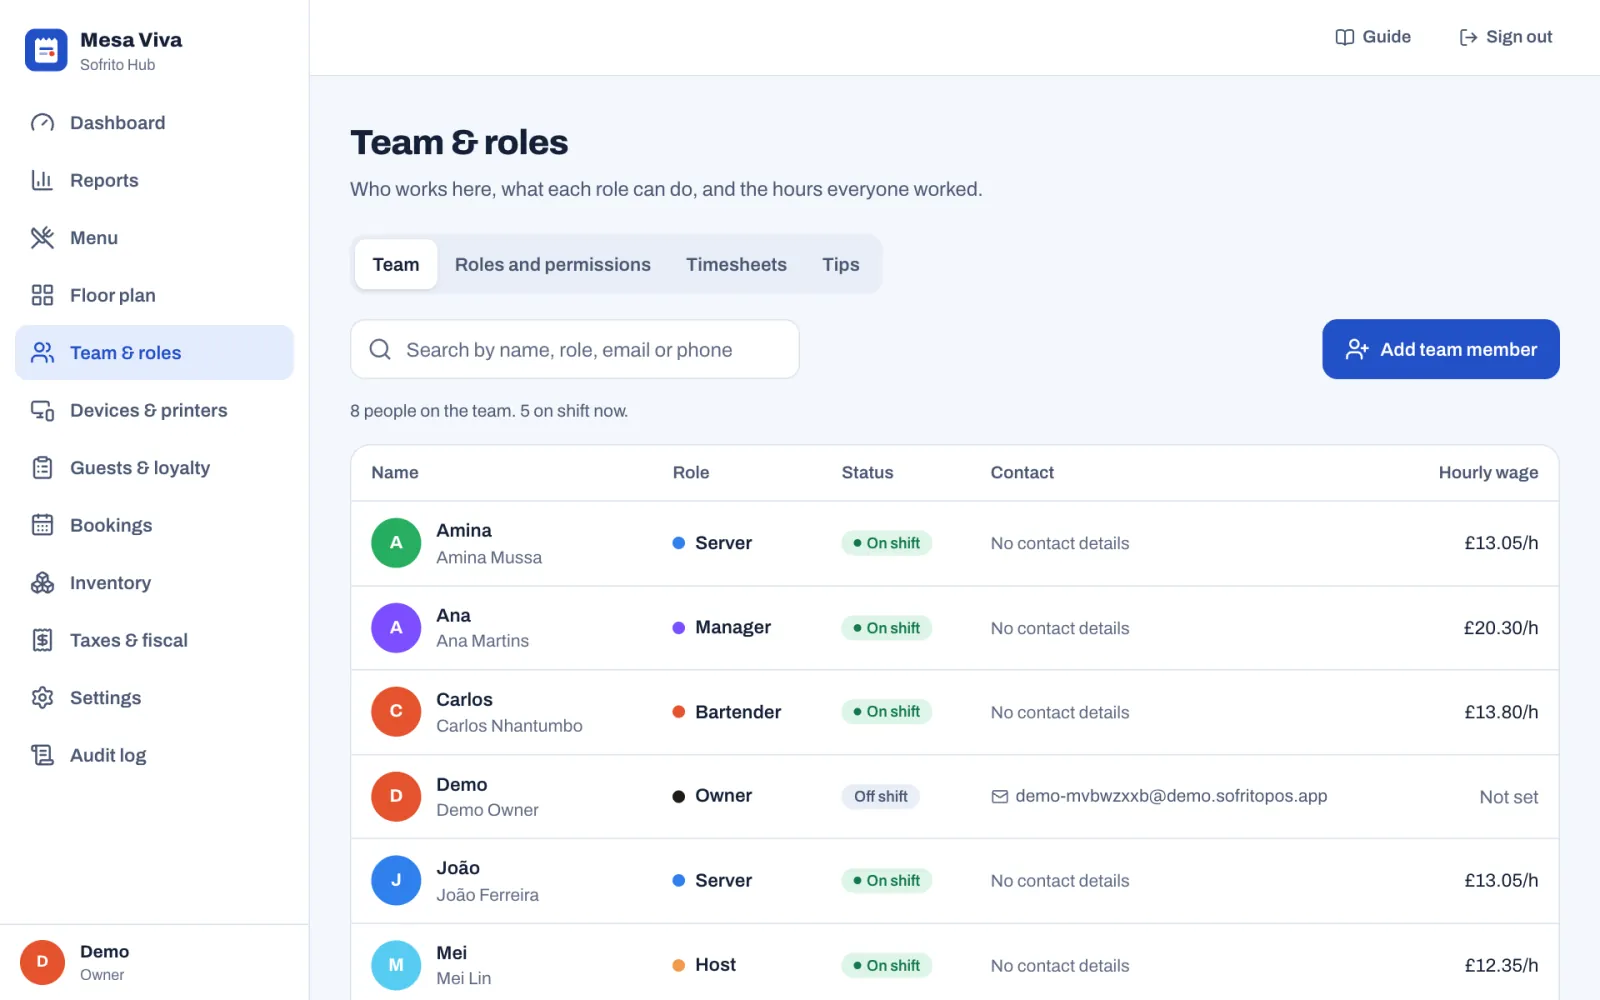
- In the back office, select Team & roles.
- Select Team.
The list shows everyone on the team with their role, whether they are On shift or Off shift, how to contact them and their Hourly wage. A yellow No PIN badge means that person can't sign in yet. Use the search box to find someone by name, role, email or phone.
#Add a team member
- In Team & roles › Team, select Add team member.
- Type their First name and Last name.
- Optional: type a Name on the POS. It is shown on the lock screen, orders and receipts. If you leave it empty, Sofrito uses the first name.
- Under Role, choose what they do. New people start as Server.
- Under PIN, type a PIN of 4 digits in PIN, then type it again in Type the PIN again.
- Optional: add their Email and Phone.
- Optional: under Pay, type their Hourly wage. Sofrito uses it for the labour cost on timesheets and in reports.
- Optional: choose a Colour. Their initials appear in this colour on the lock screen and on orders.
- Select Add to team.
They can sign in as soon as they have a PIN.
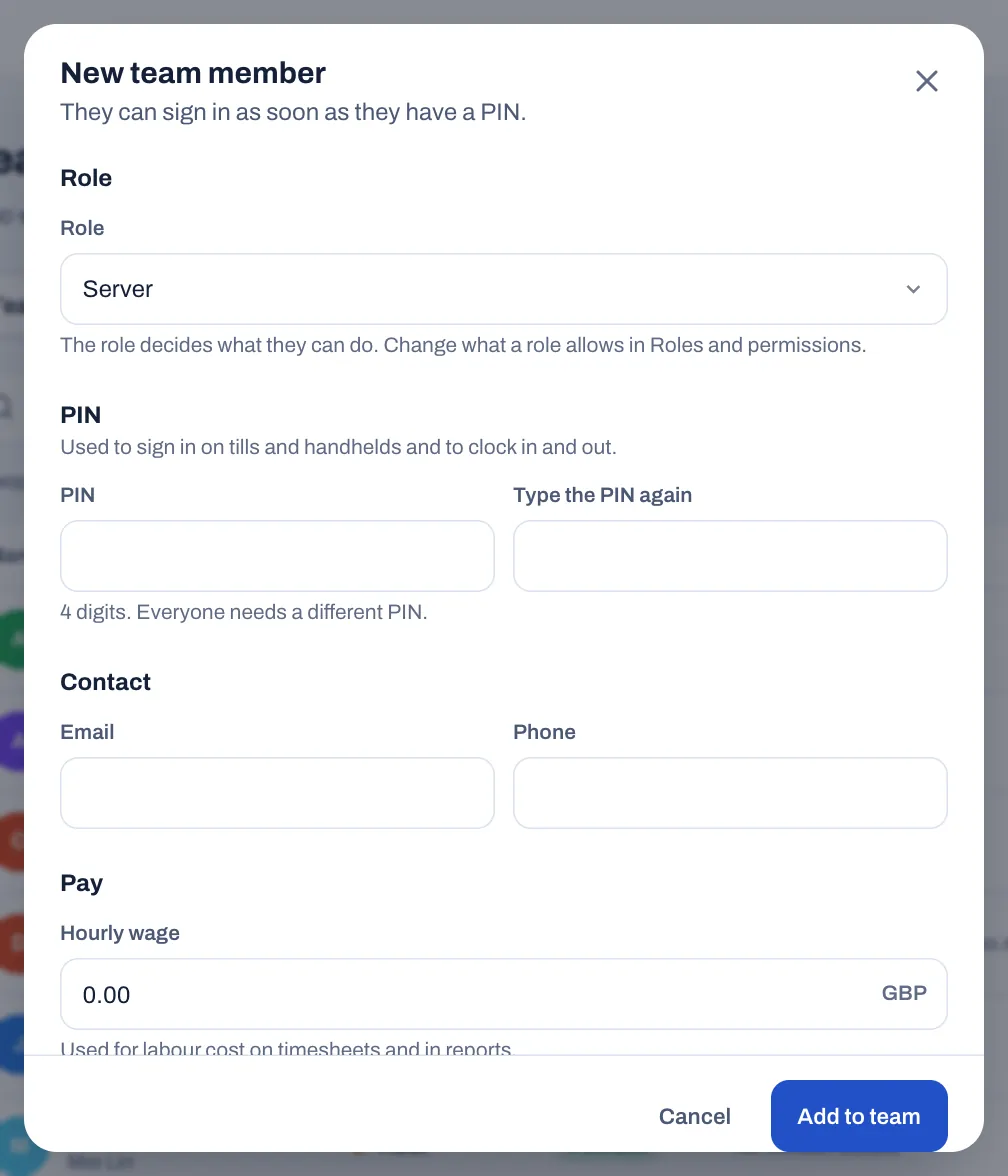
Everyone needs a different PIN. If you choose one that someone else already has, Sofrito says "Someone else already uses this PIN. Choose another one." If your restaurant has more than one location, the form also asks under Locations where the person can sign in.
#Change a PIN
Do this when someone forgets their PIN or thinks someone else knows it. Sofrito never shows a PIN once it is saved, so nobody can look it up.
- In Team & roles › Team, select the person.
- Under PIN, select Reset PIN.
- Type the new PIN in New PIN, then again in Type the PIN again.
- Select Save.
To leave the PIN as it was, select Keep the current PIN before you save. Only an owner can change an owner's details, including their PIN.
#Let someone use the back office
People whose role includes Open the back office can manage the restaurant from any browser with their email and a password.
- In Team & roles › Team, select the person.
- Make sure they have an Email. It is what they sign in with.
- Under Back-office sign-in, select Set password.
- Type a Password of at least 8 characters.
- Select Save.
They then choose Sign in to the back office on the Sofrito start screen and use their email and password. Back-office sign-in only appears when the person's role can open the back office.
The back office also opens on a till or a handheld: tap Back office under the PIN pad of the lock screen, or tap More, then Back office, once you are signed in. Anyone can walk up to a till, so it never stays signed in to the back office:
- If the person signed in on the till may open the back office, it opens as them. Otherwise it shows "Someone with back-office access enters their PIN.": that person types their PIN, or taps Use email and password instead. A PIN whose role can't open the back office gets "Your role can’t open the back office."
- It locks after 5 minutes without a touch, whatever the till's own lock time, and whenever the till locks. Sign out locks the till, and POS goes back to it.
To stay signed in, for example on the office computer, use Sign in to the back office in a browser that isn't paired as a till.
#Change someone's role
- In Team & roles › Team, select the person.
- Under Role, choose the new role.
- Select Save.
Some changes are blocked to keep the restaurant safe:
- You can't change your own role.
- Only an owner can make someone an owner. Other people don't see the Owner role in the list.
- The restaurant always needs at least one owner, so the last owner keeps their role.
#Stop someone signing in for a while
Use this for someone on leave, or while you find out what happened.
- In Team & roles › Team, select the person.
- Turn off Can sign in.
- Select Save.
They can't sign in until you turn it back on. The team list then has an Inactive view where you find them. You can't turn off your own sign-in.
#Archive someone who has left
- In Team & roles › Team, select the person.
- Select Archive, then Tap again to archive.
Sofrito removes the person from the team, deletes their PIN and signs them out on every device. Their orders, shifts and other records stay in your reports and in the audit log. You can't archive yourself or the last owner.
#Understand roles
A role is a set of permissions. Everyone with the same role gets the same access, so you change it once, for all of them. Sofrito creates these roles for a new restaurant:
| Role | What it can do when you start |
|---|---|
| Owner | Everything. The owner role always has every permission and can't be changed, so nobody can lock the restaurant out of its own system. |
| Manager | Everything except Manage roles and permissions and Subscription and billing. |
| Server and Bartender | Take orders and payments, move orders and tables, apply the restaurant's discounts, mark dishes sold out, look up guests, run bookings and seat guests, open and close the cash drawer and print the shift report (X). |
| Cashier | The same as a server, without moving orders and tables or applying discounts. |
| Host | Bookings, the waitlist, seating guests at their tables and guest profiles on the till. |
| Kitchen | The kitchen display and marking dishes sold out. A Kitchen PIN doesn't open tills or handhelds, but it clocks in and out on them. |
Only owners and managers have Change other people’s orders when you start. A server who adds to, voids or discounts a check that someone else opened needs a manager's PIN. A check with nothing on it yet, such as one a host opened when seating guests, is different: whoever adds its first items takes it over, without a manager. Taking payment never needs one, so a cashier can settle anyone's check.
To see the roles, select Team & roles › Roles and permissions. Each card shows how many people have the role and how many of the 39 permissions it has.
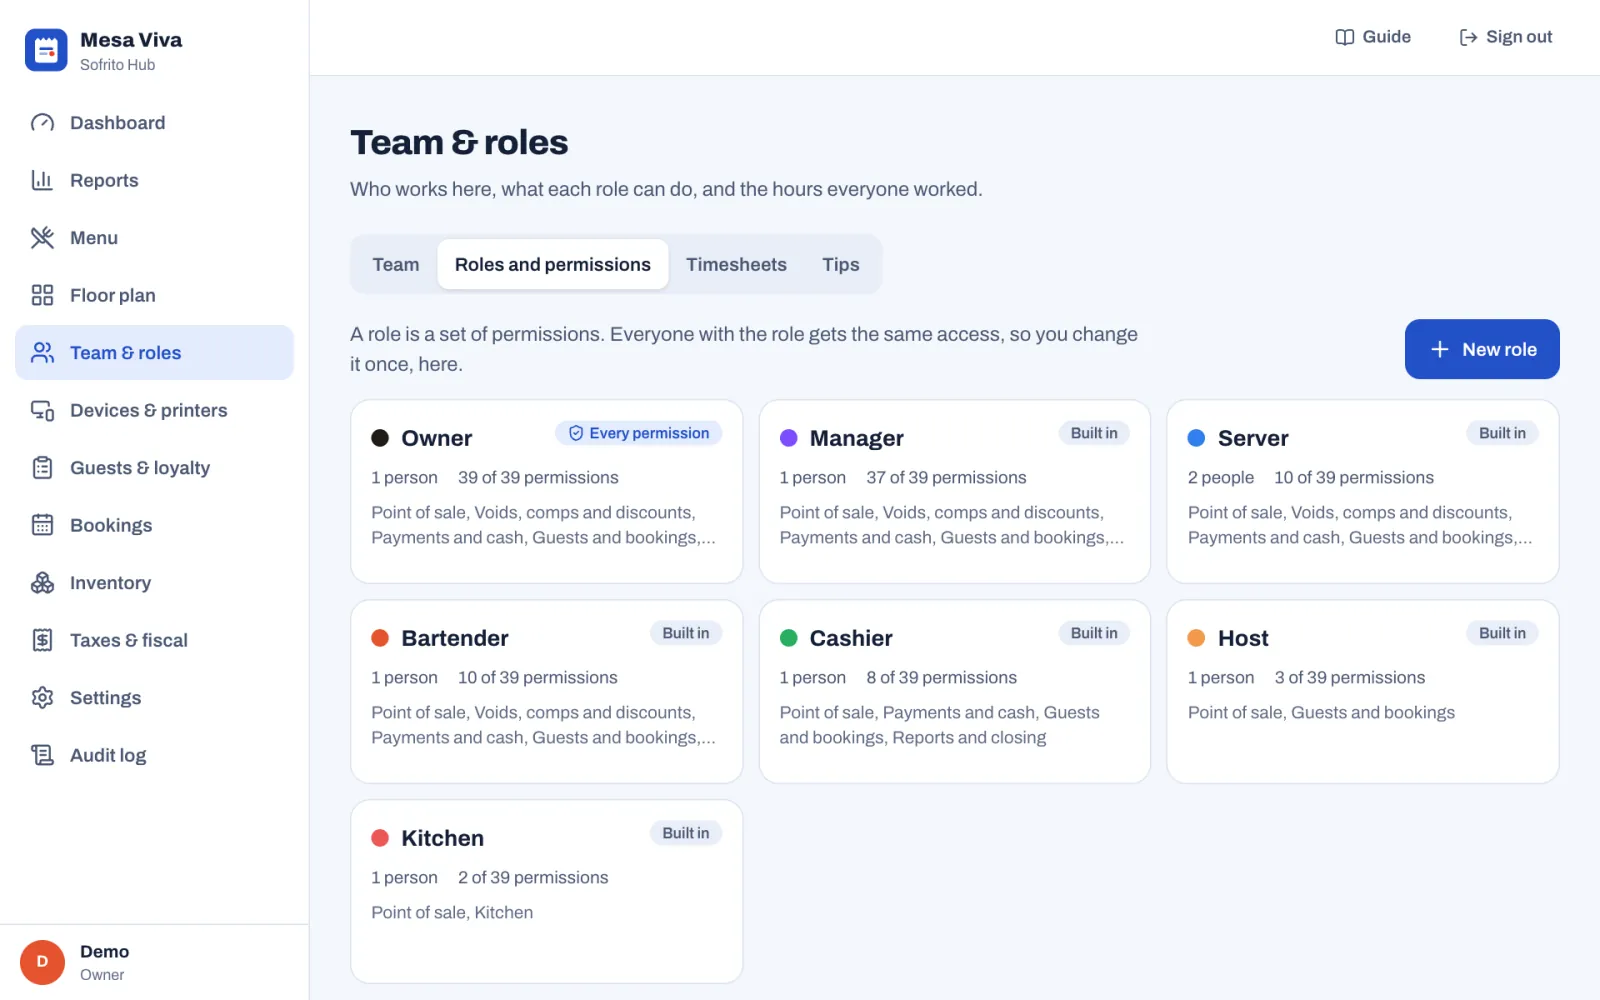
#Change what a role can do
You need Manage roles and permissions. Without it you can look at roles but not change them.
- Select Team & roles › Roles and permissions.
- Select the role.
- Tick the permissions the role should have and untick the others. Select all and Clear all change a whole group at once.
- Select Save.
The change applies to everyone with the role. You can rename the role and change its Role colour in the same place. You can't remove Open the back office or Manage roles and permissions from your own role, so you can't lock yourself out.
Permissions with the Manager can approve badge are the ones a manager can grant on the spot. When someone without the permission tries one of these actions, Sofrito asks a manager to approve it there and then with their PIN. See Approve an action with your PIN.
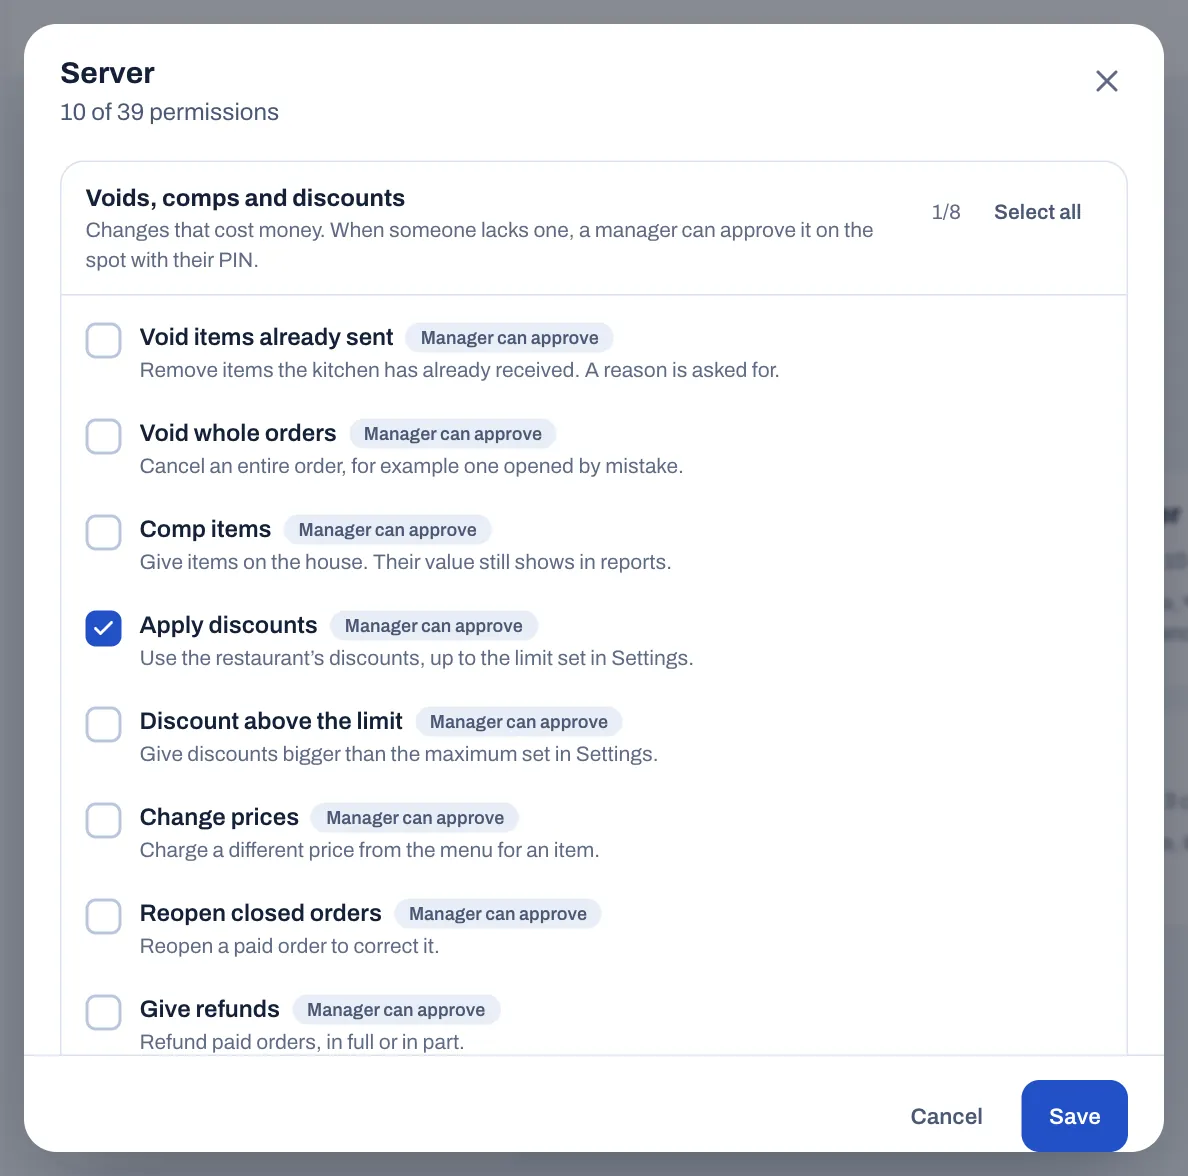
#Create a role
Create a role when one of the built-in roles doesn't fit, for example a head waiter who may comp items.
- Select Team & roles › Roles and permissions.
- Select New role.
- Type the Role name.
- Under Start from, choose Same as an existing role to copy its permissions, or No permissions to start empty.
- Pick a Role colour.
- Tick the permissions the role should have.
- Select Create role.
If you tick back-office permissions but not Open the back office, Sofrito warns you: without it those pages stay out of reach.
To remove a role you made, move everyone with it to another role first. Then open the role and select Remove role, then Tap again to remove. The built-in roles can't be removed.
#Know what each permission allows
These are the 39 permissions, in the groups the role editor shows. A ✓ in the last column means a manager can approve the action with their PIN for someone who doesn't have it.
Point of sale
| Permission | What it allows | Approve |
|---|---|---|
| Use the POS | Sign in on tills and handhelds. Without it, the person's PIN is refused there. | |
| Open orders | Start new orders and tabs and add items to them. | |
| Change other people's orders | Add to or change orders that another server opened: items, voids, comps, discounts, service charges, guests, the name, moving, handing over, splitting and merging. Sending, printing the check and taking payment don't need it, and nor do orders from online ordering. Nor does a check with nothing on it yet: whoever adds its first items takes it over. | ✓ |
| Move orders and tables | Move an order to another table or hand it over to another server. | ✓ |
| Mark dishes as sold out | Mark a dish sold out (86) or set how many are left, on every screen at once. |
Voids, comps and discounts
| Permission | What it allows | Approve |
|---|---|---|
| Void items already sent | Remove items the kitchen has already received. A reason is asked for. | ✓ |
| Void whole orders | Cancel an entire order, for example one opened by mistake. | ✓ |
| Comp items | Give items on the house. Their value still shows in reports. | ✓ |
| Apply discounts | Use the restaurant's discounts, up to the limit set in Settings › Security. | ✓ |
| Discount above the limit | Give discounts bigger than that limit. | ✓ |
| Change prices | Charge a different price from the menu for an item. | ✓ |
| Reopen closed orders | Reopen a paid order to correct it. | ✓ |
| Give refunds | Refund paid orders, in full or in part. | ✓ |
Payments and cash
| Permission | What it allows | Approve |
|---|---|---|
| Take payments | Charge by cash, card and the other payment methods. | |
| Void payments | Cancel a payment that was recorded by mistake. | ✓ |
| Open and close the cash drawer | Start the drawer with a float and count it at the end of the shift. | |
| Pay-ins, pay-outs and drops | Put cash into or take it out of the drawer outside a sale, including tips paid out from the drawer. | ✓ |
| Open the drawer without a sale | Open the cash drawer when nothing is being paid (No sale). | ✓ |
Guests and bookings
| Permission | What it allows | Approve |
|---|---|---|
| Bookings and waitlist | Create, change and seat bookings, seat walk-ins and run the waitlist. | |
| Look up guests | See and edit guest profiles from the till. | |
| Manage guests and loyalty | Edit guests, adjust points, and import, export or erase guest data. |
Kitchen
| Permission | What it allows | Approve |
|---|---|---|
| Use the kitchen display | For the kitchen team. A paired kitchen display works without anyone signing in, so anyone at the pass can bump tickets. |
Reports and closing
| Permission | What it allows | Approve |
|---|---|---|
| Print shift reports (X) | See and print the takings so far without closing the day. | |
| Close the day (Z) | Lock the day's totals and print the closing report. | ✓ |
| View reports | Sales, dishes, team performance and the dashboard. | |
| View the audit log | See who did what and when, including voids and approvals. | |
| Export data | Download sales documents and tax files such as SAF-T. |
Team
| Permission | What it allows | Approve |
|---|---|---|
| Edit timesheets | Correct other people's clock-in and clock-out times, breaks and declared cash tips. | |
| Manage the team | Add people, set PINs and wages, archive former staff, and see timesheets and tips. | |
| Manage roles and permissions | Create roles and decide what each one can do. |
Back office
| Permission | What it allows | Approve |
|---|---|---|
| Open the back office | Needed for every back-office page. | |
| Edit the menu | Dishes, prices, categories, modifiers and stations. Also discounts, service charges, price levels and reasons in Settings. | |
| Edit floor plans | Areas, tables and seats. | |
| Manage inventory | Stock, recipes, suppliers and purchase orders. | |
| Manage devices and printers | Pair tills, kitchen screens and printers, and unpair a device from its own More screen. | |
| Manage payment methods | Turn payment methods on or off and set them up. | |
| Taxes and fiscal settings | Tax rates, document series and fiscal compliance. | |
| Restaurant settings | Receipts, tipping, security, loyalty and other house rules. | |
| Subscription and billing | Change the Sofrito plan and payment details. |
#Sign in with your PIN
Every till and handheld starts on the lock screen. It shows the time and a PIN keypad. On a till it also shows the team under Who’s working?, with a green dot next to everyone who is clocked in.
- Make sure Enter your PIN is selected at the top of the keypad.
- Type your PIN.
The till opens as soon as you type the fourth digit. If the PIN is wrong, the dots turn red, shake and clear: type it again.
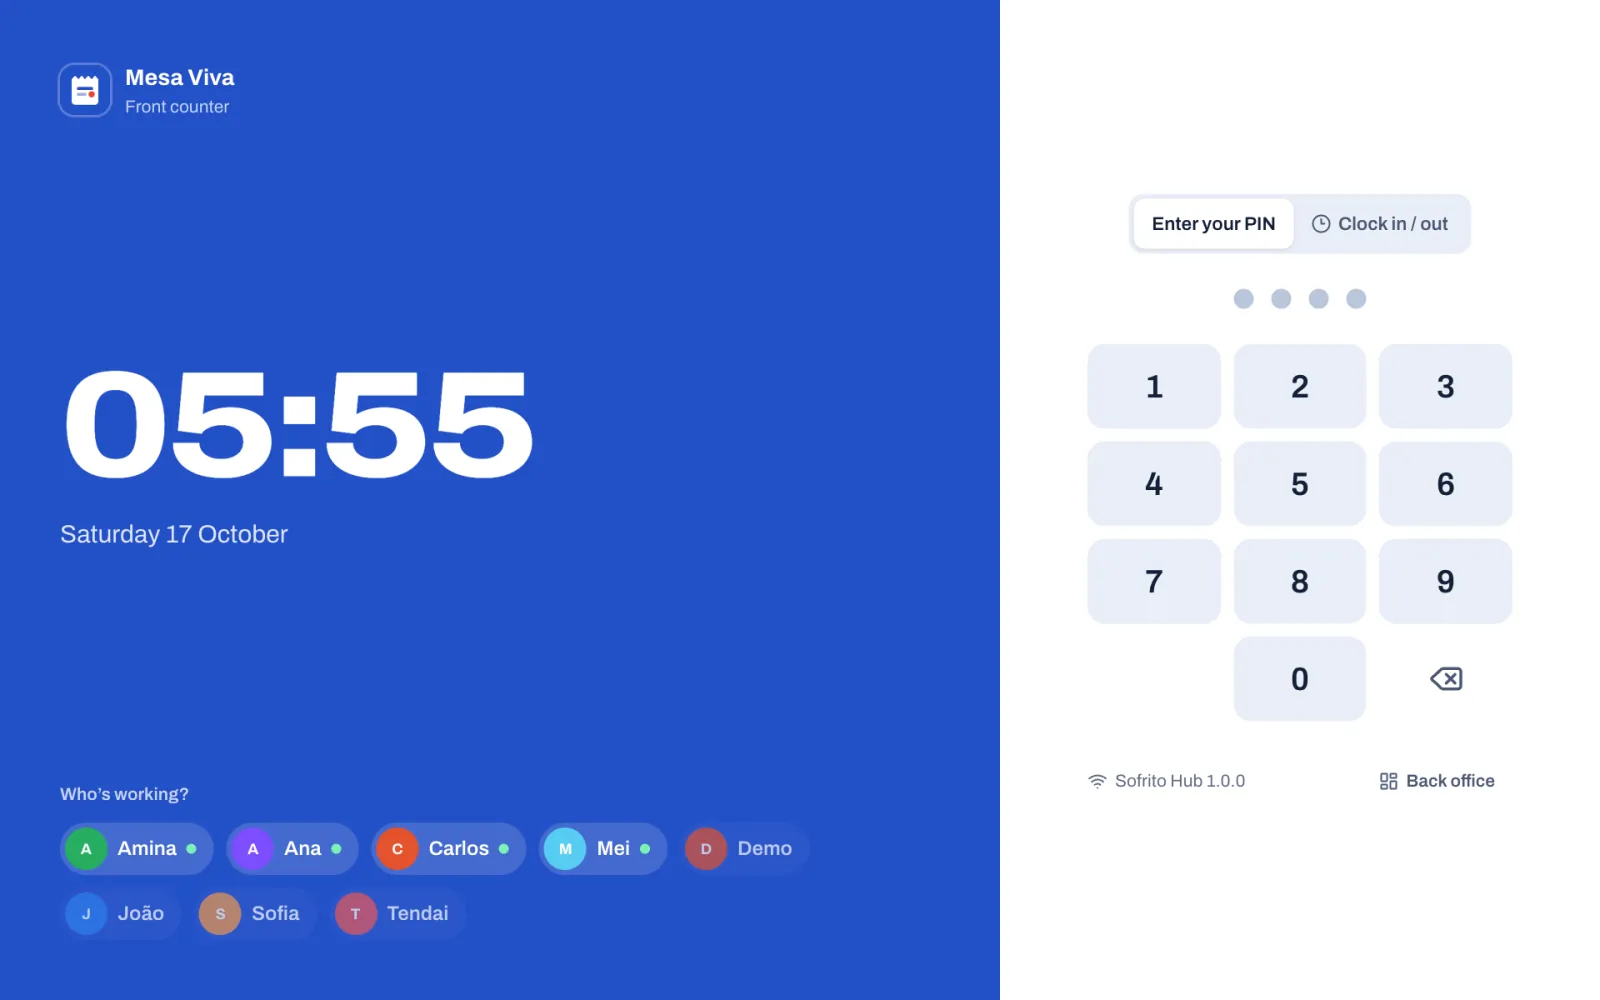
A PIN only opens a device that its role works on. A Kitchen PIN typed on a till shows "Kitchen can’t sign in on this device."
Kitchen displays, customer displays and pickup boards have no lock screen. They work as soon as they are paired.
#Lock the till between people
When you step away, tap Lock at the bottom of the left-hand bar on a till, or tap your initials at the top of a handheld. The next person signs in with their own PIN.
Sofrito also locks by itself. To choose when:
- In the back office, select Settings › Security.
- Under Lock when nobody uses it, choose how long a till may sit untouched before it goes back to the PIN screen: from 30 seconds to 30 minutes, or Never. A new restaurant starts with 90 seconds.
- Turn on Lock after each payment for shared terminals at a bar or counter.
- Select Save changes.
#Clock in and out
Clocking in records when your shift starts. It doesn't sign you in.
- On the lock screen of any till or handheld, tap Clock in / out.
- Type your PIN.
The device confirms, for example "Ana clocked in", and on a till a green dot appears next to your name. If you have already signed in, you can tap More, then Clock in, instead.
At the end of your shift, do the same again: tap Clock in / out on the lock screen and type your PIN, or tap More, then Clock out. When Ask for a tip is on in Back office › Settings › Tips, Sofrito then opens Cash tips for this shift:
- Type the tips guests left you in cash. Tips added to a card payment are counted already.
- Tap Declare with the amount, for example Declare £12.00, or tap No cash tips.
To take a break while you are clocked in, sign in, tap More, then Unpaid break or Paid break. Tap End break when you come back. Unpaid breaks are taken off the hours worked; paid breaks count as hours worked. The same card has Declare cash tips, to record cash tips before you clock out.
#Check and correct timesheets
- In the back office, select Team & roles › Timesheets.
- Choose the dates: Today, Yesterday, Last 7 days, Last 30 days, This month, or your own dates in the two date boxes.
The top of the page totals Hours worked, Labour cost, Unpaid breaks and Tips declared. Below, each person has a row with their hours, breaks, labour cost and tips. Select a row to see each shift. On the clock marks someone who hasn't clocked out yet, and Over 12 hours marks a shift that may have been left open by mistake.
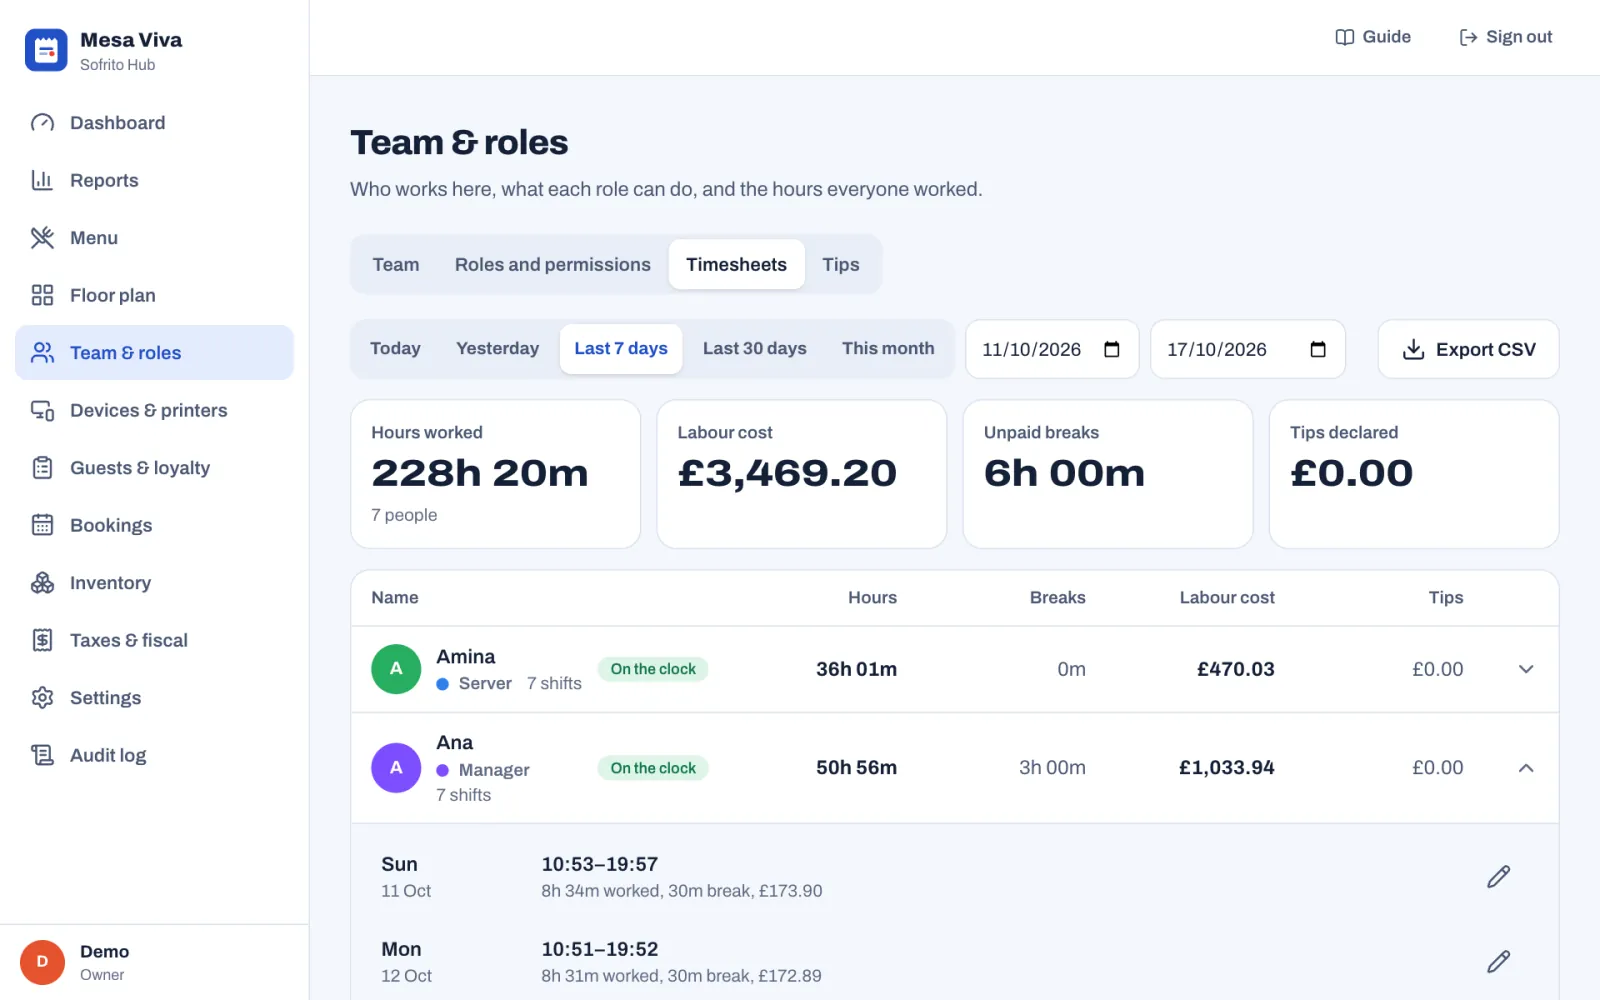
To correct a shift, you need Edit timesheets:
- Select the person's row, then the pencil next to the shift.
- Change Clocked in or Clocked out. If the person forgot to clock out, select Clock out now or type the time.
- Under Breaks, set each break to Unpaid or Paid if it was recorded wrongly.
- Change Cash tips declared if the person declared the wrong amount.
- Under Note, say why the times changed, for example "Forgot to clock out". A note is required when you change a time.
- Select Save.
Sofrito keeps the old and new times, and who changed them, in the audit log. A shift can't be in the future or longer than 24 hours.
To send hours to your payroll or accountant, select Export CSV. The file has one line per shift with the role, business date, times, hours, unpaid breaks, hourly wage, labour cost, tips and notes.
#See who is owed tips
Tips that guests add to their payments are owed to the team. Team & roles › Tips shows who is owed what, and what has been paid. You need Manage the team to open it.
- In the back office, select Team & roles › Tips.
- Choose the dates, for example Last 7 days.
The tiles show the Tips taken on payments, what was Paid out, what is Still to pay, and the Tips declared in cash, which staff keep. Each person's row shows their hours, the tips On their orders, what is Due to them, what they Declared in cash, what was Paid out and what is Still to pay.
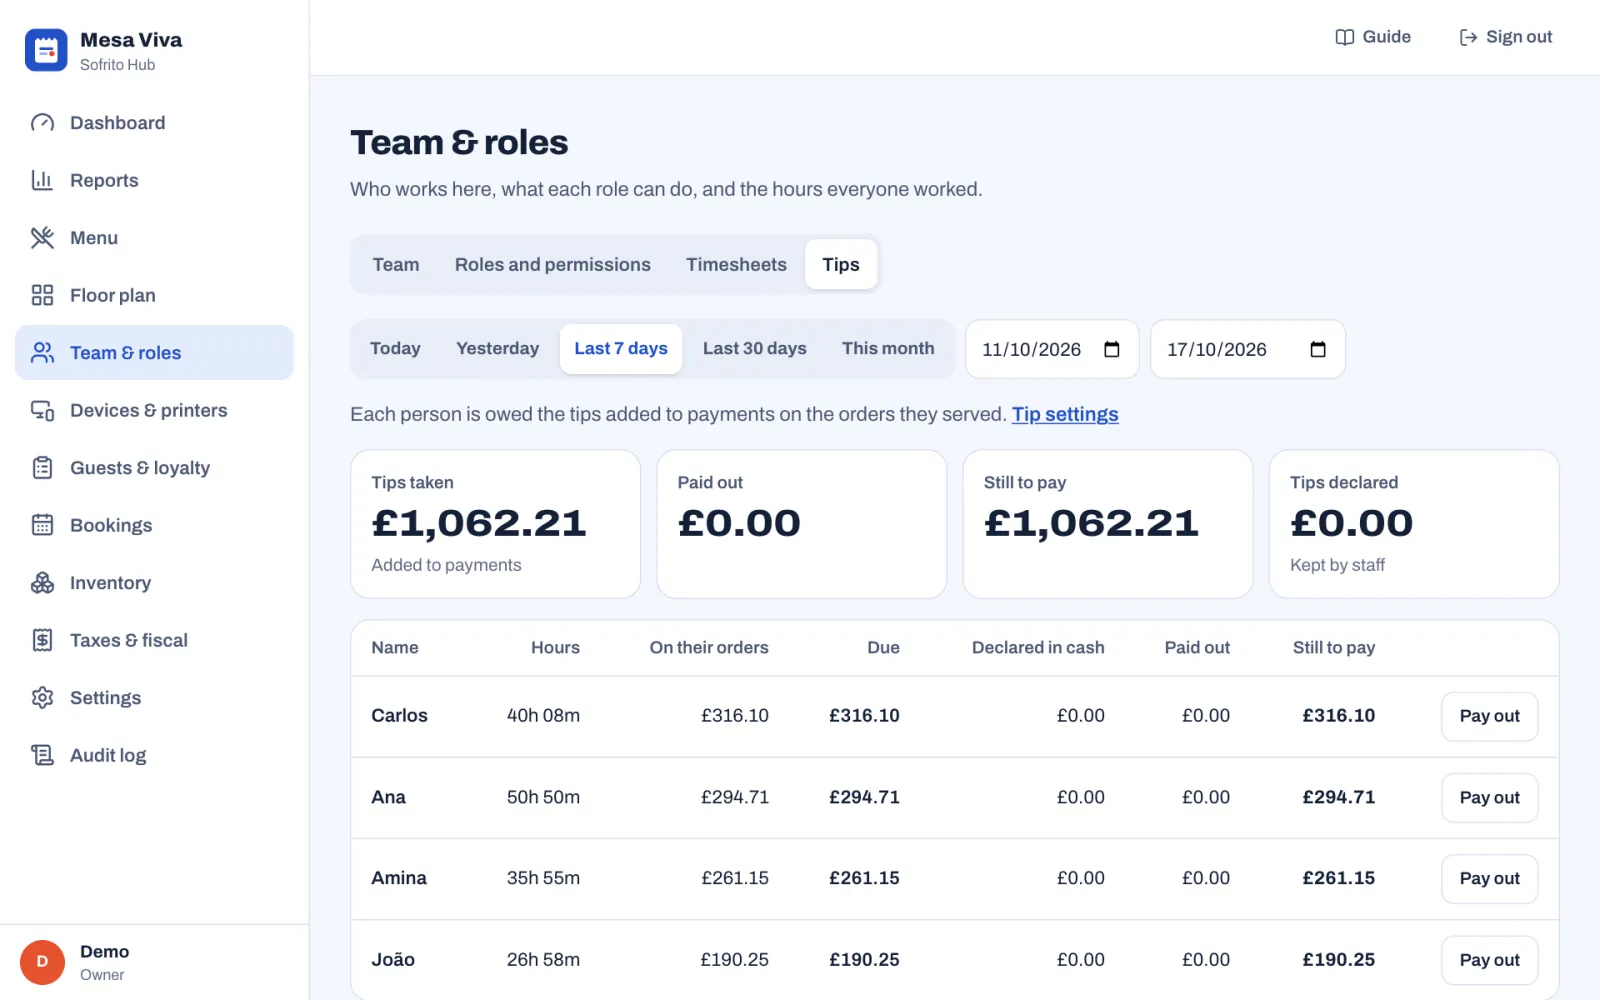
Each person is owed the tips added to payments on the orders they served. With Pool tips on in Settings › Tips, each day's tips are shared by the hours each person worked, and the Due column shows each person's Share of the pool. A service charge marked Counts as a tip is owed with the tips.
Pay out next to a person pays them, from the cash drawer or with their wages. Paying from the drawer needs Pay-ins, pay-outs and drops, and paying with wages needs Manage the team. For the steps, see Pay out tips.
#Approve an action with your PIN
When someone tries something their role doesn't allow, and the permission has the Manager can approve badge, the till asks for approval instead of refusing.
- The person who asked hands you the till. It shows Manager approval and "A manager needs to approve this."
- Type your PIN.
- Tap Approve.
The action goes ahead and is recorded with both names: the person who asked and the person who approved. "Manager" means anyone whose role has that permission, so an owner can approve too. If the PIN is wrong, the pad says "Wrong PIN."; if your role doesn't have the permission, it says, for example, "Ana can’t approve this."
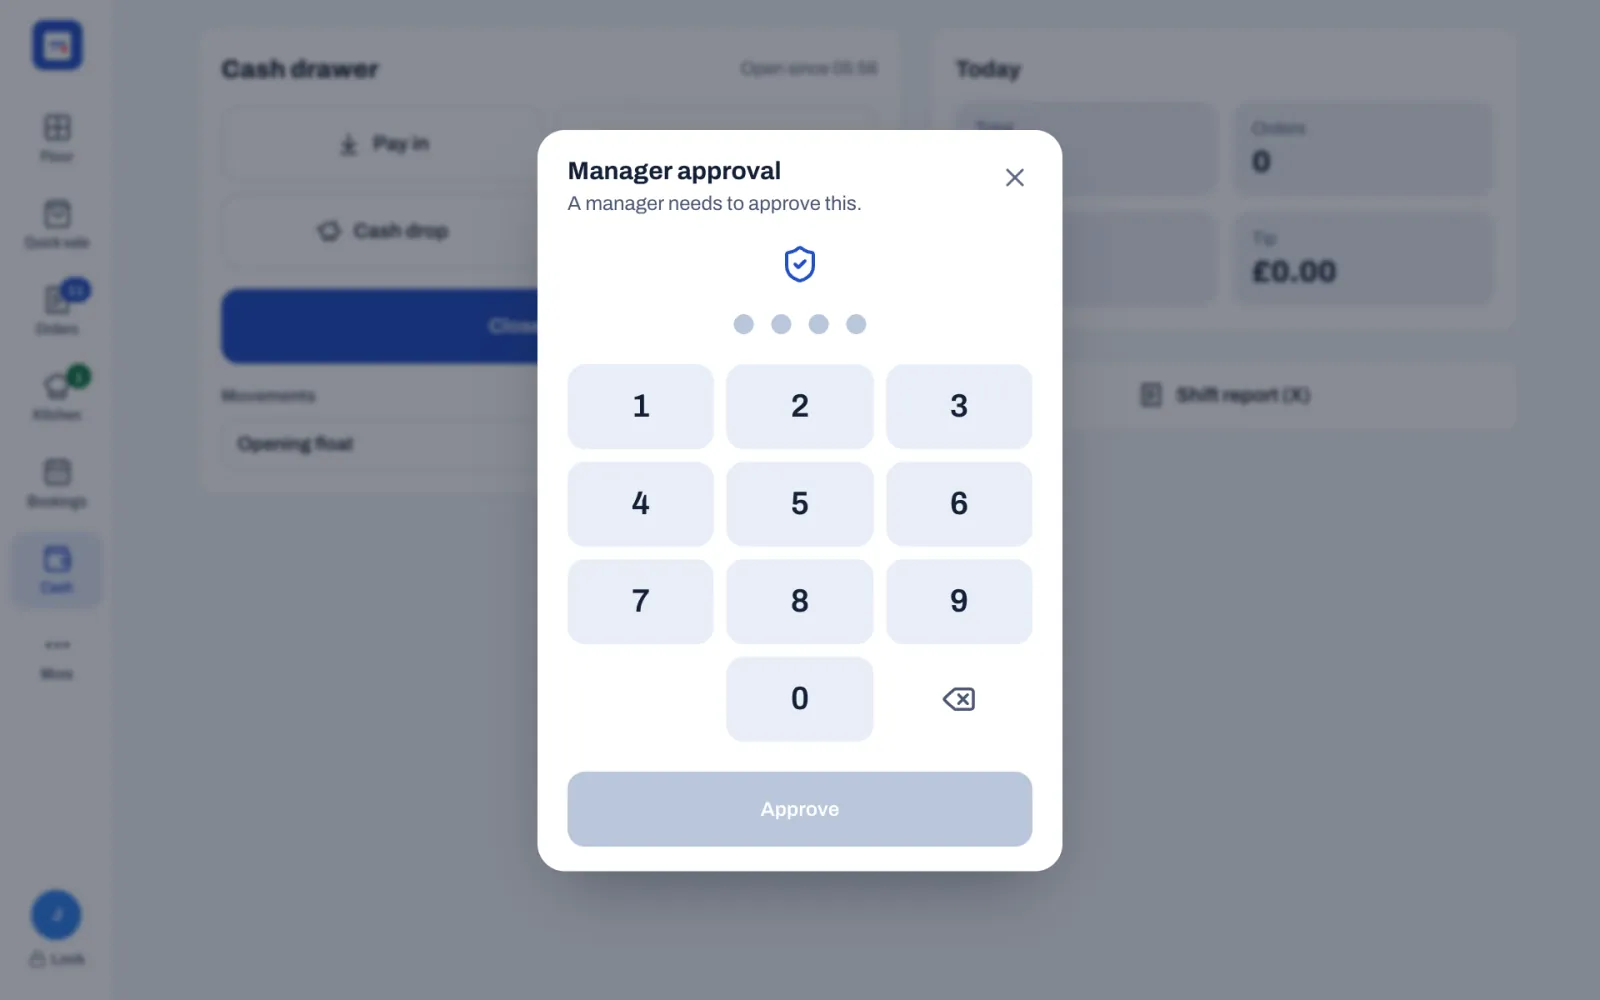
Two settings decide how often staff need a manager:
- In the back office, select Settings › Security.
- Under Discounts up to, type the biggest discount, in per cent, that staff may give on their own. A new restaurant starts with 10%. Bigger discounts need Discount above the limit or a manager's PIN.
- Under Reasons, choose whether staff must say why they void an item, give one free or refund money: Ask why an item is voided, Ask why an item is free and Ask why money is refunded. All three start on.
- Select Save changes.
You choose the reasons staff can tap in Settings › Reasons. For voids, refunds and the rest of the approval work during service, see Voids, discounts, refunds and approvals.
#Before you go live
- Remove the sample data if you added it, and add your real team.
- Give everyone their own PIN, and ask them not to share it. A shared PIN puts one person's name on another person's voids and refunds.
- Give each person the smallest role that lets them do their job. Keep Owner for the people who own the business.
- Give a back-office password only to people who need the back office.
- Type everyone's Hourly wage, so timesheets and reports show your labour cost.
- Decide whether tips are pooled, and who pays them out and how often.
- When someone leaves, archive them the same day.
Devices, printers and stations
Every screen that works with Sofrito is a paired device: the till, the servers' handhelds, the kitchen display, the customer display and the pickup board. Printers and cash drawers hang off those devices, and stations decide where each dish goes: a ticket on the kitchen printer, a card on the kitchen display, or both. This chapter is for the owner, a manager or the installer who sets the restaurant up. Everything here is in Back office › Devices & printers.
Before you start
- Decide whether the restaurant runs on Sofrito Cloud or on Sofrito Hub. See Plan your setup.
- Create your restaurant. See Create your restaurant.
- On Sofrito Hub, the devices and the network printers must be on the restaurant network, where they can reach the hub. See Sofrito Hub and working offline.
- Your role needs Manage devices and printers.
#Choose what each screen will be
Sofrito calls each kind of device by what it does. You choose the kind when you pair the device, and you can change it later.
| Kind | What it does | Good hardware |
|---|---|---|
| POS terminal (the till) | Tables, orders and payments at the counter or on the floor. | A touch PC, an iPad or an Android tablet, 10 to 15 inches. |
| Handheld | A phone or small tablet servers carry to take orders at the table. | An iPhone, an Android phone, or a handheld terminal such as Sunmi or Senraise. |
| Kitchen display | Kitchen tickets by station. Cooks bump them when they're ready. | A tablet or a screen with a small PC, mounted near the pass. |
| Customer display | Faces the guest and shows the order and the total. | A small tablet or a second screen at the counter. |
| Pickup board | Order numbers being prepared and ready to collect. | A TV or a large screen guests can see while they wait. |
| Print bridge | A computer with the Sofrito desktop app that sends print jobs to network printers. | A computer next to the printers, on the same network. |
Tills and handhelds need staff to sign in with their PIN. The kitchen display, customer display and pickup board work as soon as they are paired. A customer display first asks which till it faces.
On Sofrito Cloud, Pair a new device also offers Sofrito Hub. It is not a screen: it links the restaurant's hub to Sofrito Cloud, and never prints. See Link the hub to Sofrito Cloud.
#Pair a new device
Pairing connects a device to your restaurant with a one-time code. In the back office:
- Select Devices & printers.
- Select Pair a new device.
- Choose what the new device will be, for example Handheld.
- Optional: type a Device name, such as "Bar phone". It helps you tell devices apart in the list.
- Select Create pairing code.
Sofrito shows a 6-character code, a QR code and the address of your server. The code works once and expires after 15 minutes. If it expires, select Create a new code.
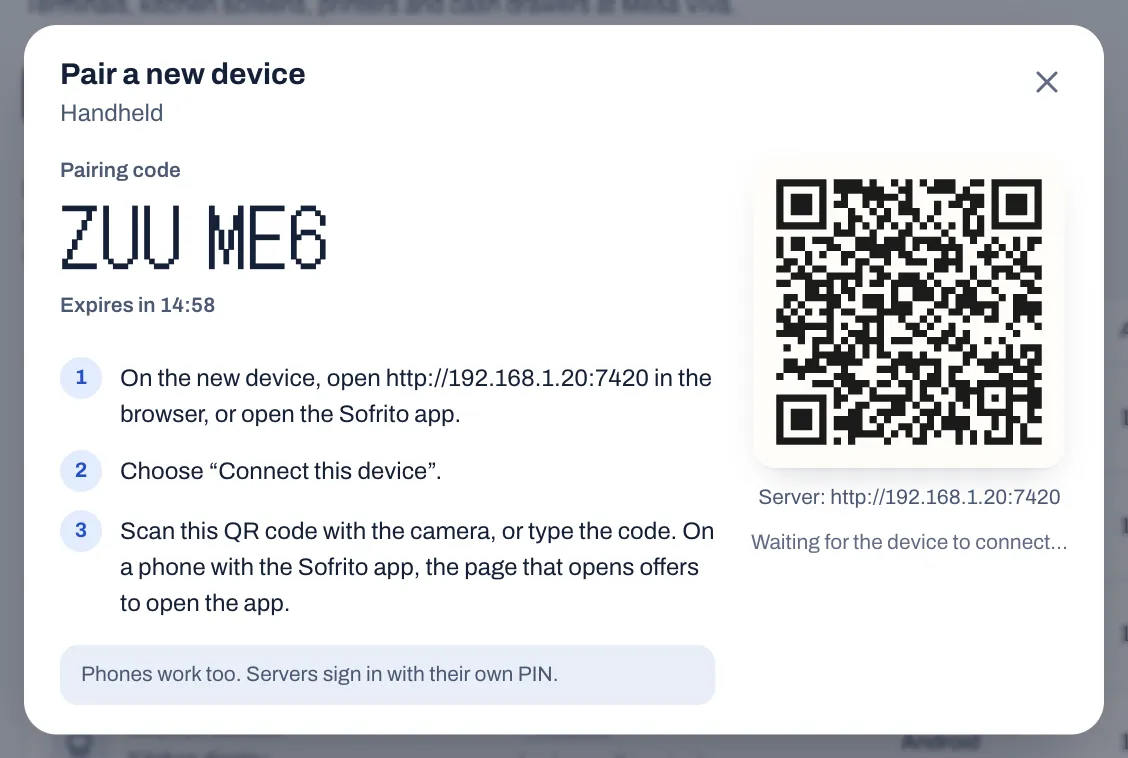
The quickest way is to scan the QR code with the new device's camera. It opens the pairing page with the code already filled in:
- On a computer, the device connects straight away.
- On a phone or a tablet, the page first offers Open in the Sofrito app. Tap it if the Sofrito app is installed: the app opens with the code. To use the browser instead, tap Connect.
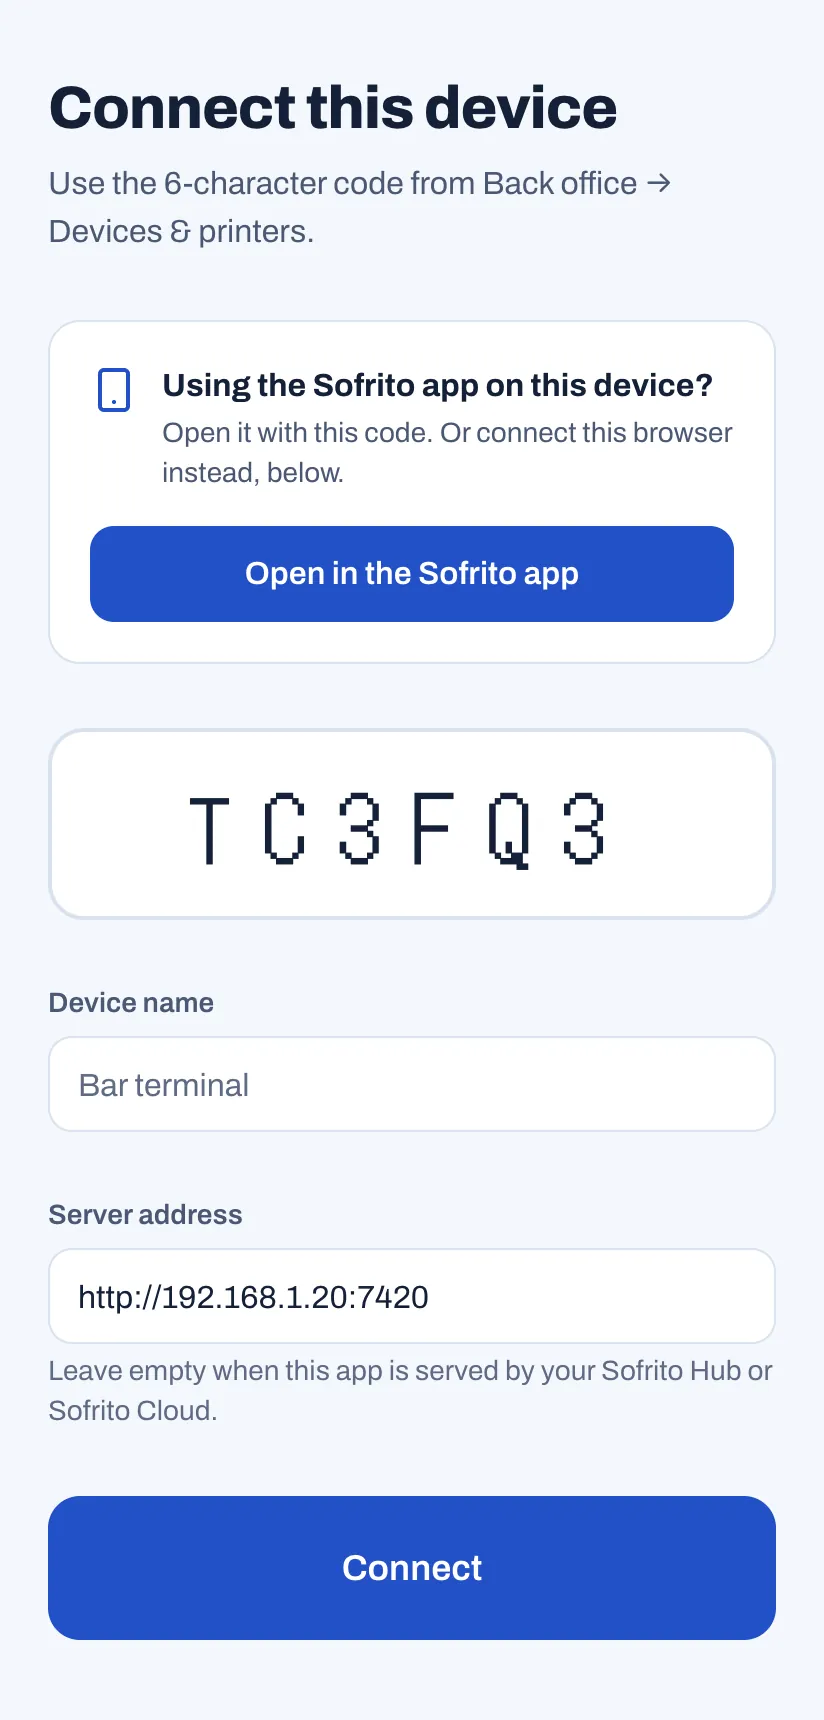
To type the code instead:
- On the new device, open the Sofrito app, or the server address in the browser.
- Choose Connect this device.
- Type the 6-character code.
- Optional: type a Device name.
- Tap Connect.
If the device asks where your restaurant is, tap Server address and type the address shown under the QR code.
When the device connects, the back office says, for example, "Bar phone is connected". Select Set it up to choose its printer and other settings now (for a customer display, the till it faces), Pair another device, or Done.
#See which devices are online
Select Devices & printers › Devices. The list shows each device's name and kind, whether it is Online or Offline (with when it was last seen), its Platform and its App version. This device marks the one you are using. In the demo restaurant, its kitchen display, Kitchen pass, shows Demo screen and Part of the demo: no device connects to it, but tickets wait on it as on a real screen.
A kitchen display that hasn't connected for over a day, while stations still send it their tickets, shows Tickets wait on it. Those tickets are never marked served, and they show as late. Select the display to see which stations, then switch it back on, or revoke it if it is no longer used (see Remove a device).
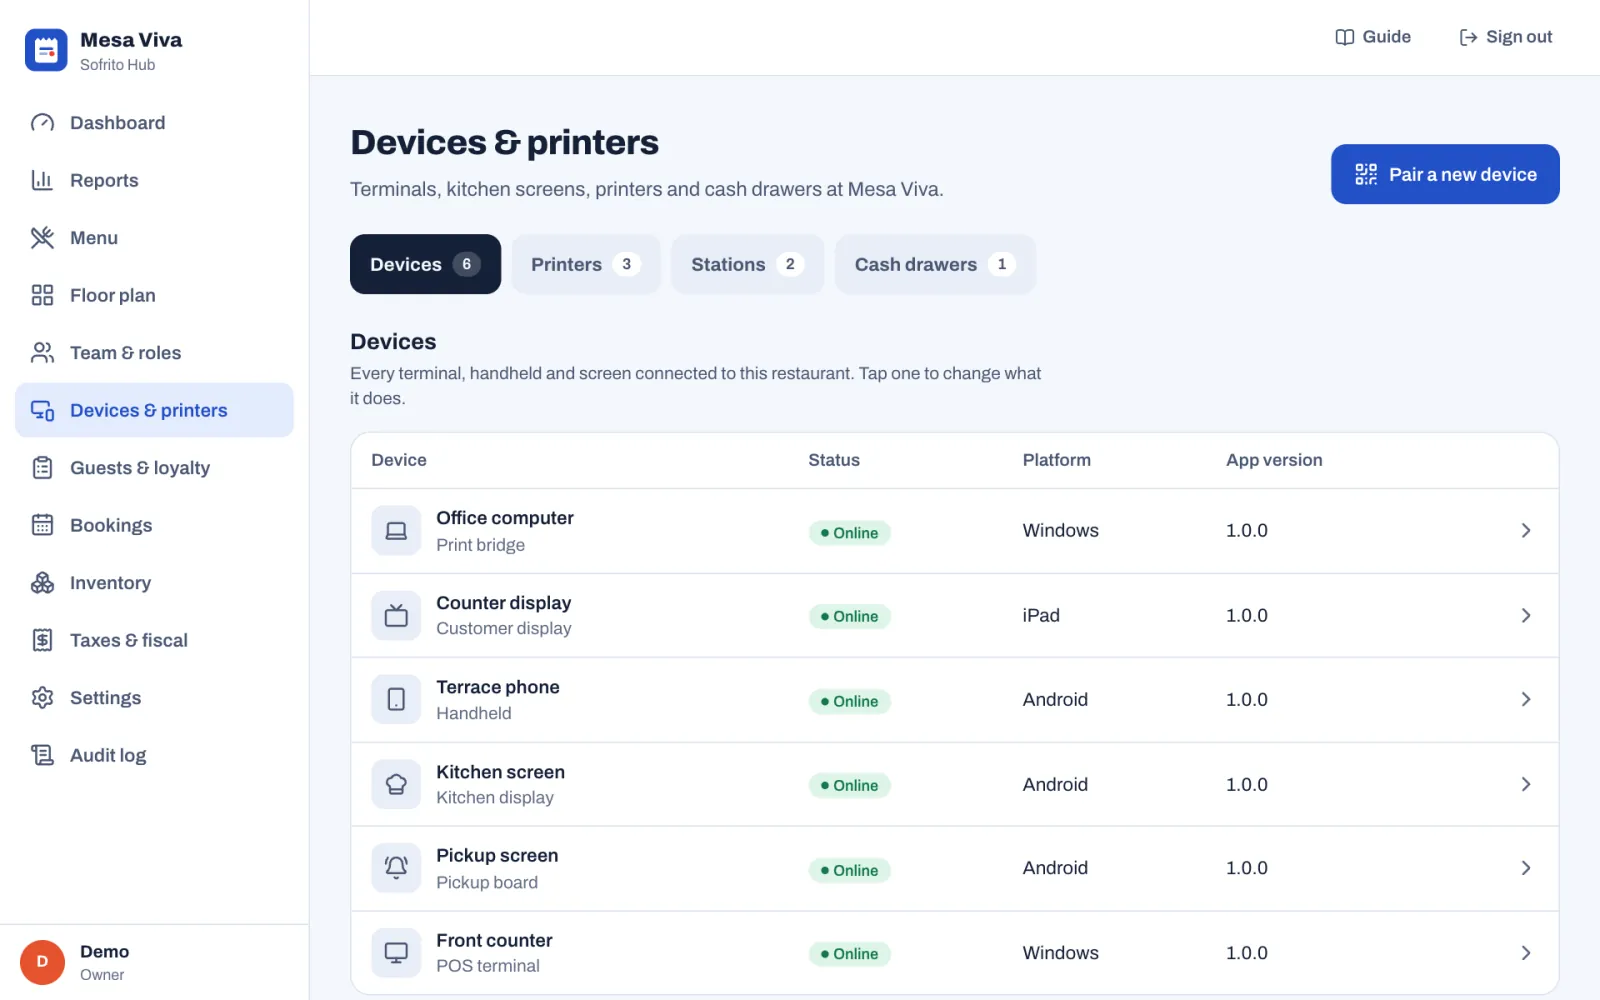
#Set up a till or a handheld
- In Devices & printers › Devices, select the device.
- Change the Device name if you need to.
- Under Receipt printer, choose where receipts and checks from this device print. Restaurant default uses the first receipt printer in your list.
- For a till, choose its Cash drawer. Automatic uses the drawer assigned to this till under Cash drawers, or else the first drawer.
- Under Area shown first, choose the part of the floor plan the device opens on, for example the terrace for the terrace handheld.
- Select Save.
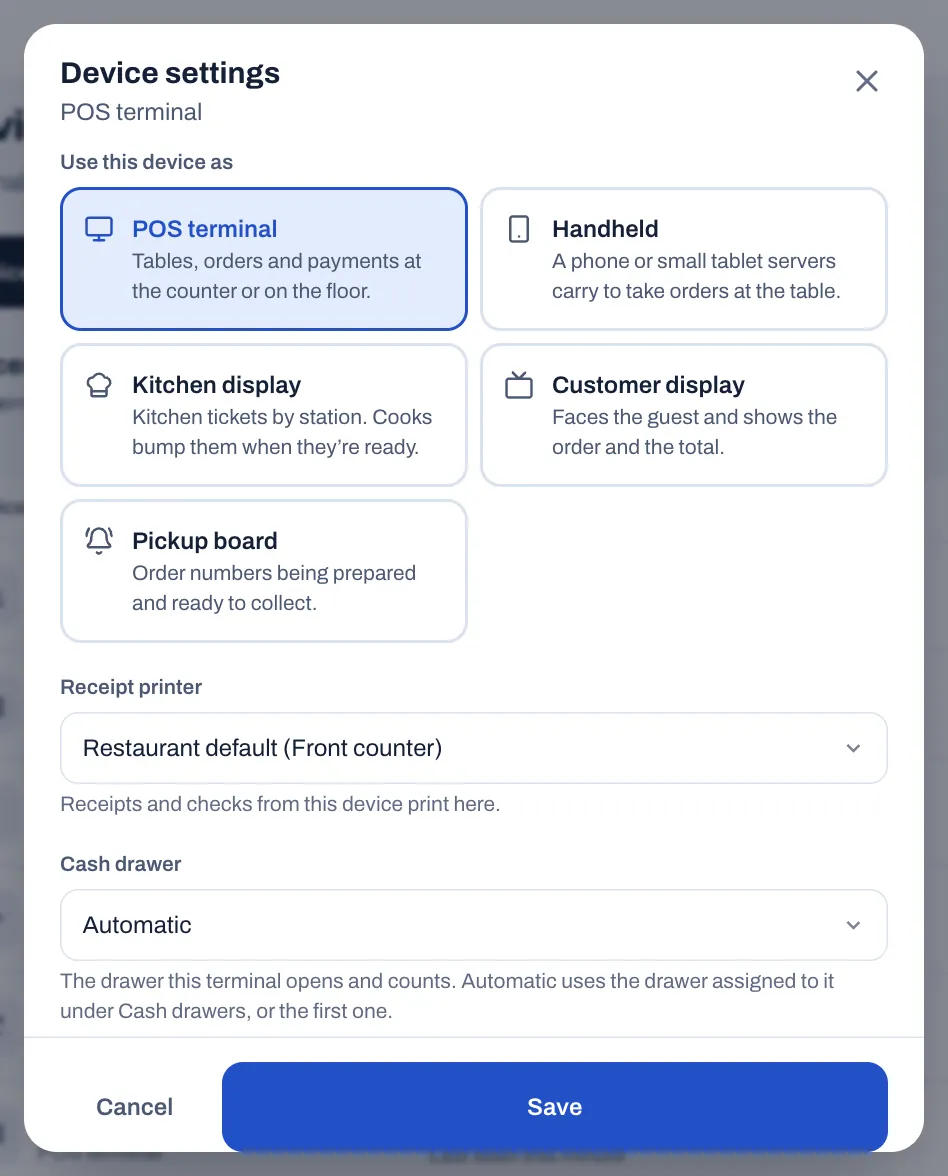
For a kitchen display, the same window has Stations on this screen: choose All stations, or only the stations this screen shows. For a customer display, it has Faces the till (see Use the customer display and the pickup board). A pickup board has nothing else to set up. If you have more than one restaurant, Restaurant moves the device to another one.
#Repurpose a screen
Any till, handheld, kitchen display, customer display or pickup board can become one of the others. In the back office:
- In Devices & printers › Devices, select the device.
- Under Use this device as, choose the new kind.
- Select Save.
The screen switches over as soon as you save. A manager can also do it on the device itself: sign in, tap More, and under Use this screen as tap Kitchen display, Customer display or Pickup board.
To turn a screen back into a till:
- Pickup board: press and hold the logo for 2 seconds.
- Customer display: press and hold the restaurant's logo for 2 seconds, then tap Use this screen as a point of sale.
- Kitchen display: press and hold the logo for 2 seconds. The screen asks "Use this screen as a point of sale? Kitchen tickets stop showing on it.": tap Switch to point of sale, or Cancel. Or tap the settings button at the top right (Screen settings), then Use this screen as a point of sale, then Switch to point of sale.
The screen then shows the PIN pad, so it grants nothing until someone signs in.
#Use the customer display and the pickup board
The customer display faces one till or handheld, and shows guests the order open on it. To choose which:
- In Devices & printers › Devices, select the customer display.
- Under Faces the till, choose the till or handheld. Until you do, it says Not chosen yet: the screen asks.
- Select Save.
You can also choose on the display itself. Until a till is chosen, it asks "Which till does this screen face?": tap the till. To change it later, press and hold the restaurant's logo for 2 seconds and tap Choose another till.
Between orders, the display shows the restaurant's logo and name with a welcome message. While an order is open on its till, it shows the items that have been sent or saved and the total to pay. On a new counter order, the items appear when you tap Pay. Once the order is paid, it shows "Thank you!". To change the greeting, select Settings › Service and type a Welcome message under Customer display.
The pickup board shows the number of every order that isn't eaten in: under Preparing while the kitchen works on it, and under Ready when it can be collected. A ready number stays up for 15 minutes or until staff mark the order collected, and the board chimes when a new order is ready. For how orders move to Ready, see Counter, takeaway and pickup.
#Remove a device
Do this when a device is lost, stolen or replaced.
- In Devices & printers › Devices, select the device.
- Select Revoke access, then Tap again to revoke.
The device signs out at once and needs a new pairing code to connect again.
On the device itself, a manager can tap More, then Unpair this device, then tap again to confirm. It does the same as Revoke access. Only people with Manage devices and printers see that button.
#Add a printer
A new restaurant starts with three printers that print on screen only: Front counter for receipts, and Kitchen and Bar for the two stations. Everything works with them before your hardware arrives. When a real printer arrives, you can open the matching printer and change How it connects: the stations and the cash drawer that use it stay as they are. To add another printer:
- Select Devices & printers › Printers.
- Select Add printer.
- Type a Printer name, such as "Kitchen printer".
- Under Prints, choose Receipts (receipts, checks and reports at the counter), Kitchen tickets (tickets for a kitchen or bar station) or Labels (sticky labels for takeaway and delivery items).
- Under How it connects, choose the connection. The next sections explain each one.
- Choose the Paper width: 80 mm or 58 mm.
- Check the Printing options (see Choose the printing options).
- Select Add printer.
- Select Print test page on the printer's row.
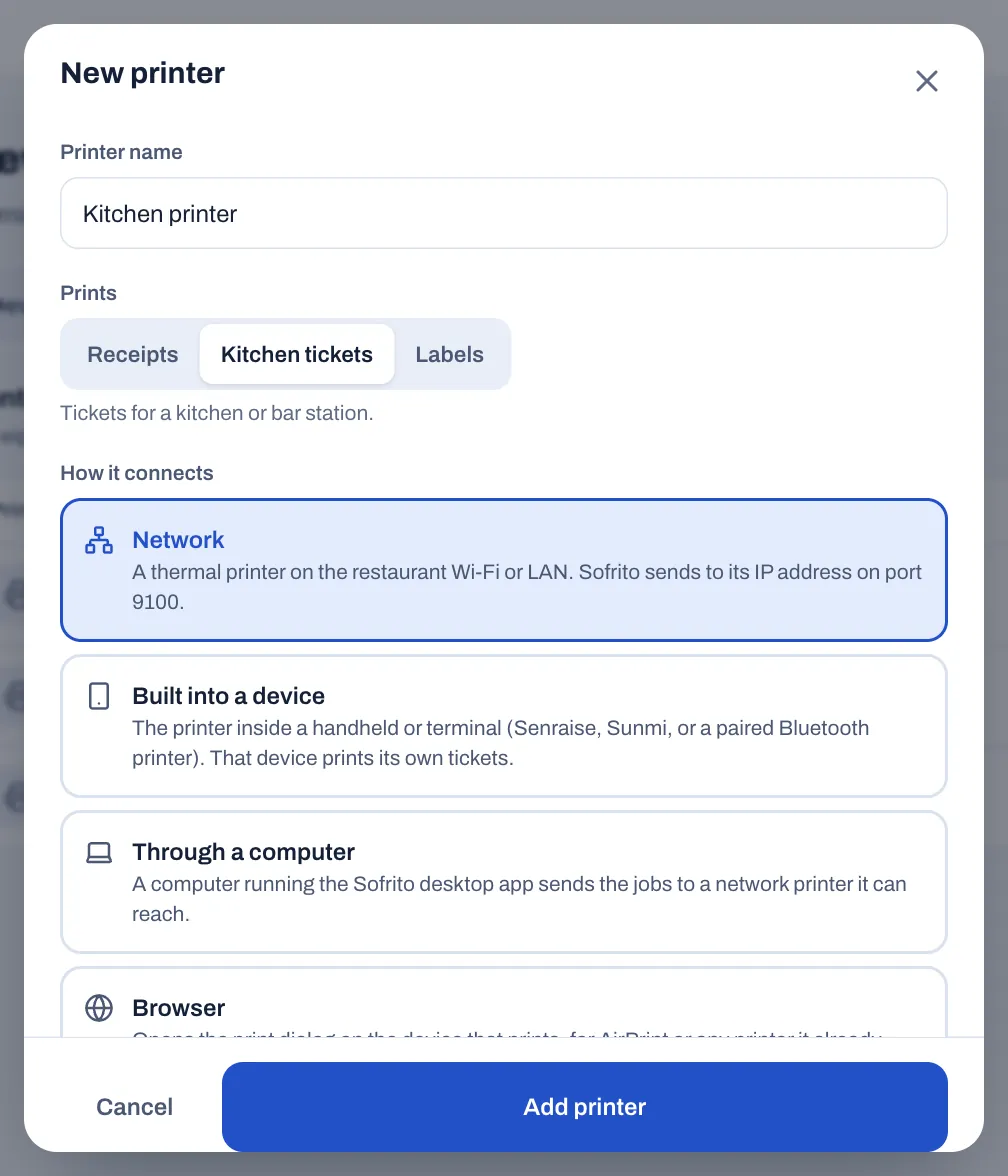
Sofrito prints ESC/POS, the language of almost every thermal receipt and kitchen printer. A receipt printer prints receipts and checks for the devices that use it. A kitchen printer prints tickets for the stations that use it (see Send each dish to the right station).
#A printer on the network
Choose Network for a thermal printer on the restaurant Wi-Fi or cable network. Sofrito sends to its IP address on port 9100.
- Type the printer's IP address, for example 192.168.1.50. To find it, print the printer's self-test page: usually you hold the feed button while you switch the printer on. If the port isn't 9100, add it after a colon.
- On Sofrito Hub, you can select Find printers on the network instead. Sofrito lists the addresses that answer on port 9100: tap the right one.
- Leave Printed by on Sofrito Hub (this server). Choose a print bridge only if the printer is on a network the hub can't reach.
On Sofrito Cloud, the cloud can't reach your restaurant network, so a print bridge in the restaurant sends the jobs. Leave Printed by on Any print bridge, or choose one computer. See Print through a computer.
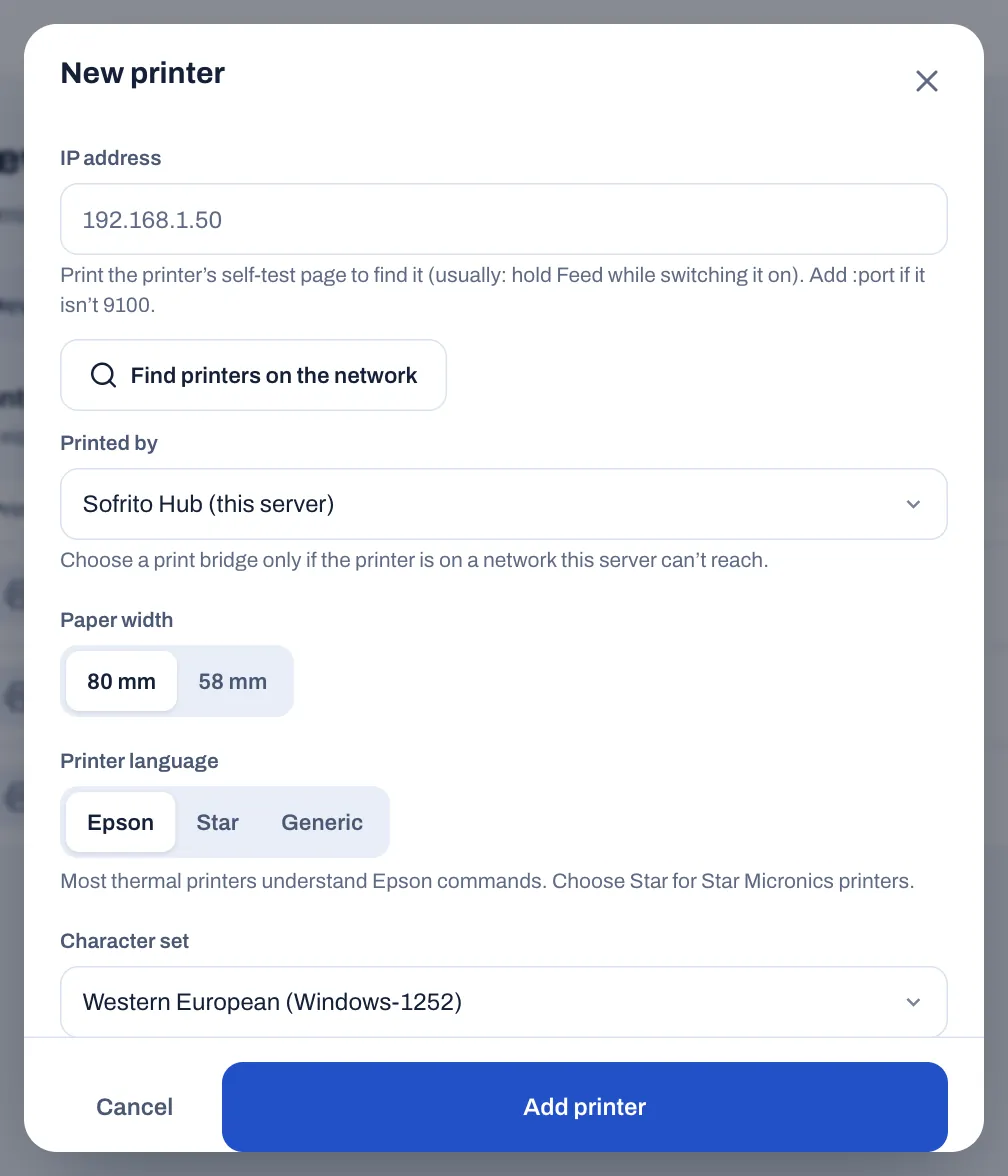
For network printers, two more settings appear:
- Printer language: most thermal printers understand Epson commands. Choose Star for Star Micronics printers.
- Character set: change it only if accented letters or the euro sign print wrong. The choices are Western European (Windows-1252), Western European with euro sign (CP858), Multilingual Latin (CP850), Portuguese (CP860) and US English (CP437).
#A printer built into a handheld or terminal
Some handhelds and terminals have a printer inside: Senraise handhelds, Sunmi devices, or a handheld paired with a Bluetooth printer. They print their own tickets through the Sofrito Android app. Sofrito draws each ticket as a picture the width of the paper, so accents, sizes and columns print the same on every make.
- Pair the handheld or terminal first (see Pair a new device).
- In Devices & printers › Printers, select Add printer.
- Type a name and choose what it Prints, usually Receipts.
- Under How it connects, choose Built into a device.
- Under Device, choose the handheld or terminal.
- Under How it prints, leave Find it automatically (recommended). It tries the Senraise print service, then the Sunmi print service, then a paired Bluetooth printer. Choose Senraise print service, Sunmi print service or Paired Bluetooth printer only if the automatic choice picks the wrong one.
- For Paired Bluetooth printer, leave Bluetooth address empty to use the paired printer (Sunmi's InnerPrinter first), or type the address of one printer, like 00:11:22:33:44:55.
- Check the Paper width. Built-in printers start at 58 mm.
- Select Add printer.
A receipt printer built into a device becomes that device's receipt printer, unless the device already has one. In that case, change Receipt printer in the device's settings.
A manager can also do this on the device itself, in the Sofrito Android app:
- Sign in on the device and tap More.
- Under Printers, the Printer in this device panel says what Sofrito found, for example "Found: Sunmi print service".
- Tap Print a test here to check the printer. This prints straight to it, without the server.
- Tap Use it for this device’s receipts. The panel then says "Receipts from this device print here."
If the panel says, for example, "Receipts from this device print on Front counter.", the printer is added but this device's receipts go elsewhere: tap Use it for this device’s receipts to bring them back. Staff without Manage devices and printers see the panel and can print a test, but can't change where receipts print.
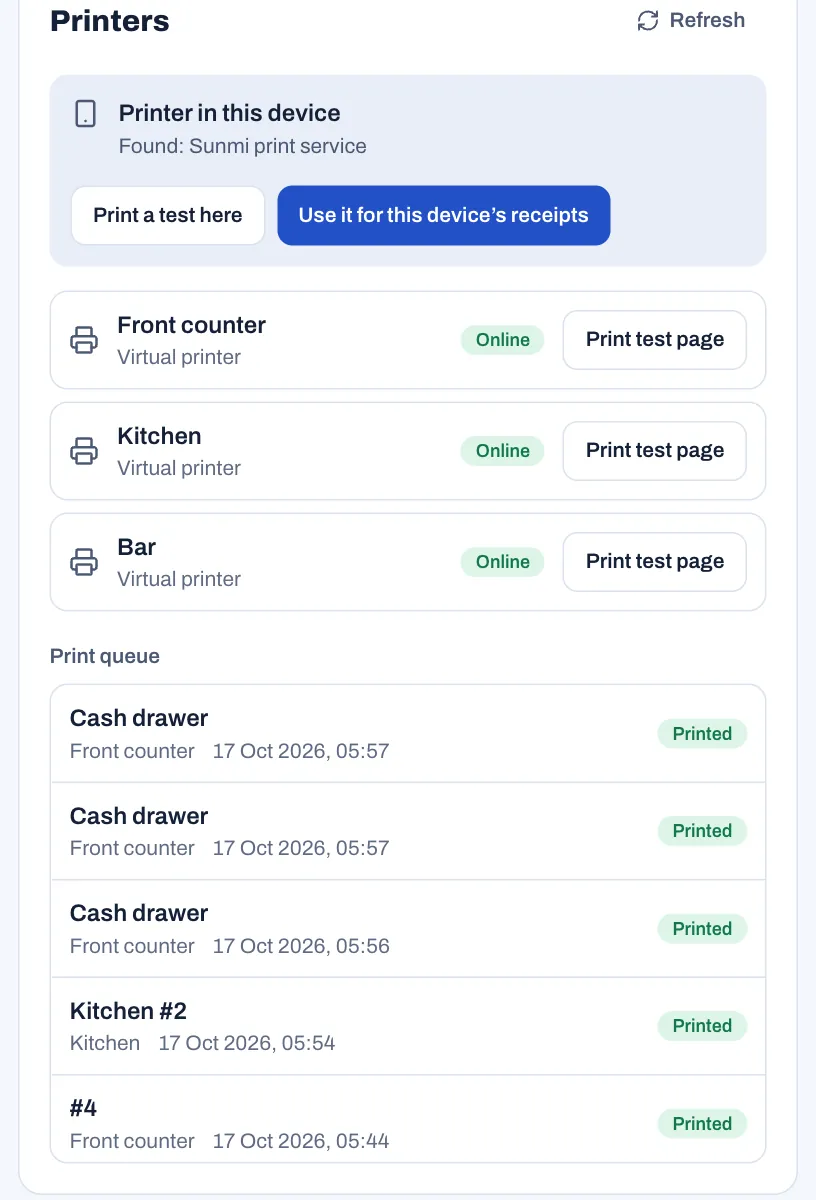
#Print through a computer
A print bridge is a computer in the restaurant that runs the Sofrito desktop app and sends print jobs to network printers. You need one on Sofrito Cloud, which can't reach your restaurant network. On Sofrito Hub, the hub prints by itself: use a print bridge only for a printer on a network the hub can't reach. A print bridge sends to printers on the network only, not to a printer plugged into the computer by USB.
To set it up:
- In Devices & printers, select Pair a new device, choose Print bridge and select Create pairing code.
- On the computer next to the printers, install the Sofrito desktop app and open it.
- On Connect to your restaurant, type the Server address shown under the QR code and choose Connect, or choose Use Sofrito Cloud.
- Choose Connect this device, type the Pairing code and choose Connect.
The computer then shows the Print bridge screen: its name, the restaurant, Connected, and "Ready. Print jobs go out as they arrive." Below are Problems (printers that are offline, and jobs that didn't print in the last hour, with the reason), the Printers it sends to, and Recent print jobs. Keep Sofrito open on that computer during service.
Then choose, for each printer, how the computer reaches it:
- A network printer: open the printer and, under Printed by, choose the computer. On Sofrito Cloud, Any print bridge also works.
- A printer only that computer can reach: under How it connects, choose Through a computer. Under Computer, choose the computer you paired. Under Printer address on that computer, type the printer's IP address or network name, as that computer reaches it, with
:portafter it if the port isn't 9100. The address is required.
Select Print test page on each printer. The computer's device settings list the printers it serves under Printers sent through this computer.
#A Star CloudPRNT printer (Sofrito Cloud only)
Star printers with CloudPRNT collect their jobs from Sofrito Cloud over the internet, so no hub and no computer are needed. This choice appears only on Sofrito Cloud.
- Add the printer and choose Star CloudPRNT.
- Select Add printer.
- Open the printer again. Under Printer setup, select Copy next to the server address.
- On a computer on the same network, open the printer's web page from its IP address. Go to CloudPRNT, switch it on and paste the server address.
- Set the polling interval to 5 seconds, so tickets come out quickly.
The printer needs internet access. Logos don't print on CloudPRNT printers.
#The browser's print dialog
Choose Browser to print through the device's own print dialog, for AirPrint or any printer the device already knows. The print dialog opens on the device that sent the job, and someone has to confirm it each time. It suits a small café with one iPad. A cash drawer can't be opened through a browser printer.
#A printer on screen only
Choose Virtual for demos and training. Nothing comes out of a printer: the tickets appear in the print queue under More › Printers on a till or a handheld, where you tap one to see it.
#Choose the printing options
Open a printer to change these. They depend on how the printer connects.
| Option | What it does |
|---|---|
| Paper cut | Partial, Full or No cut after each ticket. |
| Beep when a ticket prints | Handy in a noisy kitchen. The printer needs a buzzer. It is on for printers that print Kitchen tickets until you turn it off. |
| Copies | Prints every job from this printer 1 to 5 times. Receipts also follow Copies in Settings › Receipts: the higher of the two counts. A reprint is always one copy. |
| Blank lines before the cut | Paper fed before the cut, so the last line clears the tear bar. |
| Characters per line | Leave empty to match the paper width: 48 characters on 80 mm, 32 on 58 mm. Change it only if lines wrap or stop short. |
| Cash drawer connector | For receipt printers with a cash drawer. Most drawers use Pin 2. Try Pin 5 if the drawer doesn't open. |
| Backup printer | If this printer is offline, its jobs go to the backup instead. Sofrito tries this printer again a minute later and goes back to it once it prints. Test pages and the cash drawer always use the printer itself. |
When you open a printer that is in use, Sofrito lists what uses it: stations, devices, cash drawers and other printers that use it as a backup. To remove a printer, select Delete printer, then Tap again to delete.
#Test a printer and follow the print queue
Print test page prints a test from the saved settings, so save first if you changed something. The test page checks the connection, the paper width and the accents. It always goes to the printer itself, never to its backup.
In Devices & printers › Printers, each printer shows its status: Online, Offline, Error or Not checked, with the reason when there is a problem, for example "Out of paper.". A virtual printer shows On screen only and a browser printer Print dialog.
When a printer goes offline during service, every till and handheld shows a warning in its own language, for example "Kitchen is offline" with the reason. The device that sent a job that didn't print also shows, for example, "Kitchen #12 didn’t print on Kitchen", with Reprint.
On a till or a handheld, tap More. On a phone or a handheld, More is always the last button of the bottom bar, and it also lists the sections that don't fit in the bar, such as Cash or Bookings, as buttons at the top. The Printers card lists every printer with its status and a Print test page button. Under Print queue, the latest jobs show as Queued, Sending, Printed, Failed or Cancelled. A failed job shows why it didn't print and has Reprint: it prints once more, and the failed job then shows Cancelled. Tap a job to see what it looked like. Refresh at the top of the card updates the list.
#Send each dish to the right station
A station is a place where food or drinks are made, such as the kitchen, the bar or the pizza oven. Each dish is sent to one or more stations, and each station sends its tickets to its printers, its kitchen screens or both. A new restaurant starts with two stations, Kitchen and Bar.
- Select Devices & printers › Stations.
- Select Add station, or select a station to change it.
- Type the Station name, such as "Grill".
- Pick a Colour. Kitchen screens show it so cooks spot their tickets.
- Under Tickets print on, tick the printers that print this station's tickets. Pick none if the station only uses kitchen screens.
- Leave Show on kitchen screens on if the station's tickets should wait on the kitchen displays.
- Select Add station or Save.
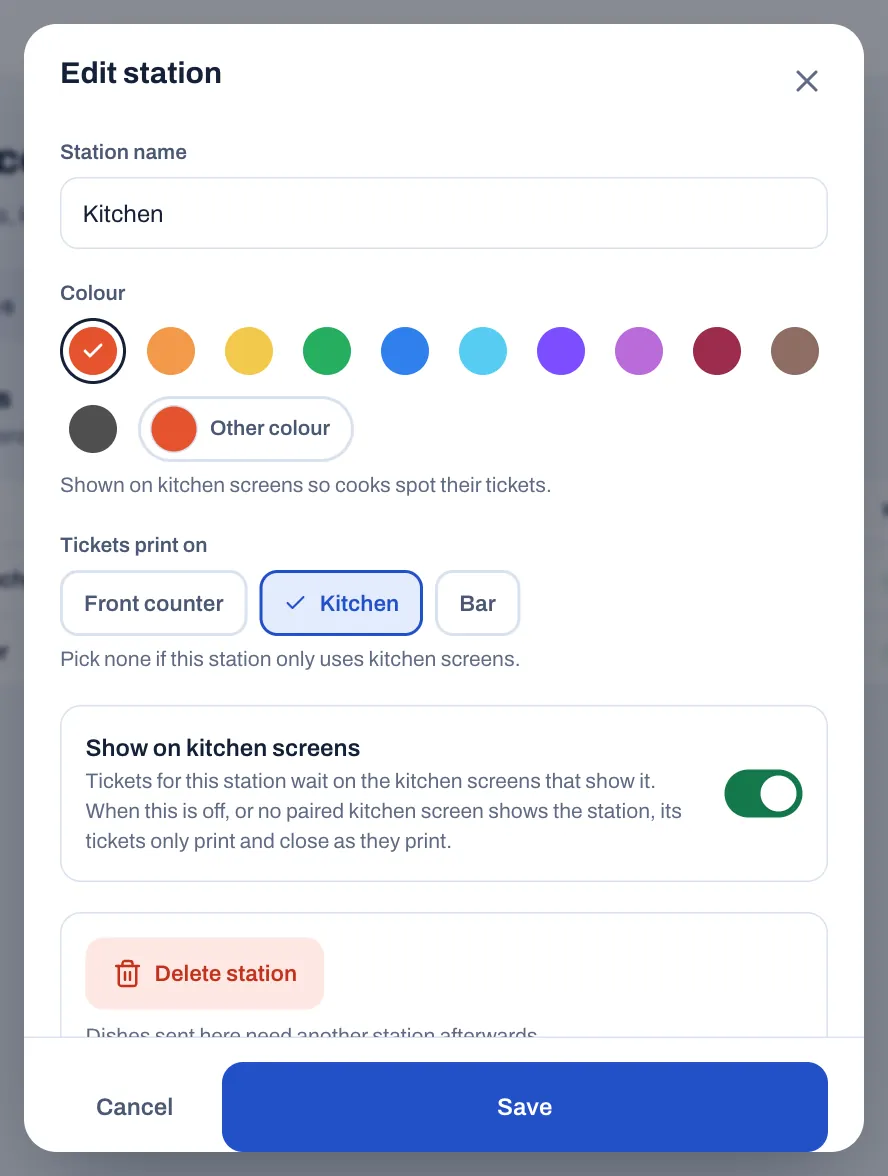
A station's tickets wait on a kitchen screen only when Show on kitchen screens is on and a paired kitchen display shows that station: it is chosen under Stations on this screen, or the display shows All stations. It doesn't matter whether that display is switched on. In every other case, the tickets only print and close as they print: the dishes show Served on the check as soon as they are sent, nothing waits on the till's Kitchen screen and nothing counts as late. A restaurant without kitchen screens has nothing to do. Pairing a kitchen display changes only the orders sent after it.
In the list of stations, the Kitchen screens column shows Shown, Hidden (the switch is off), No screen shows it (the switch is on, but no paired kitchen display shows the station) or Screen not in use (the kitchen displays that show the station haven't connected for over a day, so its tickets wait where nobody sees them; the station's window names the screen).
Then tell Sofrito which dishes go where: you choose the stations of each category and dish in the menu. See Build your menu. On each kitchen display, choose which stations it shows (see Set up a till or a handheld).
A station that no kitchen screen shows says Tickets go nowhere when it has no printer, or when Print kitchen tickets is off in Settings › Kitchen: fix it before service, or its dishes reach nobody. If you delete a station, give its dishes another station afterwards.
To run the kitchen on screens only, without paper, select Settings › Kitchen and turn off Print kitchen tickets. Do it only when a kitchen screen shows every station: with that switch off, a station that no screen shows gets no ticket at all, and the list marks it Tickets go nowhere. For how cooks use the screen, see The kitchen display.
#Print labels for takeaway and delivery
A printer whose Prints is set to Labels prints one sticky label for each takeaway and delivery item when the order is sent to the kitchen. Each label shows the order number and its place in the order (for example 2/3), the guest's name, the dish with its options, notes and allergens, and the time. Every label printer in the restaurant prints them.
#Set up cash drawers
Plug the cash drawer into the drawer port of the receipt printer (the RJ11 or RJ12 socket, often marked DK). The printer opens it.
- Select Devices & printers › Cash drawers.
- Select Add cash drawer, or select a drawer to change it.
- Type the Drawer name, such as "Front counter".
- Under Terminal, choose the till the drawer sits under, or Any terminal.
- Under Opened by, leave The terminal’s receipt printer, or choose the printer the drawer is plugged into.
- Select Add cash drawer or Save.
Each till's Cash screen counts its own drawer: the one chosen as Cash drawer in the till's settings, else the drawer assigned to it under Terminal, else the first drawer. With several drawers, buttons at the top of the Cash screen switch between them. Cash taken on a handheld goes into a drawer that is open.
Staff count each drawer when they open and close a shift (see Open for service and Close the day). The drawer opens when a shift starts, for pay-ins, pay-outs and cash drops, for No sale, for cash refunds, when tips are paid out from it, and for every payment method with Open the cash drawer turned on (see Payment methods, tips and service charge).
To retire a drawer and keep its history, turn off In use. Close it on the till first if it is open: the list marks it Open now.
#Before you go live
- Pair every till, handheld and screen, and give each one a clear name.
- Choose the till each customer display faces.
- On Sofrito Cloud with network printers, set up a print bridge and keep it running.
- Print a test page on every printer, and check the accents and the euro or pound sign.
- Send a test order with one dish for each station and check that each ticket comes out in the right place, on paper and on screen.
- Open the cash drawer from a test cash payment.
- Give each kitchen printer a backup printer.
- Revoke any device you no longer use.
Payment methods, tips and service charge
Payment methods are the buttons staff tap on the payment screen: cash, card, mobile money, vouchers, gift cards and house accounts. This chapter sets them up, together with the money rules around them: whether guests are asked for a tip, how tips reach the team, how cash is rounded, and when a service charge is added. The owner or a manager does this once in the back office, under Settings. Taking a payment during service is in Taking payment.
Before you start
- Create your restaurant. Your country gives you a first set of payment methods, tips and rounding. See Create your restaurant.
- To change payment methods, your role needs Manage payment methods. Service charges need Edit the menu. Tips and cash rounding need Restaurant settings.
#See your payment methods
- In the back office, select Settings.
- Under Money, select Payment methods.
Each method shows its type, and badges for what it does: Opens drawer, Reference when staff must type a transaction number, and Off when it is hidden from the payment screen. A new restaurant in the United Kingdom starts with Cash, Card and Gift card. Other countries start with their own methods, for example M-Pesa, e-Mola and mKesh in Mozambique, or MB WAY in Portugal, and every country gets a Gift card method. No restaurant starts with a house account method: add one if you need it (see Charge orders to a house account).
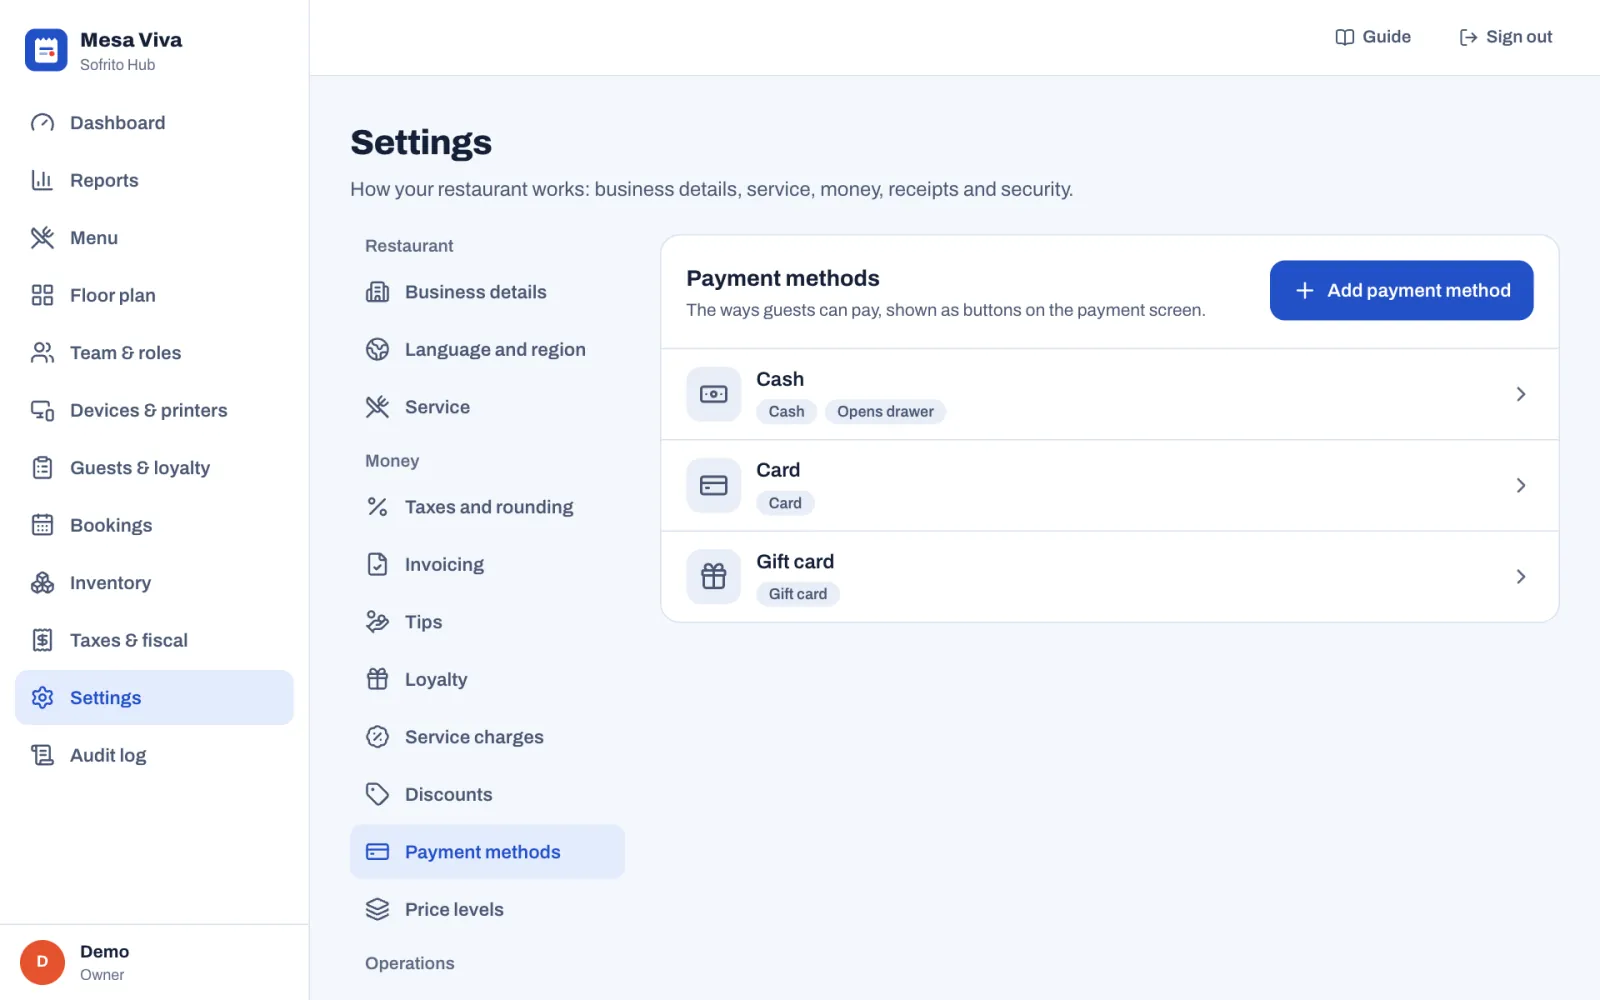
#Add a payment method
- In Settings › Payment methods, select Add payment method.
- Under Type, choose what kind of payment it is (see the table below). Sofrito fills in the usual settings for that type.
- Type the Name staff will see on the button, for example "Amex" or "Meal voucher".
- Pick an Icon and a Colour for the button.
- Check the switches: Ask for a reference, Open the cash drawer, Allow tips, and for cash Give change.
- For a card or mobile payment, choose the Card terminal setting (see Take card payments).
- Leave Fiscal payment code as it is unless your accountant tells you otherwise.
- Select Add payment method.
The new button appears on every payment screen straight away.
| Type | Use it for | What Sofrito does |
|---|---|---|
| Cash | Notes and coins. | Opens the cash drawer, works out the change and counts the money in the end-of-day cash count. |
| Card | Debit and credit cards on a card terminal. | Records the payment once staff confirm the terminal approved it. |
| Mobile money | Payments by phone, like M-Pesa, MB WAY or Pix. | Asks for the transaction reference. |
| Voucher | Meal vouchers and paper tickets. | Records the payment. No tips. |
| Gift card | Gift cards sold by your restaurant. | Checks the card's balance and takes the amount off it. No tips, no change. |
| House account | Charging a guest's account, to be paid later. | Adds the amount to what the guest on the order owes, up to their credit limit. |
| Other | Bank transfers and anything else. | Records the payment. |
What the switches do:
- Ask for a reference: staff must type a transaction number, for example the ID a phone shows after a mobile payment. It is printed on the receipt.
- Open the cash drawer: the drawer opens when this payment is taken.
- Allow tips: guests can add a tip when paying this way.
- Give change (cash only): staff can take more than the bill and hand back the difference.
- Fiscal payment code: the code this method has in your tax files, for example NU for cash in Portugal.
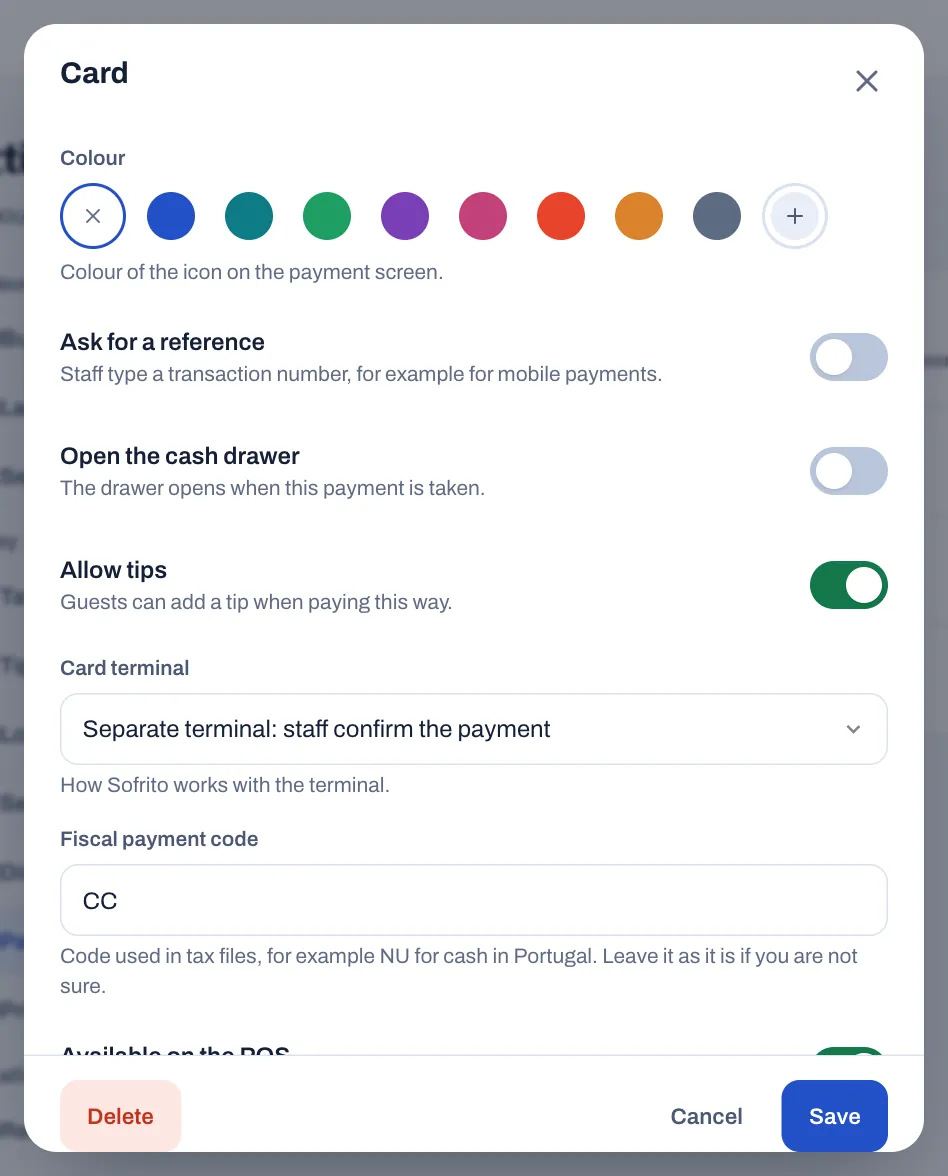
#Take card payments
Sofrito works with the card terminal you already have, from any bank or provider. The terminal is not connected to Sofrito: staff type the amount into the terminal, and confirm in Sofrito when it is approved. Under Card terminal, choose:
- Separate terminal: staff confirm the payment. On the payment screen, staff tap Charge and type the amount into the card terminal. The till says "Waiting for the card terminal…". When the terminal shows that the payment is approved, they tap Approved.
- Demo: payments are approved automatically. For demos and training only. Sofrito approves the payment by itself, without any card.
Choose Separate terminal for mobile money too. With Ask for a reference on, the payment screen asks for the Reference, the transaction ID from the guest's phone, before staff can charge.
#Change or turn off a payment method
- In Settings › Payment methods, select the method.
- Change what you need.
- To hide it from the payment screen, turn off Available on the POS. The method stays in your reports.
- Select Save.
To remove a method for good, select Delete, then Tap again to delete. If you only want to stop using it for a while, turn it off instead.
#Accept gift cards
Every restaurant has a Gift card payment method, and Sofrito keeps the balance of each card. There is nothing to set up: staff sell gift cards on the till, under More › Gift cards, and take payments with them on the payment screen. The money taken for a gift card is not a sale: tax is charged on the order the card pays for. The till steps are in Sell a gift card or check its balance and Take a gift card. Gift cards given away and corrected in the back office are in Guests, loyalty and gift cards.
Gift card payments take no tips and give no change. If one was a mistake, it can be voided under Payments taken on the payment screen before the order is paid in full: the amount goes back on the card. After the order is closed, a refund with the gift card method puts the money back on the card that paid. A gift card can't pay for another gift card.
If you don't sell gift cards, turn the Gift card method off (see Change or turn off a payment method).
#Charge orders to a house account
A house account lets a regular guest, or a company, charge orders and pay later, up to a credit limit you set. To use house accounts:
- In Settings › Payment methods, select Add payment method.
- Under Type, choose House account, and type a Name, for example "House account".
- Select Add payment method.
- Open a house account for each guest who may use one, with a Credit limit: see Run a house account.
On the till, staff add the guest to the order, then choose the house account method on the payment screen: see Charge a guest's house account. Sofrito refuses when the guest has no house account ("This guest has no house account.") or when the amount would take them over their limit. When a guest pays off their account, record the payment in the back office, on the guest's House account tab.
#Ask guests for a tip
- In the back office, select Settings › Tips.
- Turn on Ask for a tip. Tip buttons appear on the payment screen.
- Under Tip options, type up to four percentages. Select Add option to add one, or the cross next to a percentage to remove it.
- Under Work out tips on, choose Total before tax or Total with tax.
- Turn on Allow other amounts to let staff type any tip.
- Select Save changes.
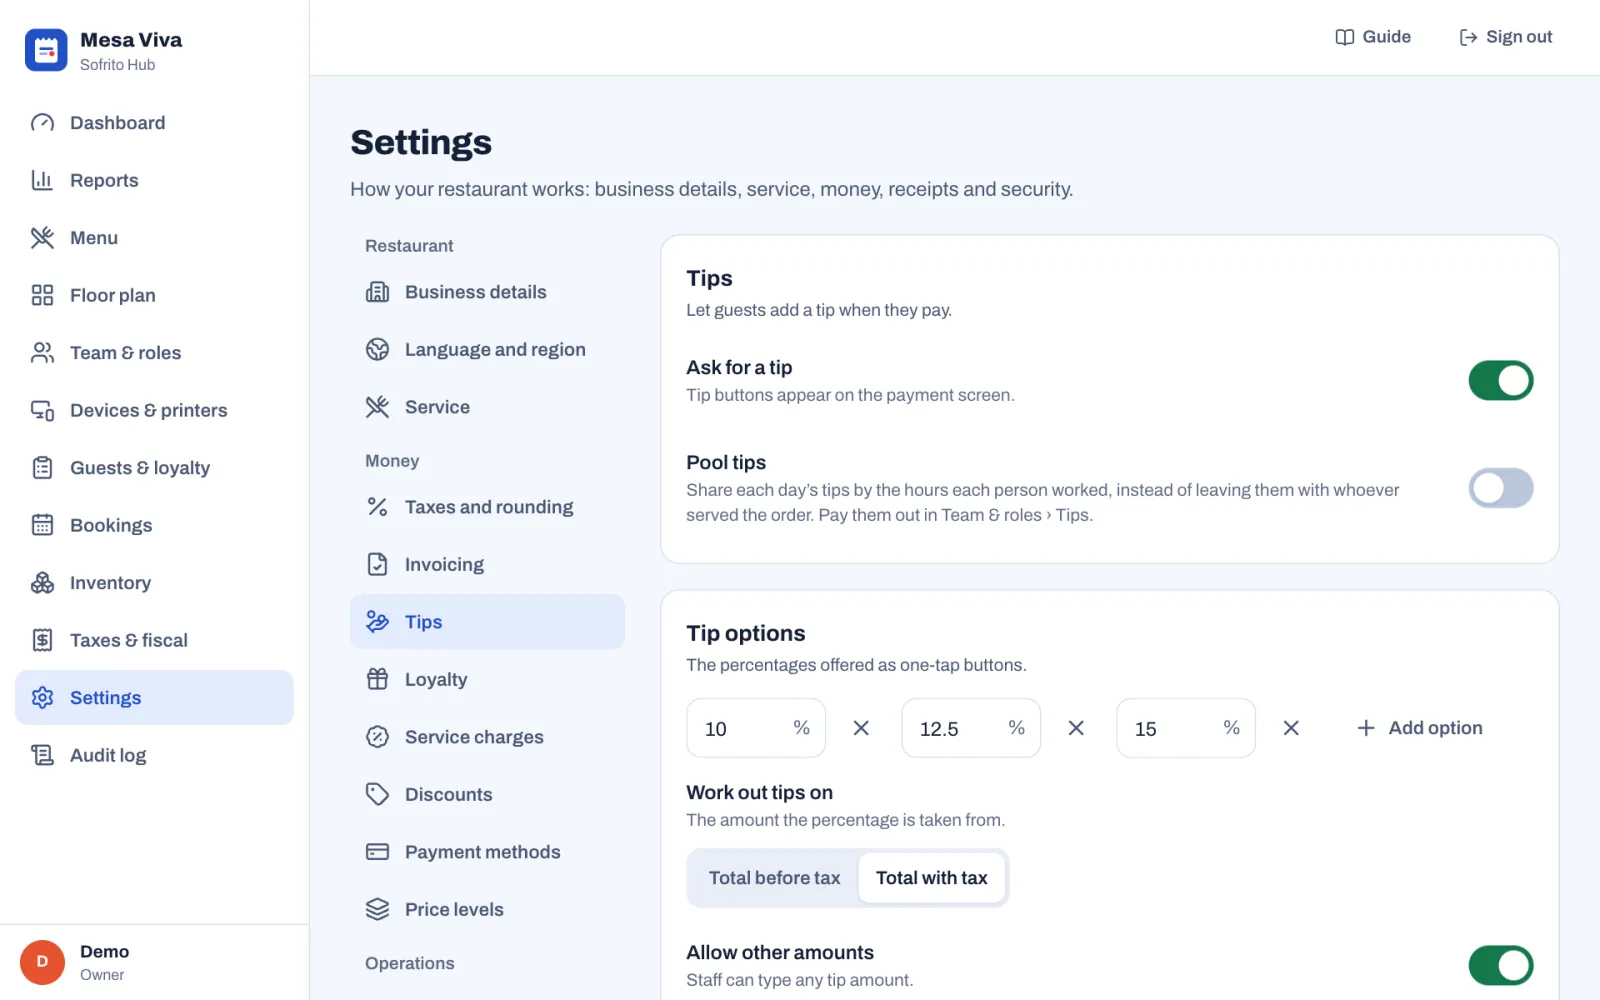
On the payment screen, staff then tap No tip, one of your percentages, or Custom to type an amount. Tips only appear for payment methods with Allow tips on.
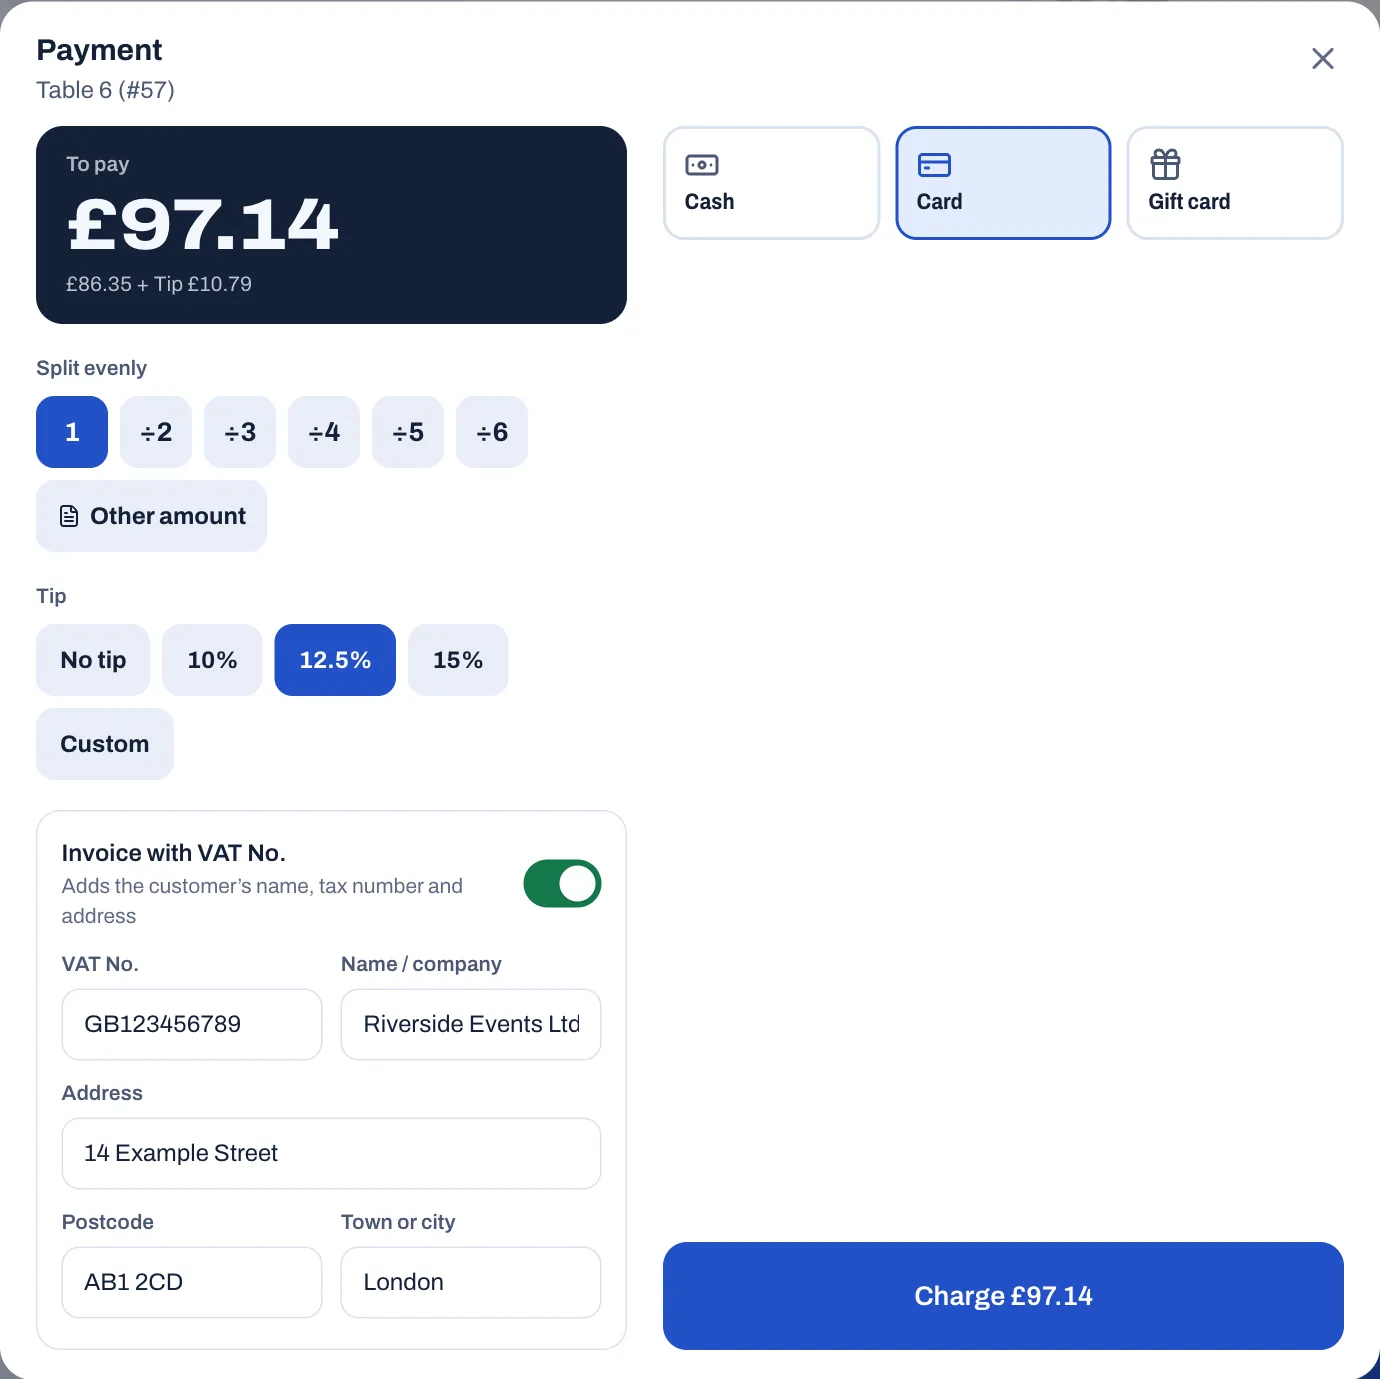
The tip is added to the payment and printed on the receipt. In reports, tips are shown apart from sales, because they belong to the team. In most countries, when tipping is on, a printed check also shows a Suggested gratuity for each tip option, so guests can see the amounts before they pay.
With Ask for a tip on, staff are also asked for their cash tips when they clock out. See Share and pay out tips.
#Share and pay out tips
Sofrito keeps track of who is owed which tips. They are the tips added to payments, plus any service charge marked Counts as a tip, on the orders each person served.
- With Pool tips off, each person is owed the tips on the orders they served.
- To share tips, turn on Pool tips in Settings › Tips and select Save changes. Each day's tips are then shared by the hours each person worked that day, from their clock-ins and clock-outs. On a day nobody clocked in, the tips stay with the servers. Pooling works even with Ask for a tip off, for example to share a service charge that counts as a tip.
- Cash that guests leave on the table, outside a payment, stays with the person who got it. When Ask for a tip is on, clocking out opens Cash tips for this shift: staff type the amount and tap Declare, for example Declare £12.00, or tap No cash tips. They can also declare it during the shift: on the till, under More, they tap Declare cash tips on the card with their name. Declared cash tips are listed, but they are not shared or paid out.
To see and pay what each person is owed, select Team & roles › Tips in the back office, then Pay out next to a person. See Pay out tips.
#Round cash payments
In countries where the smallest coins are no longer used, you can round cash totals.
- In the back office, select Settings › Taxes and rounding.
- Under Cash rounding, choose how to Round cash payments to, for example The nearest £0.05, or No rounding.
- Select Save changes.
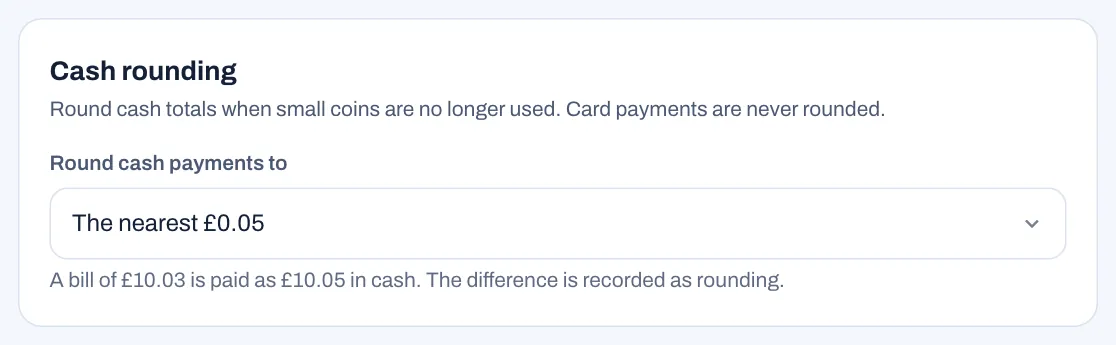
Rounding applies when a guest pays the whole amount left in cash. Card payments are never rounded. The payment screen shows the rounding next to the amount, the receipt prints it on its own line, and the difference is recorded as rounding.
#Add a service charge
A service charge is an extra charge on the bill, like 10% for large groups. A new restaurant starts with one, Service 10%, added by itself to orders of eight guests or more. Change it, turn it off or add others:
- In the back office, select Settings › Service charges.
- Select Add service charge, or select a charge to change it.
- Type a Name, such as "Service 12.5%". It is printed on the bill.
- Choose Percentage or Fixed amount, and type the Value.
- Under Tax, choose the tax category the charge is taxed with, or No tax.
- To add it without anyone tapping it, turn on Add automatically, then fill in For groups of at least (a number of guests), Only for (order types), or both. Leave the order types off to use it for every order type.
- Leave Available on the POS on.
- Select Add service charge or Save.
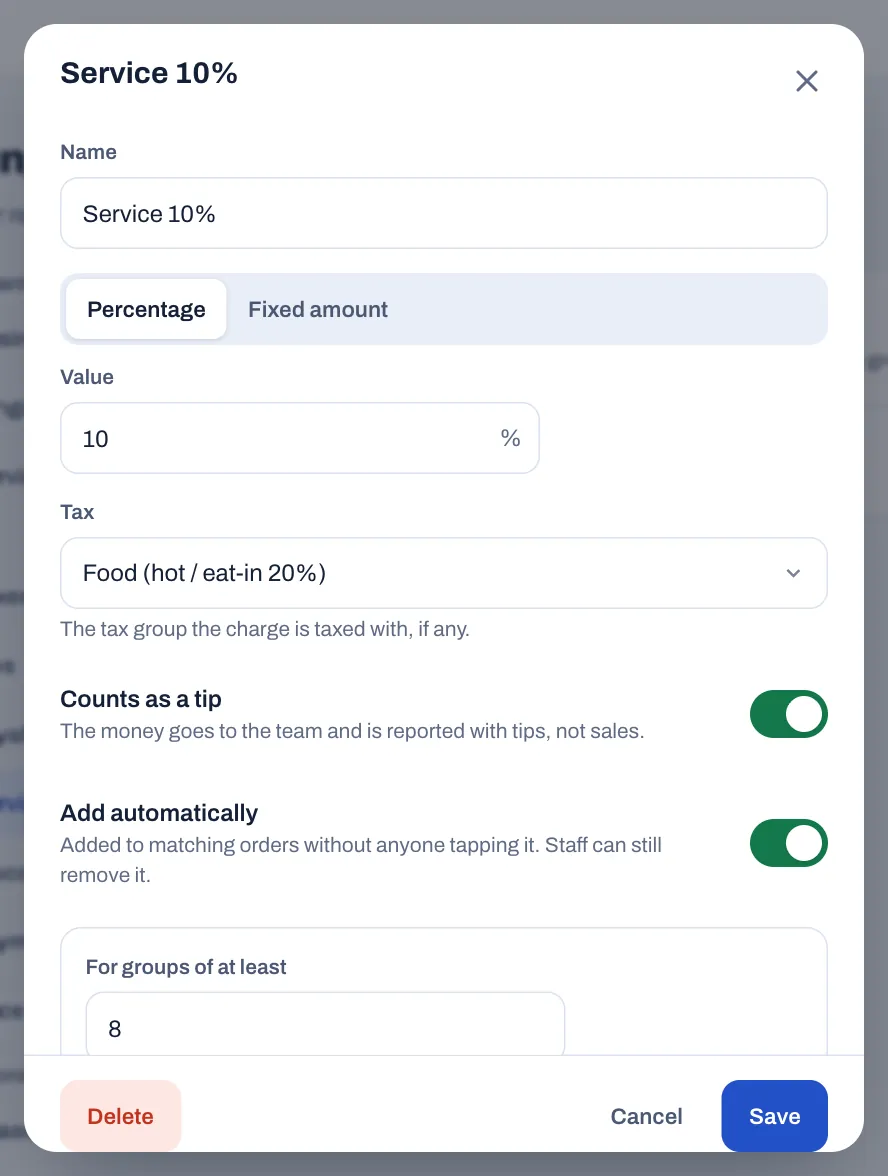
How service charges reach the bill:
- Automatically: Sofrito adds an automatic charge to every order that matches it, and takes it off again if the order stops matching, for example when the number of guests goes down.
- By area: an area of the floor plan can add a service charge to every order on its tables, for example on a terrace. See Draw your floor plan.
- By hand: on the till, staff tap More on the order, then Service charge, and choose one of your charges that is available on the POS. A charge already on the check shows On the check and can't be added twice. When no charge is available on the POS, the button doesn't show.
Staff take a charge off the bill with the cross next to it on the check. Taking off an automatic charge needs Apply discounts, or a manager's PIN. A charge taken off stays off that check, even if the order still matches its rule. Staff can add it back by hand.
To remove a service charge for good, select it in Settings › Service charges, then Delete and Tap again to delete. Floor areas that added it stop adding it. To stop using it for a while, turn off Available on the POS instead.
In reports, service charges have their own line, apart from net sales and from tips. A charge with Counts as a tip on is different: the money goes to the team, so reports count it once, with the tips, never in sales, and Team & roles › Tips shares it like a tip (see Share and pay out tips). In the list, it has a Tip badge.
#Put the customer's tax number on a receipt
Businesses often need a receipt with their name and tax number. Staff add them when the guest pays:
- On the payment screen, turn on Invoice with VAT No. ("Adds the customer's name, tax number and address"). The name of the tax number follows your country, for example Invoice with NIF in Portugal or Invoice with NUIT in Mozambique.
- Type the customer's tax number.
- Under Name / company, type the customer's name.
- If the customer wants their address on it, fill in Address, Postcode and Town or city.
- Choose the payment method and charge as usual.
The document prints the customer's name, tax number and address. In some countries this changes the kind of document Sofrito issues: in the United Kingdom, for example, the guest gets a VAT invoice instead of a receipt. In Portugal, Sofrito checks the NIF and says "That tax number is not valid." if it is wrong. Above €1,000 before VAT, the switch is on and can't be turned off, and the last payment can't be taken until the customer's name and address are filled in. See Taxes, receipts and legal documents.
#Before you go live
- Check every payment method in Settings › Payment methods: the names staff will see, which ones open the cash drawer, and which ones allow tips.
- Set every card and mobile method to Separate terminal: staff confirm the payment.
- Turn off the methods you don't take, so they don't appear on the payment screen. If you don't sell gift cards, turn off Gift card too.
- If regulars or companies will run a tab with you, add a House account method and open their accounts.
- Decide on tips, pooling and cash rounding, and save them.
- Check the Service 10% charge: change its value, its tax and group size, decide whether it counts as a tip, or turn it off.
- Take one test payment with each method and check the receipt.
Taxes, receipts and legal documents
Every sale in Sofrito ends in a legal document: a receipt, a simplified invoice or an invoice, depending on your country. Sofrito numbers each document without gaps, seals it so it can't be changed, works out the tax per rate, and keeps the day closes and tax files your tax office asks for. This chapter is for the owner, a manager or the accountant. You set it up once, before your first real sale, and check it from time to time in Back office › Taxes & fiscal.
Before you start
- Create your restaurant. The country you chose decides your currency, tax rates and legal documents. See Create your restaurant.
- To change taxes and Settings › Invoicing, your role needs Taxes and fiscal settings. Receipts and business details need Restaurant settings. Day closes need View reports, and tax files need Export data.
#Know what your country decides
When you create the restaurant, Sofrito sets it up for your country: the currency, the tax rates and categories, the name of the tax number (VAT No. in the United Kingdom, NIF in Portugal, NUIT in Mozambique), the documents it issues and how they are sealed. Sofrito has settings for 32 countries. The country and the currency can't be changed afterwards: Settings › Language and region shows them as fixed.
To see what Sofrito does for your country:
- In the back office, select Taxes & fiscal.
- Select Compliance.
The top of the page names your country, the way Sofrito seals documents there, and a badge:
- Built in: Sofrito applies the country's rules itself. Complete the checks before you go live.
- Partly built in: Sofrito numbers, chains and prints documents the way the law describes, but doesn't send records to the tax authority yet. This is Spain.
- Needs a certified add-on: Sofrito prepares every record the way the law expects, but going live needs a certified device, provider or certificate. The Country notes say which.
- Standard receipts: numbered receipts sealed in a tamper-evident chain. Check local rules with your accountant before you go live.
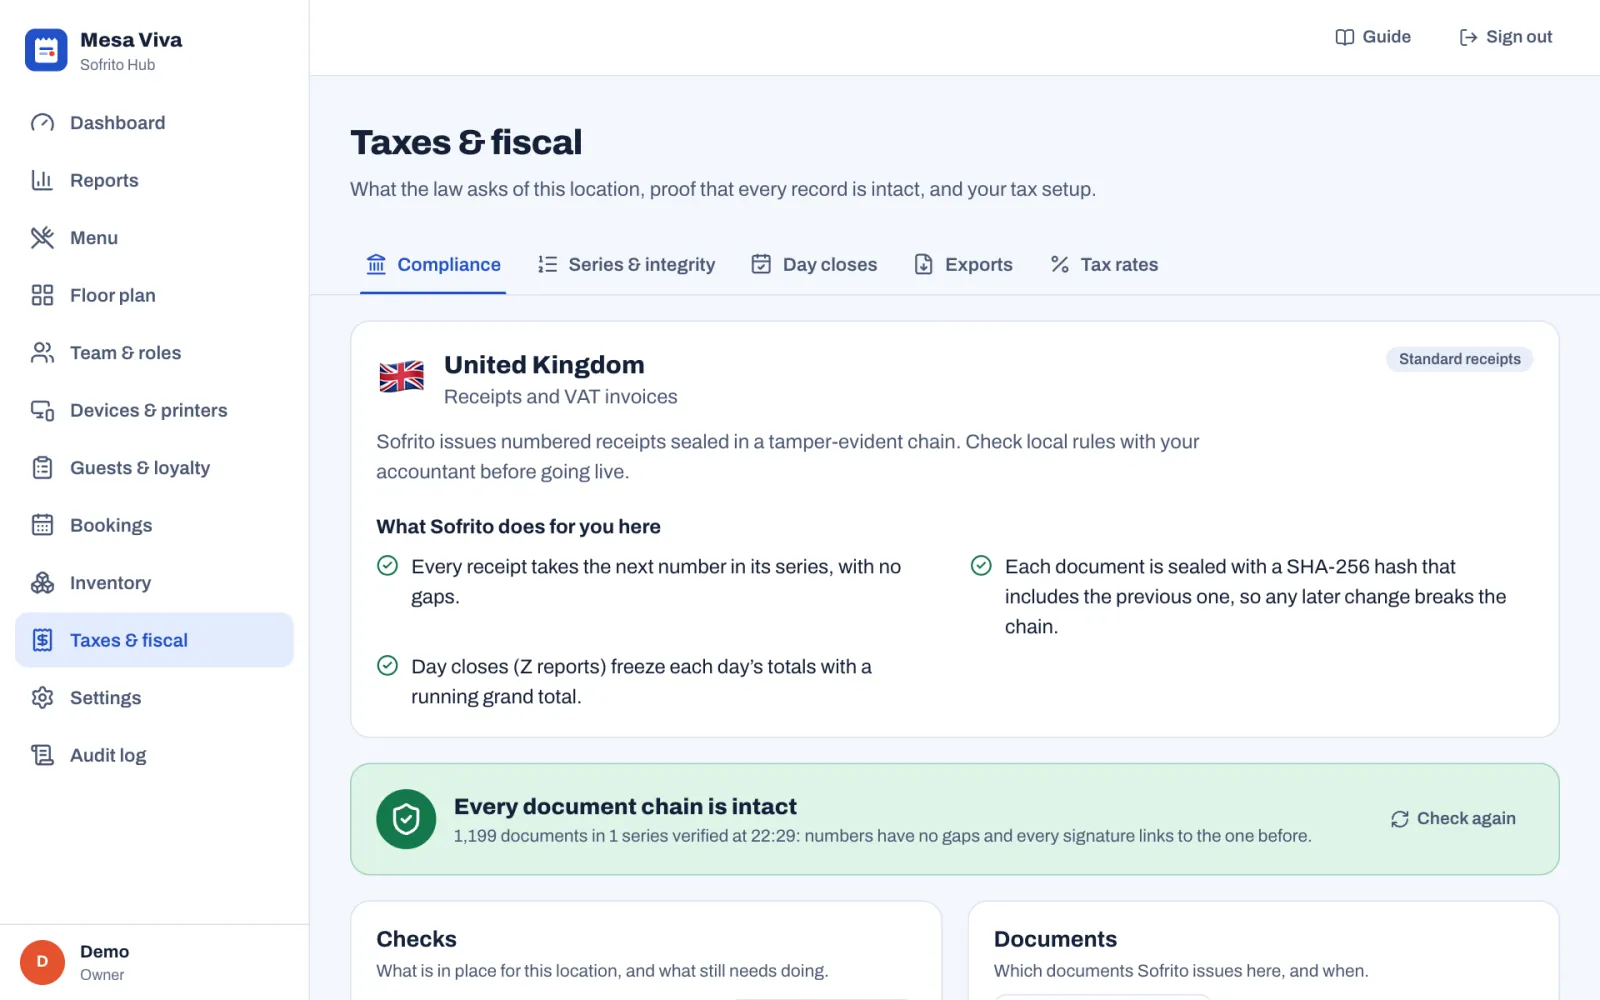
Under it, Checks lists what is in place and what still needs doing, with a button to fix it where there is one: Add in Settings for a missing tax number, Add codes for Portugal's validation codes, View for the last day close and Exports for your tax file. Documents lists which documents Sofrito issues and when, with Change in Settings to open Settings › Invoicing. Open Country notes at the bottom for the rules Sofrito follows in your country, in the language of your back office. For more about each country, see Country notes.
#Add your business details
Your legal name, tax number and address are printed at the top of every receipt and invoice.
- In the back office, select Settings › Business details.
- Check the Restaurant name. It is printed in large letters on receipts.
- Type your Legal name, the registered company name.
- Type your Tax number. Its label uses your country's name for it, for example Tax number (VAT No.).
- Type your Email and Phone.
- Under Address, type your address.
- Select Save changes.
Documents already issued keep the details they were issued with. If you have more than one location, each location can print its own details under This location: leave a field empty to use the business details.
#Choose whether your prices include tax
- In the back office, select Settings › Taxes and rounding.
- Under Prices and tax, choose:
- Prices include tax: guests pay the price on the menu and tax is worked out from it. Usual in Europe and Africa.
- Tax is added at payment: menu prices are before tax and tax is added to the bill. Usual in the United States and Canada.
- Under Round tax, leave Once per receipt unless your tax office asks for On every line. Most tax offices expect tax to be rounded once per rate on each receipt.
- Select Save changes.
#Set up your tax rates
Your country's rates are already there. Check them with your accountant, and change them when the law changes.
- Select Taxes & fiscal › Tax rates.
- Under Tax rates, select Add rate, or Edit next to a rate.
- Type the Name, for example "VAT 20%", and the Rate in per cent.
- Type a short Code. It is printed on documents and used in tax files. In Portugal the codes are NOR (normal), INT (intermediate), RED (reduced) and ISE (exempt).
- Choose the Kind: VAT, Sales tax, Levy, Service tax or Other.
- Optional: type a Region when the rate applies to one region only.
- For a 0% rate, Sofrito asks for an Exemption: type the exemption Code and the Legal reason. Both are printed on the document.
- Select Save.
Changes apply to new orders. Documents already issued keep the tax they were issued with. A rate used by a tax category can't be deleted.
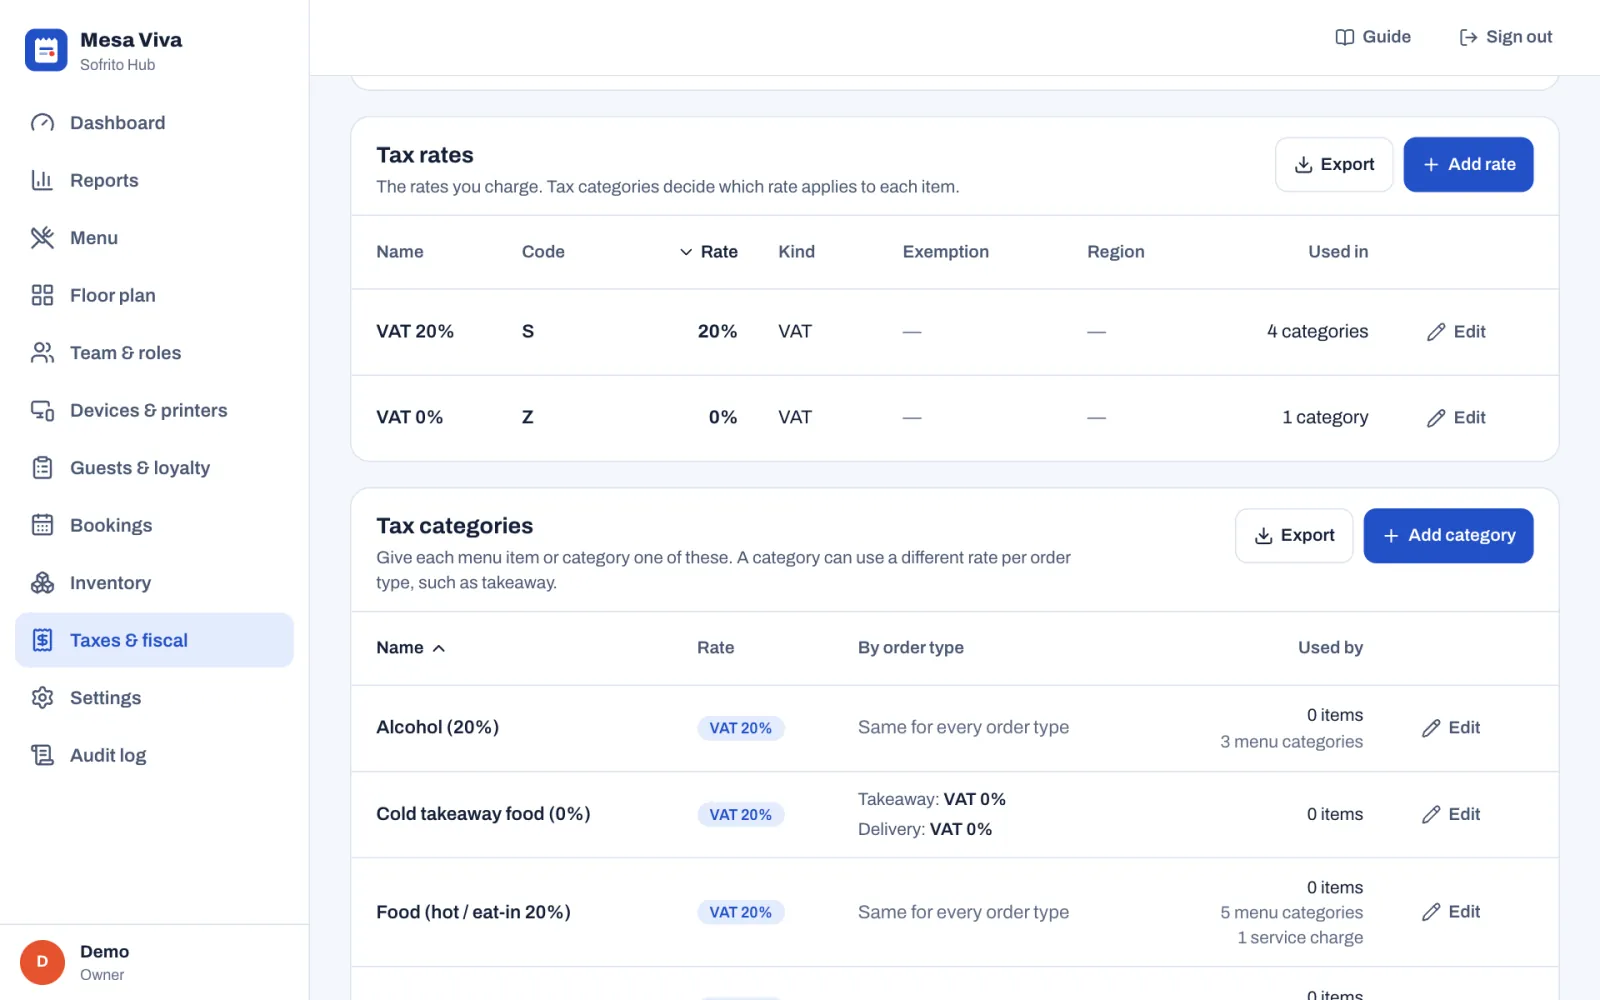
#Group rates in tax categories
Dishes don't get a rate directly. Each dish, or its menu category, gets a tax category, and the tax category decides the rate. This is how one dish can be taxed differently when it is eaten in or taken away.
- Select Taxes & fiscal › Tax rates.
- Under Tax categories, select Add category, or Edit next to a category.
- Type the Name, for example "Food".
- Under Rate, pick the rate that applies. Pick more than one to combine rates, or none if these items are not taxed.
- If the rate changes with the kind of order, turn on that order type under Different rate by order type, for example Takeaway, and pick its own rate.
- Select Save.
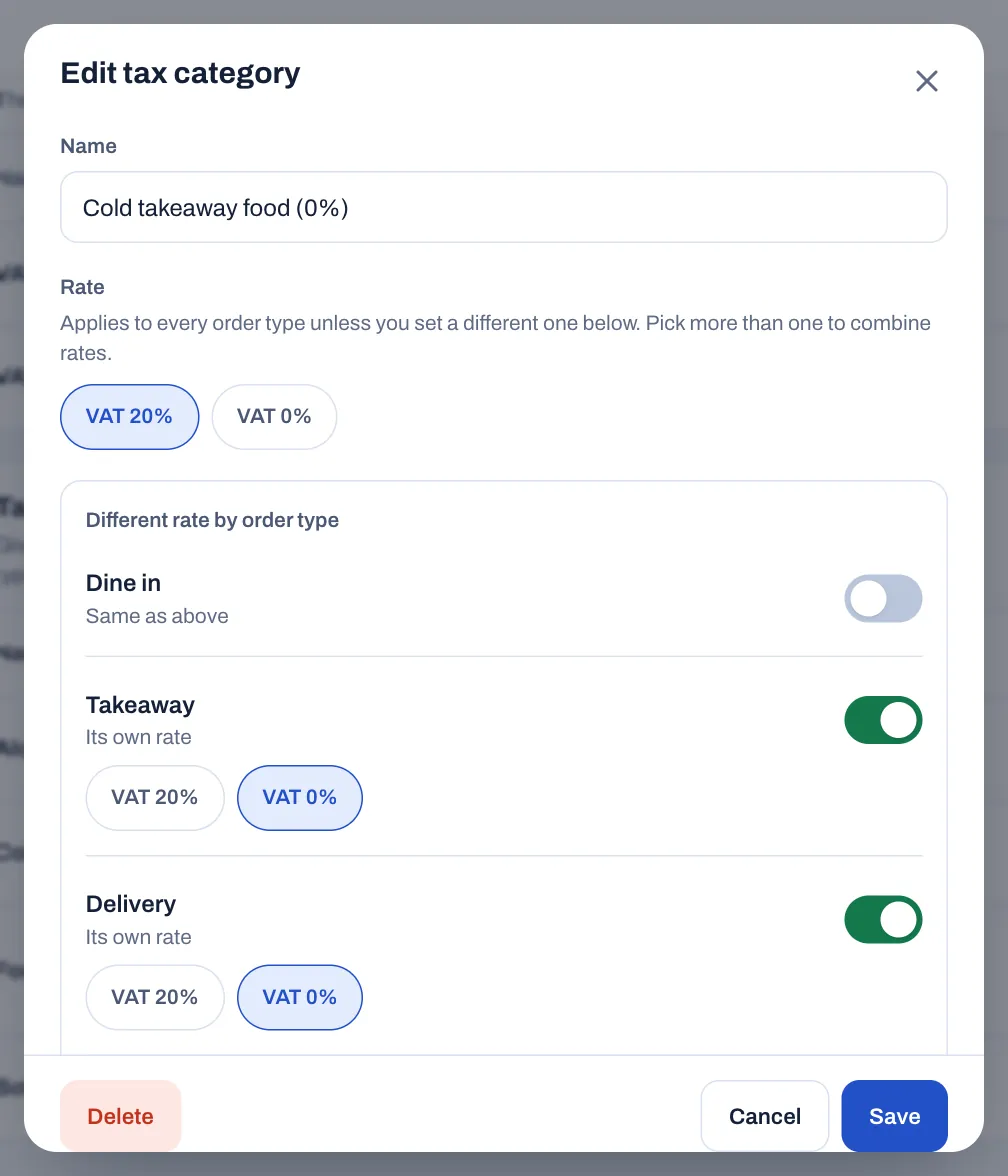
Then give each dish or menu category its tax category in the menu (see Build your menu). There, each tax category shows its rates, for example "Cold takeaway food (20%, Takeaway 0%, Delivery 0%)". Service charges get a tax category too (see Payment methods, tips and service charge). The Used by column shows how many items, menu categories and service charges use each tax category. A category in use can't be deleted.
#Understand the documents Sofrito issues
Every paid order gets a legal document straight away. Which one depends on your country, and Taxes & fiscal › Compliance › Documents shows yours:
- Sale: the document for a normal sale, for example RC (Receipt) in the United Kingdom or FS (Fatura simplificada) in Portugal.
- Invoice on request: the document for a customer who asks for one. In some countries Sofrito issues it by itself when the customer's tax number is given or the bill is above a limit.
- Credit note: the document that corrects an earlier one, after a refund or when a paid order is reopened. In Spain there are two: one for simplified invoices and one for full invoices.
- Table check: in Portugal, the check printed for a table is a legal document too, a Consulta de mesa.
A document is never changed or deleted. If something was wrong, Sofrito issues a credit note that points to the original. How staff put a customer's name, tax number and address on a document is in Put the customer's tax number on a receipt. Refunds and reopened orders are in Voids, discounts, refunds and approvals.
#Choose your documents and invoicing details
Settings › Invoicing holds the document settings for your country. It only shows what applies where you are.
- In the back office, select Settings.
- Under Money, select Invoicing.
- Under Documents, choose the Sale document, issued for a paid bill. Where your country has an invoice on request, choose it under Invoice on request: its hint says when Sofrito issues it. The Credit note and the Table check are fixed by Sofrito, as your country's rules ask.
- Under Tax authority, fill in what your tax authority gave you. Only some countries have this part: see below.
- Under Printed on every document, type any extra lines your accountant asks for, one per line. They print after the mentions the law requires, which Sofrito adds itself.
- Select Save changes.
Without Taxes and fiscal settings, your role can see this page but not change it.
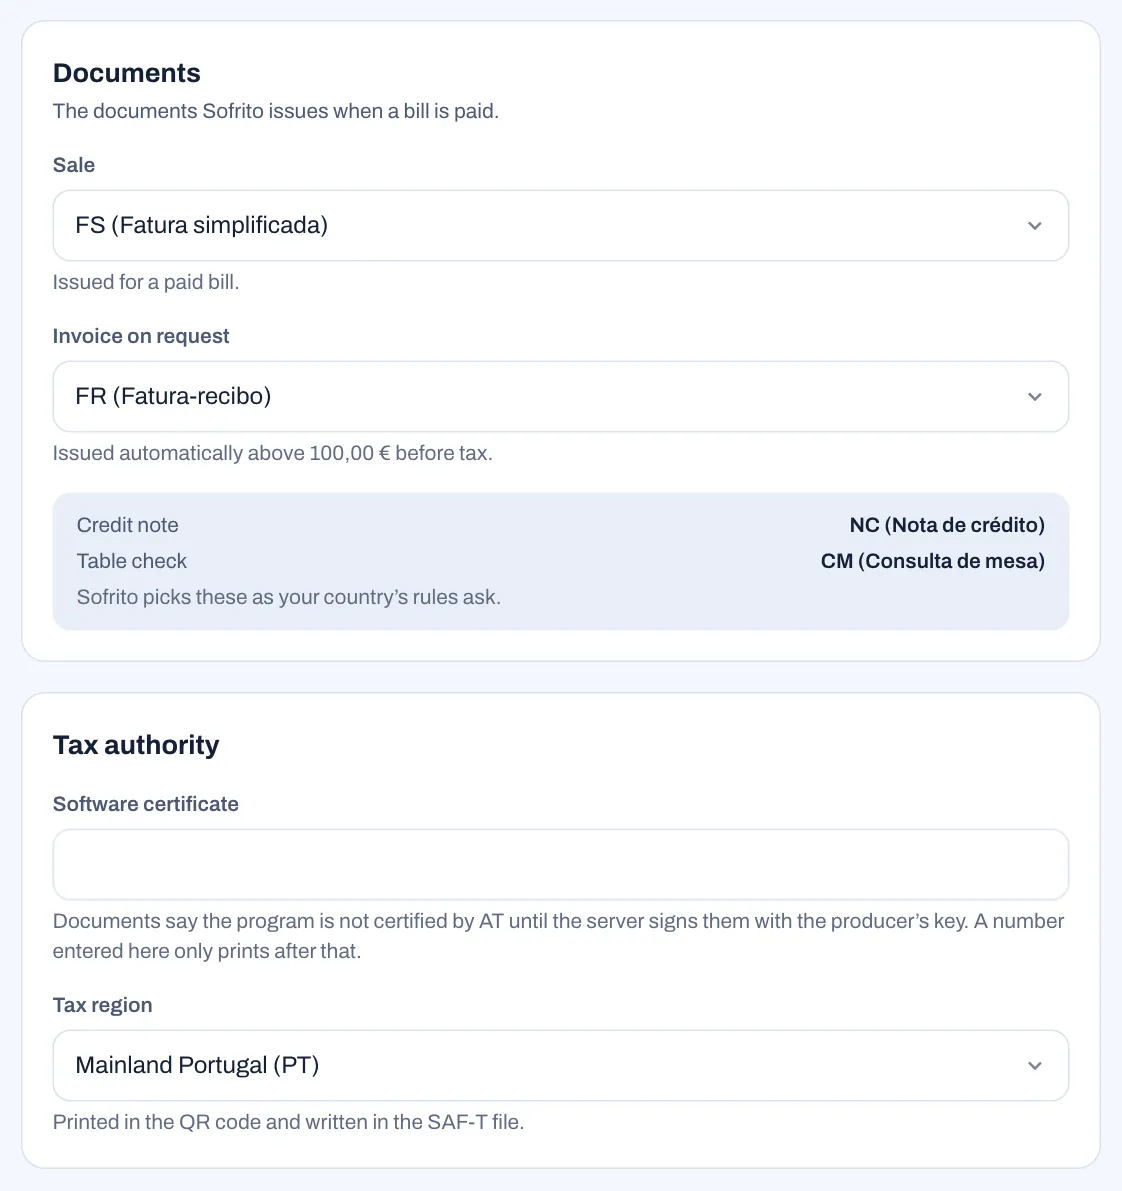
What Tax authority asks for:
- DAF authorisation (Mozambique): the reference of the authorisation your Direcção de Área Fiscal gave for computer-processed invoices. It is printed on every document.
- Software certificate (Portugal and Angola): the certificate number of the software. The server signs your documents, and a number typed here only prints once the server signs them with the producer's key. When the number is set on the server, it shows here and can't be changed.
- Tax region (Portugal): Mainland Portugal (PT), Madeira (PT-MA) or Azores (PT-AC). It is printed in the QR code and written in the SAF-T file. Changing it doesn't change your rates: also change them in Taxes & fiscal › Tax rates, because Madeira and the Azores have their own.
#Practise with training documents
Before you open, staff can practise with real orders and payments without issuing real documents.
- In Settings › Invoicing, under Training mode, turn on Issue training documents.
- Select Save changes. Every terminal now issues training documents: they go to a separate training series and say they are not valid for tax purposes.
- When you have finished, turn it off and save. Terminals issue real documents again.
While training mode is on, the Compliance tab says Training mode is on, with Turn off in Settings. Turn it off before real service.
#Check that every document is intact
Each document type has its own numbered series each year, such as RC A2026. Sofrito creates a series with the first document of its type, unless you create it in advance (in Portugal, see Meet the rules in Portugal). Each document carries a seal made from its own content and the seal of the document before it. If a document were changed or removed later, the chain would break.
- Select Taxes & fiscal › Series & integrity.
- Read the banner at the top. "Every document chain is intact" means the numbers have no gaps and every seal links to the one before.
- Select Check again to check now.
The Document series list shows each series with its Year, its Terminal, how many documents it has Issued, whether its Chain is Intact, and its Last hash, the seal of its latest document. Training documents have their own series, marked Training. In Spain, every record of the installation also forms one chain, shown under Installation chain.
#See your day closes
A day close, or Z report, freezes the day's totals. Each close is numbered, carries a grand total since the first close, and is sealed with the close before it. You close the day on the till: see Close the day.
- Select Taxes & fiscal › Day closes.
The top shows the Last close, the Grand total since the first close, and Seals: your browser recomputes each seal, and All verified means none has been changed. The list shows each close with its business day, when and by whom it was closed, the number of orders, the day total and the grand total. Select a close to see its full report. Its payments are listed under Payments, tips included, and any gift cards sold or house accounts paid under Gift cards and house accounts, as on the printed Z report. Export downloads the list.
#Download your tax files
- Select Taxes & fiscal › Exports.
- Under Period, choose a month. The month that just ended is chosen for you. Choose Custom dates for any other period.
- Download what you need:
- Fiscal documents (Download CSV): every document issued in the period, with its number, type, date, customer and tax number, totals, status and hash. One file holds up to 2,000 documents: pick a shorter period for more.
- SAF-T (Download XML), in Portugal, Angola and Mozambique: the tax file for your tax authority. Check it with the tax authority's validator before you submit it.
The SAF-T file needs your tax number. Without it, Sofrito says "Add the restaurant's tax number in Settings → Business details before exporting the SAF-T file." Your accountant can use the CSV file whatever your country. For your sales figures, see Dashboard and reports.
#Know what a receipt shows
A receipt from Sofrito shows, from top to bottom:
- your logo, the restaurant name, your legal name, address, tax number with your country's name for it (for example VAT No.) and phone, then your header lines;
- the document type and number, for example Receipt RC A2026/1185, with Original on the first one when more than one copy prints, and Copy on the others and on reprints;
- the date and time, the table or the kind of order, the number of guests, the order number and the server;
- each item with its quantity, its extras and any discount; on a full invoice, each line also shows the quantity, the unit price before tax and the rate, for example "2 x 10.00 excl. tax · Tax 20%";
- service charges and order discounts by name, then the total;
- a tax summary with the base, the tax and the total for each rate, and the legal reason for any exempt rate;
- each payment, with the cash given, the tip, the card or transaction reference, any cash rounding and the change;
- the customer's name, tax number and address, when given;
- the QR code and the legal lines your country requires, such as a short code taken from the document's seal;
- your extra lines from Settings › Invoicing, then your footer lines.
Order number, table, server, tax summary and prices of extras follow your choices in Settings › Receipts.
#Choose what your receipts show
- In the back office, select Settings › Receipts.
- Under Header, type the lines to print under your business details, for example your opening hours. Each line prints as its own line.
- Under Footer, type the lines to print at the bottom, for example "Thank you!". Credit notes leave the footer out. A new restaurant starts with a thank-you line in its own language.
- Under Print after payment, choose Always, Ask or Never (see below).
- Under Copies, choose how many receipts print each time: 1, 2 or 3.
- Under Receipt language, choose the language of the printed labels, such as Total and VAT: English, Português, Español, Français, Deutsch, Italiano or Nederlands, or keep the restaurant's language.
- Under What the receipt shows, turn on or off: Logo, QR code, Tax summary, Order number, Table, Server and Prices of extras.
- Select Save changes.
What Print after payment does:
- Always: the receipt prints by itself when an order is paid.
- Ask: the till asks "Print a receipt?", with No receipt and Print.
- Never: the till only shows Done. Staff can print it later from the order, with Reprint receipt. The first time it prints, it is still the original.
With more than one copy, the first is marked Original and the others Copy. If the receipt printer has its own Copies setting (see Choose the printing options), the higher of the two counts: they don't multiply. A reprint is always one copy.
The document title, such as Receipt or Invoice, follows the receipt language too, except in countries where Sofrito prints the titles the law uses, such as Portugal, Spain, France, Germany, the United Kingdom and Mozambique.
The Preview on the right shows where your lines go. Anything the law requires is always printed, whatever you switch off. QR code adds a code guests can scan to check the document. Where the law requires a QR code, in Portugal, Spain and Saudi Arabia, the switch stays on and says "Required here: every document carries the fiscal QR code."
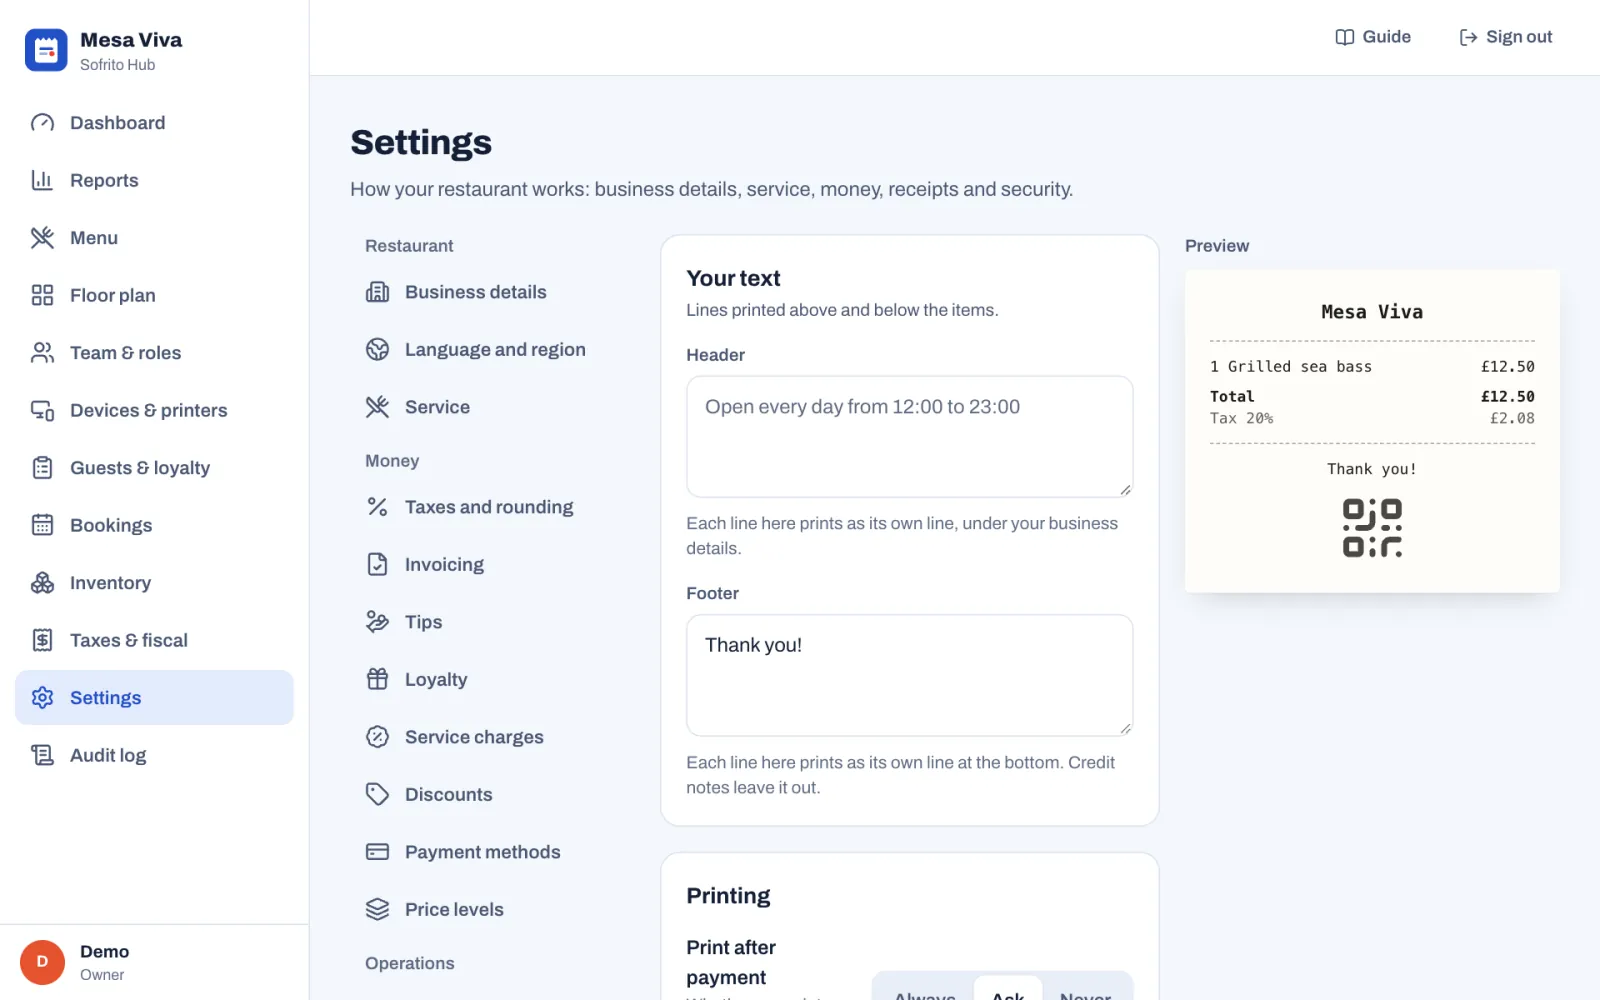
#Add your logo
- In the back office, select Settings › Business details.
- Under Logo, select Upload logo.
- Choose a PNG, SVG, JPG or WebP image. A transparent background looks best, and Sofrito makes large images smaller for you.
The logo is saved as soon as you choose it. Sofrito also makes a black-and-white copy for thermal printers. It prints at the top of receipts and shows on the screens guests see. Star CloudPRNT printers print receipts without it. To leave it off receipts, turn off Logo in Settings › Receipts.
#Meet the rules in Portugal
Certification. The country note says going live in Portugal needs Sofrito's AT certificate. Its number and the producer's key that signs documents are set up on the server. Until they are, every document ends with the line "Programa não certificado pela AT. Documento sem validade fiscal.", and the Checks on the Compliance tab show No software certificate number yet. Once the server signs documents, the check shows the certificate number, and so does Settings › Invoicing › Software certificate.
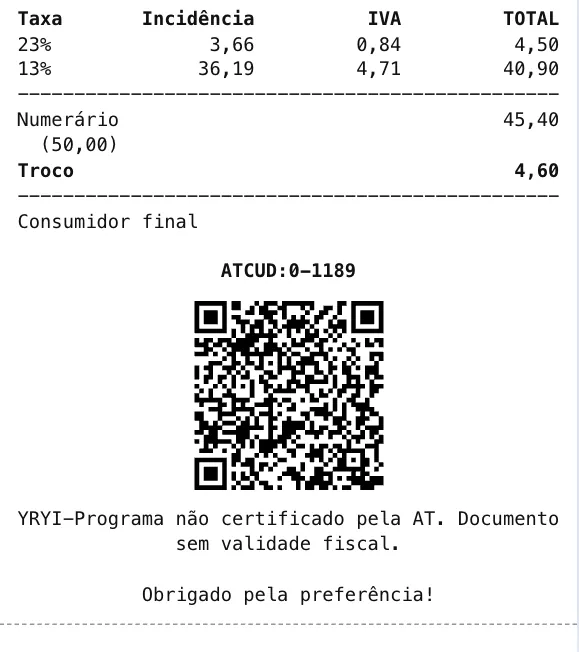
Series and ATCUD. The country note says every series must be communicated to the AT before its first document, to get its validation code. Sofrito prints that code in the ATCUD of every document in the series. Without it, the ATCUD prints as 0 and the document number, as on the receipt above. Create the series in advance and add their codes before you open:
- Select Taxes & fiscal › Series & integrity.
- Under AT validation codes, choose the year: this year or next year.
- Select Create and the number of series, for example Create 4 series. Sofrito creates every series that year needs: one for each document type your restaurant issues, on every till and handheld. Until then, they show Not created yet.
- Communicate each series to the AT in the Portal das Finanças (e-Fatura, Séries), with the document type, the series and the first number, 1.
- Next to each series, select Add code, and type the Validation code exactly as the AT shows it: 4 to 20 letters and numbers.
- Check the line under The next document in this series will print, then select Save.
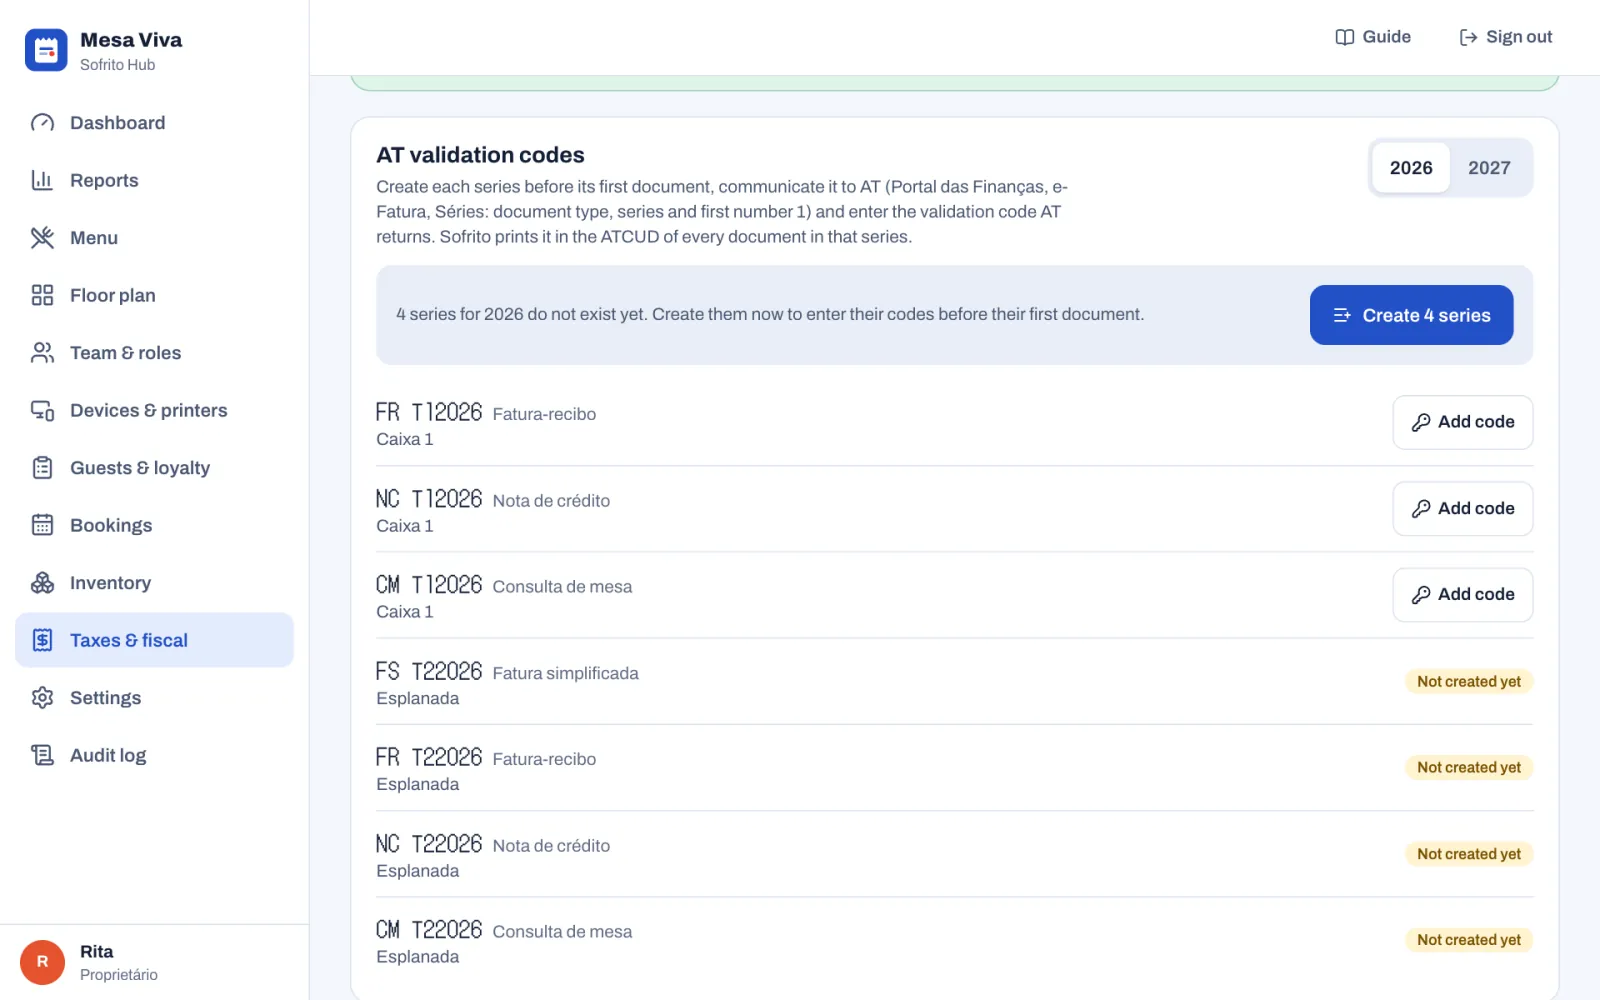
When every series has its code, the panel says so. Once documents are issued with a code, the code can no longer be changed. When you pair another till or handheld, its series show as Not created yet: create them and add their codes before it takes its first payment. A series that a document creates by itself starts without a code, and its first documents keep the ATCUD they were printed with.
The till warns staff before they charge. When series of their terminal have no code yet, the payment screen says "No AT validation code for this terminal's … series", naming the document types, and "A manager adds the codes in Back office → Taxes & fiscal → Series & integrity." The Compliance tab counts the series without a code, with Add codes. In December it checks next year's series too, so you can add their codes before 1 January.
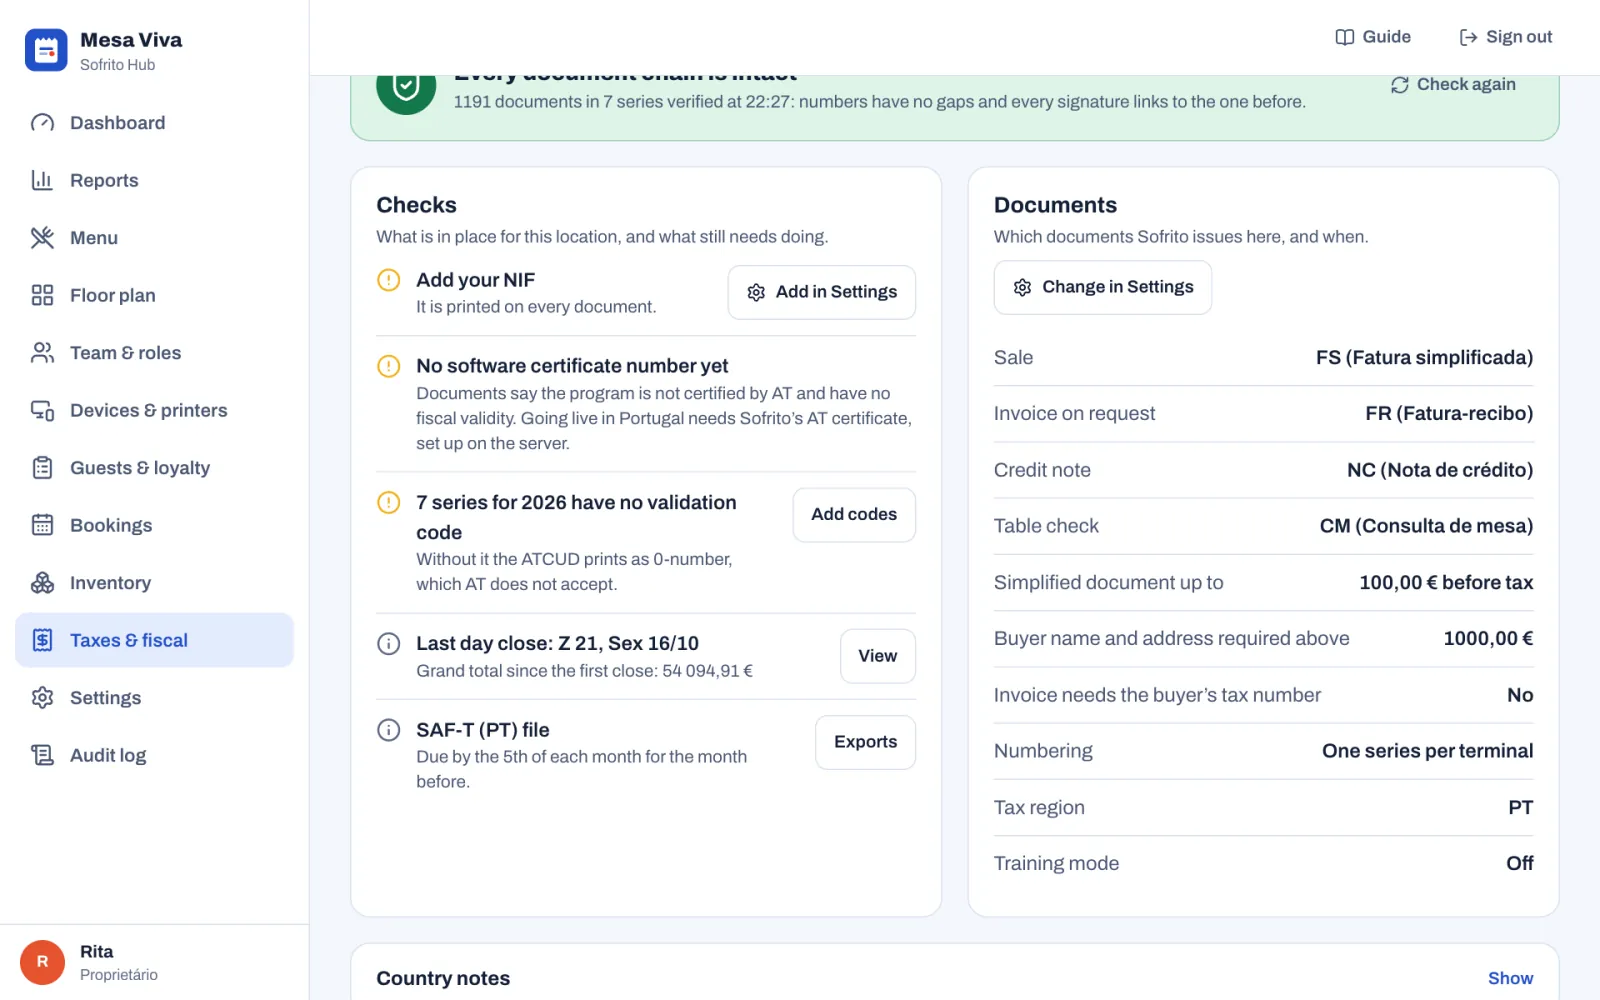
Madeira and the Azores. Set Settings › Invoicing › Tax region to Madeira (PT-MA) or Azores (PT-AC), and change your rates in Taxes & fiscal › Tax rates.
SAF-T (PT). The country note says the monthly invoicing file is due by day 5 of the following month. Download it from Taxes & fiscal › Exports.
#Meet the rules in Angola and Mozambique
#Before you go live
- In Settings › Business details, check the legal name, tax number and address. They print on every document.
- Decide whether your prices include tax, before your first sale.
- Check every tax rate and tax category with your accountant, and give every dish a tax category.
- Check Settings › Invoicing with your accountant.
- Write your receipt header and footer, choose the receipt language, the copies and when receipts print, and upload your logo.
- Print a receipt from a test sale and show it to your accountant.
- If you practised with training documents, turn Issue training documents off.
- On Taxes & fiscal › Compliance, work through every warning under Checks, and read the Country notes.
- In Portugal: pair all your tills and handhelds, create this year's series, add the AT validation code of each one, check your tax region, and plan the monthly SAF-T (PT) file.
- In Mozambique: type your DAF authorisation in Settings › Invoicing, and plan the monthly SAF-T (MOZ) file.
- Close every business day with a Z report (see Close the day).
Open for service
This chapter covers the first minutes of a shift: unlocking the till with your PIN, locking it again, clocking in and out, opening the cash drawer with a float, and a short check that everything works before the doors open. Everyone on a shift unlocks and clocks in. The person who opens the restaurant, usually a manager, also opens the drawer and runs the checklist.
Before you start
- The till, handhelds and screens are paired, and the printers are added: see Devices, printers and stations.
- Everyone has a PIN and a role: see Your team, roles and PINs.
- The menu and the floor plan are ready: see Build your menu and Draw your floor plan.
#Unlock the till with your PIN
When nobody is signed in, the till shows the lock screen. On the left are the restaurant name, the name of this device, the time and the date. On wide screens, Who’s working? lists the team, with a green dot next to everyone who is clocked in. On the right is the PIN pad.
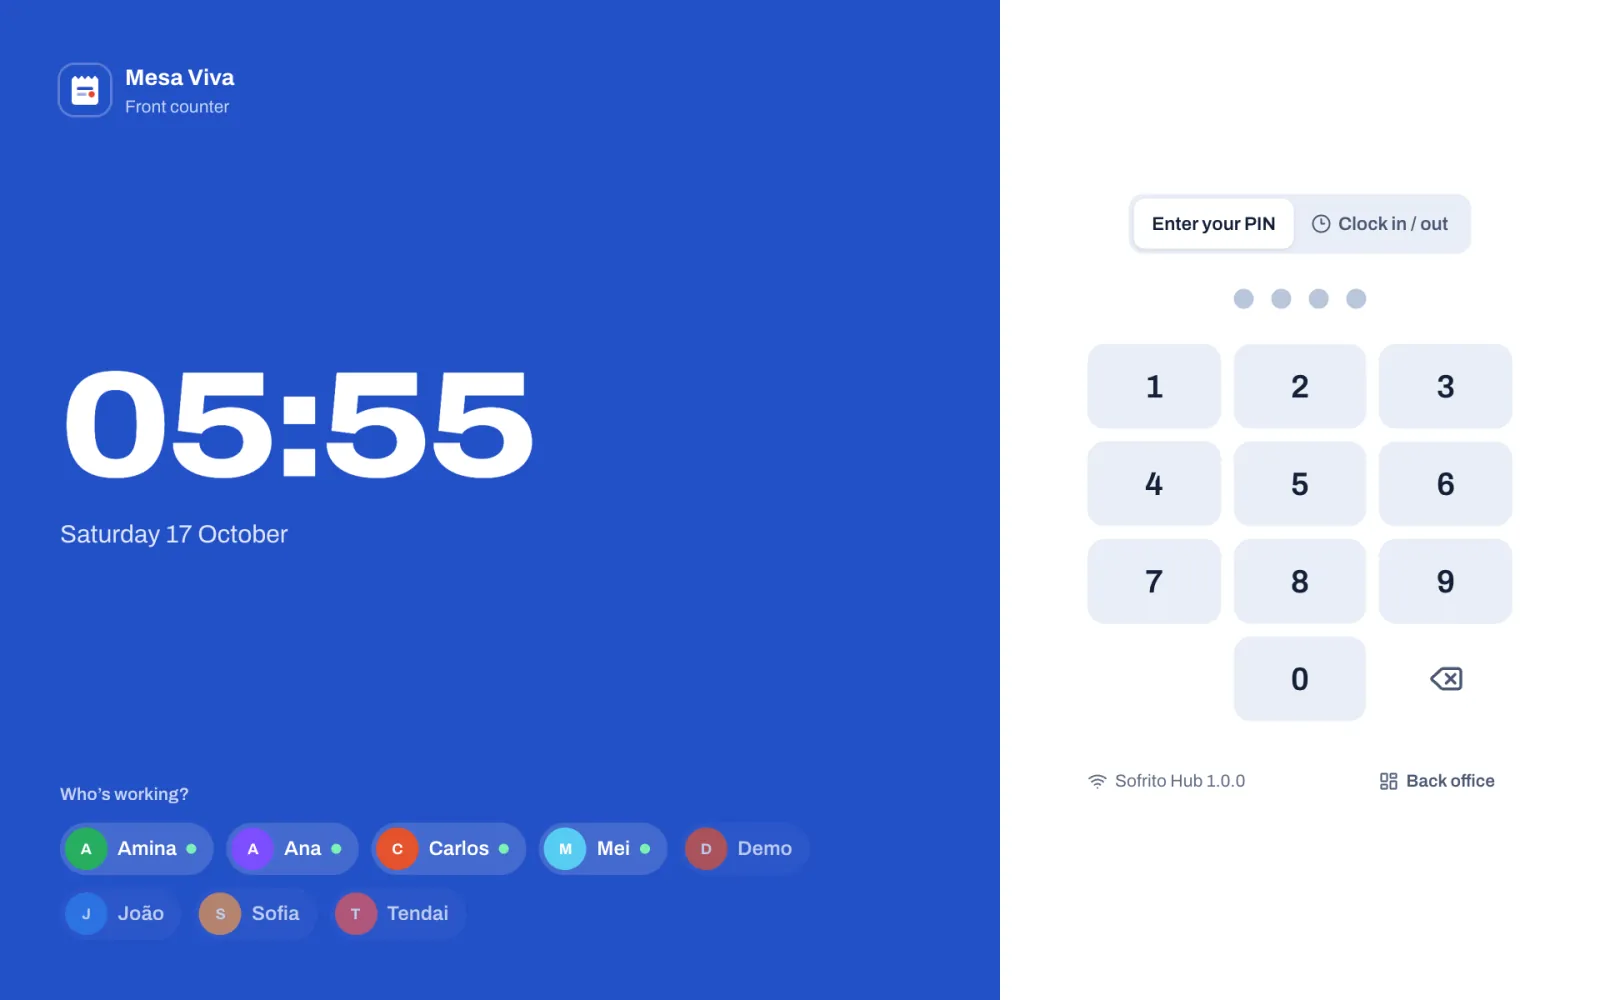
- Check that Enter your PIN is selected above the PIN pad.
- Type your PIN.
The till opens as soon as you type the last digit. In a restaurant with tables it opens on Floor; in a counter restaurant, on a new order.
The till you used to set up the restaurant, or to open the demo, opens signed in as the owner the first time. Once it locks, it asks for a PIN like every other till.
If the PIN is wrong, the dots turn red, shake and clear. Type it again. After five wrong PINs in a row, the device stops taking PINs for a short time and shows "Too many wrong PINs. Try again in a moment." A PIN only opens a till if its role works on tills: a Kitchen PIN shows "Kitchen can’t sign in on this device." If you have forgotten your PIN, a manager gives you a new one: see Your team, roles and PINs.
Under the PIN pad, the till shows how it is connected: Sofrito Hub with its version, Sofrito Cloud, or "Offline — reconnecting…" in red. Back office opens the back office for someone with back-office access: they type their PIN, or tap Use email and password instead. It locks again after 5 minutes without a touch. See Let someone use the back office.
#Lock the till when you step away
- On a till or a tablet, tap your picture with Lock at the bottom of the left-hand bar.
- On a phone, tap your picture with the padlock at the top right.
The next person unlocks with their own PIN. Items you have tapped but not sent are still on the check when you come back to that device.
The till also locks itself after 90 seconds without a touch. A manager can change this in Back office › Settings › Security under Lock when nobody uses it, and can turn on Lock after each payment for shared tills at a bar or counter.
#Clock in and out
Clocking in records when your shift starts, for the timesheets and the labour cost. It is separate from unlocking: the till also opens for someone who has not clocked in, so make clocking in a habit.
- On the lock screen, tap Clock in / out.
- Type your PIN.
The till shows, for example, "João clocked in". Your name moves up the Who’s working? list with a green dot, and the PIN pad goes back to Enter your PIN. Type your PIN again to start working. If you signed in first, tap More, then Clock in.
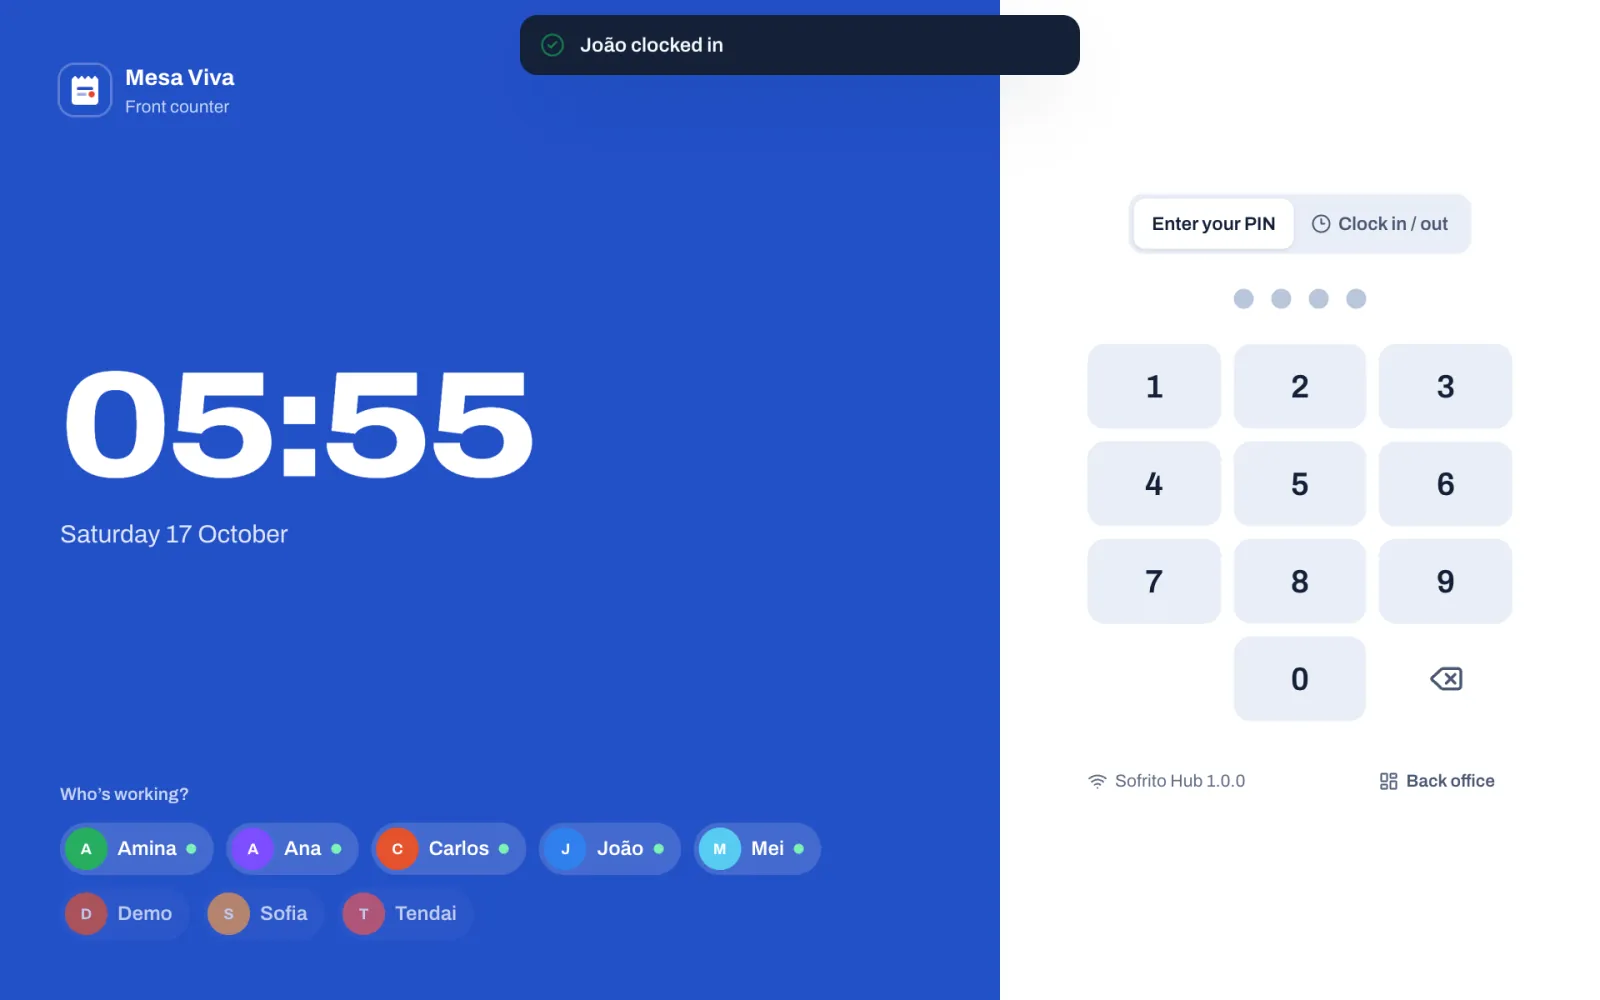
At the end of your shift, do the same again: tap Clock in / out and type your PIN, or tap More, then Clock out. The till shows "João clocked out". If you are on a break, clocking out ends it.
When the restaurant asks guests for tips, the till then asks for your Cash tips for this shift. Type the tips guests left you in cash and tap Declare with the amount, or tap No cash tips. Tips added to card payments are counted already. Managers pay out tips from Back office › Team & roles › Tips: see Pay out tips.
#Take a break
- On the till, tap More.
- The first card shows your name and On shift since with the time you clocked in. Tap Unpaid break or Paid break, as your manager tells you.
- When you come back, tap End break.
Unpaid breaks are taken off the hours worked; paid breaks count as hours worked. The same card has Declare cash tips, to record cash tips before you clock out, and Clock out. If you are not clocked in, the card shows Clock in instead.
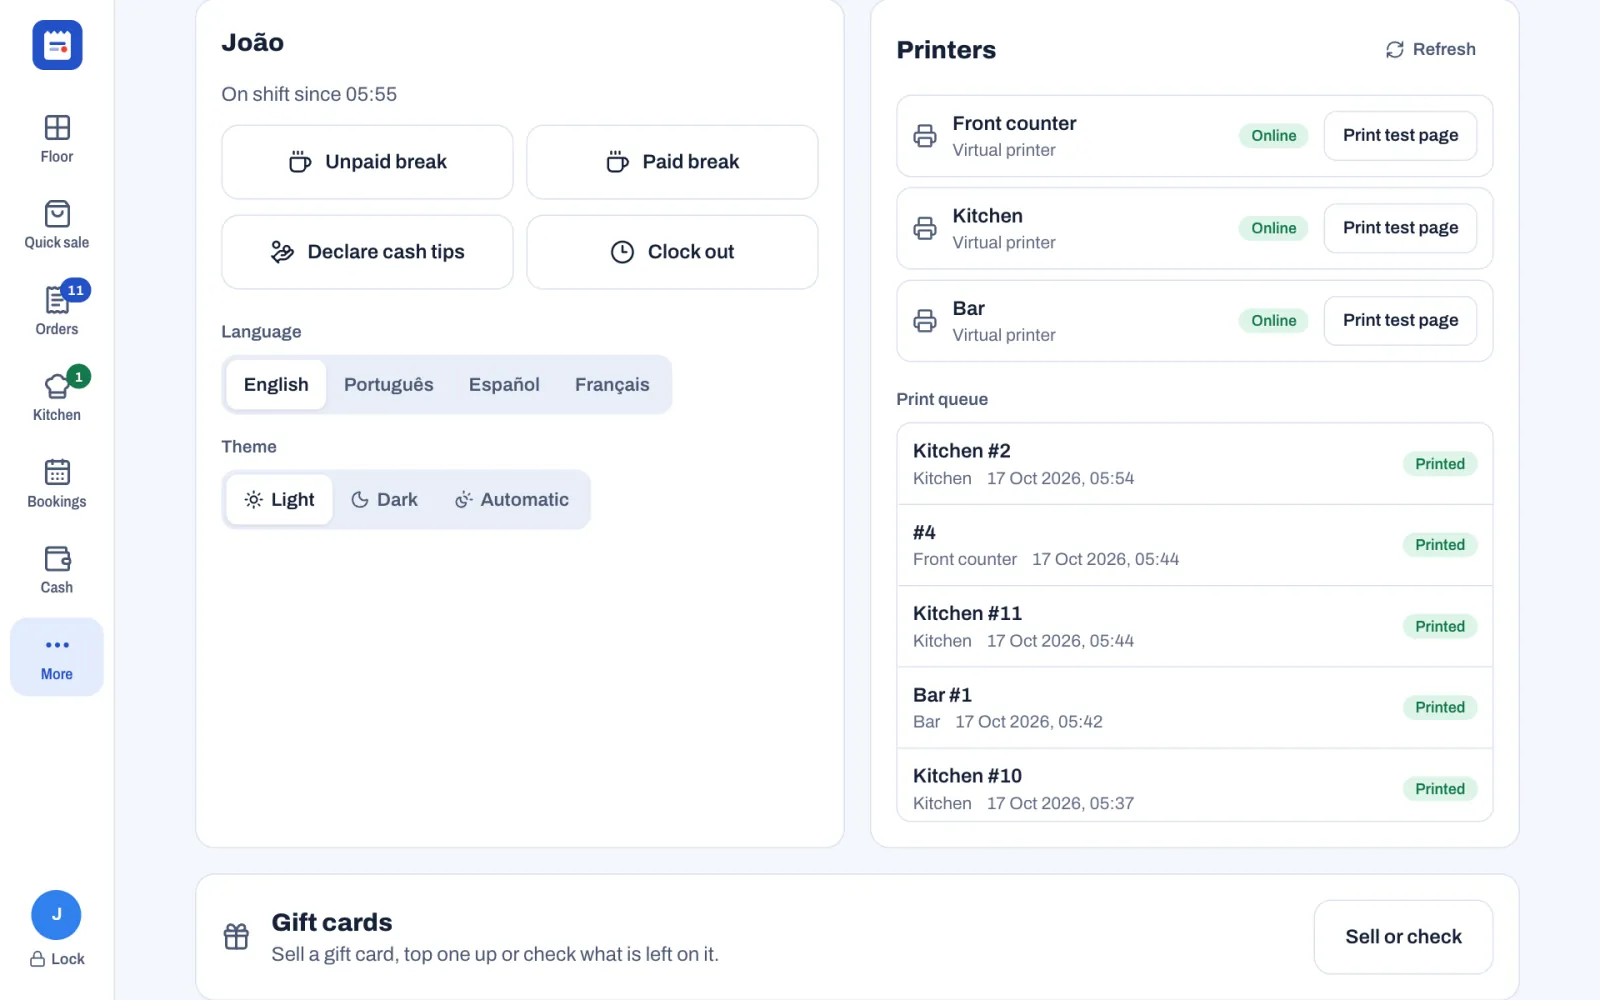
On a phone, the bottom bar shows the first four sections and More. More lists the other sections, such as Bookings and Cash, as buttons at the top.
Managers check and correct shifts in Back office › Team & roles › Timesheets: see Your team, roles and PINs.
#Open the cash drawer with a float
The float is the cash you put in the drawer before service so you can give change. Open the drawer before the first cash payment of the day.
- Count the cash you are putting in the drawer.
- Tap Cash. The Cash drawer card shows No drawer is open. It is this till's own drawer. If the restaurant has more than one drawer, buttons with their names at the top of the card switch between them.
- Tap Open drawer. The Starting cash window says "Count the cash in the drawer before the first sale." and suggests the restaurant's usual float (£100.00 in the demo).
- If you counted a different amount, tap the delete key until the amount is empty, then type what you counted. The last two digits are pence: type 1, 2, 0, 0, 0 for £120.00.
- Tap Open drawer.
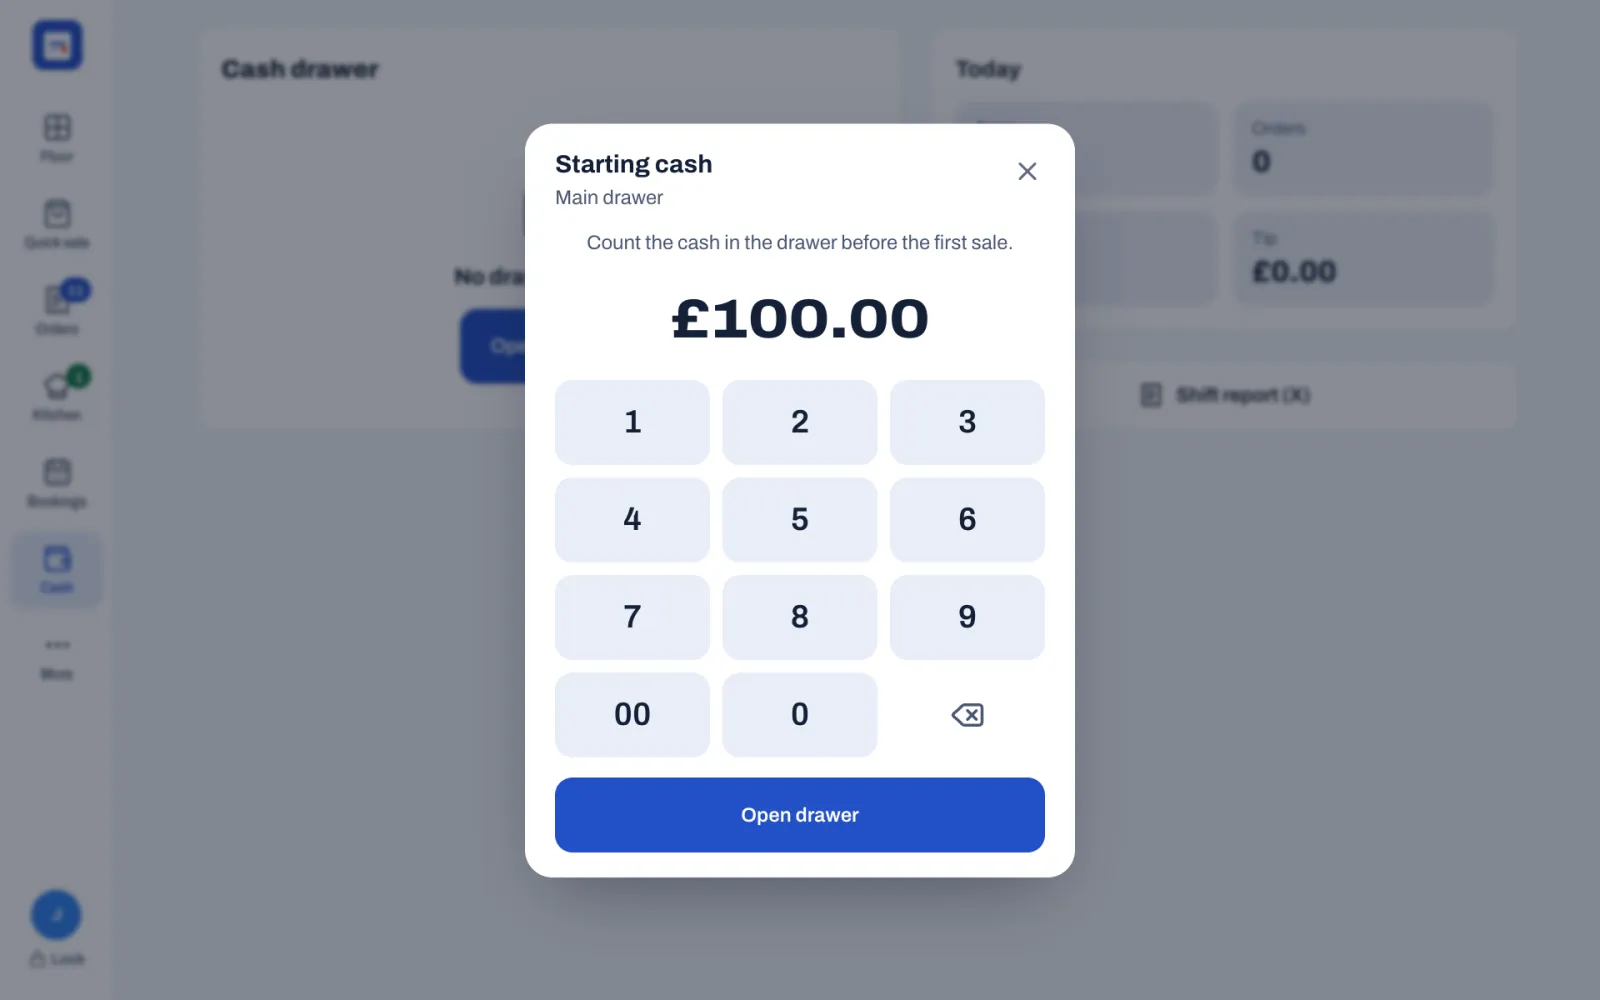
The drawer opens if it is connected. The card now shows Open since and the time, the buttons Pay in, Pay out, Cash drop, No sale and Close drawer, and under Movements the first line: Opening float +£100.00. If you are allowed to print shift reports, the Today card on the right shows the day's takings so far, and the payments by method under Payments, tips included.
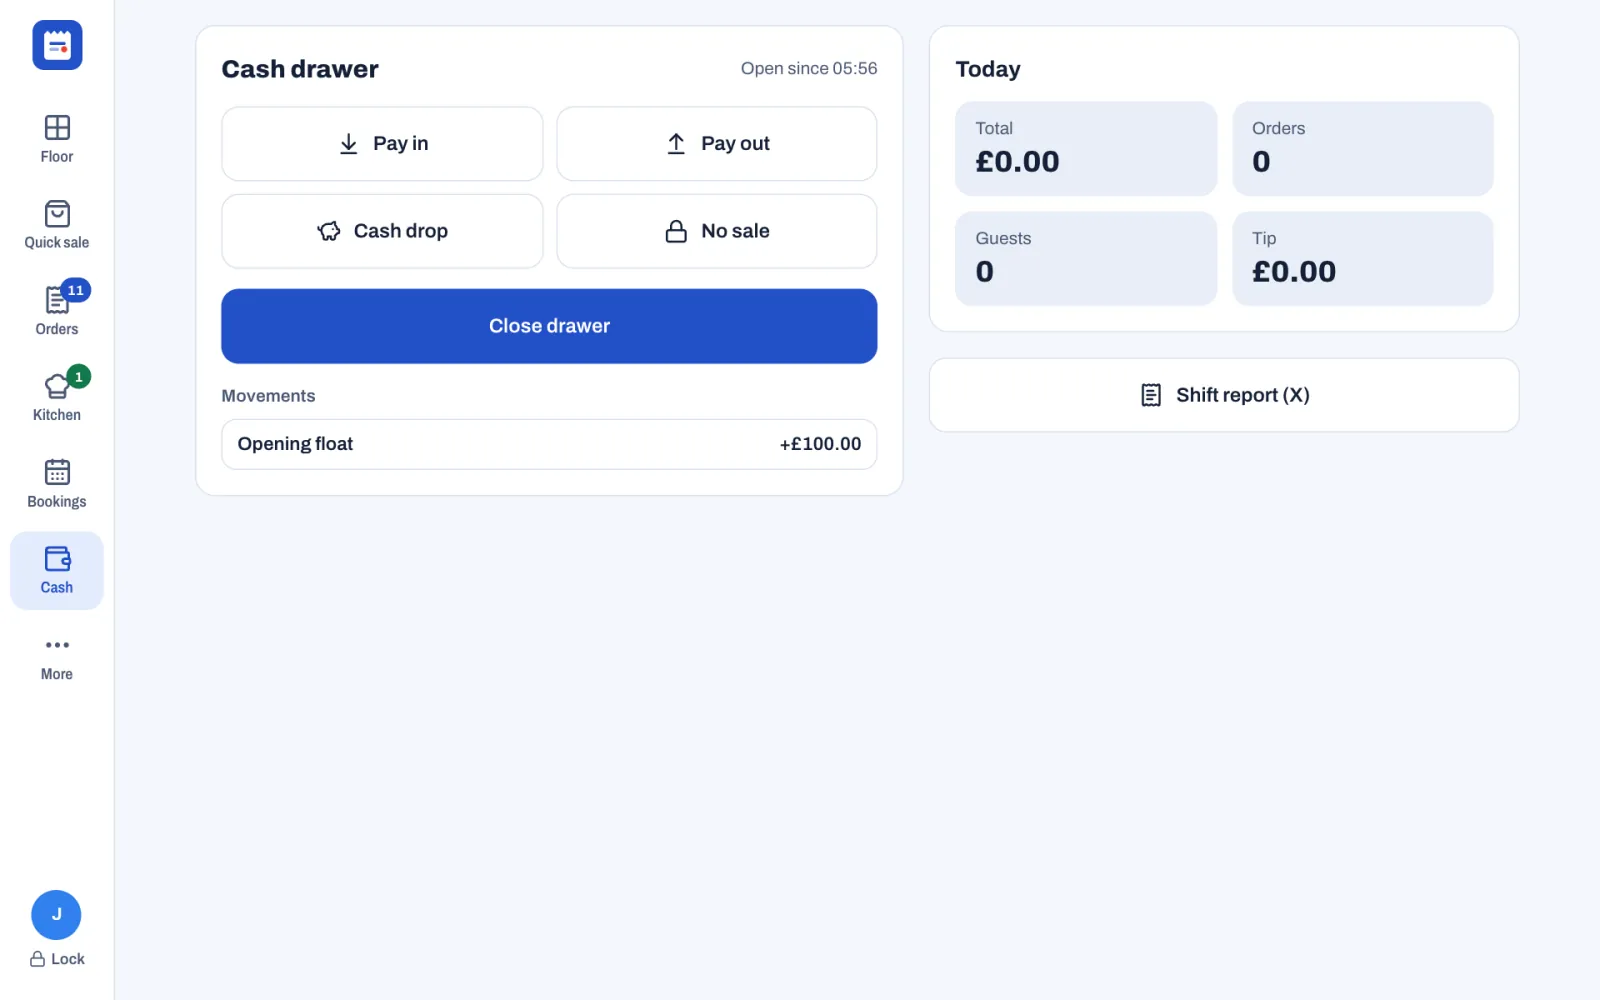
To open the drawer, your role needs Open and close the cash drawer. Servers, bartenders, cashiers, managers and owners have it in a new restaurant.
For pay-ins, pay-outs, cash drops, the shift report and closing the drawer, see Close the day. For No sale, see Voids, discounts, refunds and approvals.
#Mark dishes you can't serve as sold out
When the kitchen tells you a dish has run out, mark it so nobody can sell it.
- Open any order, or tap Quick sale, so the menu shows.
- Press and hold the dish. On a till with a mouse, right-click it. The dish's details open, with its photo, description and allergens, and whether it is On sale.
- Tap Mark sold out.
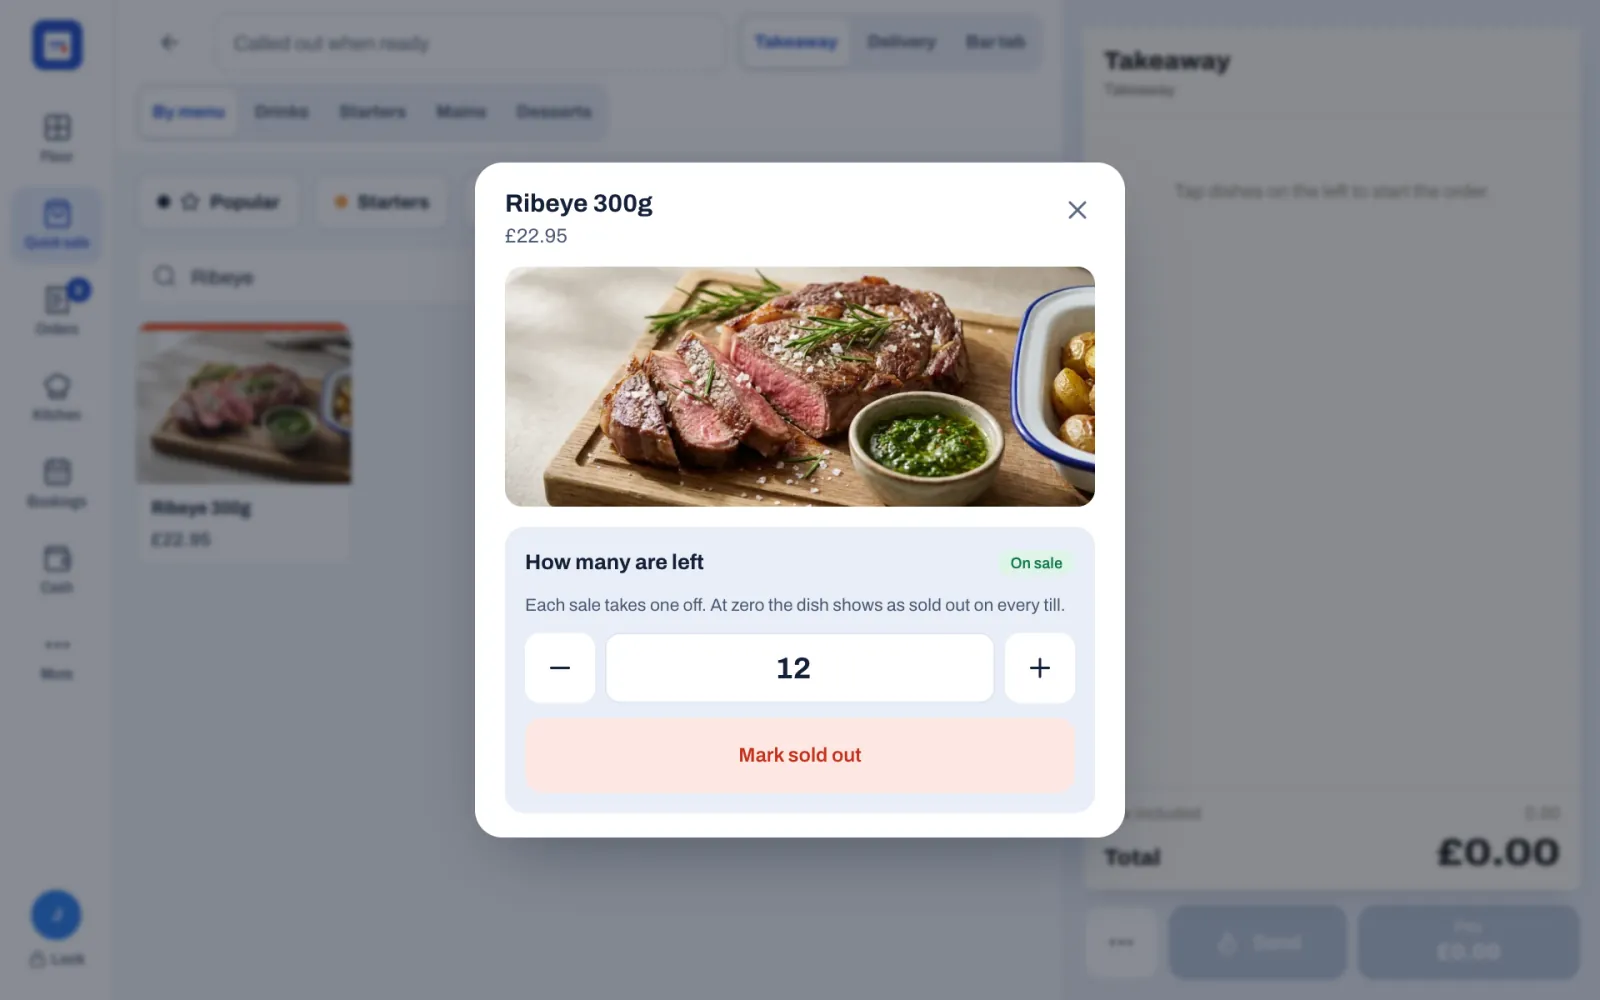
The dish shows a Sold out stamp on every till and handheld, and staff can't add it to an order. To sell it again, press and hold it and tap Put back on sale. Closing the day puts every sold-out dish back on sale, unless a manager turns off Put sold-out dishes back on sale each day in Back office › Settings › Service.
You need Mark dishes as sold out for this. Servers, bartenders, cashiers and the kitchen have it in a new restaurant; the kitchen uses Sold out on the kitchen display. When the menu counts how many of a dish are left, the details show How many are left: change the number and tap Save count. The dish shows the number once five or fewer remain, for example 3 left, and is sold out at zero. Counted dishes keep their count when the day closes. See Build your menu.
#Before the doors open
Run through this list before the first guests arrive.
The connection
- On the lock screen of each till and handheld, check the connection under the PIN pad. It should say Sofrito Hub or Sofrito Cloud, not "Offline — reconnecting…". See Sofrito Hub and working offline.
Printers
- On a till, tap More.
- Under Printers, check each printer you use tonight. Its status shows Online, Offline, Error or Not checked.
- Tap Print test page on each one and check that a page comes out with no faded or missing lines.
- Under Print queue, the latest jobs show Printed, Queued, Sending, Failed or Cancelled. Tap a job to see what it printed. Refresh updates the list.
- Put a spare roll of paper next to each printer.
- If the restaurant prints through a computer (a print bridge), check that Sofrito is open on it and says "Ready. Print jobs go out as they arrive."
If a printer stops working during service, a yellow message appears on the tills, for example "Kitchen is offline" with the reason. The till that sent a ticket that didn't print shows it in red, with Reprint. See Troubleshooting and questions.
The kitchen display
- Check each kitchen screen is on, shows the stations it should and reads All caught up before the first order. See The kitchen display.
Handhelds and other screens
- Charge every handheld, and check each one shows the lock screen and its connection.
- Each server unlocks with their own PIN. Never share a handheld under one person's PIN.
- Switch on the customer display and the pickup board if you use them, and check the customer display faces the right till. See Counter, takeaway and pickup.
Payments
- Switch on the card terminal and check it has paper and a charged battery. Sofrito does not talk to the terminal: see Taking payment.
- Open the cash drawer with a counted float, as above.
The menu and the bookings
- Ask the kitchen what is not available tonight and mark it Sold out.
- Tap Bookings to see tonight's tables, large parties and notes. See Bookings and the waitlist.
Table service
This chapter is for servers and anyone who takes orders at tables, on the till or on a handheld. It covers the floor plan and its colours, opening and blocking tables, ordering by seat and by course, options, notes and allergies, sending to the kitchen and holding courses back, every action in the order's More menu, and what changes on a phone.
Before you start
- You can unlock the till with your PIN: see Open for service.
- The floor plan is drawn: see Draw your floor plan.
- Guest count, seat numbers and courses are set in Back office › Settings › Service: see Settings, section by section.
#Read the floor plan
Tap Floor. Each area has its own button at the top, for example Dining room, Terrace and Bar. The number on an area is how many of its tables are busy.
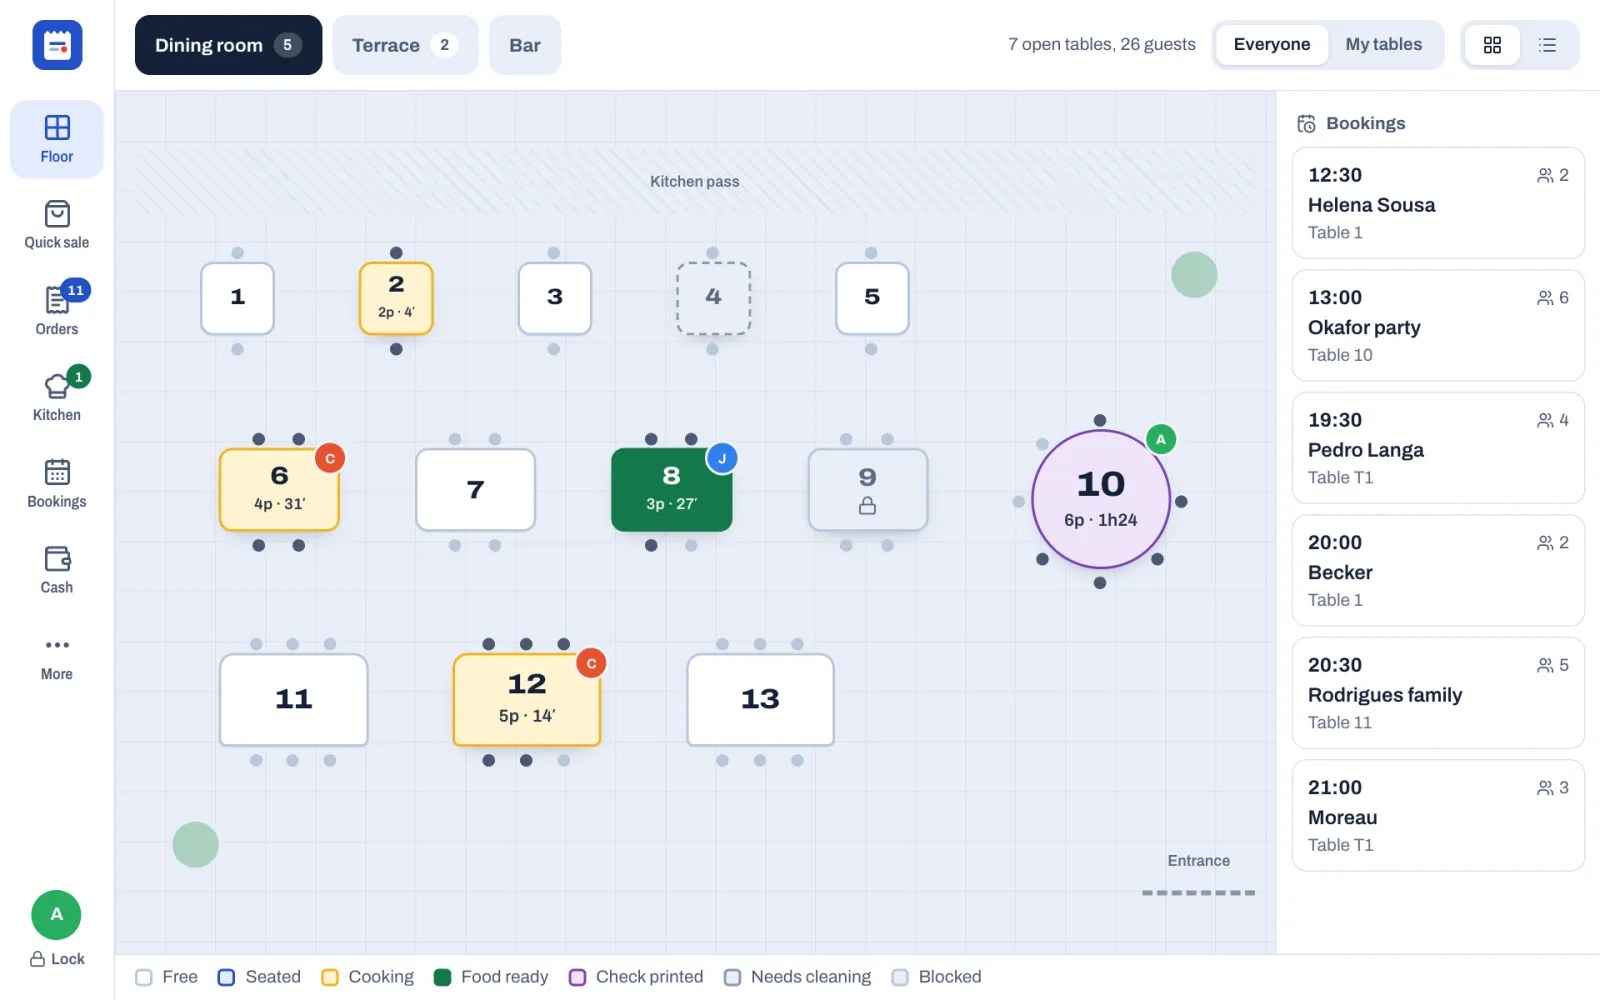
At the top right:
- Everyone shows every table. My tables keeps your own tables bright and greys out the others (in the list, it hides them).
- The two buttons with squares and lines switch between the plan and a list of table cards.
- On wide screens, a summary such as "7 open tables, 26 guests".
On wide screens, the day's next bookings are listed on the right of the plan, if your role can see bookings and the restaurant takes bookings.
The legend along the bottom explains the colours:
| Colour | Status | What it means |
|---|---|---|
| White | Free | No open check. The list shows the number of seats. |
| Blue | Seated | A check is open. Nothing is cooking or waiting on the pass. |
| Amber | Cooking | Items are with the kitchen and not ready yet. |
| Green | Food ready | The kitchen has marked food ready. Take it to the table. |
| Purple | Check printed | The check has been printed for the guests. |
| Grey, dashed | Needs cleaning | The bill is paid. Clear the table. |
| Grey, with a padlock | Blocked | The table is kept free. See Keep a table free. |
On the plan you also see:
- the number of guests and the time since the table opened, for example 4p · 37′;
- the server's initials in a coloured circle, on tables big enough to show them;
- the chairs as dots around the table, darker for each guest seated;
- a red, pulsing border when something has been in the kitchen longer than the late time (20 minutes in a new restaurant);
- a purple time on a free table when a booking for it starts soon. See Bookings and the waitlist.
#Open a table
- Tap a free table.
- The window Open table 1 asks How many guests? Tap the number. The table's own number of seats is highlighted.
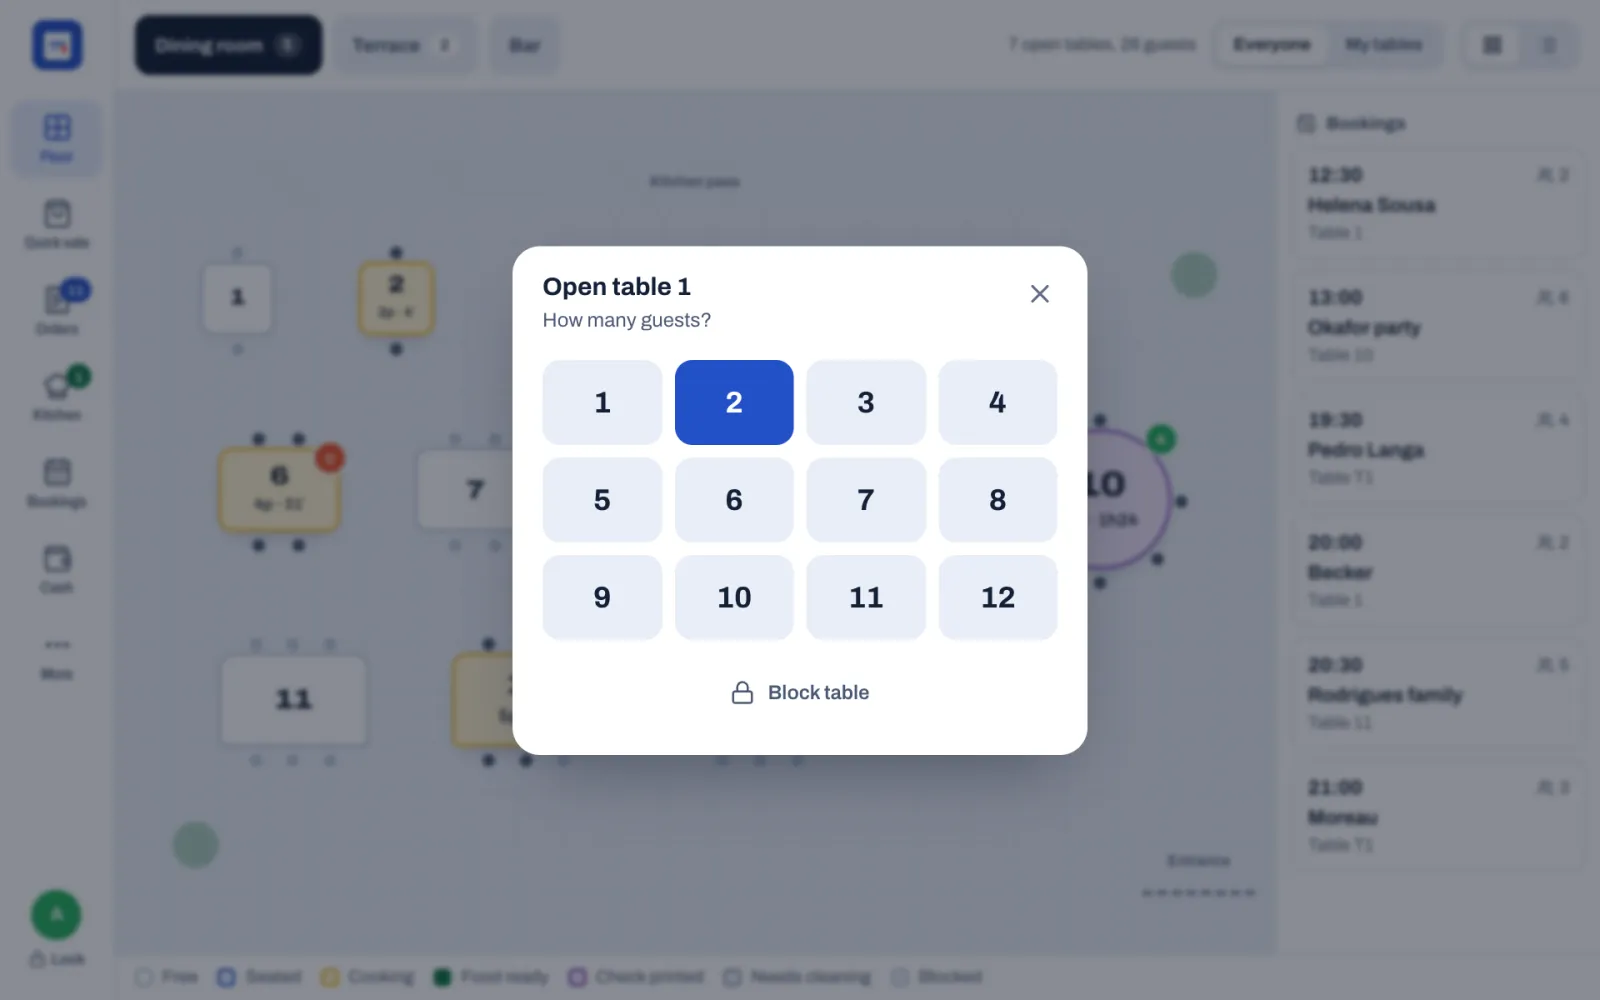
The order screen opens for that table. If Ask how many guests is off in Back office › Settings › Service, the table opens straight away with its number of seats. To choose the number of guests anyway, touch and hold the table instead of tapping it.
A host, or anyone whose role can't take orders, seats guests the same way. The till then stays on the floor plan and shows Seated with the table, for example "Table 3", and the table turns blue. The first server to add dishes to that check takes it over, without a manager's PIN.
Tapping a busy table opens its check. If the table has more than one check, Sofrito lists them with their numbers, guests and totals: tap one, or tap New separate check to start another. See Start a separate check.
#Keep a table free
Block a table that must stay empty for now, for example one kept for a regular or one with a wobbly leg. While it is blocked, nobody is seated there.
- Tap the free table. If Ask how many guests is off, touch and hold it instead: a tap would open it.
- Tap Block table at the bottom of the window.
The table turns grey with a padlock, on every till and handheld. To use it again, tap it, then:
- tap Unblock table; or
- tap Open check to seat guests there straight away. Opening the check unblocks the table too.
#Take the order
The order screen shows the menu on the left and the check on the right.
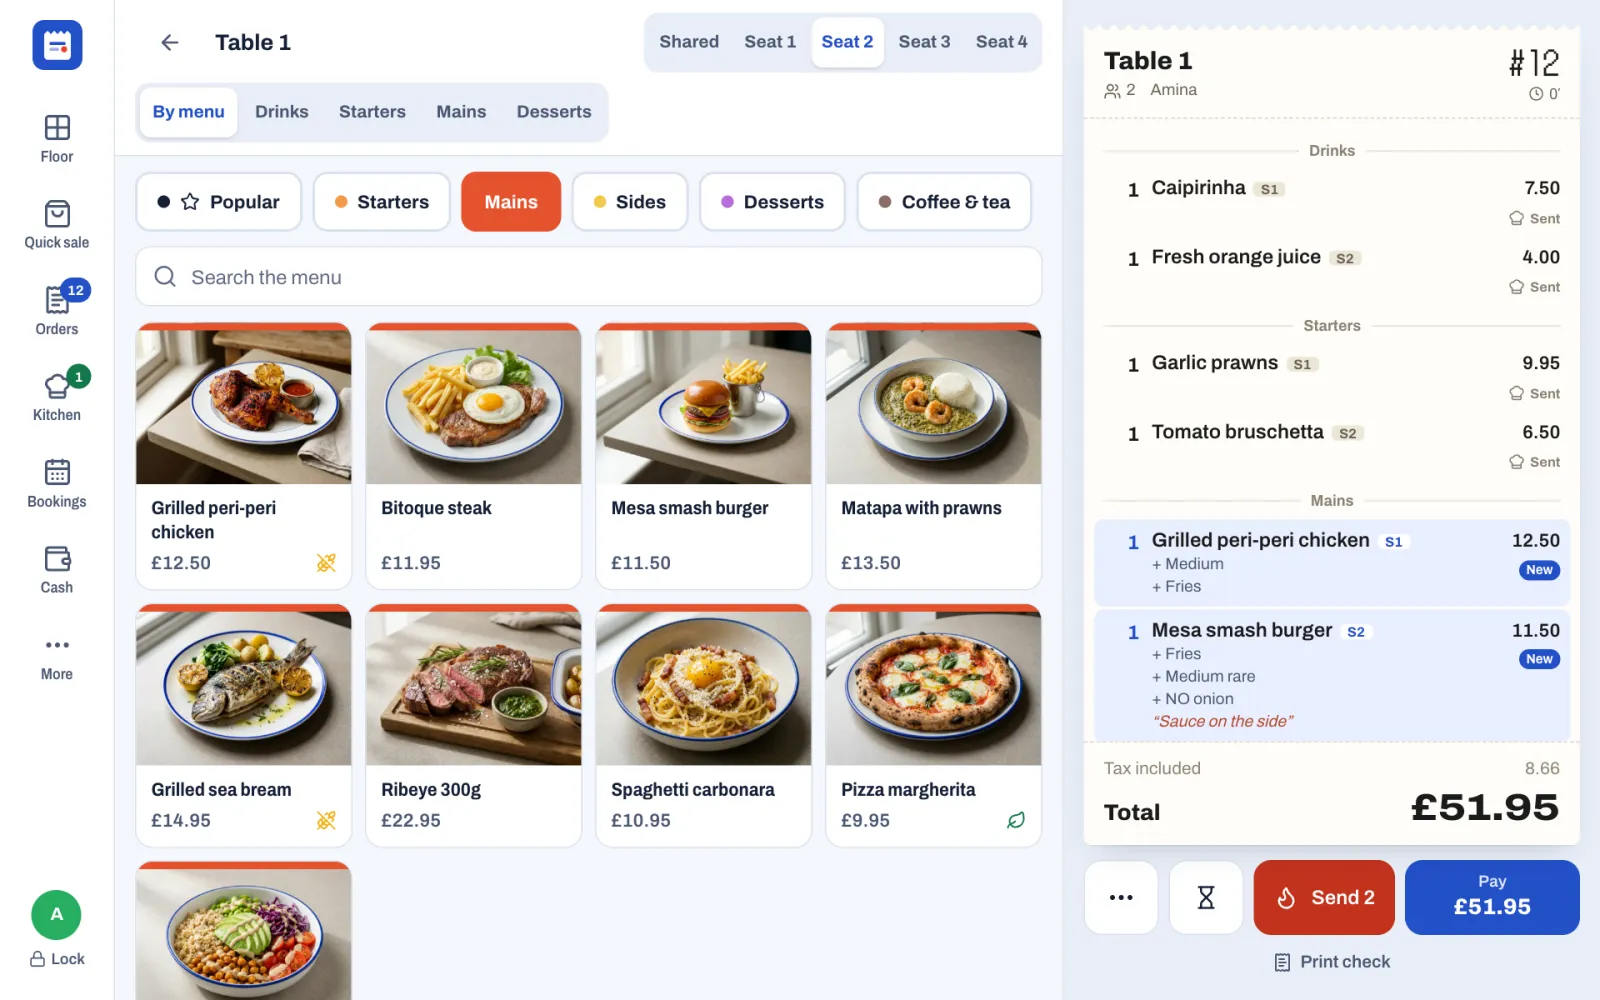
At the top of the menu:
- Shared, Seat 1, Seat 2 and so on choose the seat for the next items. There is one seat for each guest, and at least four.
- By menu, Drinks, Starters, Mains and Desserts choose the course. By menu uses each dish's own course: a drink goes with Drinks, a starter with Starters. The course buttons need a wide screen; on a phone or a tablet held upright, change the course on the item instead (see below).
- The categories, starting with Popular, and Search the menu. You can search by name, or by a dish's code or barcode.
To order:
- Tap the seat.
- If you want a course other than the menu's, tap it.
- Tap the dishes. Each one goes on the check with a blue New badge, under its course, with its seat (S1, S2).
- Tap a simple dish again to add one more.
The seat and course stay selected until you change them. Seats and courses only appear when Seat numbers and Courses are on in Back office › Settings › Service.
When a price level applies, such as Happy hour or takeaway prices, its name shows at the top of the menu. The dish buttons, the check and Pay all show the same prices. Dishes marked Sold out can't be tapped. To see a dish's description and allergens, press and hold it.
#Choose options and add a note
When you tap a dish with options, its window opens first.
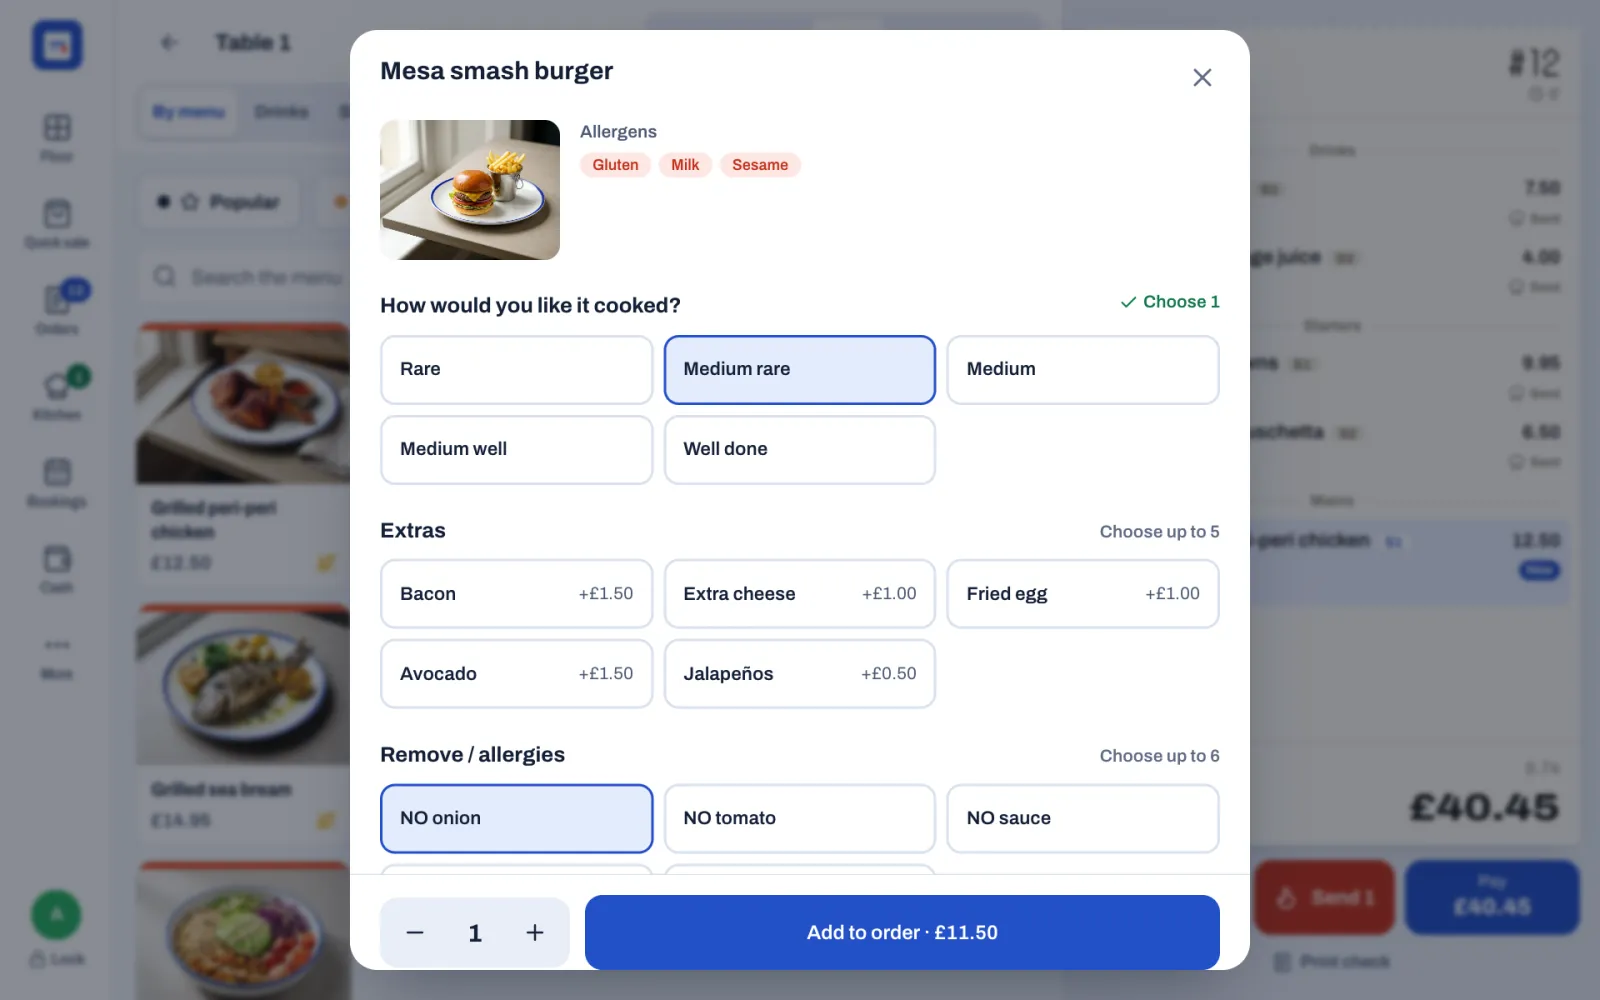
- Each group says what it needs: Choose 1 (exactly one), Choose 1 to 3, Choose up to 3, Choose at least 2 or Optional. A group that needs a choice turns green with a tick once it has one.
- The usual choice is already selected, so for most guests you only confirm.
- Options that cost more show the extra, for example +£1.50. Options that lower the price show the difference, for example -£0.50.
- Allergens show at the top.
- Under Notes, type anything the kitchen should know, for example "Sauce on the side".
- Set the quantity with − and + at the bottom.
Tap Add to order. The button shows the price, and stays grey until every required group has a choice. For a dish without a fixed price, type the price under Enter price first.
#See the guest's allergies
When the guest on the check has allergies on their profile, a red band under the check's header lists them, for example "Allergies: Peanuts". This happens when you add the guest with ••• › Add guest, and when the table was seated from the guest's booking. Every kitchen ticket for the order shows the allergies too, on the kitchen display and on paper. In the demo restaurant, table T2 on the terrace shows "Allergies: Gluten".
Allergies are kept on the guest's profile in Back office › Guests & loyalty: see Guests, loyalty and gift cards.
#Change an item before you send it
Tap an item with the New badge.
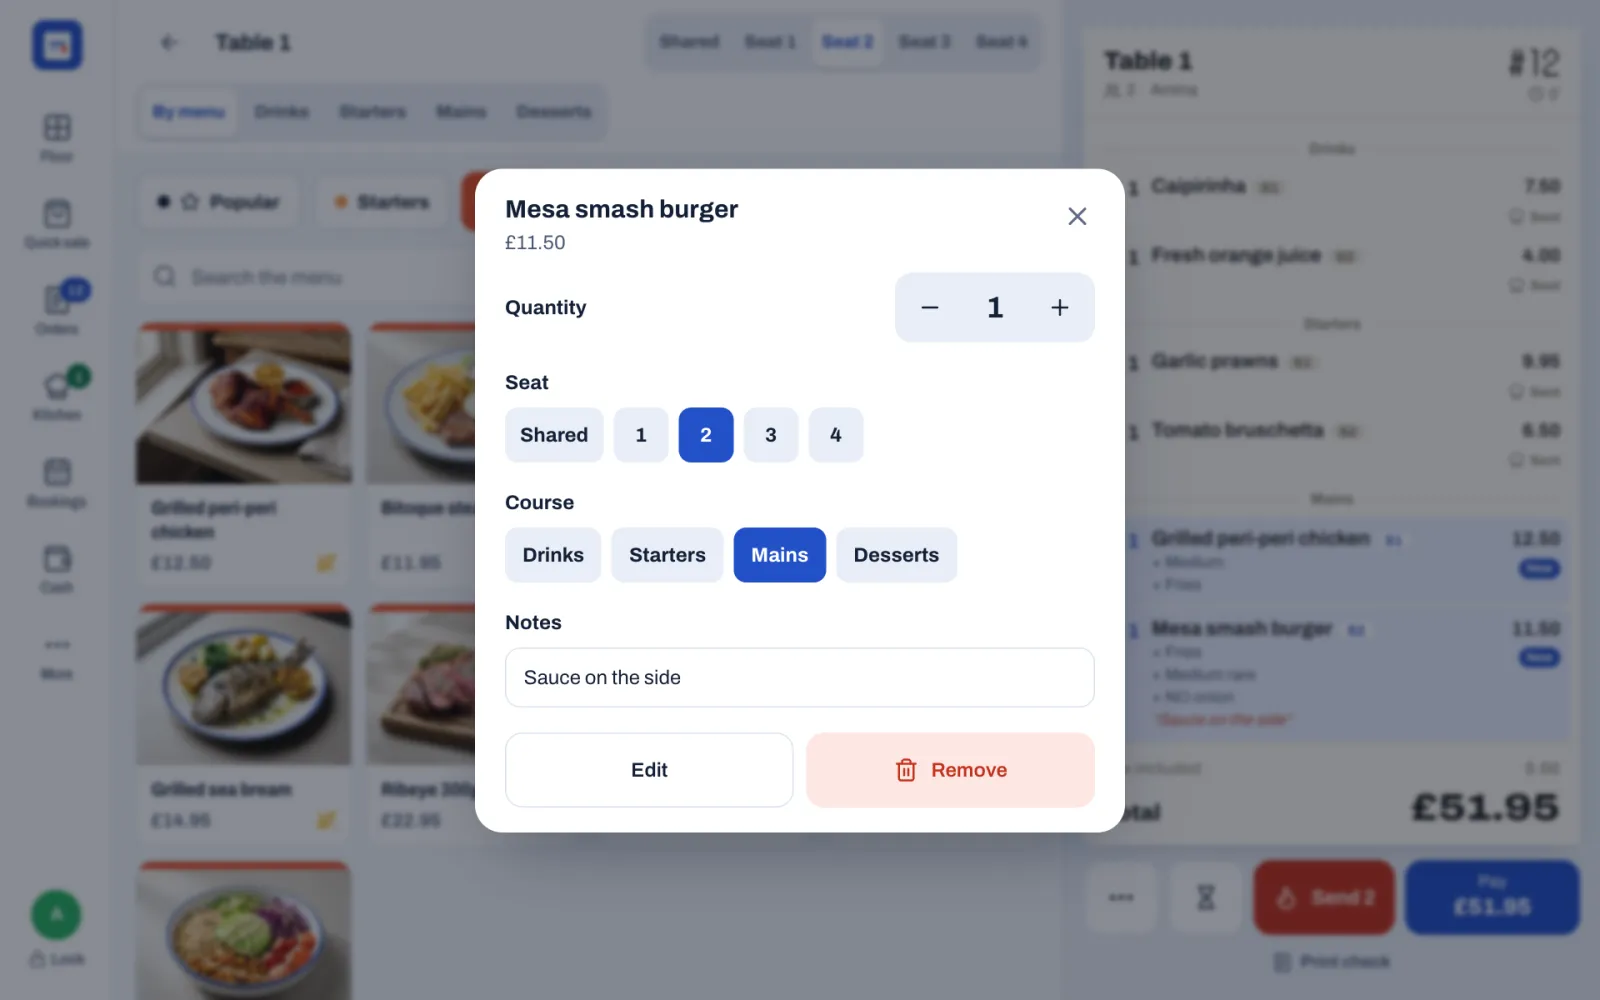
- Quantity: − and +. Going below 1 removes the item.
- Seat: move it to another seat, or to Shared.
- Course: move it to another course.
- Notes: the note for the kitchen.
- Edit: change its options.
- Remove: take it off the check.
Close the window to keep your changes.
New items stay on this device until you send them or hold them. Other tills and handhelds don't see them yet.
Once an item is sent or held, tapping it opens other choices: Void or Remove, Comp, Change price, the restaurant's item discounts and Split item. See Voids, discounts, refunds and approvals and Split the bill.
#Send the order to the kitchen
Tap Send. The button shows how many items will go, for example Send 4.
Sofrito shows "Sent to the kitchen". The items go to the kitchen display and the kitchen printers of their stations, and the table turns amber. On the check, each sent item shows how far it has got: Sent, Cooking, Ready and then Served. On phones and small tablets you see only the icon.
Some items show Served as soon as they are sent: dishes with no station, and dishes whose station isn't shown on any kitchen display. Their tickets only print. See The kitchen display.
To add another round, tap the table, add the items and tap Send again. Only the new items go.
On a phone, Sofrito goes back to the floor after you send, ready for the next table.
#Hold items and send them later
The hourglass button next to Send (Hold) saves new items on the check without sending them. They wait until you fire them. Use it to take the whole order at once but have the mains cooked later. The hourglass appears when a dine-in check has new items.
- Add the drinks and starters.
- Tap Send.
- Add the mains.
- Tap the hourglass. Sofrito shows "Held — sent to the kitchen when you tap Fire". On the check, the mains show Held, and a Fire Mains button appears above Send.
- When the table is ready for the mains, tap the table on the floor.
- Tap Fire Mains. The mains go to the kitchen.
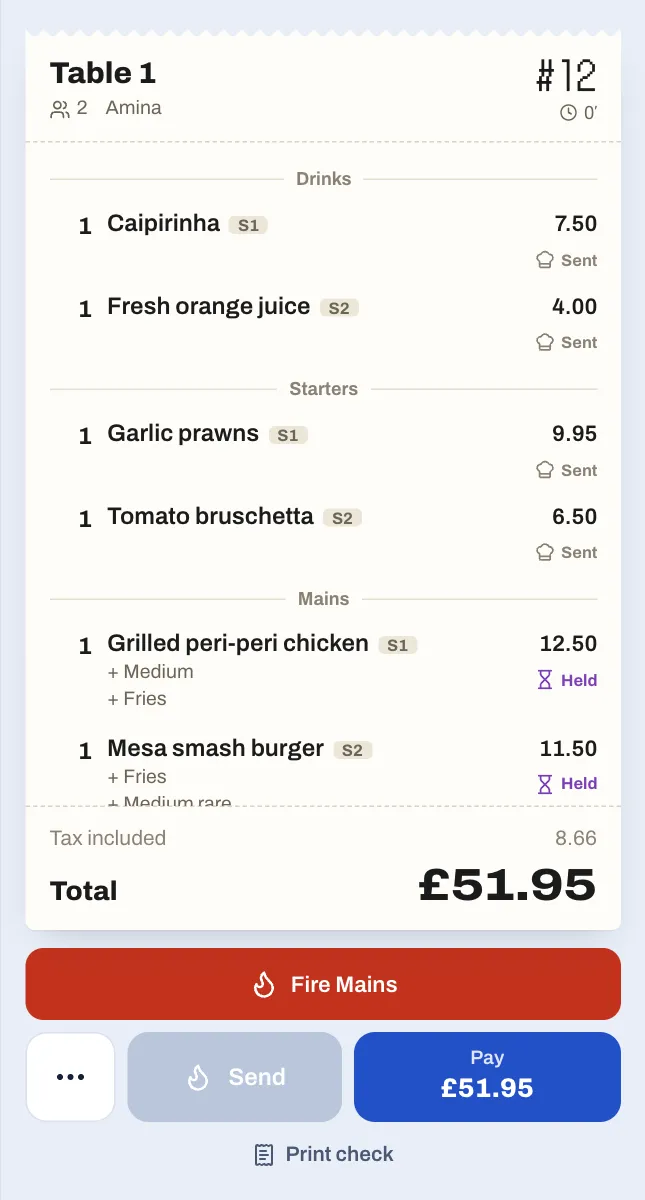
Send never sends held items. If the guests order another drink while the mains are held, Send sends the drink, and the mains keep waiting for Fire Mains. While a course is held, the kitchen display shows "Mains to follow" on the table's tickets. In the demo restaurant, table 12 has its mains held.
When the bill is paid in full, anything still held goes to the kitchen, as long as Send to the kitchen on payment is on in Back office › Settings › Service.
To hold later courses on every table without tapping the hourglass, turn on Hold later courses in Back office › Settings › Service (it needs Courses on). The first course (Drinks) always goes straight away. Send then sends the course being served, and later courses wait on the check with a Fire button. Only dine-in checks are held this way: takeaway, delivery and counter orders, bar tabs, and orders from online shops go to the kitchen at once.
#Serve the food when it's ready
- When the kitchen marks your food ready, your devices chime and show, for example, "Table 8 is ready", with the station that finished it. A manager turns this on or off in Back office › Settings › Kitchen (Tell the server when food is ready).
- The table turns green: Food ready.
- On the check, a green button shows, for example, Served: 6 ready on the pass. Tap it when you take the food out. The items show Served and the table turns blue.
- Kitchen lists the tickets under Food ready and Cooking. Tap Done on a ready ticket when you take it.
For the kitchen's side, see The kitchen display.
#Use the More menu on a check
Tap the ••• button at the bottom left of the check. Its menu is called More.
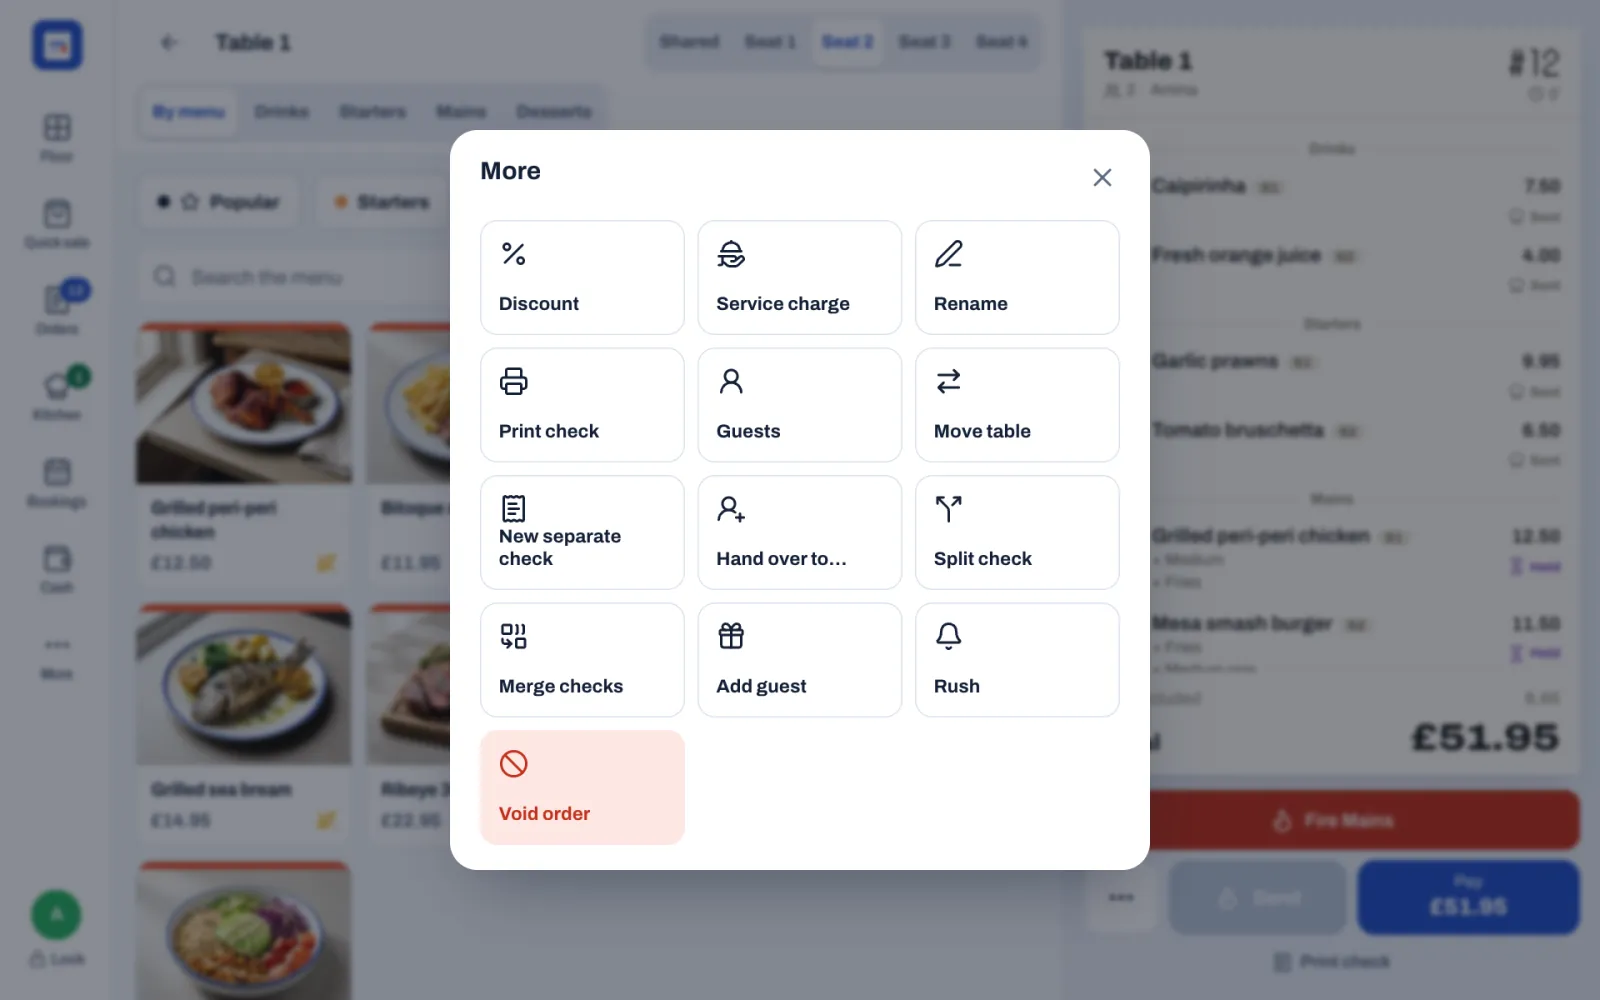
| Button | What it does |
|---|---|
| Discount | A discount on the whole check, or a promo code. See Apply a discount. |
| Service charge | Lists the restaurant's service charges, for example Service 10%: tap one to add it. A charge already on the check shows On the check. Shows when the restaurant has a service charge available on the POS. |
| Rename | Changes the name on the check. See Rename a check. |
| Print check | Prints the check for the guests and turns the table purple. |
| Guests | Changes the number of guests, from 1 to 16. Dine-in checks only. |
| Move table | Moves the check to another table. Dine-in checks only. |
| New separate check | Opens another check at the same table. See Start a separate check. |
| Hand over to… | Gives the check to another member of staff. |
| Split check | Moves items to new, separate checks. Shows when the check has two lines or more and nothing has been paid. See Split the bill. |
| Merge checks | Brings another open check into this one. Shows when there is another open check. |
| Add guest | Links a guest profile to the check, for loyalty points, allergies and the guest's details on the receipt. Once linked, the button shows the guest's name, with a warning triangle if they have allergies. See Guests, loyalty and gift cards. |
| Rush | Marks the check's tickets RUSH on the kitchen display. Shows once something has been sent. |
| Void order | Cancels the whole order. On a check with payments, it lists the payments to void first. See Void a whole order. |
On a check another server opened, most of these need Change other people's orders, or a manager's PIN. Print check and Rush never do, and neither does taking payment. A check with nothing on it yet, such as one a host opened, can be handed over without a manager, and becomes yours when you add its first items. See Know what needs a manager.
When a guest is linked, tapping their name opens their card: their visits, their loyalty points and, if they have one, their house account, for example "House account: £0.00 owed, £200.00 left". If they have allergies, the card adds that every kitchen ticket for the order shows them.
#Print the check
- Tap Print check under the Pay button, or ••• › Print check.
The check prints on this device's receipt printer. It is headed Pro forma and says "This is not a receipt". When tipping is on, it also suggests tips. The table turns purple (Check printed), so the team knows the guests have the bill. After the first print, the link under Pay disappears; reprint from ••• › Print check.
#Rename a check
- Tap ••• › Rename.
- Type the name under Name on the order.
- Tap Save.
On a table, the name shows next to the check's number when the table has more than one check, so you can tell them apart. On a takeaway order, it is the name at the top of the check, in Orders and on the pickup board. To take the name off, empty the box and tap Save.
#Move a check to another table
- Tap ••• › Move table.
- Tap the new table. The tables are grouped by area; tables with an open check are amber, and the current one is greyed out.
The check, its kitchen tickets and the guests move to the new table. If the new table already had a check, it now has two: tap the table to choose between them. To move tables, your role needs Move orders and tables; otherwise a manager approves with their PIN.
#Hand a check to another server
- Tap ••• › Hand over to….
- Tap the person who takes over.
The table now shows their initials and appears under their My tables. Do this before you leave at the end of your shift.
#Start a separate check
When some guests at a table want to pay on their own from the start, give them their own check.
- Open the table's check.
- Tap ••• › New separate check.
- Tap the number of guests on the new check. If Ask how many guests is off, this step is skipped.
The new check opens, with its own number. From then on, tapping the table lists its checks: tap the one you want.
#Merge two checks
- Open the check you want to keep.
- Tap ••• › Merge checks.
- Tap the other check. The list shows each open check without payments, with its number, table or name, and total.
The items of the other check move into this one, its guests are added, and the other check closes. A check that has a payment can't be merged into another. Merging needs Move orders and tables, or a manager's PIN.
#Change the number of guests
Tap ••• › Guests and tap the new number.
#Clear the table after payment
Once the bill is paid, the table shows Needs cleaning (when Mark tables for clearing is on in Back office › Settings › Service). When it's ready, tap the table and tap Mark as clean. To seat new guests straight away, tap Open check instead.
#Take orders on a handheld
Servers can take orders at the table on a phone or a small tablet paired as a Handheld. See Devices, printers and stations. Everything works as on the till. On a phone, the screens are arranged differently:
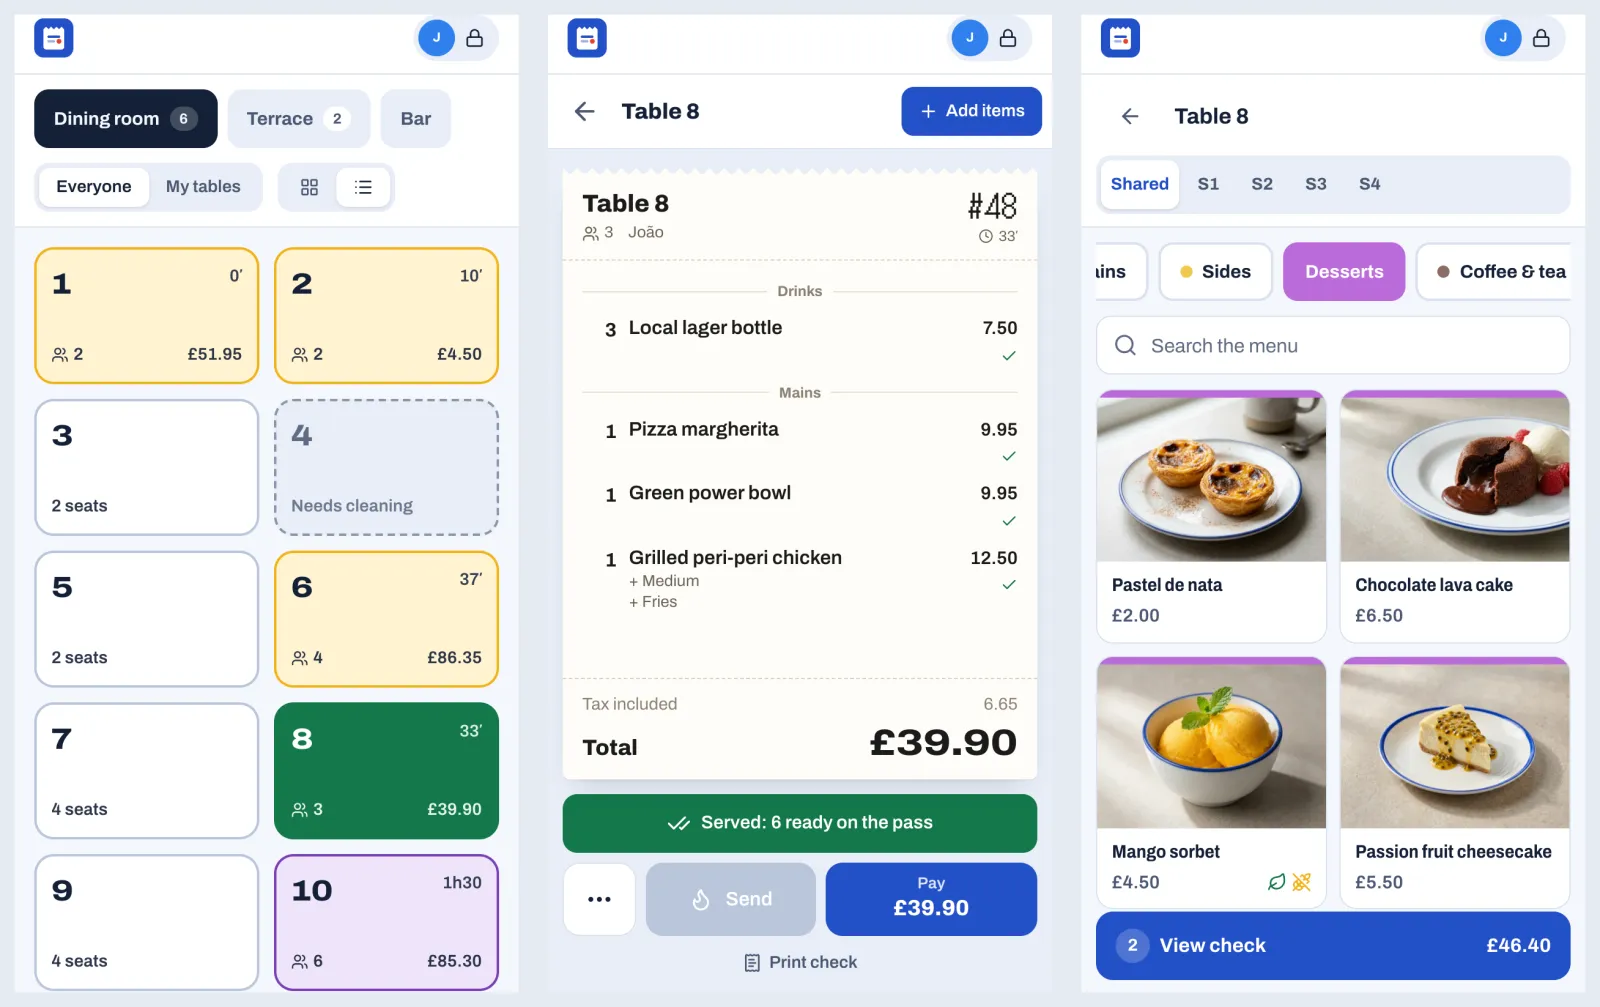
- Floor opens as a list of table cards. The plan button switches to the plan. The colours are the same as on the till, without the legend.
- A table opens on its check. Tap Add items to see the menu. An empty check says "Tap Add items to start the order." The blue View check bar at the bottom shows how many new items there are and the total: tap it to go back to the check.
- The seats show as S1, S2 and so on. There are no course buttons: tap a new item on the check to change its course.
- After Send, the phone goes back to the floor.
- Your picture with a padlock at the top right locks the phone.
- The bottom bar shows the first four sections and More. More lists the other sections, such as Bookings and Cash, as buttons at the top.
A tablet shows the same screens as the till: the left-hand bar with every section, and the menu and the check side by side. The course buttons need a wide screen, so on a tablet held upright, change the course on each item.
#Busy nights
- Use seats from the first round. Splitting the bill later takes seconds.
- Send drinks and starters as soon as you have them. Hold the mains with the hourglass, and tap Fire Mains when the starters are cleared.
- Keep My tables on, and watch for green tables and red borders.
- Tap Served as you take food out, so the pass and the floor stay accurate.
- Block the tables you are keeping, so nobody seats walk-ins there.
- Lock the till every time you walk away from it.
- Hand your open tables over before you leave.
Counter, takeaway and pickup
This chapter is for cashiers and anyone who serves at the counter or the bar. It covers quick sales, takeaway orders called out by name, the Orders list, handing orders over when they are ready, and the two screens that face your guests: the pickup board and the customer display.
Before you start
- Your payment methods are set up: see Payment methods, tips and service charge.
- The pickup board, the customer display and any label printer are paired or added: see Devices, printers and stations.
- The cash drawer is open: see Open for service. If it isn't, the till asks for the starting cash at the first cash payment.
#Ring up a quick sale
- Tap Quick sale. In a restaurant without tables the button is called New order, and the till opens on it.
- Check the order type at the top, for example Takeaway. To change it, tap another one, such as Delivery.
- If a box at the top says Called out when ready, type the guest's name (see the next section).
- Tap the dishes and drinks. Options and notes work as at a table: see Choose options and add a note.
- Tap Pay and take the payment. See Taking payment.
- On Payment complete, tap Print or No receipt. With some receipt settings the only button is Done: see Print or skip the receipt.
A new, empty order opens, ready for the next guest, with an empty name box. The items went to the kitchen when the order was paid in full (Send to the kitchen on payment in Back office › Settings › Service, on in a new restaurant).
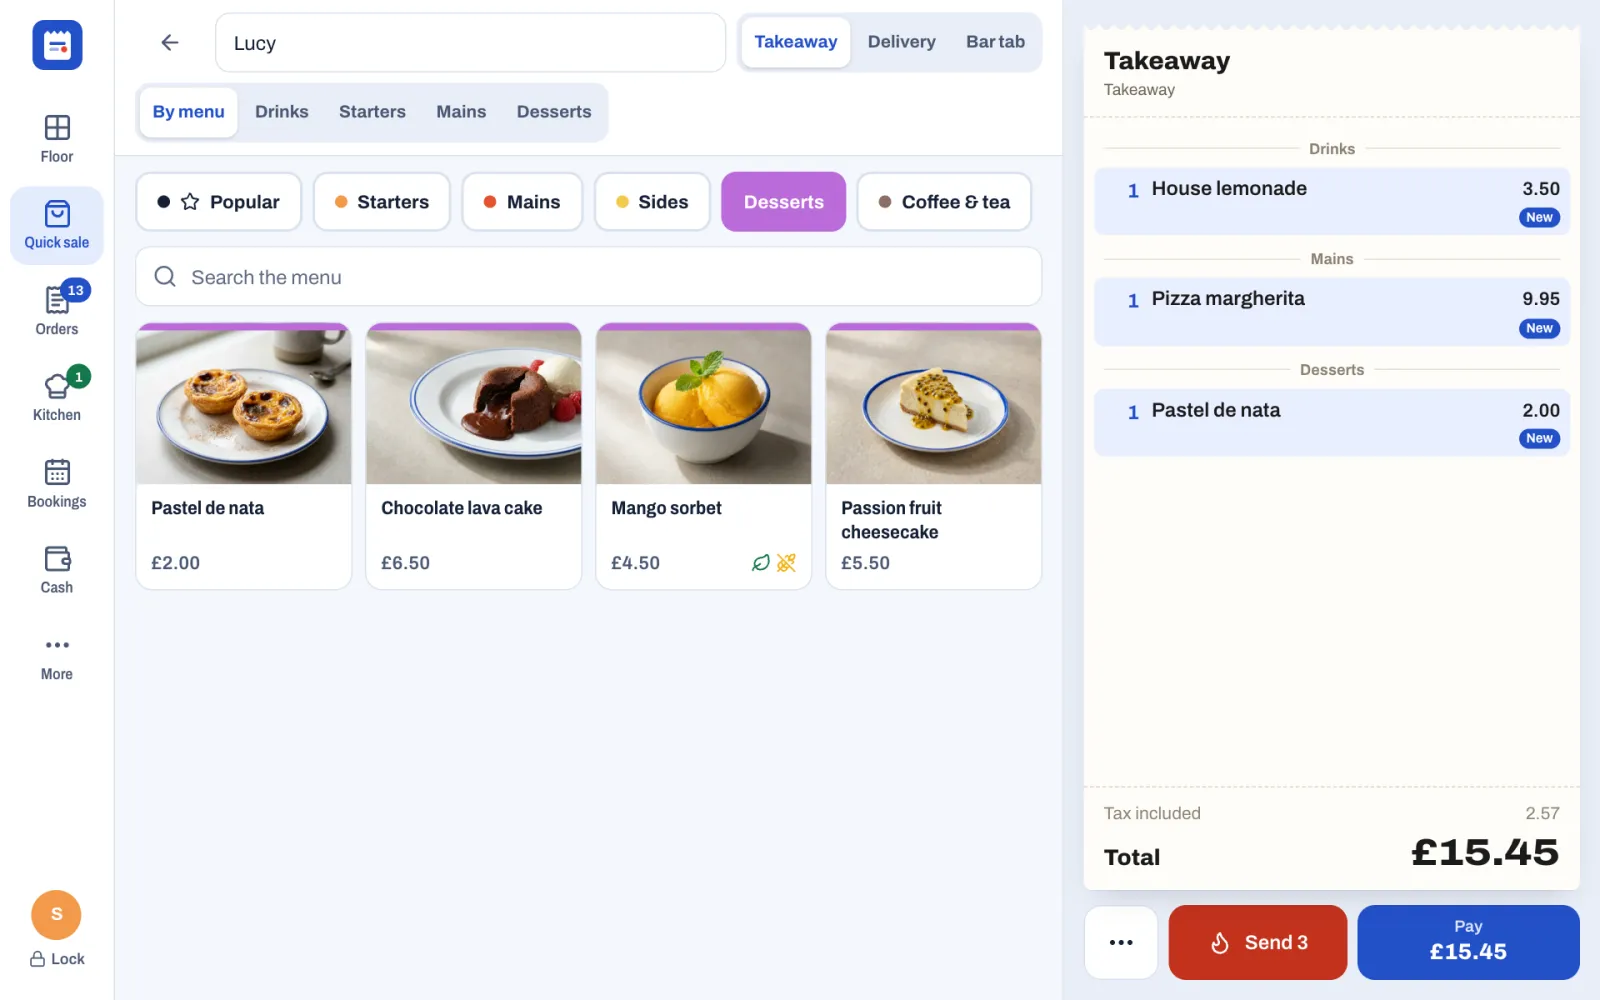
A new order starts as the first order type your restaurant offers, leaving out Dine in: Takeaway in the demo. The other order types turned on in Back office › Settings › Service show next to it, for example Delivery and Bar tab. Dine in is offered here only in restaurants without tables; elsewhere, dine-in checks open from the floor plan. If your restaurant has takeaway prices, the dish buttons, the check and Pay all show them.
If the guest pays when they collect, tap Send instead of Pay. The order goes to the kitchen and stays open in Orders until it is paid.
#Take a takeaway order with a name
Sofrito asks for a name on the order types chosen in Back office › Settings › Service under Ask for the guest's name on. In the demo these are takeaway, counter and bar tab orders.
- Type the name in the box at the top, Called out when ready, before you tap Send or Pay.
- Add the items and carry on as for a quick sale.
The name appears on the kitchen tickets and the kitchen display, in the Orders list, on the pickup board when the order is ready, and in the message the order's server gets, for example "Lucy (#14) is ready". To add or change the name of an order that is still open, tap ••• › Rename on its check.
#Labels for takeaway bags
If the restaurant has a label printer (a printer whose Prints is Labels), every takeaway and delivery item gets its own sticky label when it is sent to the kitchen. Each label shows the order number and the item's place in the order (for example 2/3), the guest's name or the order type, the dish with its options and notes, its allergens in reverse print, and the time. Dine-in and counter orders get no labels. See Devices, printers and stations.
#Find an order in the Orders list
Tap Orders. The number on the button is how many orders are open.
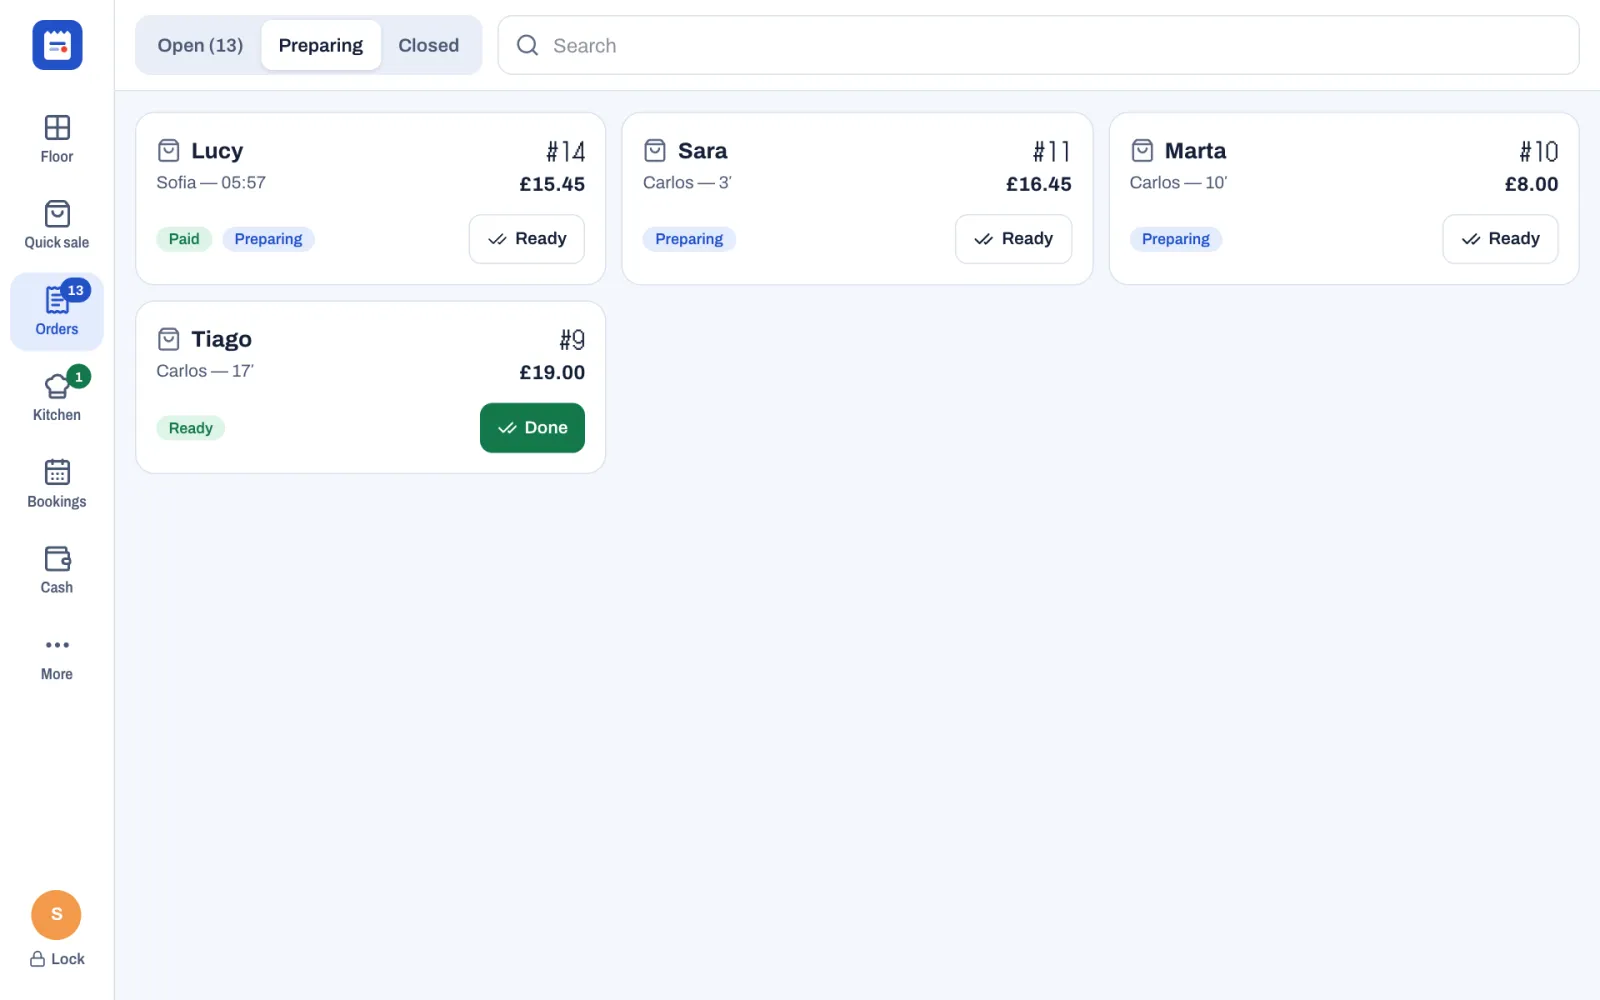
The three tabs at the top:
- Open, with the number of open orders, for example Open (13): every open order, newest first, from tables, takeaway and bar tabs.
- Preparing: today's takeaway, delivery and counter orders that are being prepared or are ready to collect, paid or not.
- Closed: orders that are paid, and orders that were voided, newest first. Checks merged into another or split into new ones are not listed. Orders from earlier days show their date as well as the time.
Each card shows an icon for the kind of order, the table or the guest's name, who took it, how long it has been open (or when it was paid), the order number and the total. Badges say more: Paid, Paid with an amount when part of the bill is paid, Voided, Preparing and Ready.
Type in Search to find an order by number, table, name or guest. Tap a card to open the order. A paid order opens its receipt view: see What a closed order shows. A voided order shows its items crossed out, with no buttons.
#Hand over an order when it's ready
When the kitchen marks every ticket of the order ready on the kitchen display, the order becomes Ready by itself. It moves to Ready on the pickup board with a chime, and the person who took it gets a message.
If the kitchen works from printed tickets only, because the order's stations aren't shown on any kitchen display, mark the order ready yourself:
- Tap Orders.
- Tap Preparing.
- Tap Ready on the order.
When the guest collects the order, tap Done on it in the same list. The order leaves the Preparing tab and the pickup board. If the guest has not paid yet, tap the order's card and take the payment with Pay.
#Show order numbers on the pickup board
The pickup board is a large screen your guests can see while they wait, such as a TV.
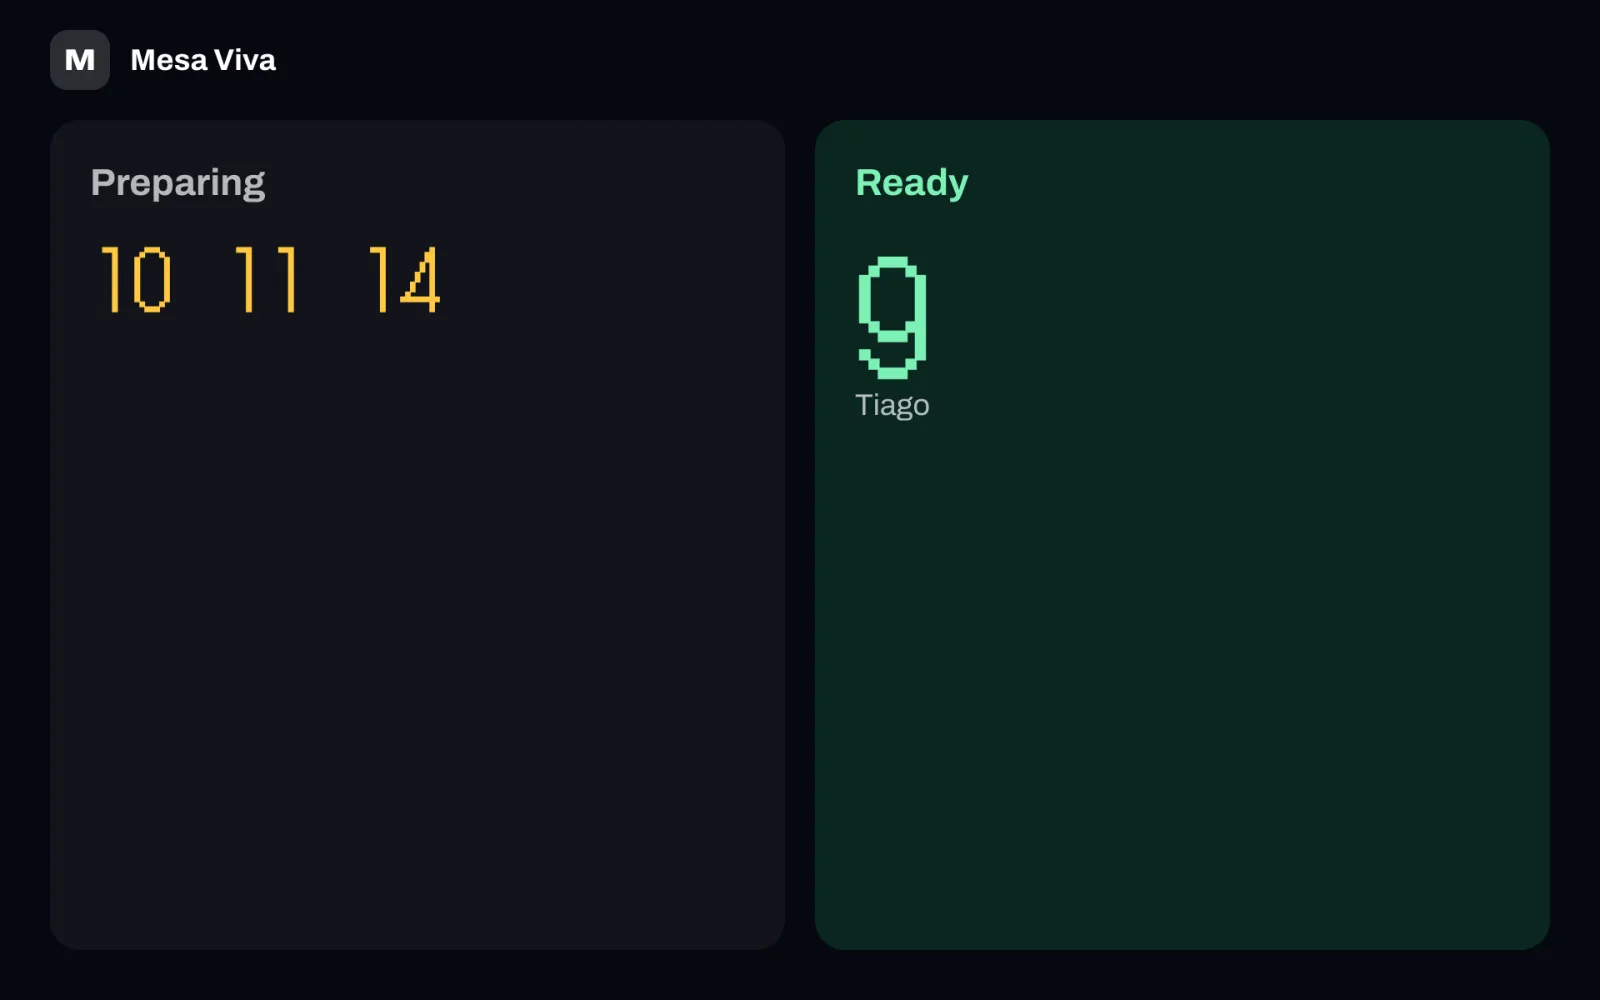
- At the top, the restaurant's logo and name. The logo is the one in Back office › Settings › Business details; without one, the board shows the restaurant's first letter.
- Preparing shows the numbers of the orders the kitchen is working on, in yellow.
- Ready shows the orders to collect, in green, with the guest's name. The newest is the largest. The board chimes when an order becomes ready.
A number leaves Ready when staff tap Done in Orders, or after 15 minutes. The board shows counter, takeaway and delivery orders of the last 12 hours, never table orders. In a new restaurant, order numbers start again at 1 every day (Restart order numbers every day in Back office › Settings › Service).
To set it up, pair the screen as a Pickup board in Back office › Devices & printers: see Devices, printers and stations. Or turn a paired till into a pickup board:
- A manager unlocks the till with their PIN.
- Tap More.
- Under Use this screen as, tap Pickup board.
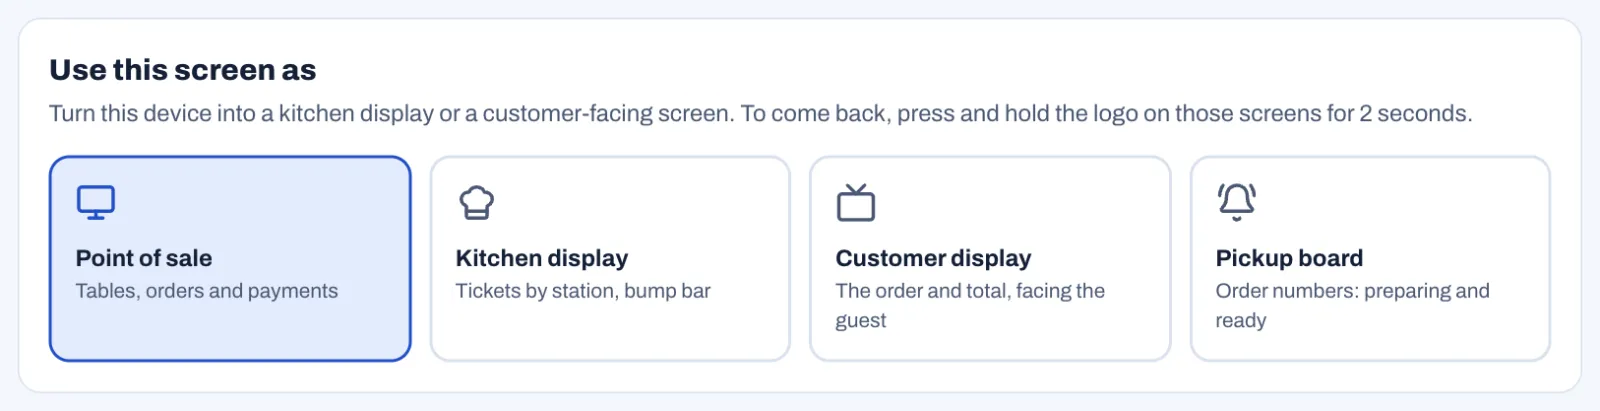
The board has no buttons. To turn it back into a till, press and hold the logo at the top left for 2 seconds. Use this screen as shows only to people whose role has Manage devices and printers.
#Show the order on the customer display
The customer display faces the guest at a till, so they can check their order and the total. Each customer display faces one till or handheld, and shows only the order open on it.
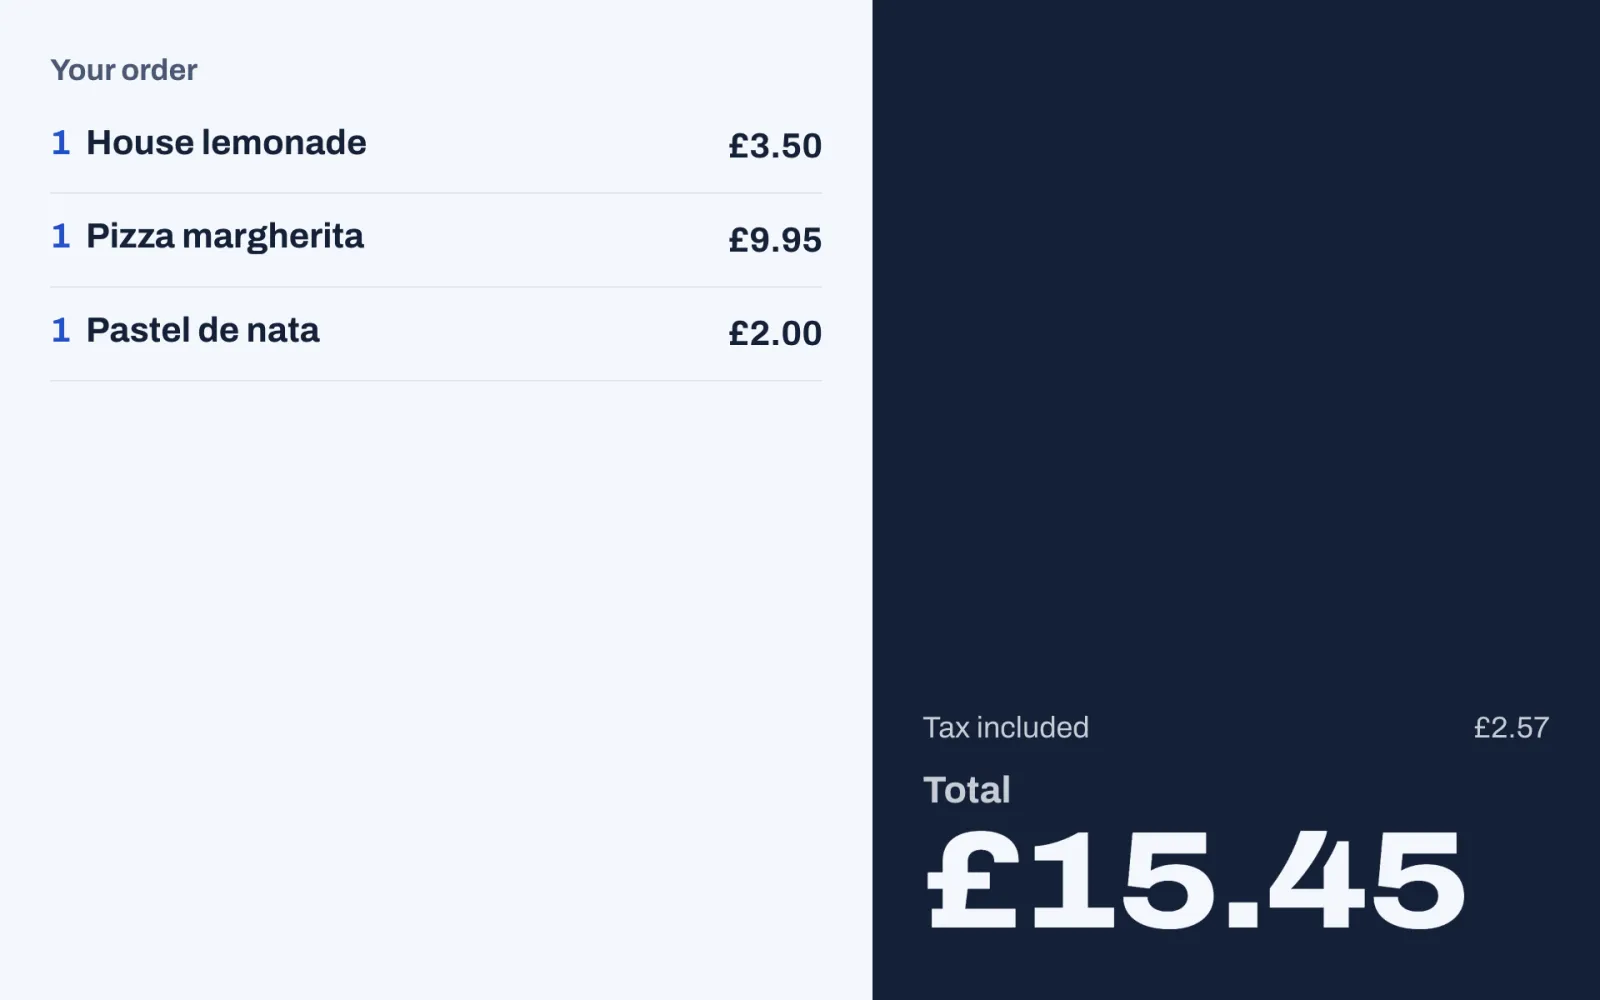
- Between orders, it shows the restaurant's logo, your welcome message and the restaurant's name, over a photo of one of your dishes when the menu has photos. Change the message in Back office › Settings › Service under Welcome message.
- While an order is open on its till, it shows Your order: each item with its options and price (On the house for free items), any discount, the tax (Tax included where your prices include tax) and the Total still to pay.
- Once the order is paid, it shows "Thank you!" and the restaurant's name for a few seconds.
The display shows items once they are saved: after you tap Send or Pay, not while you are still tapping dishes.
To set it up:
- Place a tablet or a screen facing the guest, and pair it as a Customer display in Back office › Devices & printers. See Devices, printers and stations.
- Choose the till it faces. In Back office › Devices & printers, select the display and choose the till under Faces the till. Or, on the display itself, tap the till under "Which till does this screen face?".
A manager can also turn a paired till into a customer display: unlock it, tap More, and under Use this screen as, tap Customer display. The screen then asks which till it faces.
The display has no buttons. On its welcome screen, press and hold the restaurant's logo for 2 seconds. Two choices appear: Choose another till, and Use this screen as a point of sale to turn it back into a till.
#Good practice at the counter
- Ask for the name before the first item, and type it straight away.
- Tap Pay, then let the guest check the order on the customer display before you charge.
- Tap Done as soon as an order is collected, so the pickup board shows only orders still waiting.
- At a till shared by several people, turn on Lock after each payment in Back office › Settings › Security, so every sale is under the right name.
The kitchen display
This chapter covers the kitchen side of service: how orders reach each station, which tickets each kitchen screen shows, how to read a ticket, guests' allergies, and how to start, finish, bump and recall a ticket. It also covers dishes voided after they reach the kitchen, kitchen printers, bump bars, and how servers hear that their food is ready. Cooks and bartenders use the kitchen display. Managers set up stations, screens and printers in the back office. Servers follow their food on the till or a handheld.
Before you start
- The kitchen screens are paired and the kitchen printers are added: see Devices, printers and stations.
- Your stations are set up and every dish goes to one: see Send each dish to the right station and Build your menu.
#How orders reach the kitchen
When a server taps Send, Sofrito splits the order by station. Each station gets its own ticket with only its own dishes: the kitchen gets the food, the bar gets the drinks. The ticket appears at once on every kitchen display that shows that station, and prints on the station's printers if it has any.
A station's tickets wait on kitchen screens only when both of these are true at the moment the order is sent:
- Show on kitchen screens is on for the station in Back office › Devices & printers › Stations. It is on for a new station.
- A paired kitchen display shows the station: the station is chosen in the display's settings, or the display shows All stations. The display doesn't have to be switched on.
Otherwise the station's tickets only print, and close as they print. Its dishes show Served on the check as soon as they are sent, nothing waits on the till's Kitchen screen, and nothing counts as late. A restaurant without kitchen screens doesn't need to do anything. In Devices & printers › Stations, each station shows Shown, Hidden, No screen shows it, or Screen not in use when the displays that show it haven't connected for over a day. Such a display is marked Tickets wait on it under Devices: its tickets are never marked served. Switch it back on, or revoke it if it is no longer used. Pairing a kitchen display changes only the orders sent after it.
- When the server sends more dishes for the same table later, they arrive on a new ticket marked ADD-ON.
- A dish with no station is never sent to the kitchen.
- A kitchen display shows only the tickets of the current business day, which ends at the hour set in Back office › Settings › Language and region › Business day ends at. Closing the day (Z) clears any ticket still open from that day, and those tickets don't come back in Recall: see Close the day.
- A kitchen display needs no PIN. Once it is paired, it shows tickets as soon as it is switched on.
- The kitchen display uses a dark theme. When nothing is waiting, it shows All caught up.
#Choose the stations a screen shows
Each kitchen display shows every station, or only the ones you choose. Give each station its own screen, for example one on the grill and one behind the bar, and put a screen on All stations at the pass. The demo restaurant has one kitchen display, Kitchen pass, which shows all stations. Devices & printers lists it as Demo screen: no device connects to it, but its tickets wait on it as on a real screen.
On the kitchen display:
- Tap a station at the top of the screen, for example Kitchen. The screen now shows only that station's tickets.
- Tap another station to add it, or tap a chosen station again to take it off.
- Tap All stations to show everything again.
Only stations with Show on kitchen screens turned on are listed. If none is, the screen says so and tells you where to turn it on. The screen keeps your choice when it restarts. The settings button at the top right opens Screen settings, which has the same choice as switches under Stations on this screen.
From the back office:
- Select Devices & printers › Devices, then the kitchen screen.
- Under Stations on this screen, select All stations, or only the stations this screen should show.
- Select Save.
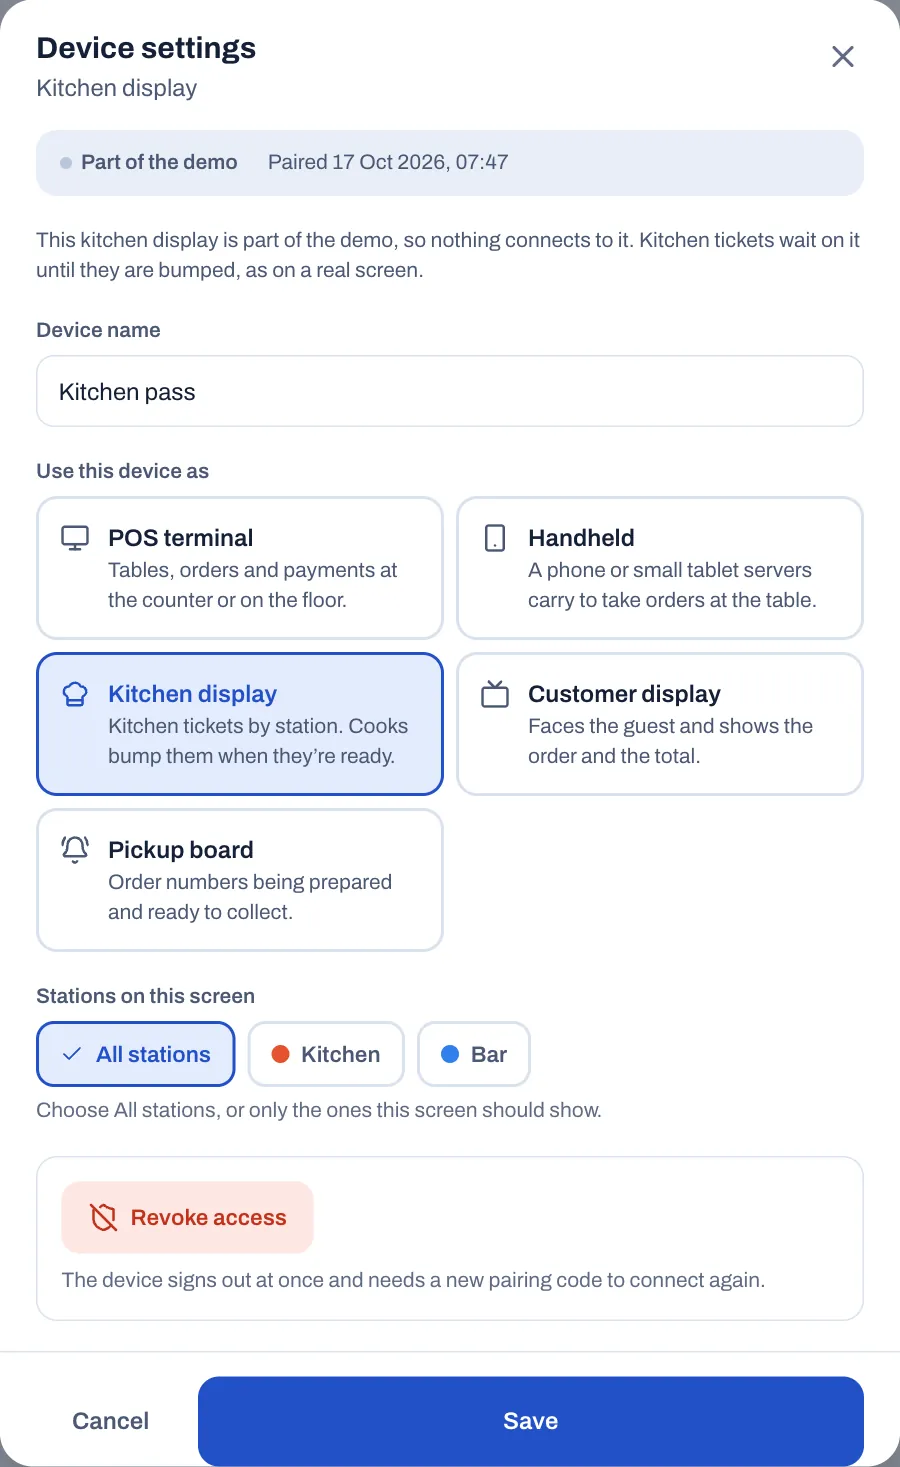
To use the screen as a till again, press and hold the logo at the top left for 2 seconds. The screen asks "Use this screen as a point of sale? Kitchen tickets stop showing on it.": tap Switch to point of sale, or Cancel to keep it as a kitchen display. Or open Screen settings, tap Use this screen as a point of sale, then tap Switch to point of sale. To turn a till into a kitchen display, see Repurpose a screen.
#Read a ticket
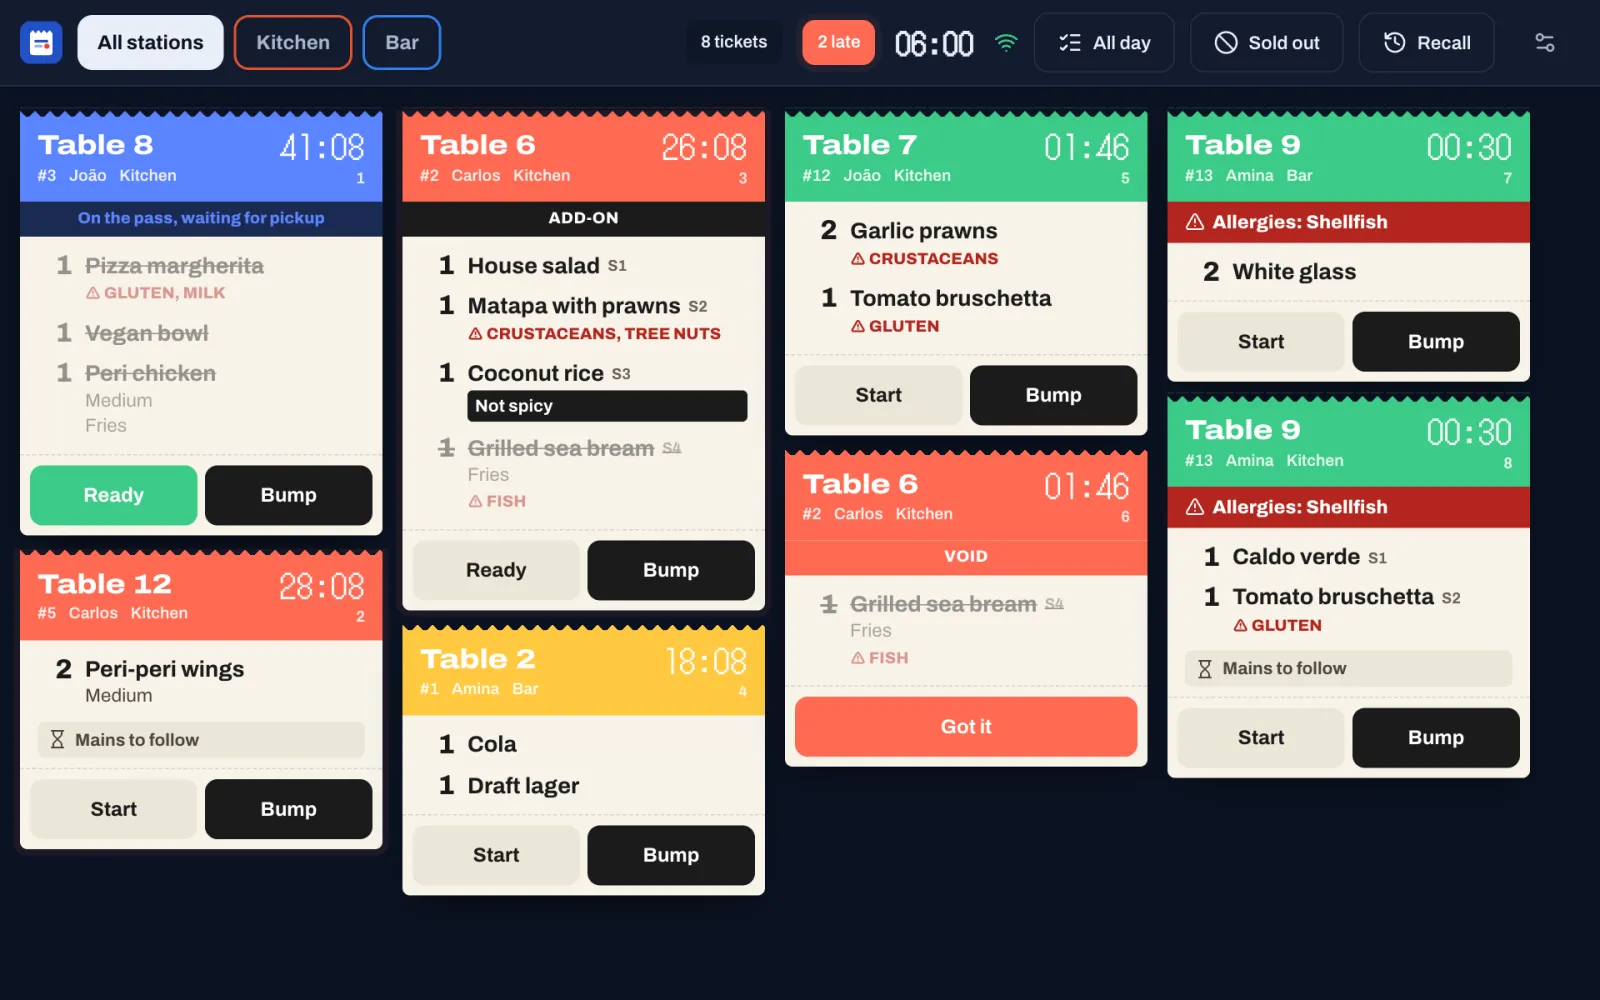
Tickets are in the order they arrived, oldest first: down the first column, then down the next. Tickets marked RUSH go first. When there are more than fit, scroll sideways.
The top bar shows how many tickets are on the screen, how many are late (in red), the time, and a Wi-Fi sign that turns red when the screen loses its connection.
The colour at the top of a ticket shows its age:
| Colour | Meaning |
|---|---|
| Green | New. |
| Yellow | Older than Warn after: 10 minutes in a new restaurant. |
| Red | Older than Late after: 20 minutes in a new restaurant. The ticket pulses and counts as late. |
| Blue | Ready and waiting on the pass. |
A VOID ticket is red too, whatever its age: see When a dish is voided.
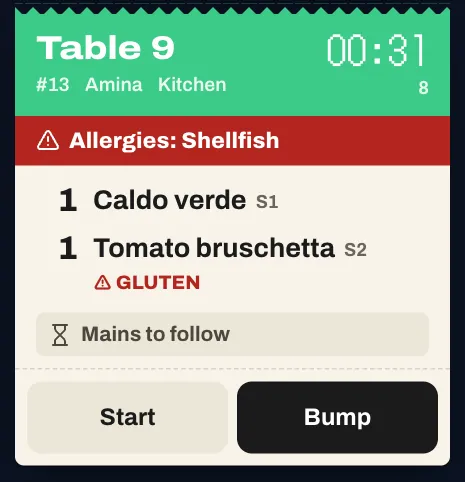
At the top of each ticket:
- The table, for example Table 7. A takeaway or counter ticket shows the guest's name, or the order type when there is no name.
- The order number, the server and, when the screen shows all stations, the station.
- The timer: minutes and seconds since the order was sent.
- A small number under the timer: the ticket's place on the screen, for the bump bar.
Under it, a red band when the guests have allergies: for example "Allergies: Shellfish". See Guests' allergies.
Then a coloured line when the ticket needs attention:
- ADD-ON: more dishes for a table that already has a ticket at this station.
- RUSH: the server has asked the kitchen to hurry.
- FIRE: start a course you already have. The note says which, for example "FIRE MAINS".
- VOID: the server has voided a dish you already had.
- On the pass, waiting for pickup: the ticket is ready.
Then the dishes:
- A yellow note at the top is for the whole order, for example the note on a booking.
- Each dish shows the quantity, the name and the seat: S1 is seat 1. Dishes are listed by course, then by seat.
- Identical dishes sent together share one line, for example "2 Burger", when Group identical dishes is on (it is in a new restaurant). Dishes with different choices, notes or seats stay on lines of their own.
- The guest's choices are under the dish. A choice that starts with "No", such as "NO onion", is in bold red.
- A note the server typed for the dish is in white on black.
- Allergens are in red capitals after ⚠.
- A dish that is crossed out and faded is done, or the server voided it after sending.
A course the server holds back is not on the kitchen display yet. While a later course of the order is held for your station, the ticket ends with a grey line such as "Mains to follow". The course arrives when the server taps Fire for it, for example Fire Mains, as a new ticket, marked ADD-ON if the table already has a ticket at your station, and the line goes. See Hold items and send them later.
#Guests' allergies
When a guest has allergies on their guest profile, every kitchen ticket for their order shows them in a red band under the ticket's header, for example "Allergies: Shellfish". Printed kitchen tickets start with them, after "ALLERGY:". The till shows the same band on the check and on each card of its Kitchen screen.
Sofrito takes the allergies from the guest on the order, from the guest of the booking the table was seated from, and from the guests of checks merged into the order. To add a guest's allergies, open their profile in Back office › Guests & loyalty: see Let allergies reach the kitchen.
The allergens of each dish, set in the menu, show under the dish. The guest's allergies are what that person can't eat, whatever they order.
#Start, finish and bump a ticket
- When you start a ticket, tap Start. The button changes to Ready.
- As each dish is done, tap it to cross it off. Tap it again if you crossed off the wrong one.
- When the whole ticket is on the pass, tap Ready. Crossing off the last dish does the same. The ticket turns blue, shows On the pass, waiting for pickup, and Sofrito tells the server.
- When the food has left the pass, tap Bump. The ticket leaves the screen.
A ready ticket also leaves the screen when the server takes the food and marks it served on the till. See How servers know food is ready.
#When a dish is voided
When a server voids a dish the kitchen already has:
- The dish is crossed out on its ticket, if the ticket is still on the screen. A ticket whose dishes are all voided leaves the screen.
- A red VOID ticket arrives at each station that had the dish, with the dish crossed out, and the screen plays a falling tone. It arrives even if you have already bumped the dish's ticket.
- On a station that only prints, the station's printers print the VOID ticket instead.
The VOID ticket stays on the screen until a cook taps Got it. Stop making the dish, or put it aside, then tap Got it. A VOID ticket never counts as late, and its dishes don't count under All day.
#Bring back a bumped ticket
If you bumped a ticket by mistake:
- Tap Recall at the top of the screen.
- Recently bumped lists the tickets bumped at this screen's stations in the last 30 minutes, newest first, up to 20. VOID tickets, and tickets the day close (Z) cleared, are not in it.
- Tap Recall next to the ticket.
The ticket comes back with its dishes no longer crossed off. Its timer still counts from when the order was sent. A manager sets how long tickets stay in the list with Keep bumped tickets in Recall for: see Set the kitchen times and alerts.
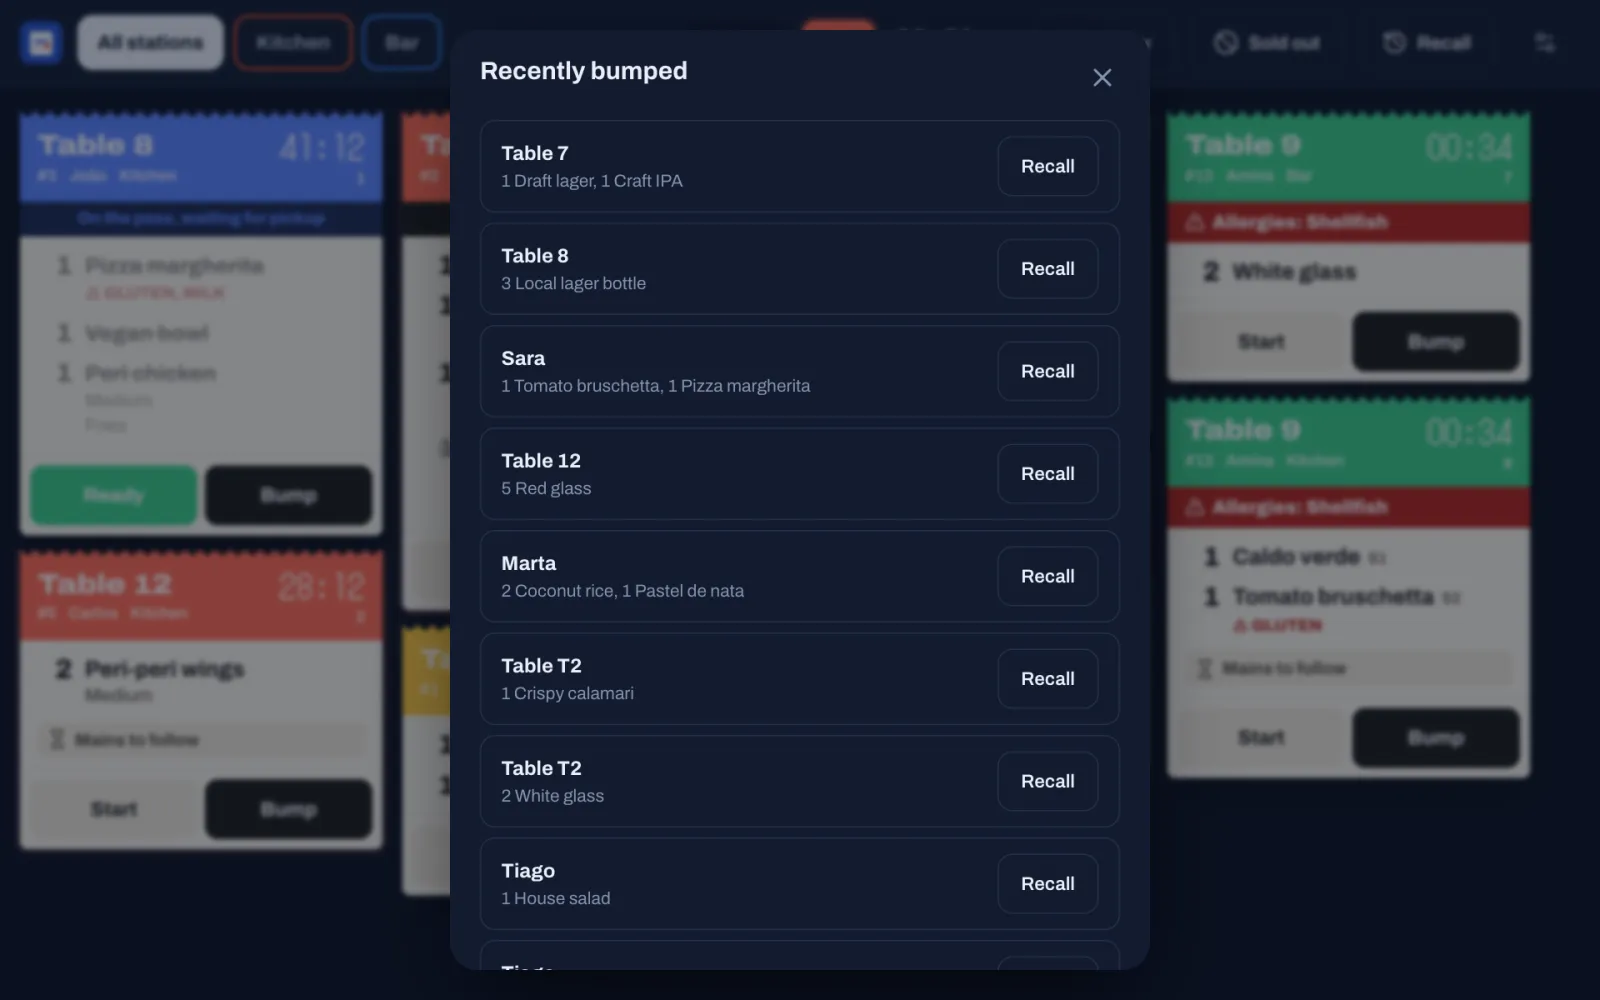
#See how much of each dish to make
Tap All day at the top of the screen. A panel lists each dish still to make on the tickets this screen shows, with how many in all, the most first. Dishes you have crossed off don't count. Tap All day again to close the panel.
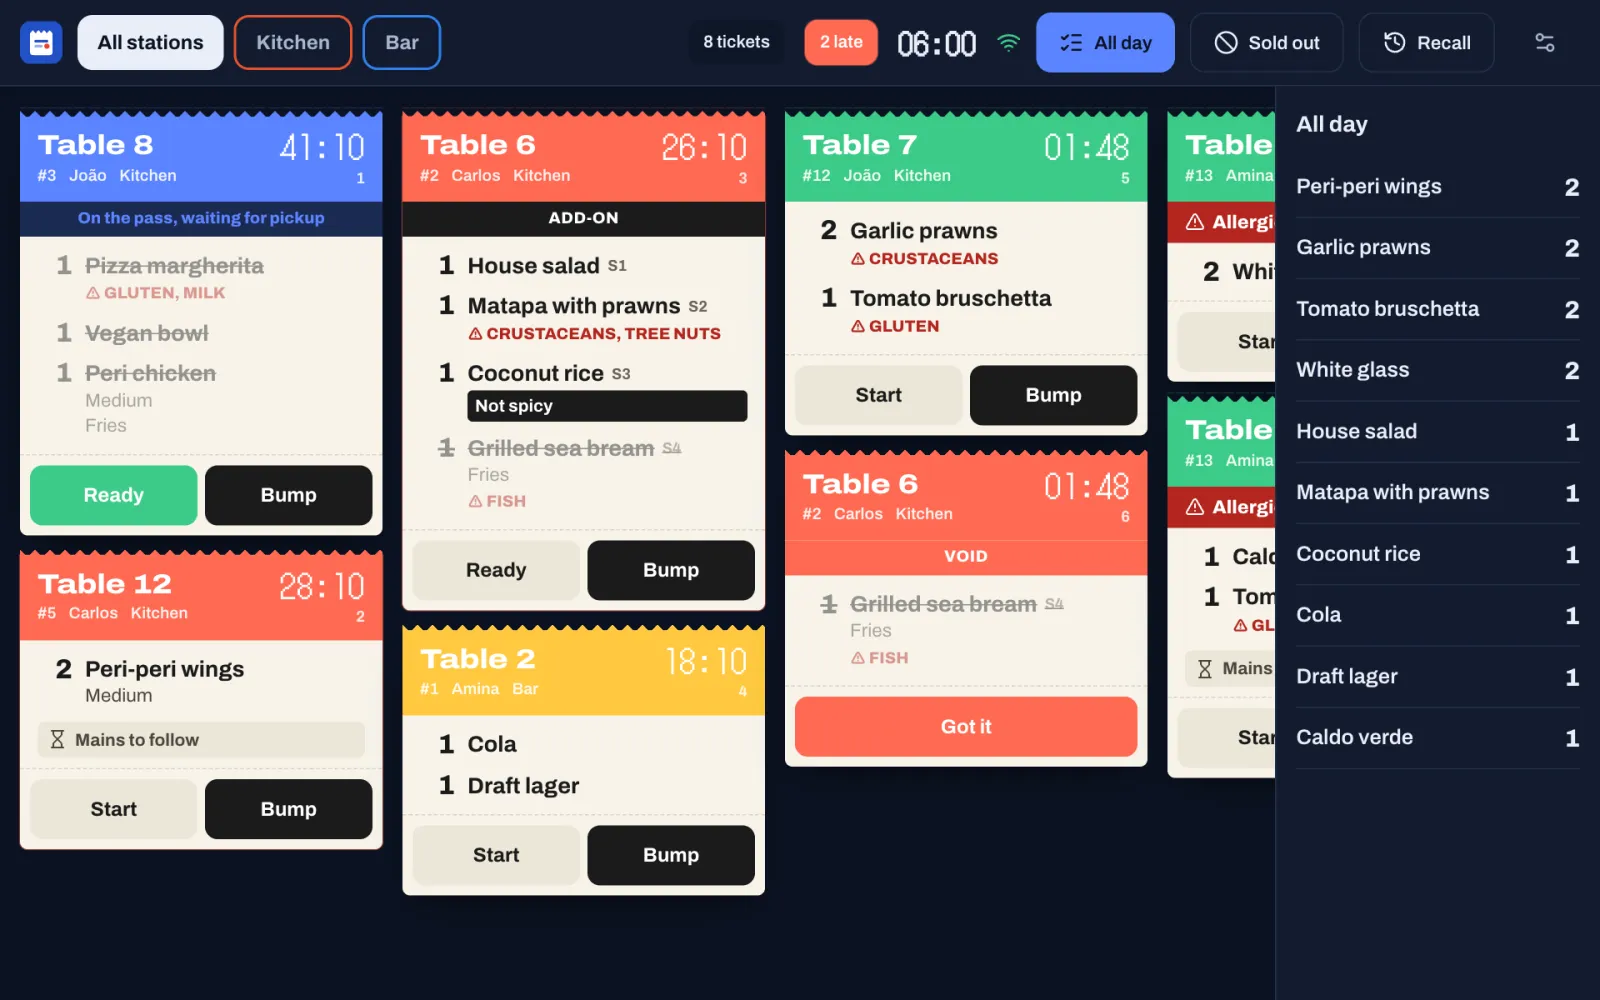
#Mark a dish sold out
When the kitchen runs out of something, mark it sold out from the kitchen display. Every till and handheld greys the dish out at once, and nobody can order it until it is back on sale. The kitchen display needs no PIN for this.
- Tap Sold out at the top of the screen. The number next to it is how many dishes are sold out.
- Find the dish. The list shows the dishes this screen's stations make, with the sold-out ones first. To search, type part of the name in Find a dish.
- Tap the dish, then Mark sold out.
To put it back on sale, open Sold out, tap the dish and tap Put back on sale.
For a dish whose stock is counted, such as a daily special, the dish shows How many are left. Change the number with − and +, or type it, and tap Save count. When none are left, type how many you have and tap Put back on sale.
Closing the day puts every dish marked sold out back on sale, unless your manager turned that off. See Mark a dish as sold out.
#Run the pass and the bar
The pass. Put a kitchen display on All stations where the food leaves the kitchen. It shows every station's tickets, each with the station's name, so whoever runs the pass sees when all of a table's dishes are ready. The cooks tap Ready. The ticket stays blue on the pass until the food goes out and the pass bumps it, or the server marks it served.
The bar. The bar is a station like any other. Put a kitchen display behind the bar showing only Bar, or give the Bar station a printer. Drinks tickets arrive the moment a server sends them, with the same buttons and colours.
#Use a bump bar or a keyboard
A kitchen display also works from keys, so you can plug in a keyboard, or a bump bar that sends these keys:
- 1 to 9 bump the ticket with that number. The number is the small figure under each ticket's timer. On a VOID ticket, the key does the same as Got it.
- R recalls the last ticket bumped.
Only the first nine tickets on the screen have a key.
#Print kitchen tickets
A station can print its tickets as well as show them on a screen, or print them instead.
- Add the kitchen printer in Back office › Devices & printers › Printers, with Prints set to Kitchen tickets. See Add a printer.
- In Devices & printers › Stations, open the station and choose the printer under Tickets print on. Choose more than one printer to print each ticket on all of them.
- Check that Print kitchen tickets is on in Back office › Settings › Kitchen. It is on in a new restaurant.
Each paper ticket shows:
- at the top, the guest's allergies after "ALLERGY:", in large white-on-black letters, when the guests have allergies on their profile;
- the station and the time, then the table in large letters;
- the order number, the order type, the number of guests, the server and the guest's name;
- each dish in capitals with its seat, and the guest's choices under it;
- the dish's note after ">>" and its allergens after "ALLERGY:", both printed white on black;
- a line such as "-- Mains --" between courses, when the ticket has more than one;
- the note for the whole order at the bottom.
When a server voids a dish the kitchen already has, the station's printers print a VOID ticket for it. RUSH, on the other hand, shows only on kitchen screens: it doesn't print anything.
A station that only prints has nobody to tap Ready on a screen, so its servers don't get a message when the food is ready. Tell them yourself, or give the station a kitchen display too. A takeaway made only of such dishes doesn't become ready by itself either: mark it ready on the till, as in Hand over an order when it's ready. To keep tickets coming when a kitchen printer fails, give it a Backup printer: see Choose the printing options.
#How servers know food is ready
When a station marks a ticket ready, the server who owns the order hears a chime and sees a message, for example "Table 7 is ready" and "Kitchen finished the ticket". It appears on every till and handheld where that server is signed in.
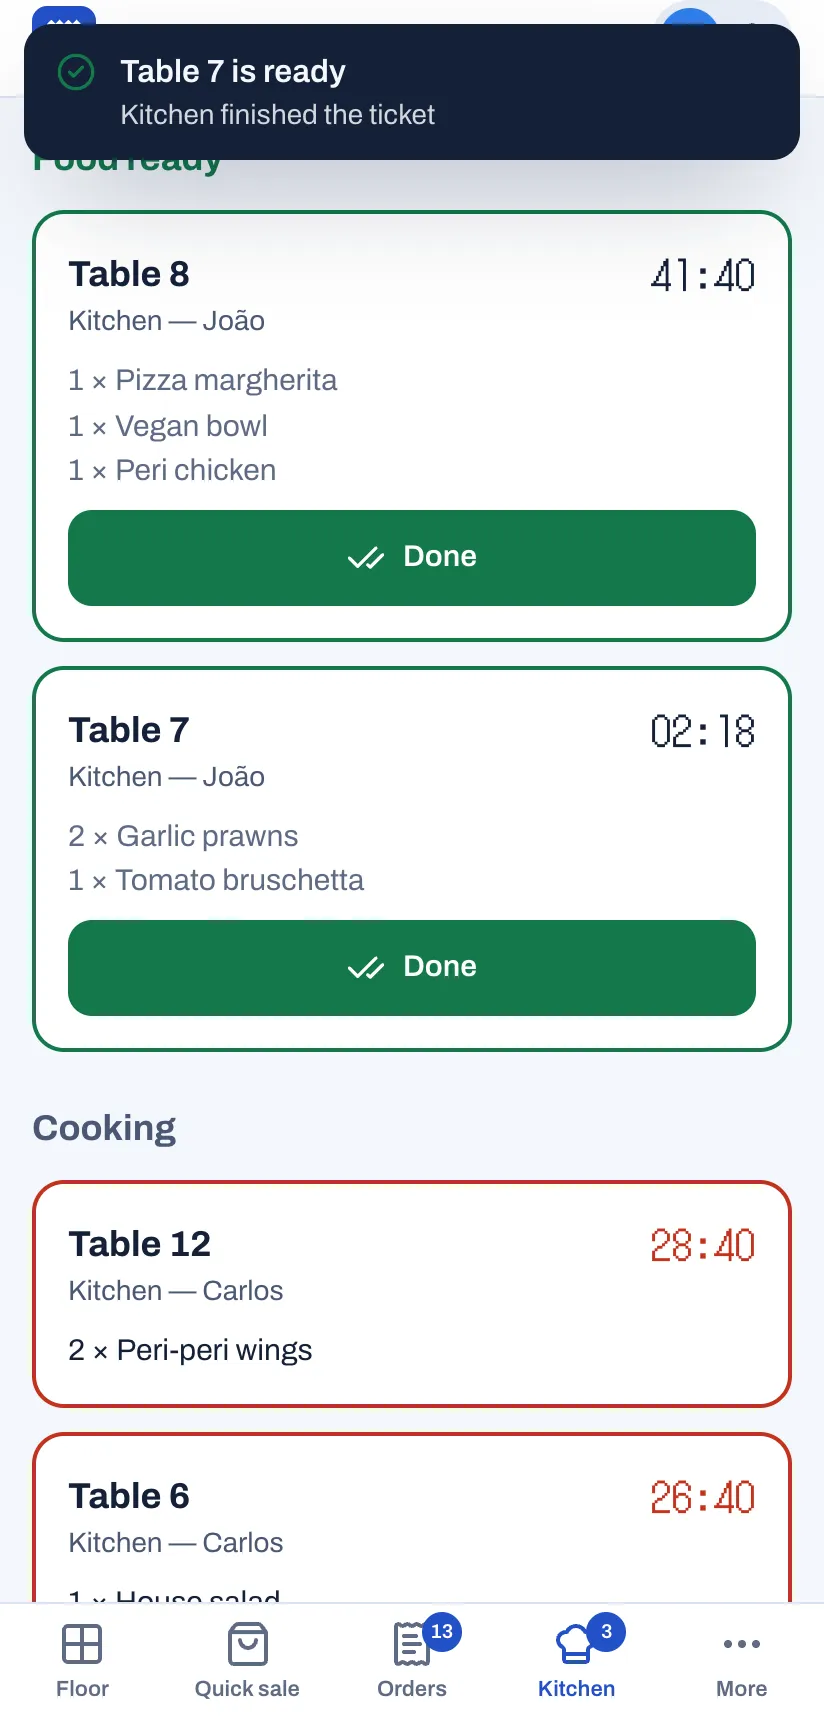
The server also sees that the food is ready:
- on the floor plan, where the table turns green, Food ready;
- under Kitchen, which lists every ticket under Food ready or Cooking, with the station, the server, the timer and the guests' allergies. The timer turns red when a ticket is late. Tap a ticket's table to open its order;
- on the order itself, where a green button shows, for example, Served: 3 ready on the pass.
When the server takes the food:
- Tap Done on the ticket under Kitchen, or open the order and tap the green Served button.
- The ticket leaves the kitchen display, and the table stops showing Food ready.
Tickets of stations that only print never show under Kitchen. For takeaway and counter orders, the order also becomes ready on the pickup board once every station with a kitchen screen has marked its ticket ready. See Counter, takeaway and pickup.
#Set the kitchen times and alerts
In Back office › Settings › Kitchen:
- Warn after: the minutes before a ticket turns yellow.
- Late after: the minutes before a ticket turns red and counts as late. It must be more than Warn after.
- Group identical dishes: identical dishes sent together show as one line, like "2 Burger". On in a new restaurant. Voiding one of them leaves the rest on the line.
- Keep bumped tickets in Recall for: how long a bumped ticket stays in Recall. 30 minutes in a new restaurant.
- Sound for new tickets: kitchen screens play a sound when a ticket arrives.
- Tell the server when food is ready: the message on the server's devices.
- Print kitchen tickets: stations with a printer get a paper ticket as well as the screen.
Select Save changes when you are done. The same late time turns timers red on the Kitchen screen of the till.
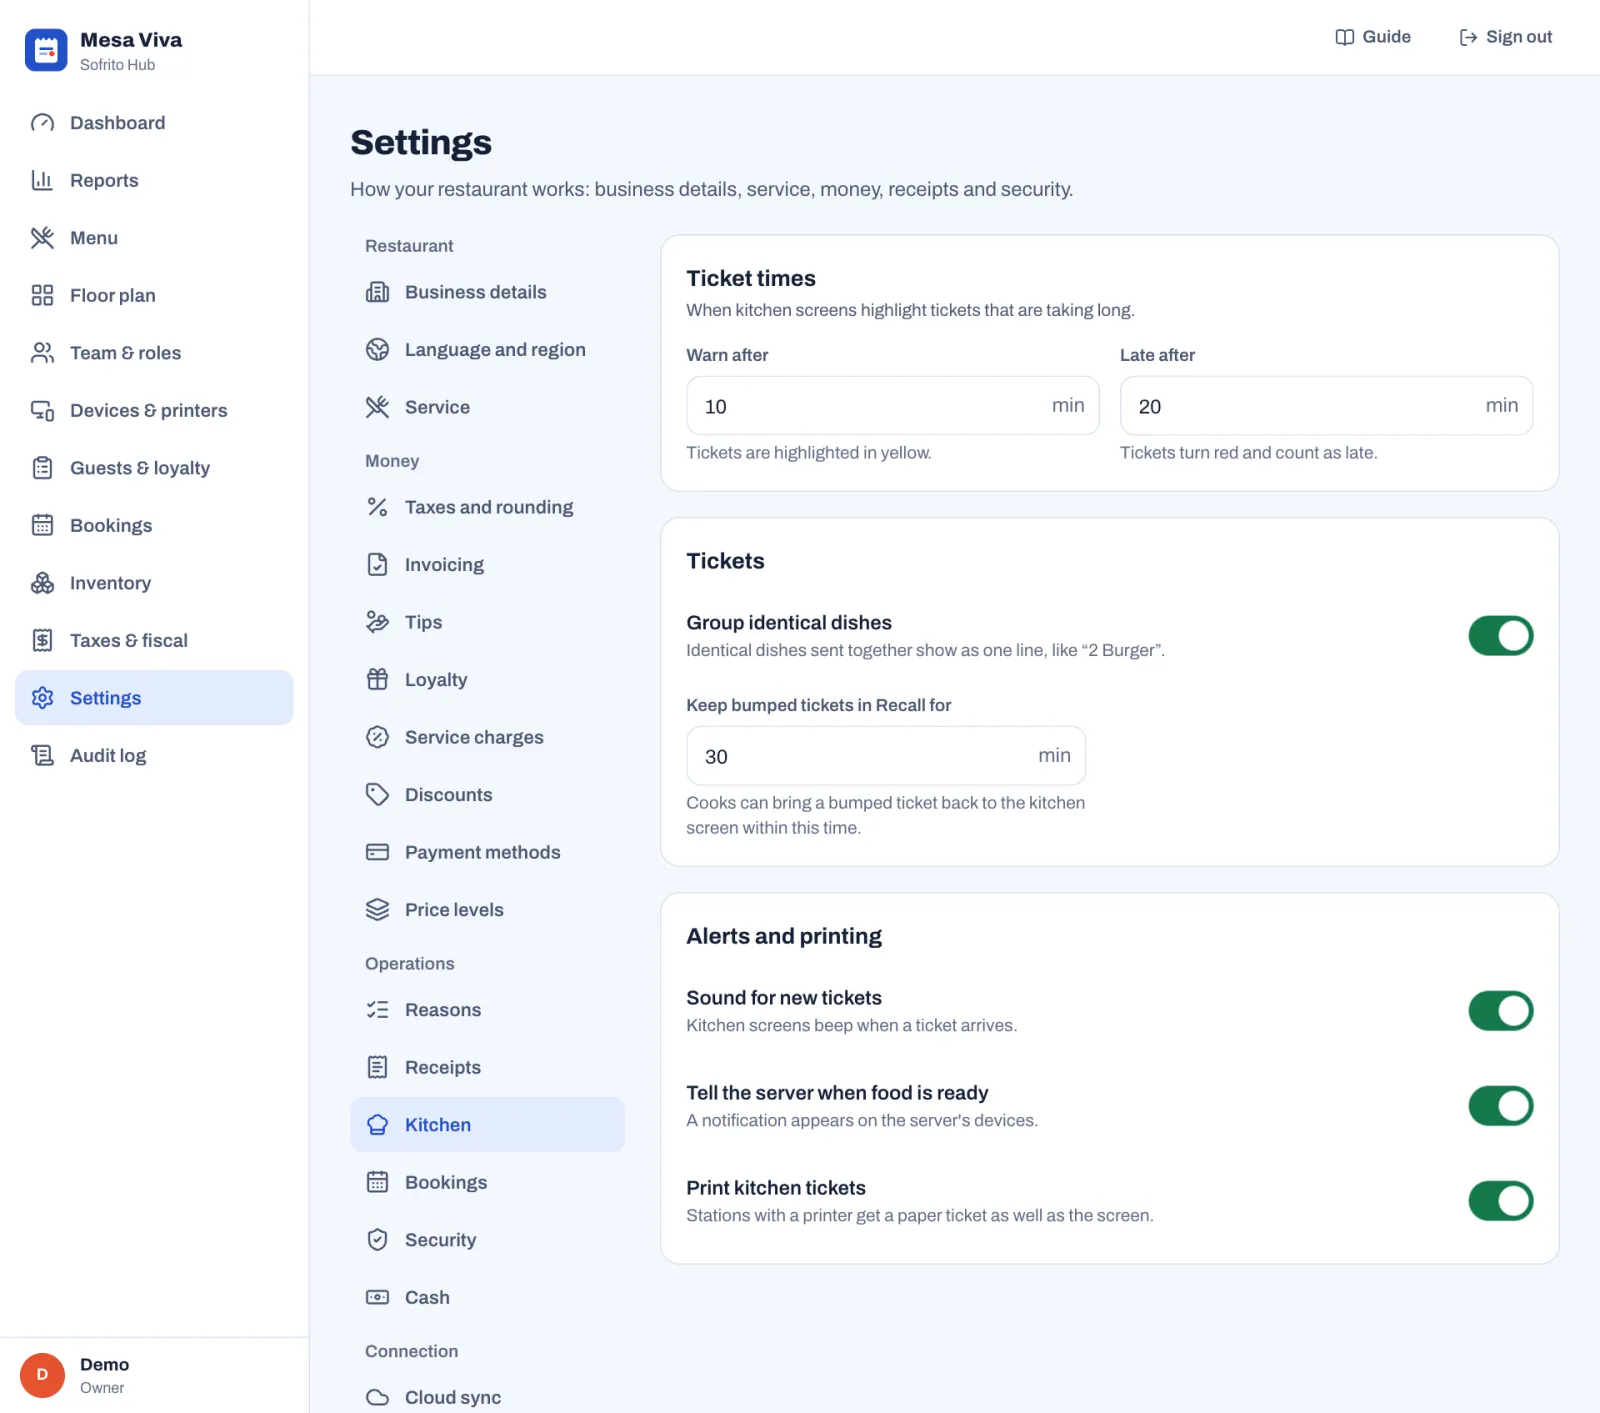
To see how long tickets take at each station, open the Kitchen tab in Back office › Reports: see Dashboard and reports. It times only tickets finished on a kitchen screen.
#Busy nights
- Read the red allergies band before you start each ticket.
- Tap Ready as soon as food is on the pass, so servers come straight away.
- Keep one screen on All stations at the pass, even when each station has its own.
- Open All day at the start of a rush to see how many of each dish are coming.
- Mark a dish sold out the moment you run out, before servers take orders you can't make.
- Tap Got it on a VOID ticket as soon as you have seen it, so it doesn't hide the tickets still to cook.
- Bump tickets as the food leaves. Old tickets left on the screen hide the ones that are really late.
- Before you close, bump anything left on the kitchen display. Closing the day clears what is still open, and the next business day starts with All caught up.
Taking payment
This chapter is for everyone who takes payment, at the till or at the table with a handheld. It covers the payment screen, each way of paying, selling gift cards, tips, splitting the bill, part payments and correcting them, invoices with the customer's tax number, receipts, and what a paid order shows afterwards. Refunds are in Voids, discounts, refunds and approvals.
Before you start
- Your payment methods, tips and service charge are set up: see Payment methods, tips and service charge.
- Your receipts are set up: see Taxes, receipts and legal documents.
- The cash drawer is open: see Open for service. If it isn't, the till asks for the starting cash at the first cash payment.
#Open the payment screen
- Open the check: tap the table, or the order in Orders.
- Tap Pay. The button shows what is still to pay.
Items that have not been sent yet, held ones included, are saved, and go to the kitchen when the bill is paid in full.
The Payment window shows the table and order number at the top, for example "Table 6 (#2)". Anyone whose role can take payments can settle any check, whoever opened it.
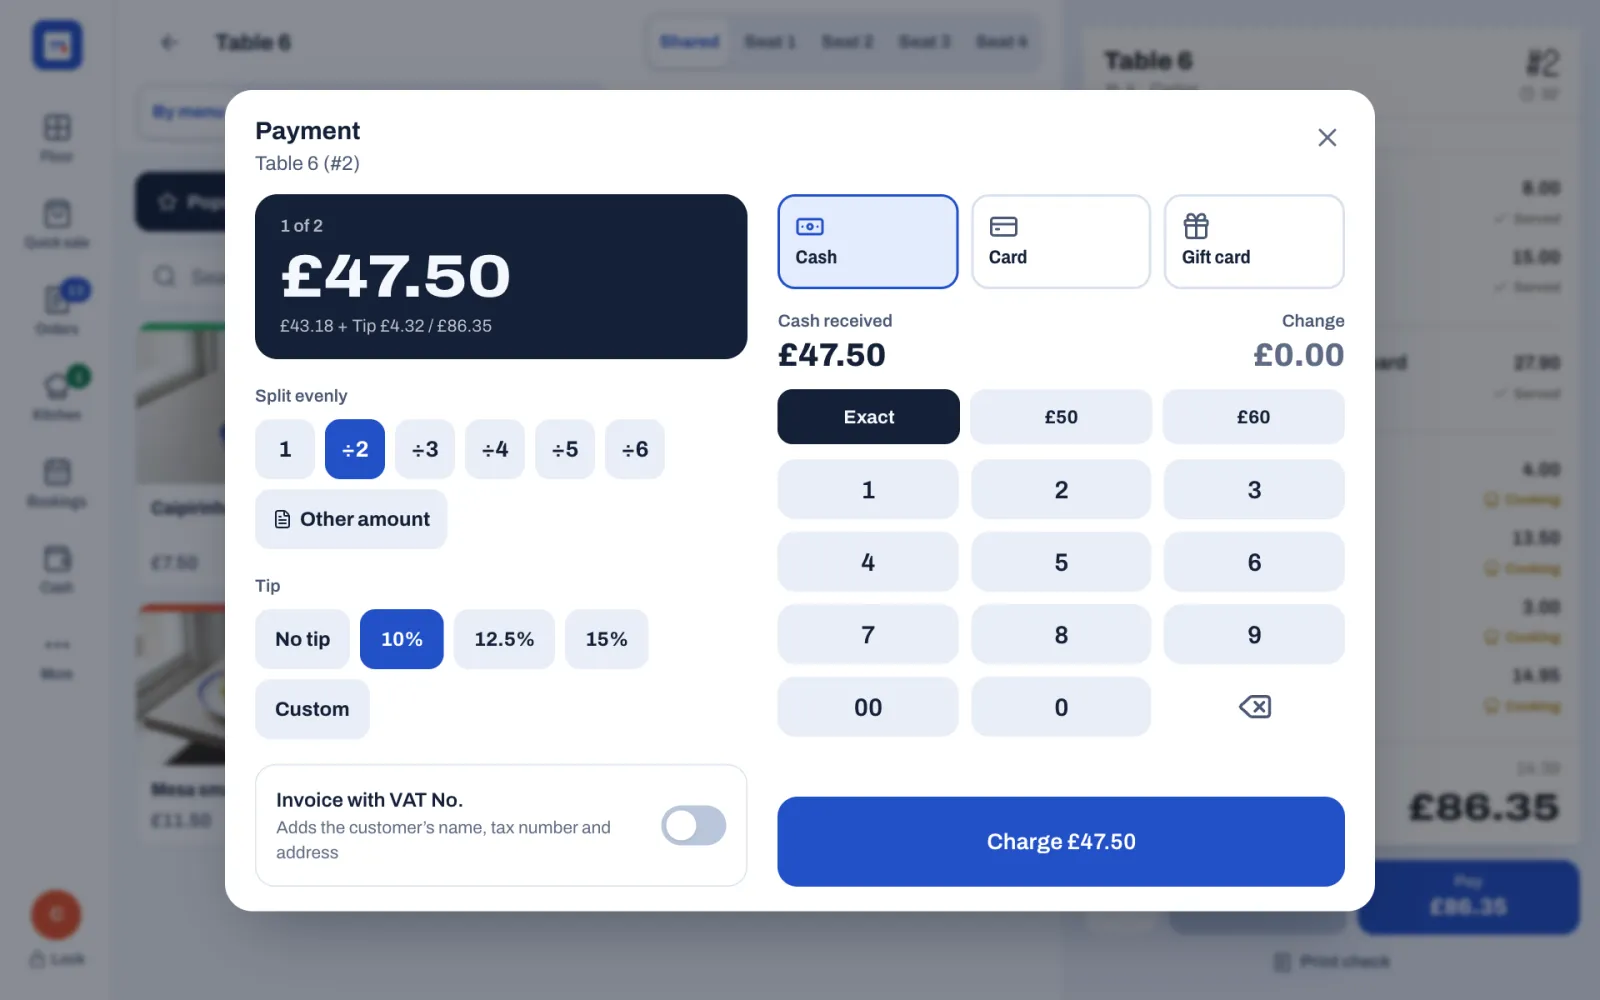
- On the left: the amount box (To pay, or for example 1 of 2 when you split), Payments taken once part of the bill is paid, Split evenly, Other amount, Tip and the invoice switch.
- On the right: one button for each payment method, for example Cash, Card and Gift card, and under it what that method needs.
- At the bottom right: the button that takes the payment, for example Charge £47.50.
To go back without paying, close the window with ×.
#Take cash
- Tap Cash.
- Tap the amount the guest gives you: Exact, or a note such as £50 or £60. For any other amount, type it on the number pad; the last two digits are pence.
- Check Change.
- Tap the button. It says, for example, Give £1.83 change, or Charge £47.50 when there is no change.
If no cash drawer is open, the Starting cash window opens first: "Count the cash in the drawer before the first sale." Count the cash, type the amount if it differs from the one shown, and tap Open drawer. The payment then goes through. To open a drawer, your role needs Open and close the cash drawer.
The cash drawer opens. When this payment completes the bill, Payment complete shows the change in large figures. Give the change, then print the receipt or skip it: see Print or skip the receipt.
#Take a card payment on your terminal
Sofrito does not talk to the card terminal. You type the amount on the terminal, then confirm the payment in Sofrito.
- Tap Card.
- Tap Charge with the amount, for example Charge £47.50. Sofrito shows "Waiting for the card terminal…" and asks you to confirm once the terminal shows the payment approved.
- Type the same amount, tip included, on the card terminal and let the guest pay.
- When the terminal shows that the payment is approved, tap Approved.
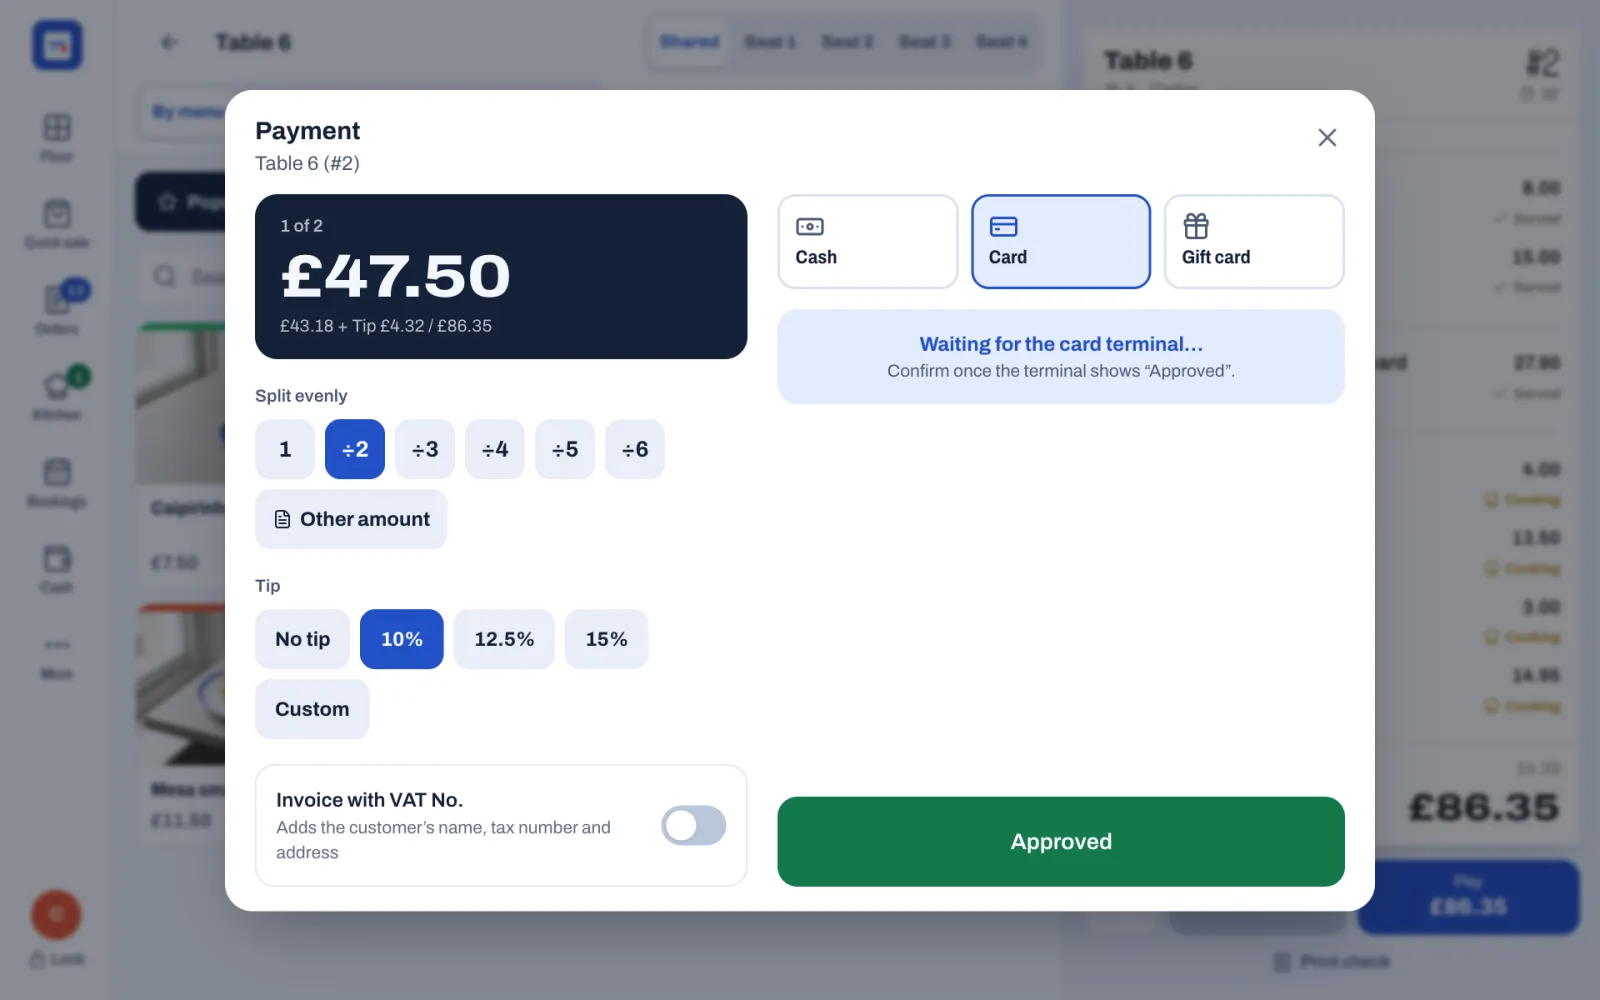
If the terminal declines the card, don't tap Approved. Choose another method, or close the window: nothing is recorded until you tap Approved.
A card method can also be set to Demo: payments are approved automatically in Back office › Settings › Payment methods. Sofrito then approves the payment as soon as you tap Charge, without a terminal. Use it only for training.
#Take mobile money
Mobile money methods ask for a reference, the transaction number the guest's phone shows after paying.
- Tap the method, for example M-Pesa.
- Ask the guest to pay from their phone and show you the confirmation.
- Type the transaction number in Reference ("Transaction ID from the phone").
- Tap Charge with the amount.
The Charge button stays grey until there is a reference. Any method with Ask for a reference turned on works this way: see Payment methods, tips and service charge.
#Take a gift card
- Tap Gift card.
- Type or scan the code in Gift card code.
- Tap Charge with the amount.
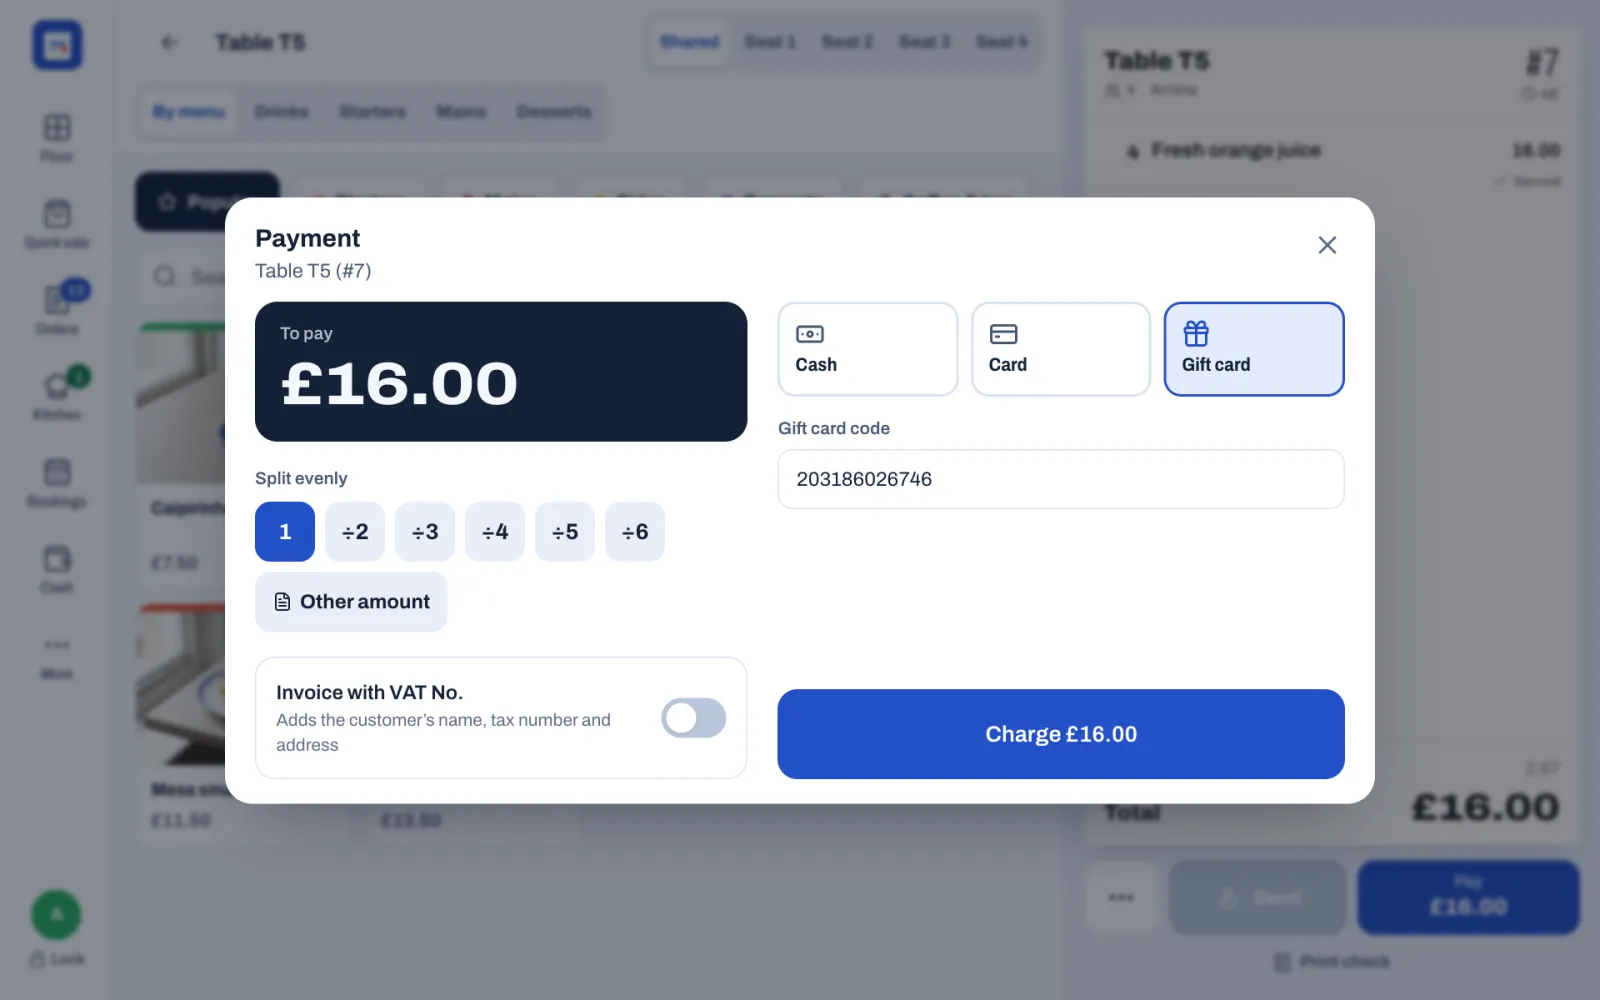
Sofrito takes the amount from the card's balance. If the card doesn't hold enough, it says how much is left, for example "This gift card has only £12.50 left.", and takes nothing: take that much on the card with Other amount, and the rest with another method. Tips can't be paid with a gift card. For the other gift card messages, see Troubleshooting and questions.
#Sell a gift card or check its balance
Anyone whose role can take payments sells gift cards on the till. Selling one is not a sale: tax is charged on the order the card later pays for.
- Tap More.
- Under Gift cards, tap Sell or check.
- On Sell or top up, type or scan the code printed on the card under Gift card code. Leave it empty to give the card a new code. For a card already sold, the box says how much is left on it, and the amount is added to it.
- Tap an amount, such as £50, or type it on the number pad.
- Under Paid with, tap how the guest pays, for example Cash. For cash, tap the notes the guest gives you.
- Tap Sell for £50.00, or Top up £50.00 for a card already sold.
Sofrito shows Gift card sold (or Gift card topped up), the card's code and its balance. For a new code, it says "Write this code on the card, or give the guest a copy." Tap Done. Cash goes into the cash drawer. If no drawer is open, the Starting cash window opens first, as for a cash payment: count the cash, tap Open drawer, and the sale goes on. A gift card or a house account can't pay for a gift card.
To see what is left on a card, tap Check a balance, type or scan the code and tap Check. Sofrito shows the balance, the date the card was issued and its latest movements, such as Issued, Spent and Refunded. Top up this card takes you back to Sell or top up with the code filled in. For gift cards given away or corrected in the back office, see Guests, loyalty and gift cards.
#Charge a guest's house account
If your restaurant uses house accounts (see Charge orders to a house account), a guest with an account can put the bill on it and pay later.
- On the check, tap ••• › Add guest and choose the guest. Their card shows what they owe and what is left, for example "House account: £0.00 owed, £200.00 left".
- Tap Pay.
- Tap the house account method, for example House account.
- Tap Charge with the amount.
Sofrito adds the amount to what the guest owes. Without a guest on the check, it says "Choose the guest whose house account is charged." If the amount would take the guest over their limit, it says how much is left and takes nothing. Guests pay off their account in the back office.
#Add a tip
- Under Tip, tap a percentage, for example 10%, 12.5% or 15%.
- Or tap Custom and type the tip.
The amount box shows the bill and the tip, for example "£43.18 + Tip £4.32". The tip is worked out on the amount being paid now, so each guest who pays a share tips on their share. On the receipt, the tip shows under the payment.
The Tip row appears when Ask for a tip is on in Back office › Settings › Tips and the chosen method accepts tips. Cash, card and mobile money do in a new restaurant; gift cards don't. In reports, tips are kept apart from sales.
#Split the bill
#Evenly
- Under Split evenly, tap ÷2, ÷3 and so on up to ÷6. The amount box shows 1 of 2 and one share.
- Take the first payment. Sofrito shows, for example, "£43.17 left to pay", and the window stays open.
- Take the next payment. Sofrito counts down: after the first of three shares, it shows 1 of 2.
Each guest can pay their share with a different method and their own tip. After each payment, Tip goes back to No tip, so each guest chooses their own.
#By an amount
- Tap Other amount. Sofrito suggests half of what is due.
- Tap the delete key until the amount is empty, then type the amount. The last two digits are pence.
- Choose the method and take the payment.
#By item, on separate checks
Do this before anyone pays.
- On the check, tap ••• › Split check.
- Each item has a row of buttons. · keeps it on this check; 1 moves it to the first new check, 2 to the second, and so on. Tap + for another check, up to six. The totals of each check show at the top.
- Tap Split check.
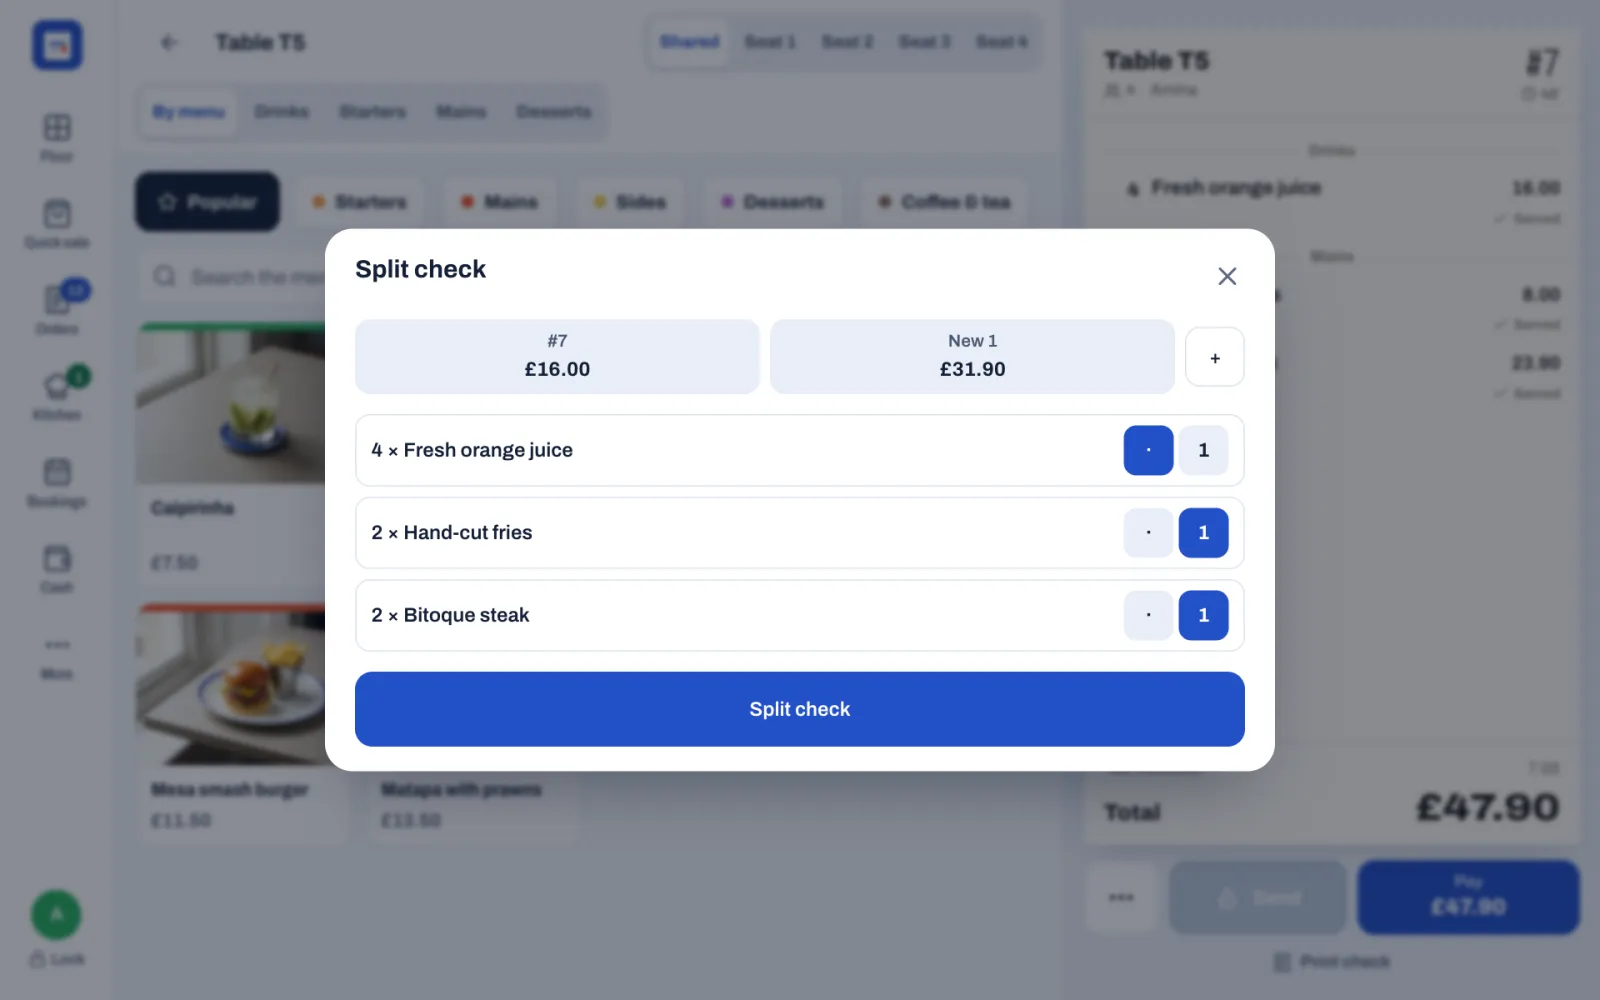
Sofrito opens the first new check. Each check has its own number and is paid on its own. When you tap the table, Sofrito lists its checks: tap the one to pay.
Items move as whole lines. To share one item, such as a bottle of wine, between guests, first tap it on the check and tap Split item ÷4 (the number is the number of guests, up to six). The item becomes equal parts on the same check, which you can then move to different checks. This button appears on sent and held items, on checks with more than one guest.
Once part of the bill is paid, Split check is no longer offered: split the payment evenly or by amount instead.
#Take part of the bill now
Any payment smaller than what is due leaves the order open. Sofrito shows, for example, "£43.17 left to pay".
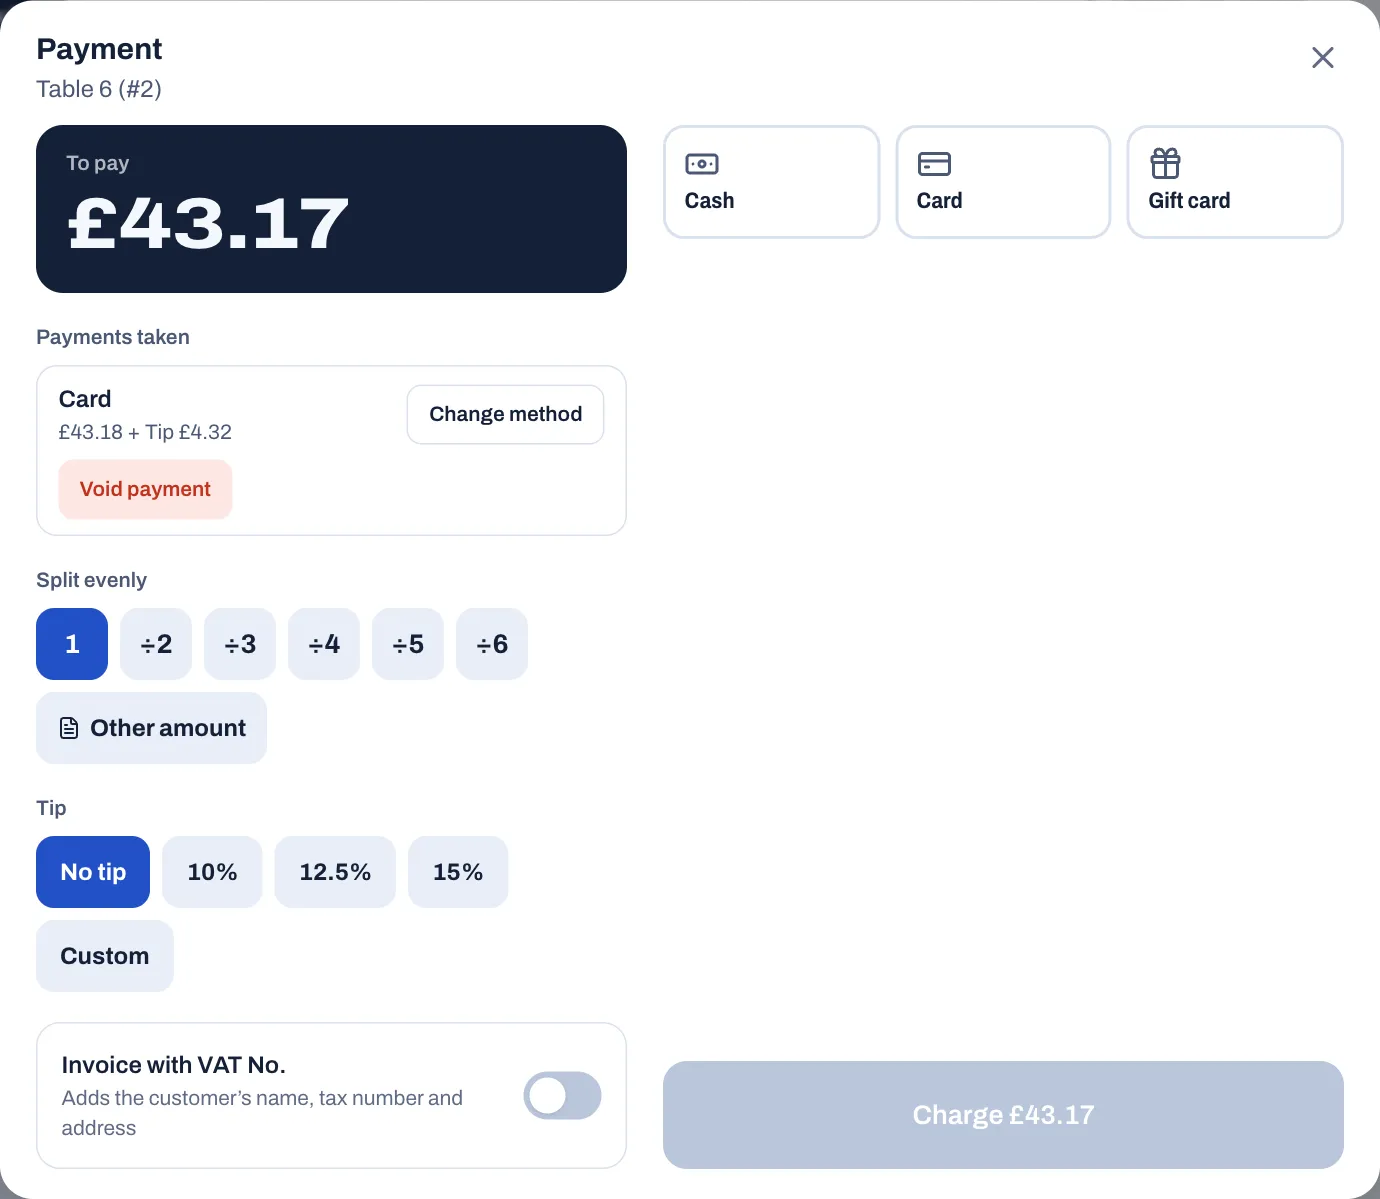
- The Payment window lists what was paid under Payments taken, and the amount box shows what is left.
- The check shows Paid and Due, and Pay shows what is left.
- The order's card in Orders shows Paid with the amount paid so far.
- The table stays busy on the floor until the rest is paid.
Come back to the check later and tap Pay to take the rest. The order closes, and the receipt is issued, when nothing is left to pay.
#Correct a payment
While the bill is still open, each payment under Payments taken has two buttons:
- Change method: for a payment taken with the wrong method, for example card that was really cash. Sofrito voids the payment and sets the same amount and tip up again. Tap the right method and take it.
- Void payment: takes the payment off the bill. Tap the reason, for example Charged in error.
Both need Void payments, or a manager's PIN. A voided cash payment comes out of the cash the drawer should hold. A voided gift card payment goes back on the card, and a voided house account payment comes off what the guest owes. A card payment is only voided in Sofrito: give the money back on the card terminal yourself.
If the total goes down after a payment, for example because an item was voided, the window says how much more was paid than the order now costs. Void a payment, then take it again for the right amount.
Once the order is paid in full and closed, its payments can't be voided: refund it instead. See Refund a paid order.
#Give an invoice with the customer's tax number
When a business customer needs their name and tax number on the document:
- On the payment that pays the bill in full, turn on Invoice with VAT No. ("Adds the customer's name, tax number and address"). The name of the number follows your country, for example Invoice with NIF in Portugal or Invoice with NUIT in Mozambique.
- Type the customer's tax number under VAT No. and their name or company under Name / company.
- If the customer wants their address on it, fill in Address, Postcode and Town or city.
- Take the payment as usual.
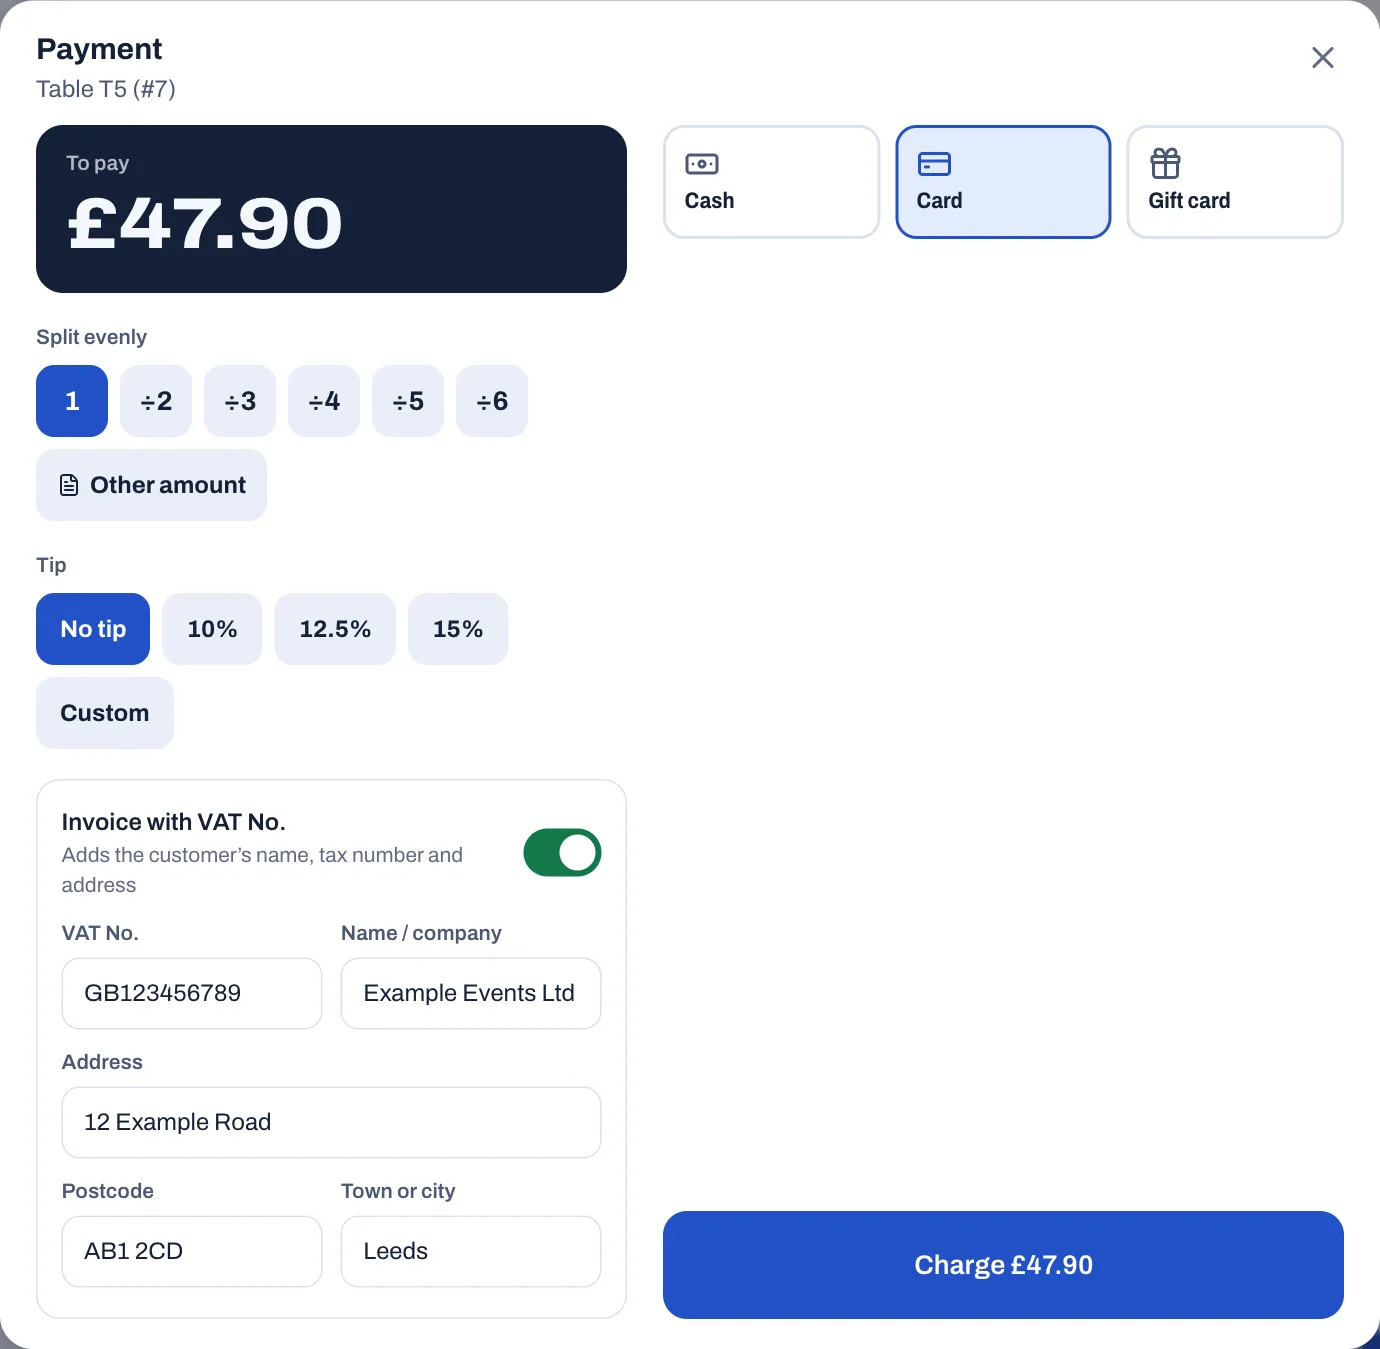
The document shows the customer's name, tax number and address. In the United Kingdom, the guest gets a VAT invoice instead of a receipt, with each item's price before VAT and its rate. If the tax number is not valid for your country, Sofrito shows "That tax number is not valid." and takes no payment: check the number with the guest and try again.
If the check has a guest profile with a tax number (see Guests, loyalty and gift cards), their name and number go on the document without the switch.
For each country's documents, see Taxes, receipts and legal documents and Country notes.
#Print or skip the receipt
When the bill is paid in full, Payment complete shows the document number, for example RC A2026/1146, and for cash the change to give.
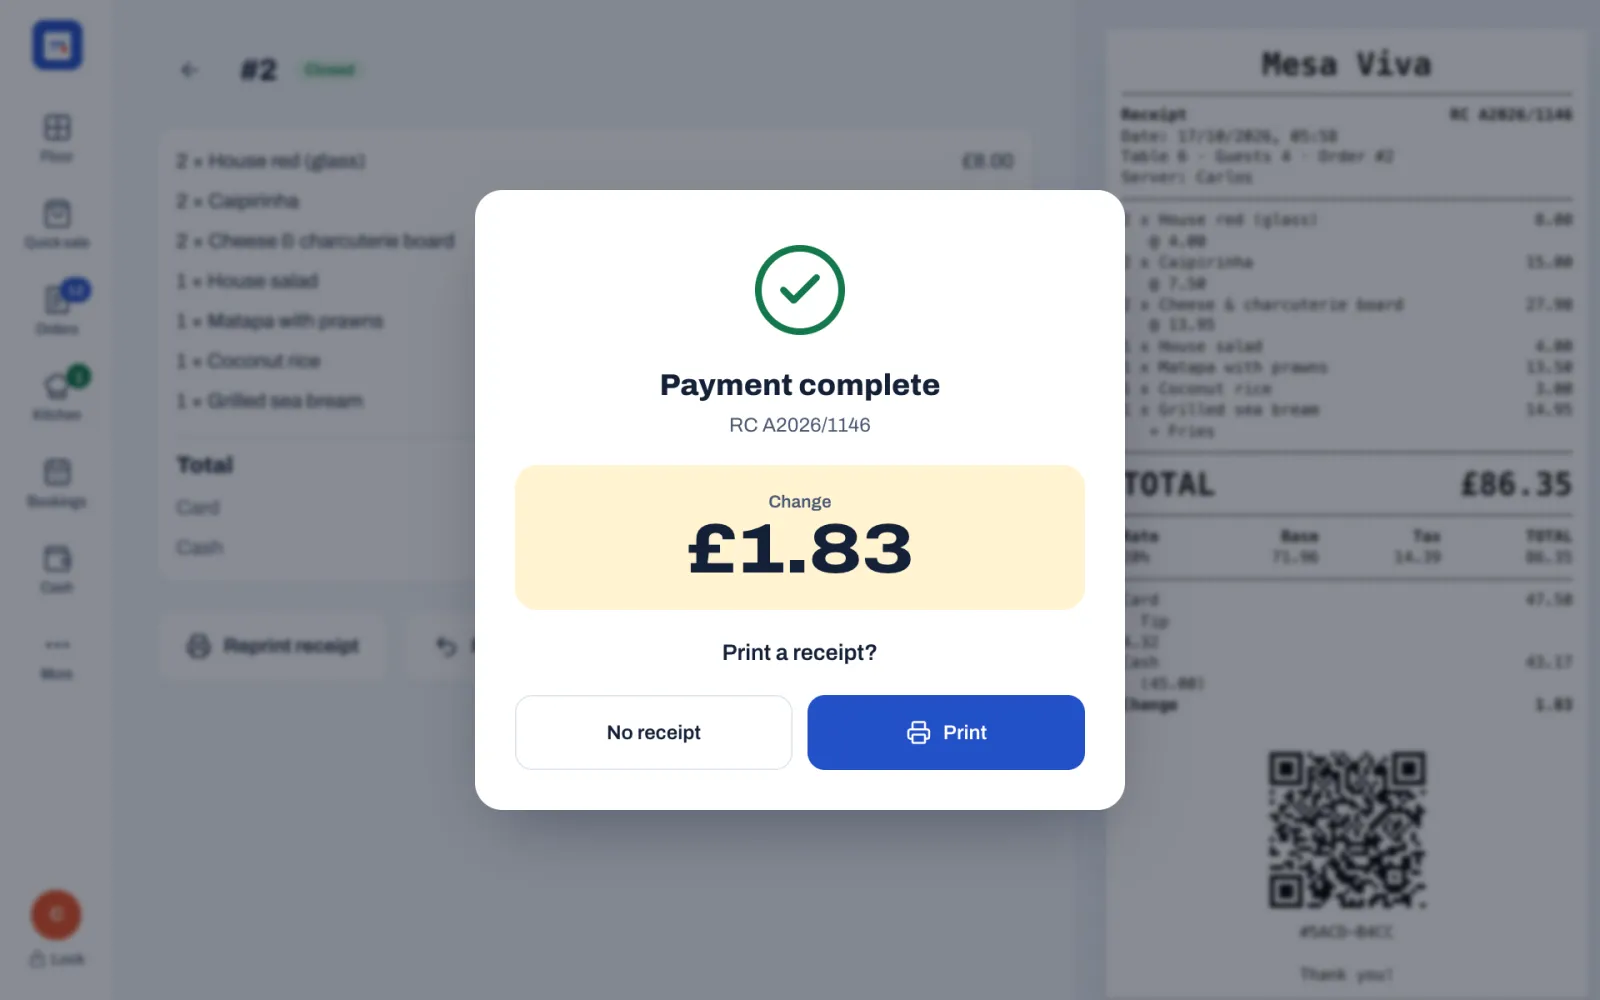
What you tap next depends on Print after payment in Back office › Settings › Receipts:
- Ask: the window asks "Print a receipt?". Tap Print to print it on this device's receipt printer, or No receipt. A new restaurant starts on Ask, except one set up for counter service, which starts on Always.
- Always: the receipt prints by itself. Tap Done.
- Never: nothing prints. Tap Done. If the guest wants a receipt later, use Reprint receipt on the order (see Reprint a receipt).
A table order then goes back to Floor, where the table shows Needs cleaning. A counter order opens a new, empty order. If Lock after each payment is on, the till locks.
If a receipt can't print, the till that sent it shows, for example, "RC A2026/1146 didn't print on Front counter", with the reason and a Reprint button. Fix the printer, for example add paper, and tap Reprint.
Copies, in the same settings, prints up to three receipts each time: the first is marked Original and the others Copy. If the receipt printer has its own Copies setting, the higher of the two counts.
#Reprint a receipt
- Tap Orders.
- Tap Closed.
- Find the order: search by number, table or name.
- Tap the order.
- Tap Reprint receipt.
A reprint is one copy, marked Copy. If the receipt was never printed, for example because the guest said no, the first print is the original.
#What a closed order shows
Tap a paid order in Orders › Closed to open it.
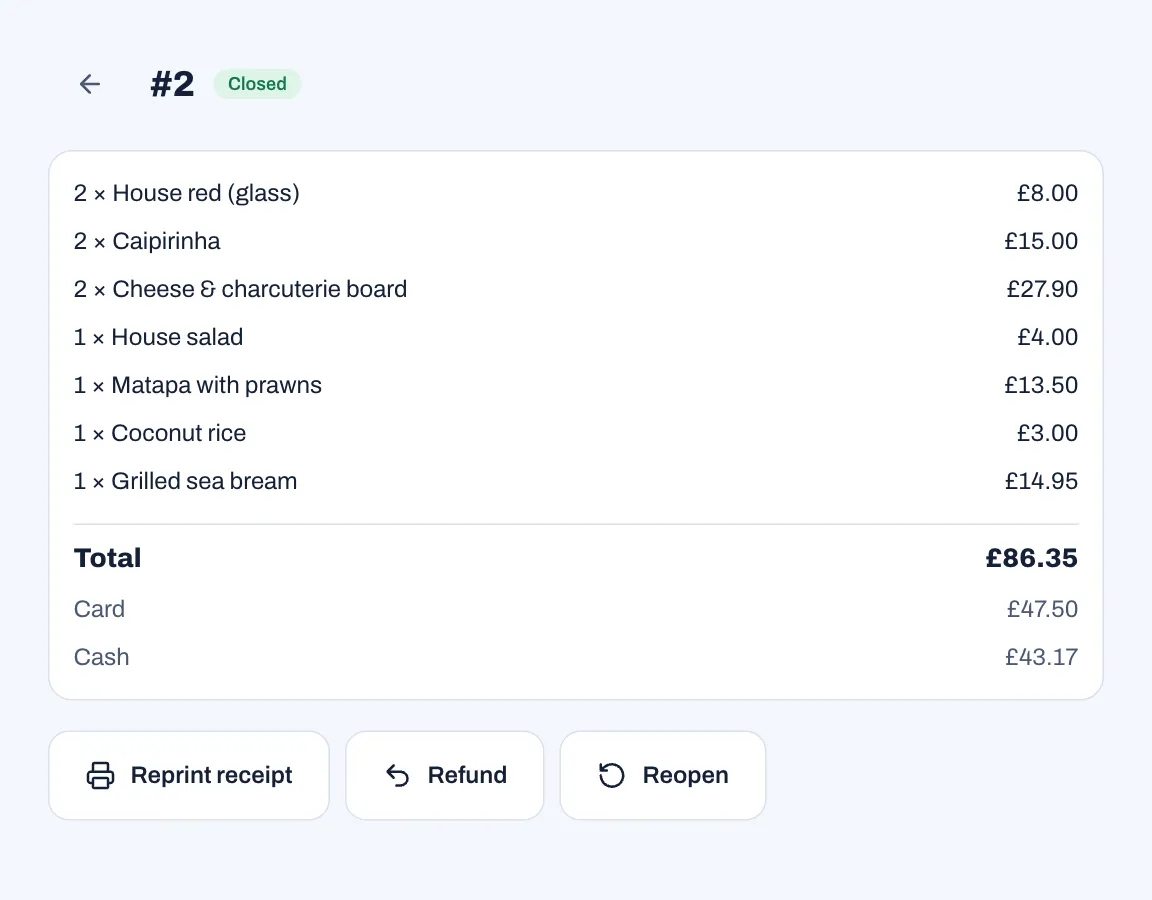
- The order number with Closed.
- Each item with its quantity and price. Refunded items carry a badge, for example −1.
- Total, then each payment with its method and amount, tip included. Card payments show the last four digits of the card when Sofrito knows them.
- Refund with the amount, if anything was refunded.
- The buttons Reprint receipt, Refund and Reopen. For Refund and Reopen, see Voids, discounts, refunds and approvals.
- On the right, a preview of the receipt or invoice of the sale. After a refund, it still shows the sale, not the credit note.
#Before you charge
- Check the table and order number at the top of the Payment window before you take money.
- Ask about an invoice before the last payment, not after.
- For a card, wait until the terminal shows the payment approved before you tap Approved.
- Count the change on the counter, in front of the guest.
- If a payment went on the wrong method, fix it with Change method before the bill is closed.
- Give every guest who wants one a receipt.
Voids, discounts, refunds and approvals
Some actions change what the restaurant earns: voids, comps, discounts, price changes, voided payments, refunds, reopening a paid order and opening the cash drawer without a sale. Sofrito asks why, asks a manager to approve when your role doesn't allow the action, and records who did it and who approved it. This chapter is for everyone on the floor, and for the managers who approve these actions and check them afterwards.
Before you start
- Each role's permissions are set: see Your team, roles and PINs.
- The discount limit, the reasons staff choose from and the restaurant's discounts are set in Back office › Settings, under Security, Reasons and Discounts: see Settings, section by section.
#Know what needs a manager
Each role has a list of permissions in Back office › Team & roles › Roles and permissions. When someone tries an action their role doesn't allow, and the permission is marked Manager can approve, the till asks for a manager's PIN instead of refusing.
With the roles of a new restaurant:
| Action | Permission | Server, bartender | Cashier |
|---|---|---|---|
| Remove an item that hasn't been sent | none | Yes | Yes |
| Change a check someone else opened | Change other people's orders | Manager | Manager |
| Void a whole order before anything was sent | none | Yes | Yes |
| Void an item already sent | Void items already sent | Manager | Manager |
| Void a whole order once something was sent | Void whole orders | Manager | Manager |
| Comp an item, or undo a comp | Comp items | Manager | Manager |
| Change the price of an item | Change prices | Manager | Manager |
| Give a discount up to the limit | Apply discounts | Yes | Manager |
| Give a discount above the limit, or one marked Needs a manager's PIN | Discount above the limit | Manager | Manager |
| Remove an automatic service charge | Apply discounts | Yes | Manager |
| Move a check to another table, hand it over, or merge checks | Move orders and tables | Yes | Manager |
| Void a payment, or change its method | Void payments | Manager | Manager |
| Refund a paid order | Give refunds | Manager | Manager |
| Reopen a paid order | Reopen closed orders | Manager | Manager |
| Open the drawer without a sale | Open the drawer without a sale | Manager | Manager |
| Pay in, pay out or make a cash drop | Pay-ins, pay-outs and drops | Manager | Manager |
Yes means the person can do it. Manager means a manager approves with their PIN. Owners and managers have all of these permissions. The limit for discounts is Discounts up to in Back office › Settings › Security: 10% in a new restaurant.
Change other people's orders ("Add to or change orders that another server opened") covers every change to a check someone else opened: adding or changing items, voids, comps, discounts, service charges, voiding a payment, moving the table, handing the check over, the number of guests, the guest on the check, renaming, splitting and merging, and voiding the order. Without it, a manager approves, even for a change your role may make on your own checks. It is never asked for to send, fire a course, print the check, rush, mark a pickup ready or done, take payment or close a paid check. A check with nothing on it yet, such as one a host opened when seating guests, needs nobody's approval either: whoever adds its first items takes it over, and anyone can hand it over. Orders that came from an online shop or another app belong to nobody, so anyone can change them.
#Approve with a manager PIN
When an action needs approval, the Manager approval window opens: "A manager needs to approve this." Like every message on the till, it is in the till's language.
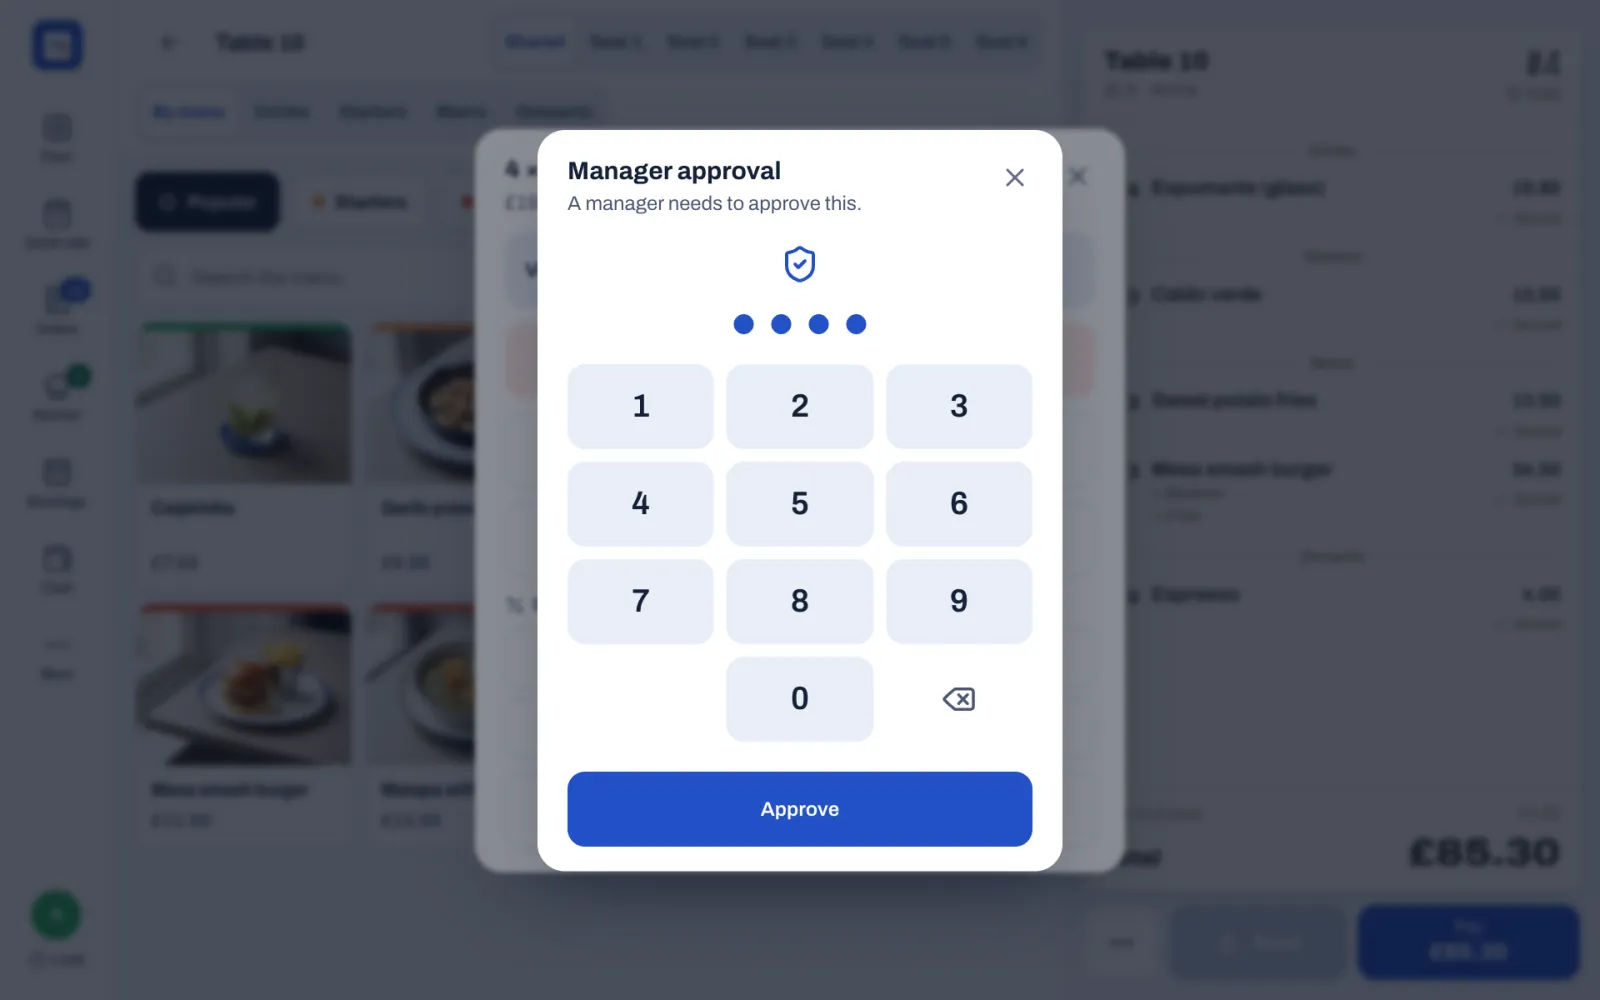
- Hand the till to a manager.
- The manager types their PIN.
- The manager taps Approve.
The action goes ahead and is recorded with both names: the person who asked and the person who approved. The person who asked stays signed in, and the approval counts only for that one action.
"Manager" means anyone whose role has the permission, so an owner can approve too.
- If the PIN is wrong, the window says "Wrong PIN." Type it again.
- If that person's role doesn't have the permission, the window says so, for example "Ana can't approve this."
- After three wrong tries the action is cancelled. Start it again.
- After five wrong PINs on the same device, approvals pause there for a moment: "Too many wrong PINs. Try again in a moment." A correct manager PIN clears the earlier wrong tries.
- To cancel, close the window with ×.
#Remove an item that hasn't been sent
Items marked New, and items saved but not sent (Held, or Saved — not sent yet), have not reached the kitchen.
- Tap the item on the check.
- Tap Remove.
The item disappears from the check. Sofrito asks no reason and no approval, and the kitchen sees nothing. On a check someone else opened, removing a held or saved item needs Change other people's orders, or a manager's PIN.
#Void an item already sent
- Tap the item on the check.
- If there are several, for example 4 × Espumante (glass), set how many to void with − and +.
- Tap Void.
- Tap the reason, or type it under Other reason and tap Confirm.
- If your role needs it, a manager approves.
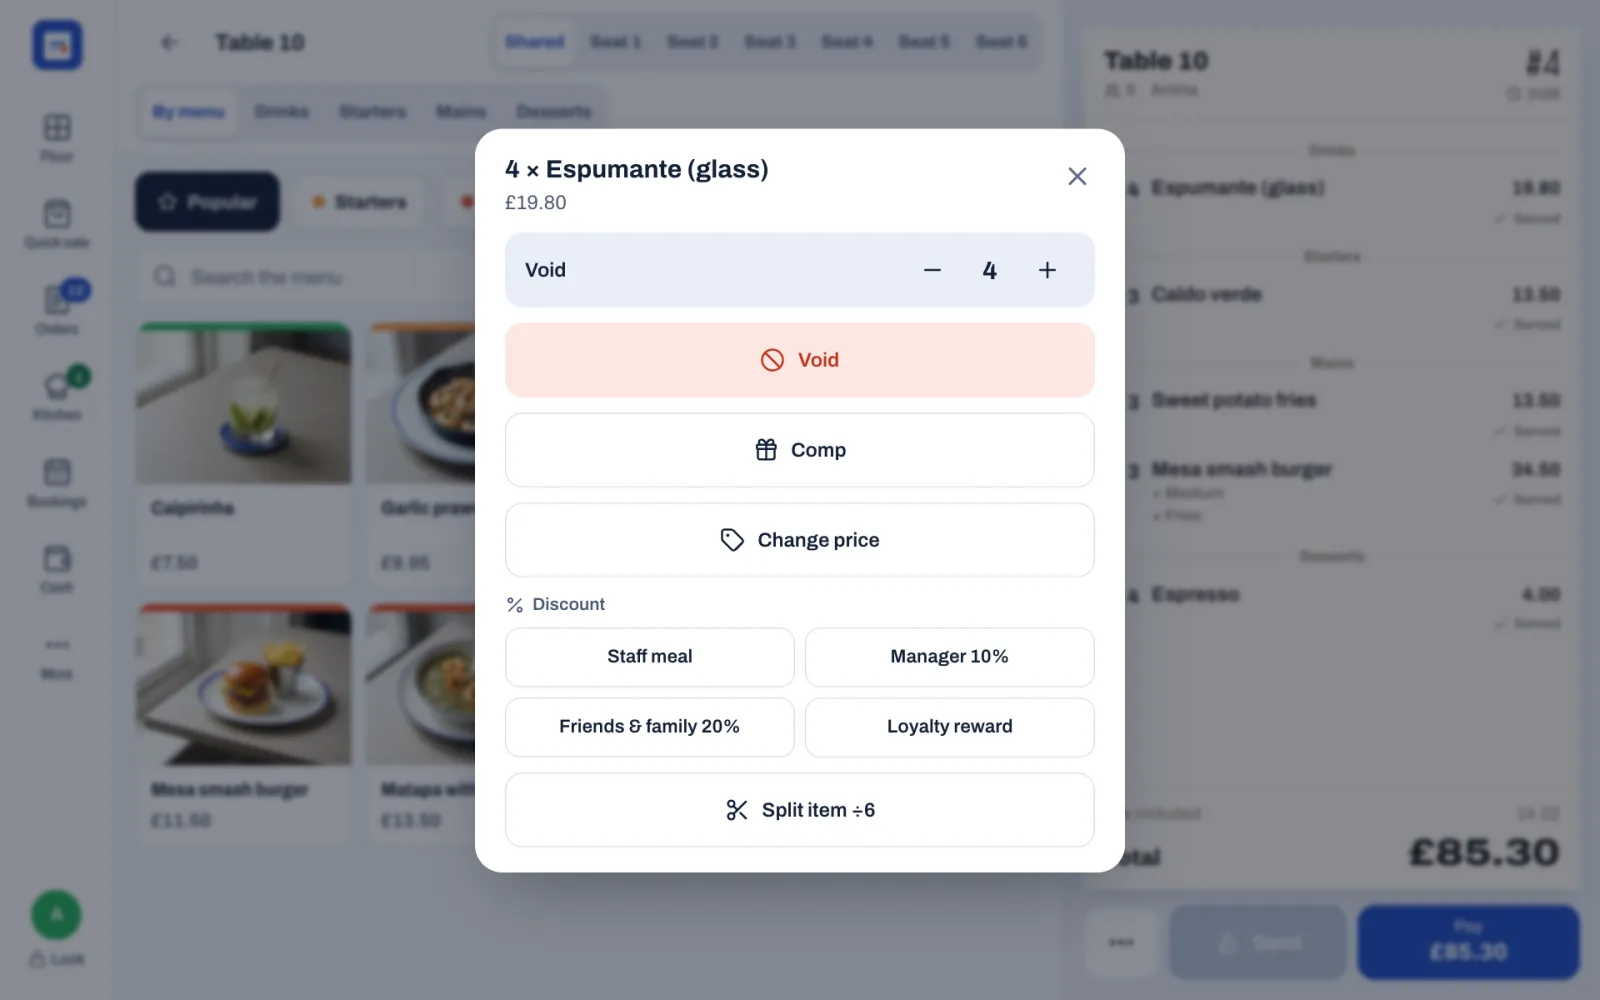
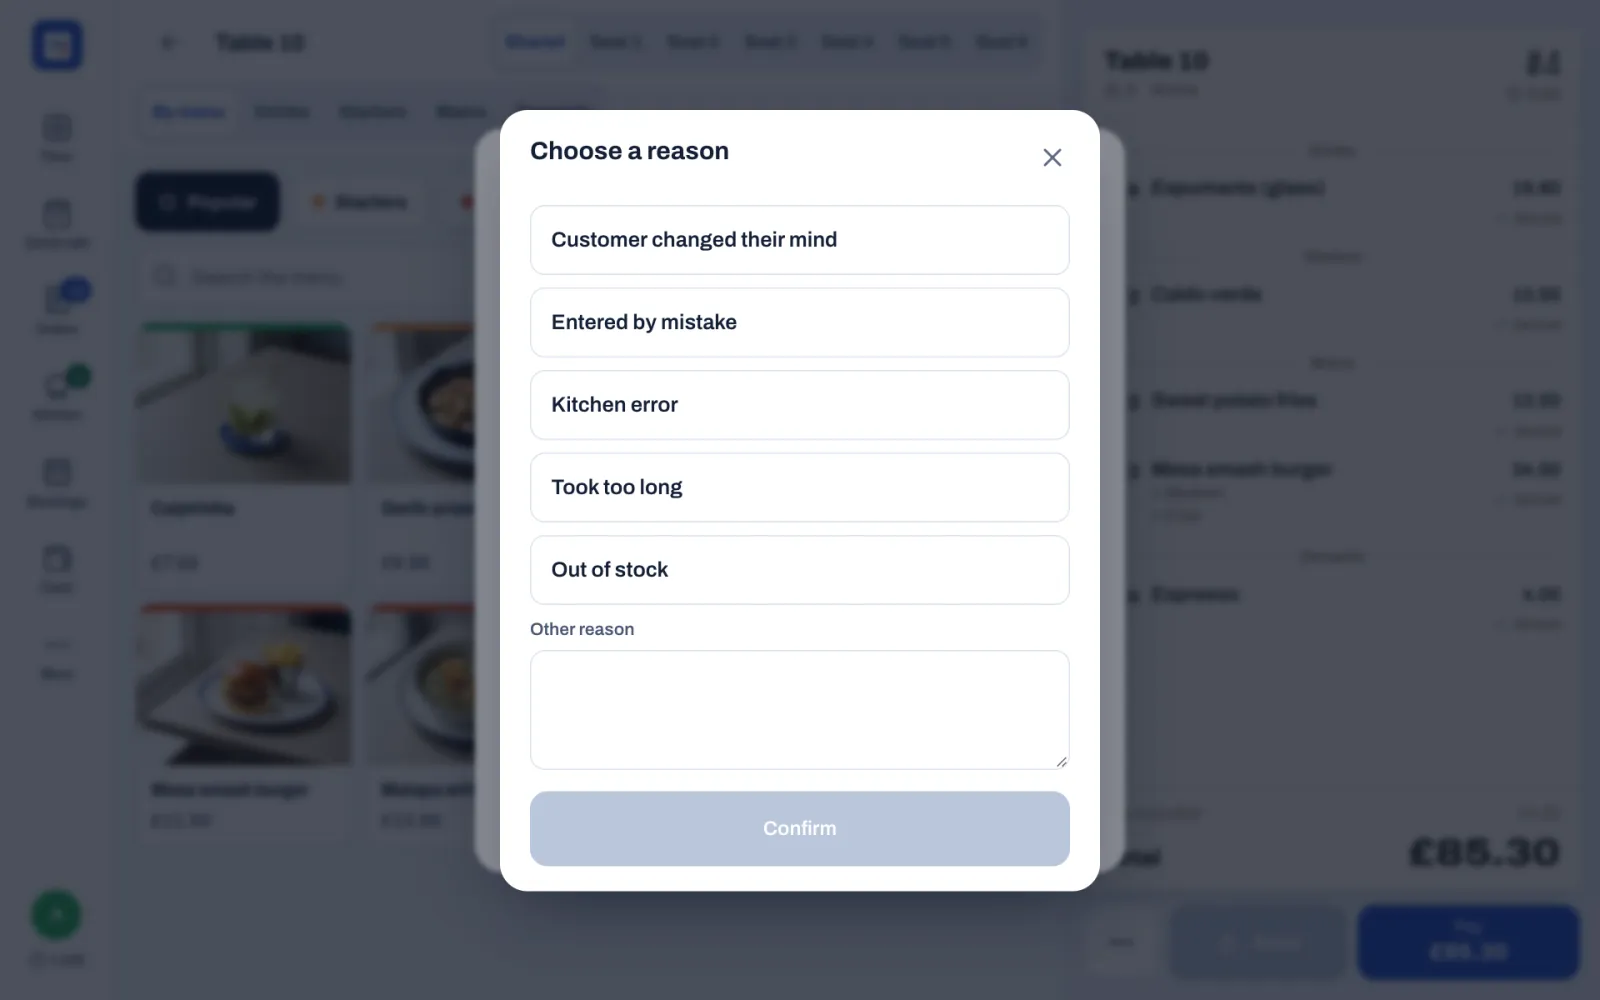
The item is crossed out on the check, with Voided and the reason, and the total no longer includes it. The kitchen gets a VOID ticket for it, on screen or on paper, so the cooks stop; on the kitchen display it stays until a cook taps Got it. If you voided only some of them, the rest stay on the check.
Sofrito asks for the reason when Ask why an item is voided is on in Back office › Settings › Security (on in a new restaurant). You choose the reasons staff can tap in Back office › Settings › Reasons.
If you void every item on a check, Pay says there is nothing to charge: close the check with ••• › Void order.
#Void a whole order
Use this for an order opened by mistake, or for guests who leave before eating.
- Open the order.
- Tap ••• › Void order.
- Tap the reason, or type it under Other reason and tap Confirm. A reason is always needed.
- If anything was already sent to the kitchen and your role needs it, a manager approves.
The order closes as Voided, the kitchen gets VOID tickets for what it had, and the table is free again. The order is listed under Orders › Closed, marked Voided, and a booking seated on it is marked Finished. Any loyalty points the guest spent on the order go back to them.
If payments were taken on the order, Void order first says "Void the payments first: the money goes back to the guest. Then void the order." and lists them:
- Tap Void payment on each payment, and tap the reason. See Correct a payment.
- When no payment is left, tap Void order.
- Carry on from step 3 above.
#Give an item on the house
A comp makes an item free but keeps it on the check and in the reports.
- Tap the item on the check. Items marked New must be sent or held first.
- Tap Comp.
- Tap the reason, for example Birthday.
- If your role needs it, a manager approves.
The price is crossed out and On the house shows under the item. The comp covers every unit on that line. Sofrito asks for the reason when Ask why an item is free is on in Back office › Settings › Security.
To undo a comp, tap the item and tap Undo comp. This needs the same permission as the comp.
#Change the price of an item
When an item must cost something other than its menu price, for example a dish served smaller:
- Tap the item on the check. Items marked New must be sent or held first.
- Tap Change price.
- Type the new price for one item under New price for one. Below it, Sofrito shows the price now, for example "Now £4.50 for one".
- Tap Change price.
- If your role needs it, a manager approves.
The item shows Price changed and its new total. Change price doesn't show for comped items, or for dishes whose price staff type at the till (Open price). Every price change appears in Reports › Exceptions under Price changes, and in the audit log with the old and the new price.
#Apply a discount
#On one item
- Tap the item on the check. Items marked New must be sent or held first.
- Under Discount, tap one of the restaurant's discounts, for example Staff meal.
#On the whole check
- Tap ••• › Discount.
- Tap one of the restaurant's discounts. The value shows next to each, for example 20% or £5.00.
- If Sofrito asks for a reason, tap it.
- If your role needs it, a manager approves.
To give a discount of your own, use the lower part of the same window instead of step 2:
- Tap %, or the currency for an amount (GBP in the demo).
- Type the value.
- Tap Discount.
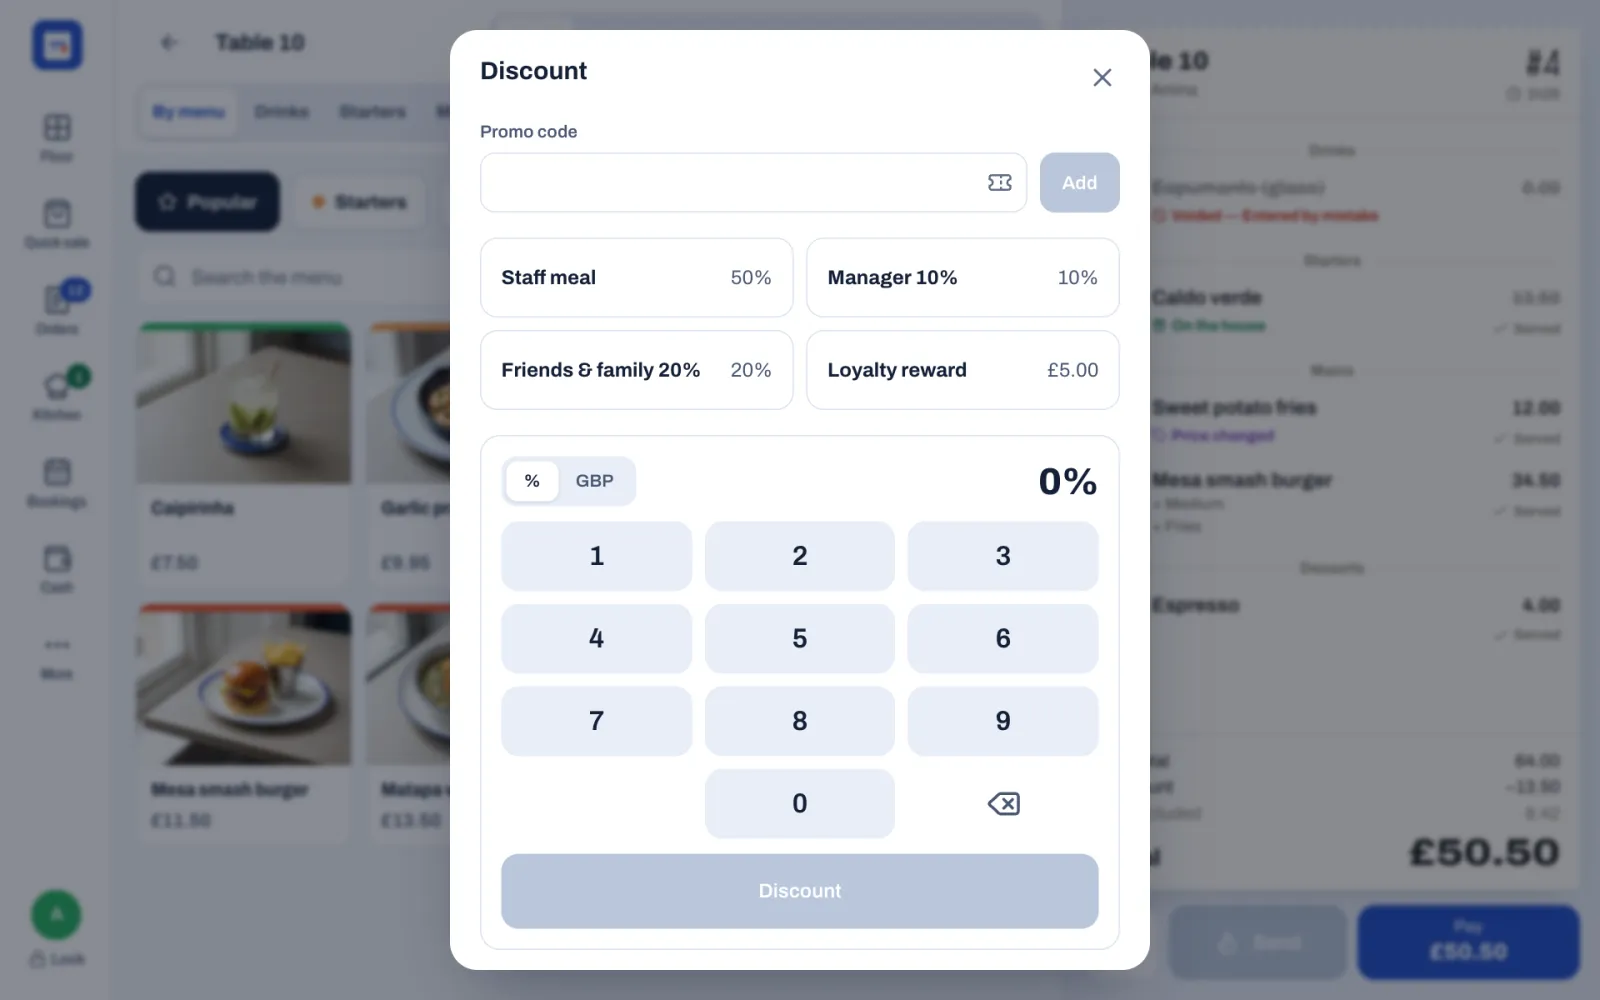
#With a promo code
When one of the restaurant's discounts has a promo code (set in Back office › Settings › Discounts), the Discount window starts with a Promo code box.
- Tap ••• › Discount.
- Type the code the guest gives you. Capital or small letters don't matter.
- Tap Add.
The discount comes with its own rules: a reason or a manager's PIN, if it asks for them. If no discount has that code, Sofrito says, for example, "No discount has the code SPRING10."
#On the check
The discount shows at the bottom of the check with its name and amount. The totals show the Subtotal and the Discount, which includes any comps. To remove a discount, tap × next to it. Removing a discount paid with loyalty points gives the guest their points back.
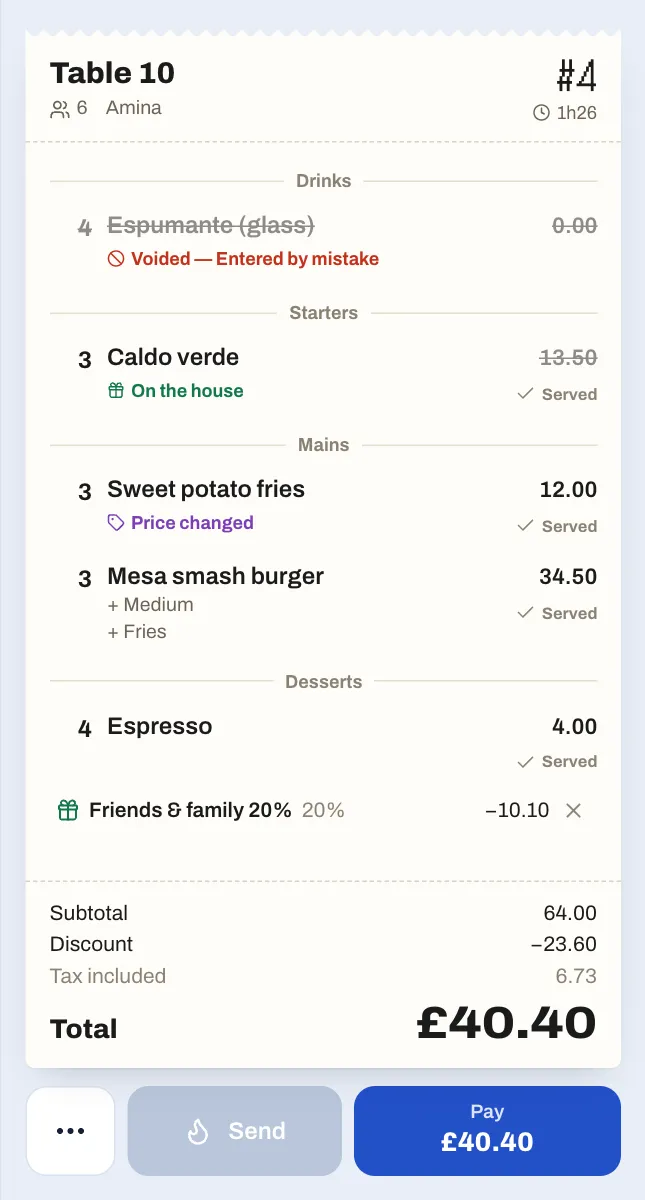
A discount needs a manager when:
- it is bigger than the Discounts up to limit (a fixed amount counts as its share of the check);
- it is marked Needs a manager's PIN in Back office › Settings › Discounts, like Manager 10% and Friends & family 20% in the demo;
- your role doesn't have Apply discounts.
Sofrito asks for a reason for discounts marked Ask for a reason, and for your own discounts when Ask why an item is free is on.
#Remove an automatic service charge
A service charge that Sofrito adds by itself, for example Service 10% on tables of eight or more in the demo, shows on the check with an ×. Removing it counts as a discount: you need Apply discounts, or a manager approves. Once removed, it stays off that check, even if more guests join. To put it back, tap ••• › Service charge and choose it.
#Refund a paid order
- Tap Orders.
- Tap Closed.
- Tap the order.
- Tap Refund.
- For each item to give back, tap + once for each one, or All. Each row says how many are left to refund, for example "2 left to refund", and − takes one off.
- Tap how the money goes back: Cash, Card, a mobile money method, or the gift card or house account that paid for the order. Only payment methods that are switched on are listed, and the one the order was paid with is chosen first. The red button shows the total, for example Refund £7.50.
- Tap Refund £7.50.
- Tap the reason.
- If your role needs it, a manager approves.
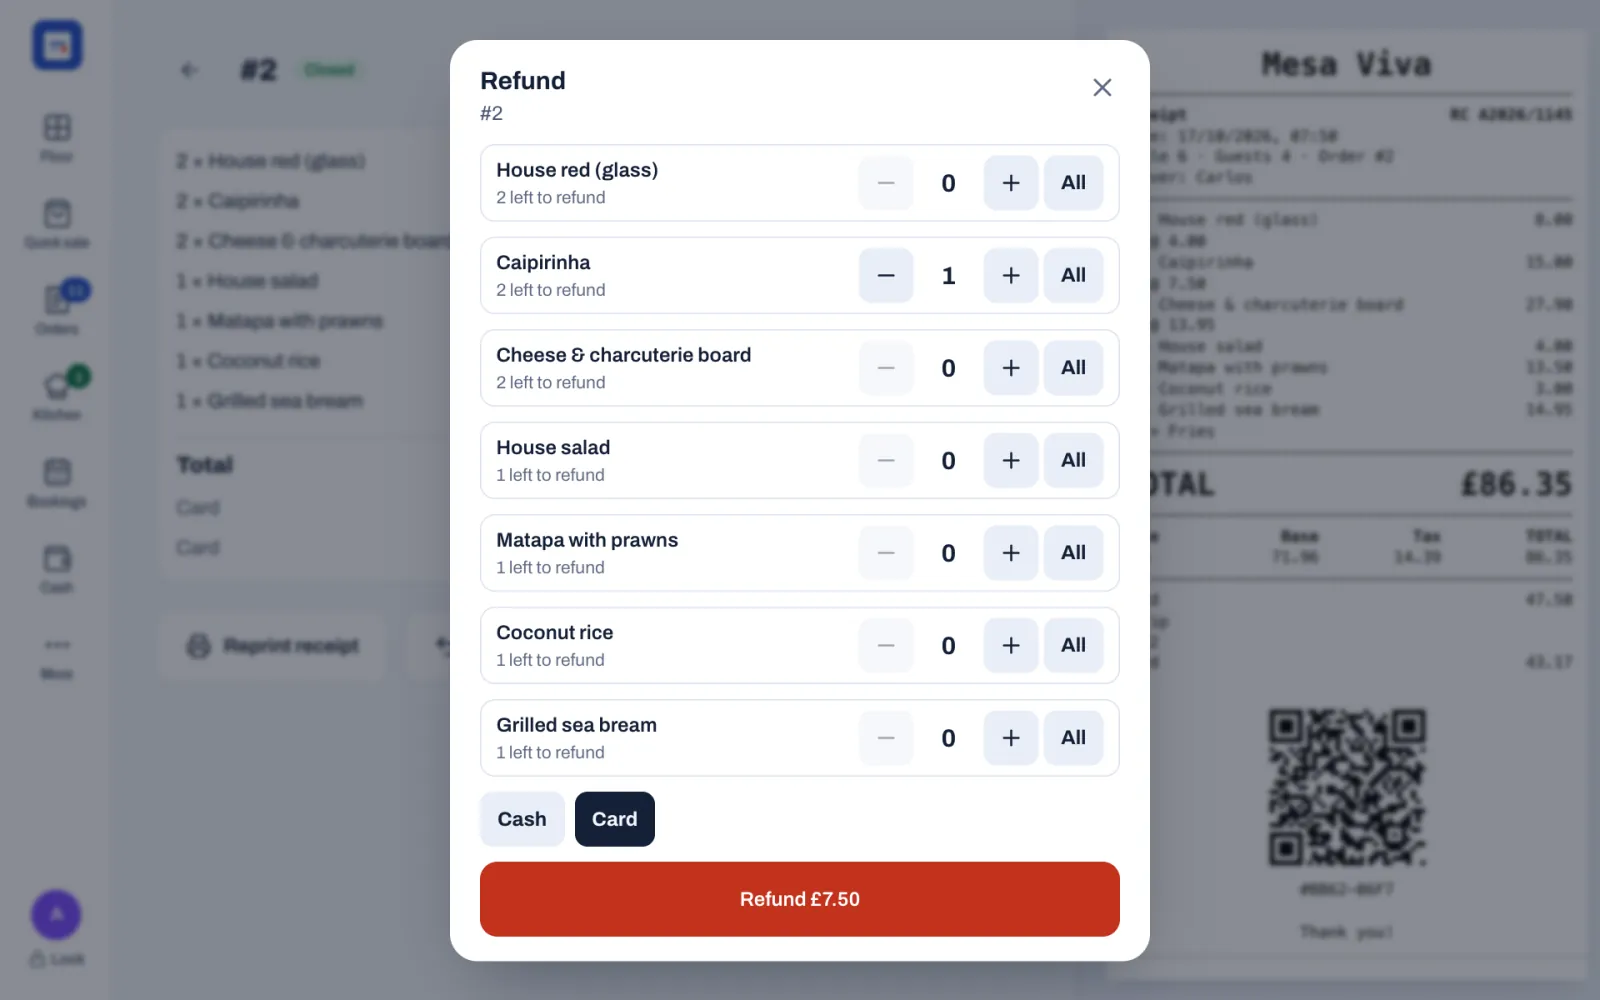
What happens next:
- Sofrito issues a credit note for the refunded items.
- A cash refund opens the drawer, and the amount comes out of the cash the drawer should hold. If no drawer is open, the Starting cash window opens first, before any manager's approval: "Count the cash in the drawer before the refund is paid out of it." Count the cash, tap Open drawer, and the refund goes on.
- A gift card refund puts the money back on the card that paid, and a house account refund takes it off what the guest owes. Neither can give back more than the card or the account paid.
- A card or mobile money refund is only recorded in Sofrito. Make the refund on the card terminal, or send the money back, yourself.
- If a guest is on the order, the refund takes back the loyalty points its share of the order earned, and gives back the points spent on that share.
Tap the back arrow and open the order again: it now shows a Refund line, and the refunded items carry a badge, for example −1. You can't refund more of an item than was sold, or more money than was paid. A refund is booked on the day you make it, even when the order's own day is already closed.
#Reopen a paid order
Reopen puts a paid order back on the floor so you can correct it: a dessert ordered after the bill, a payment taken with the wrong method, or a wrong tax number on the receipt.
- Open the order from Orders › Closed.
- Tap Reopen.
- Tap the reason, for example Items added after paying.
- If your role needs it, a manager approves.
Sofrito cancels the receipt with a credit note, and the order opens again with its payments. Then:
- To add items, add them and take payment for the difference. Sofrito issues a new receipt when the order is paid in full.
- To fix a payment, void it under Payments taken and take it again: see Correct a payment.
- When nothing is left to pay, tap Pay. The window says "Nothing is left to pay. Close the order to issue its receipt." Tap Close order.
Until the order is closed again, the guest's visit, spend and loyalty points from it are taken back; closing it counts them once. An order whose business day has been closed (Z) can't be reopened: Sofrito says, for example, "The business day of this order (16 October 2026) is closed. Refund it instead."
#Open the drawer without a sale
- Tap Cash.
- Tap No sale.
- Tap the reason, for example Change for a note, or type one.
- If your role needs it, a manager approves.
The drawer opens. The drawer's Movements list shows No sale with the reason, and the audit log records it as Drawer opened without a sale.
#Find every exception in the reports and the audit log
Owners and managers check these actions in the back office.
#The Exceptions report
- In the back office, select Reports.
- Select Exceptions.
- Choose the dates: Today, Yesterday, Last 7 days, Last 30 days, This month, or your own dates.
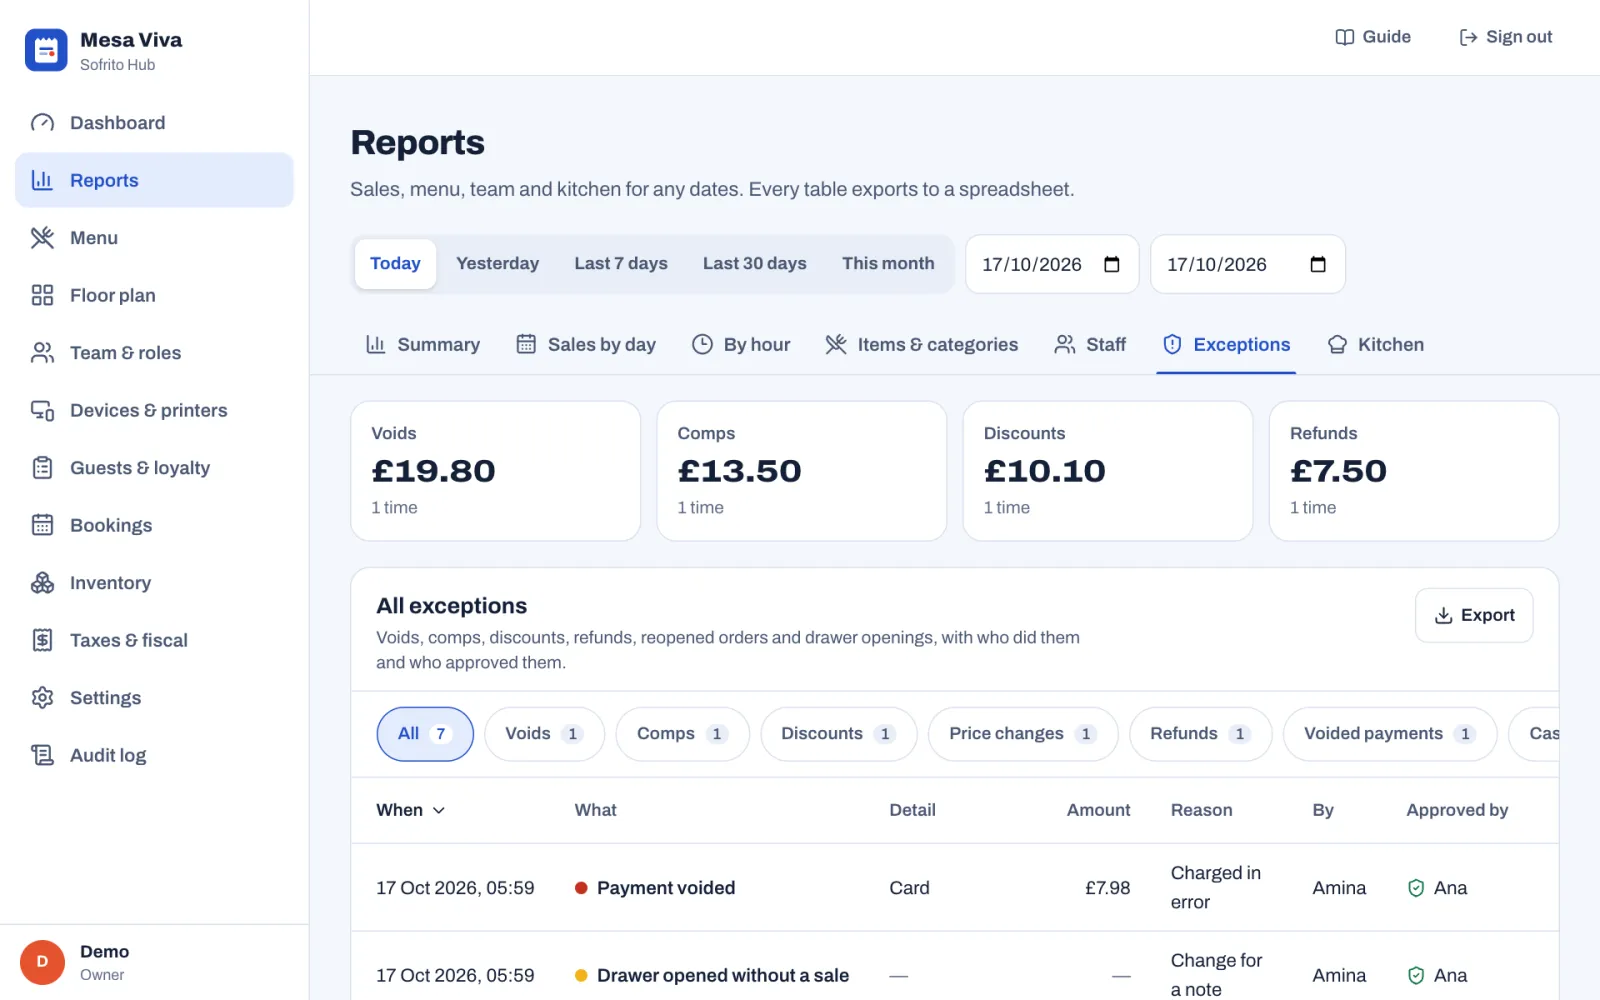
- Four tiles show the total and the number of Voids, Comps, Discounts and Refunds. Select a tile to list only those.
- All exceptions lists every void, comp, discount, price change, refund, voided payment, reopened order, drawer opened without a sale and pay-out, with When, What, Detail, Amount, Reason, By and Approved by. Not needed means nobody had to approve it. The buttons above the table filter by kind: Voids, Comps, Discounts, Price changes, Refunds, Voided payments, Reopened orders and Cash drawer, each shown when it has entries.
- By employee shows how often each person used these actions, and for how much. Voided payments count with the refunds.
- Export downloads each table as a spreadsheet.
The other reports show the same money: the Summary has lines for Discounts, Comps, Refunds and Voids, and Staff shows each person's discounts, comps and voids. See Dashboard and reports.
#The audit log
- In the back office, select Audit log.
- Choose the dates.
- Under Activity, choose Voids, comps, discounts and refunds.
- To narrow it down, choose an Employee, or type an item, reason, document or person under Search.
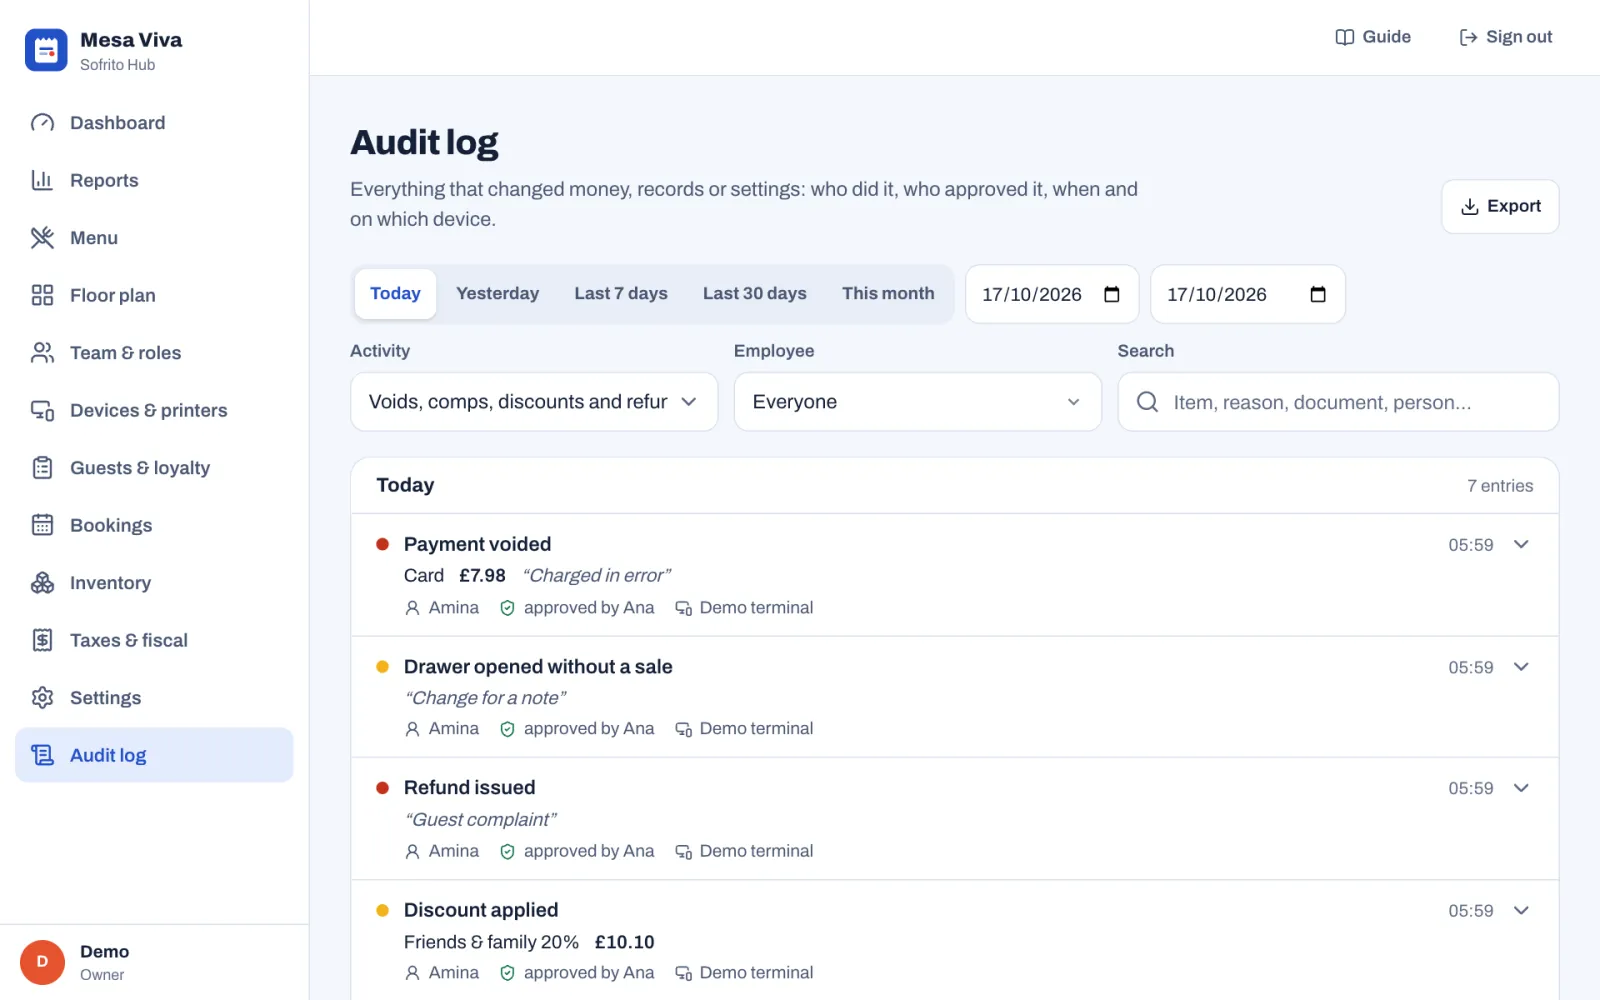
Each entry shows what happened, the details such as the item, the amount and the reason, who did it, approved by whom, the device and the time. Select an entry to see all its details. Export downloads the list. To see the log, a role needs View the audit log. See Security, the audit log and your data.
#Good practice
- Everyone works under their own PIN, and managers type their own PIN for approvals.
- Choose the real reason. Use Other reason when none of the reasons fits, and keep the list of reasons short and clear in Back office › Settings › Reasons.
- Keep the discount limit low, and mark generous discounts Needs a manager's PIN.
- Fix a payment taken with the wrong method with Change method before the bill closes, rather than refunding it afterwards.
- Look at Reports › Exceptions every week. Look for one person with many voids, price changes or voided payments, or voids and refunds late at night with no approval.
Bookings and the waitlist
This chapter covers taking, changing and cancelling a booking, the statuses a booking goes through, seating guests when they arrive, the waitlist for walk-ins, planning the day in the back office, and the booking settings. Hosts and anyone at the till take and seat bookings. Managers plan the day in the back office and choose the booking times.
Before you start
- Your tables are on the floor plan: see Draw your floor plan.
- Take bookings is on in Back office › Settings › Bookings. It is on in a new restaurant: see Choose your booking times and table times.
- Your role needs Bookings and waitlist. Hosts, servers, bartenders, cashiers, managers and owners have it in a new restaurant: see Your team, roles and PINs.
#Find the bookings
- On the till: tap Bookings. On a phone, if Bookings is not in the bottom bar, tap More, then Bookings.
- In the back office: select Bookings.
- On the floor plan: from 30 minutes before a booking (Hold the table in the booking settings), its table shows the booking time in purple while it is free, and Reserved with the time in the list view. On a wide screen, a Bookings column at the side lists the next bookings of the day. Neither shows while Take bookings is off.
The Bookings screen on the till opens on today. The bookings are in time order, each with its time, the guest's name, a status badge, the party size, the tables, the phone number and the notes. Bookings that are already seated, finished, cancelled or no-shows are greyed out. The Waitlist is on the right, or under the bookings on a phone.
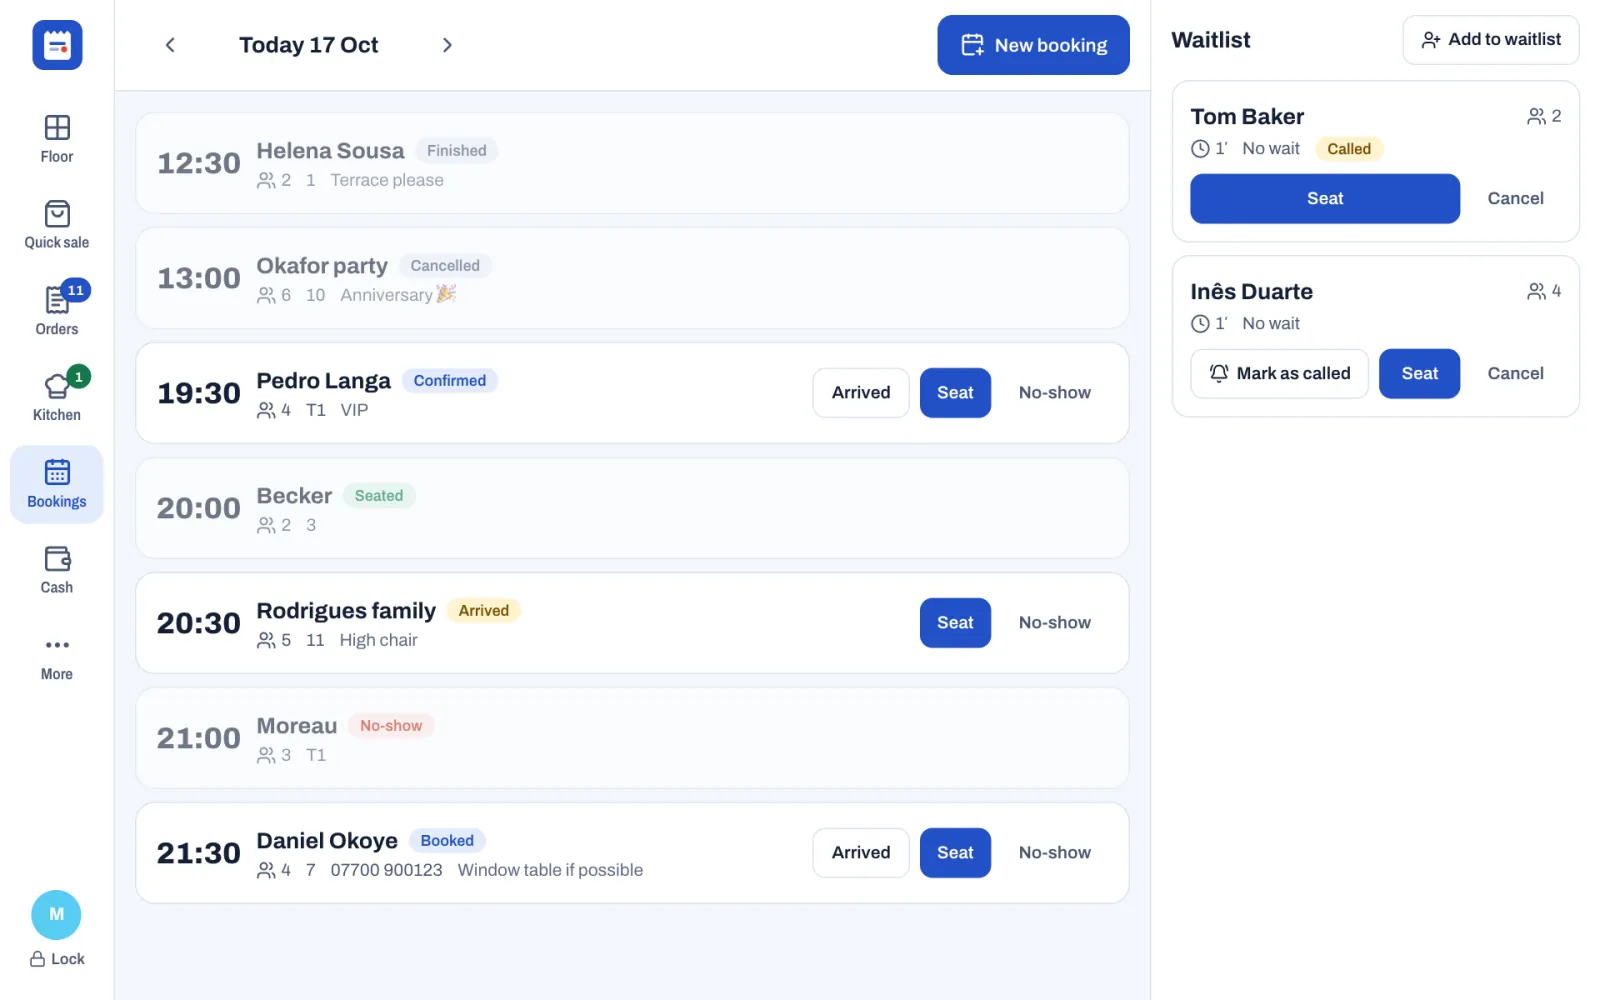
#Take a booking on the till
- Tap Bookings. To book another day, tap the arrows on each side of the date until it shows that day.
- Tap New booking.
- Type the guest's Name and Phone.
- Under Guests, tap the party size.
- Check the Date. It starts on the day shown on the Bookings screen.
- Under Time, tap the time, or type another time in the Other time box after the times.
- Under Table, tap a table to hold it for them, or leave it empty. Sofrito lists the tables that fit the party. A table already booked at that time shows when, for example "Booked 20:30", and can't be chosen. Tap more than one table for a large party.
- Under Notes, type anything the team should know, for example "High chair" or "Allergic to nuts".
- Tap Save. It works once the booking has a name and a time.
The times and party sizes come from the booking settings. In a new restaurant, the till offers times from 12:00 to 14:00 and from 19:00 to 22:00, every half hour, and parties of 1 to 12. To add an email address or tags, use the back office.
If you change the date or time after choosing a table, and the table is booked at the new time, it turns red and the window says, for example, "Already booked at that time: 7. Choose another table or time." Save stays off until you do. If someone else books the table in the meantime, Sofrito doesn't save the booking and says who has it, for example "That table is already booked for Becker at that time."
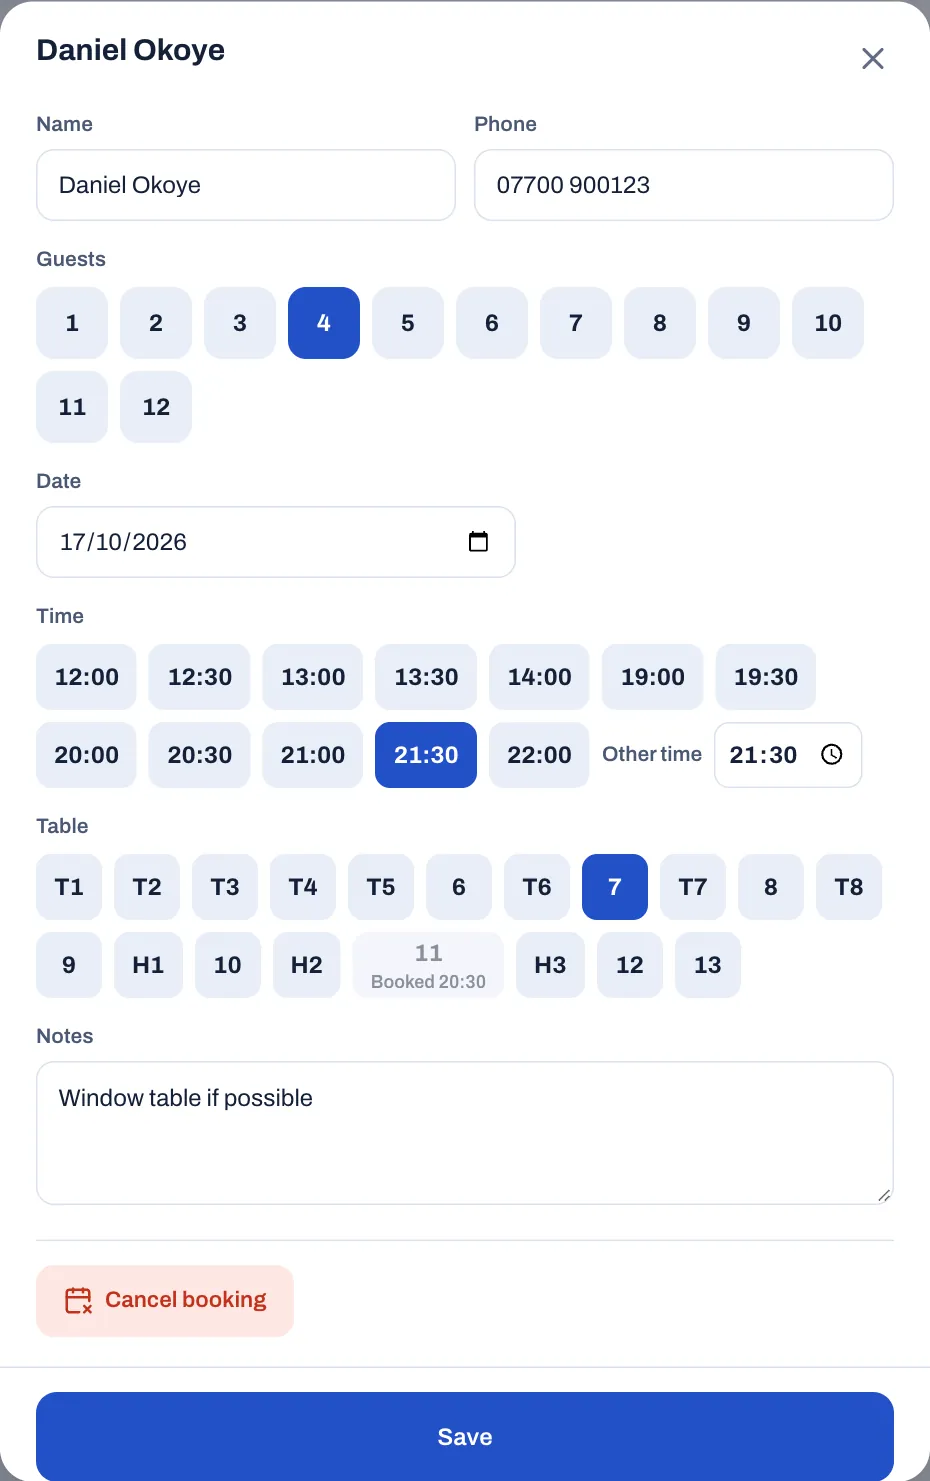
#Change, move or cancel a booking on the till
To change a booking, tap it in the list, change what you need and tap Save. To move it to another day, change its Date. The till keeps what only the back office edits, such as the link to the guest's profile, the email address, the source, the tags and the table time.
To cancel a booking that is still to come:
- Tap the booking in the list.
- Tap Cancel booking, then Tap again to cancel it.
Sofrito says "Booking cancelled". The booking stays in the list, greyed out, with the badge Cancelled, and its tables are free for other bookings.
#Take a booking in the back office
The back office has every detail of a booking.
- Select Bookings, then New booking.
- Under Guest, type the Name, Phone and Email. While you type, Sofrito suggests matching guests under Is this one of your guests?. Select one to link the booking to the guest's profile, with their visits, spend and allergies. See Guests, loyalty and gift cards.
- Under When, set the Party size, the Date and the Time.
- Table time is how long the table is held: 1h 30m in a new restaurant, unless you change it here or in the booking settings. The time it ends shows underneath, for example "Until 22:00".
- Under Source, choose how the booking came in: Phone, Online, Walk-in, Email or Other.
- Under Tables, choose one or more tables, or select the suggestion, for example Use 9: the smallest table that fits and is free at that time. Tables that are already booked at that time can't be chosen.
- Under Notes and tags, add notes and tags such as Birthday, Anniversary, VIP, High chair, Window table or Wheelchair access.
- Turn on Already confirmed with the guest if you have confirmed it. Leave it off if you still need to call or message them.
- Select Create booking.
To change a booking, select it in the Timeline or the List, change what you need and select Save.
#Follow a booking from booked to finished
| Status | Meaning |
|---|---|
| Booked | Taken, but not confirmed with the guest yet. |
| Confirmed | You have confirmed it with the guest. |
| Arrived | The guests are here, for example waiting at the bar. |
| Seated | The guests are at their table. |
| Finished | The guests have left. |
| No-show | The guests didn't come. |
| Cancelled | The guest cancelled. |
On the till, a booking that is still to come has three buttons: Arrived (until they have arrived), Seat and No-show.
A seated booking becomes Finished by itself when its check is paid and closed, or voided. If the party split the bill, it finishes with the last of their checks.
In the back office, open the booking: the Status buttons at the top change it as soon as you select one. In the List view you can also change the status from each row.
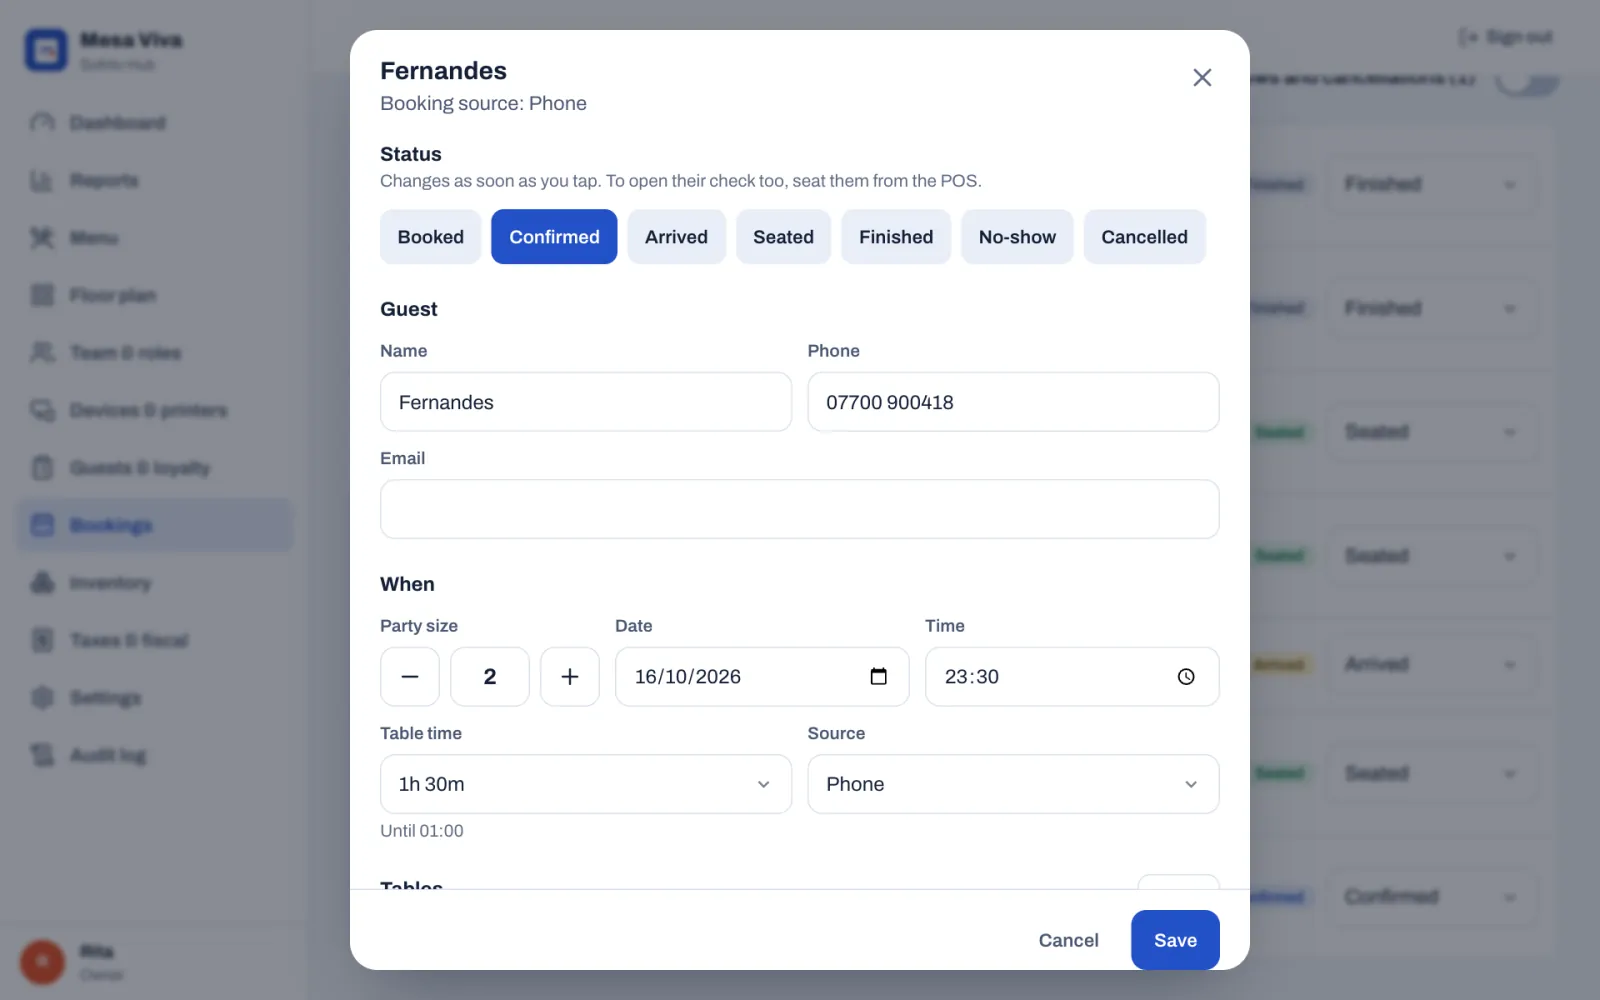
A booking holds its tables while it is Booked, Confirmed, Arrived or Seated. Marking it No-show or Cancelled frees the tables for other bookings.
#Seat a booking
When the guests arrive:
- On the till, tap Bookings.
- If they wait at the bar first, tap Arrived.
- When their table is ready, tap Seat. The Seat window shows the party size and the tables of each area. Tables in use are greyed out, and the tables big enough for the party are green.
- Tap the table.
Sofrito opens a check on that table with the guest's name and the number of guests, shows the order screen, and marks the booking Seated. If you chose a different table from the one booked, the booking moves to it, and the table it held is free for other bookings. Someone whose role can't take orders, such as a host, stays on the floor plan instead. The booking's notes reach the kitchen with the first ticket of each station, as a note for the whole order. If the booking is linked to a guest's profile, so is the check, and the guest's allergies show on the check and on every kitchen ticket: see Guests' allergies.
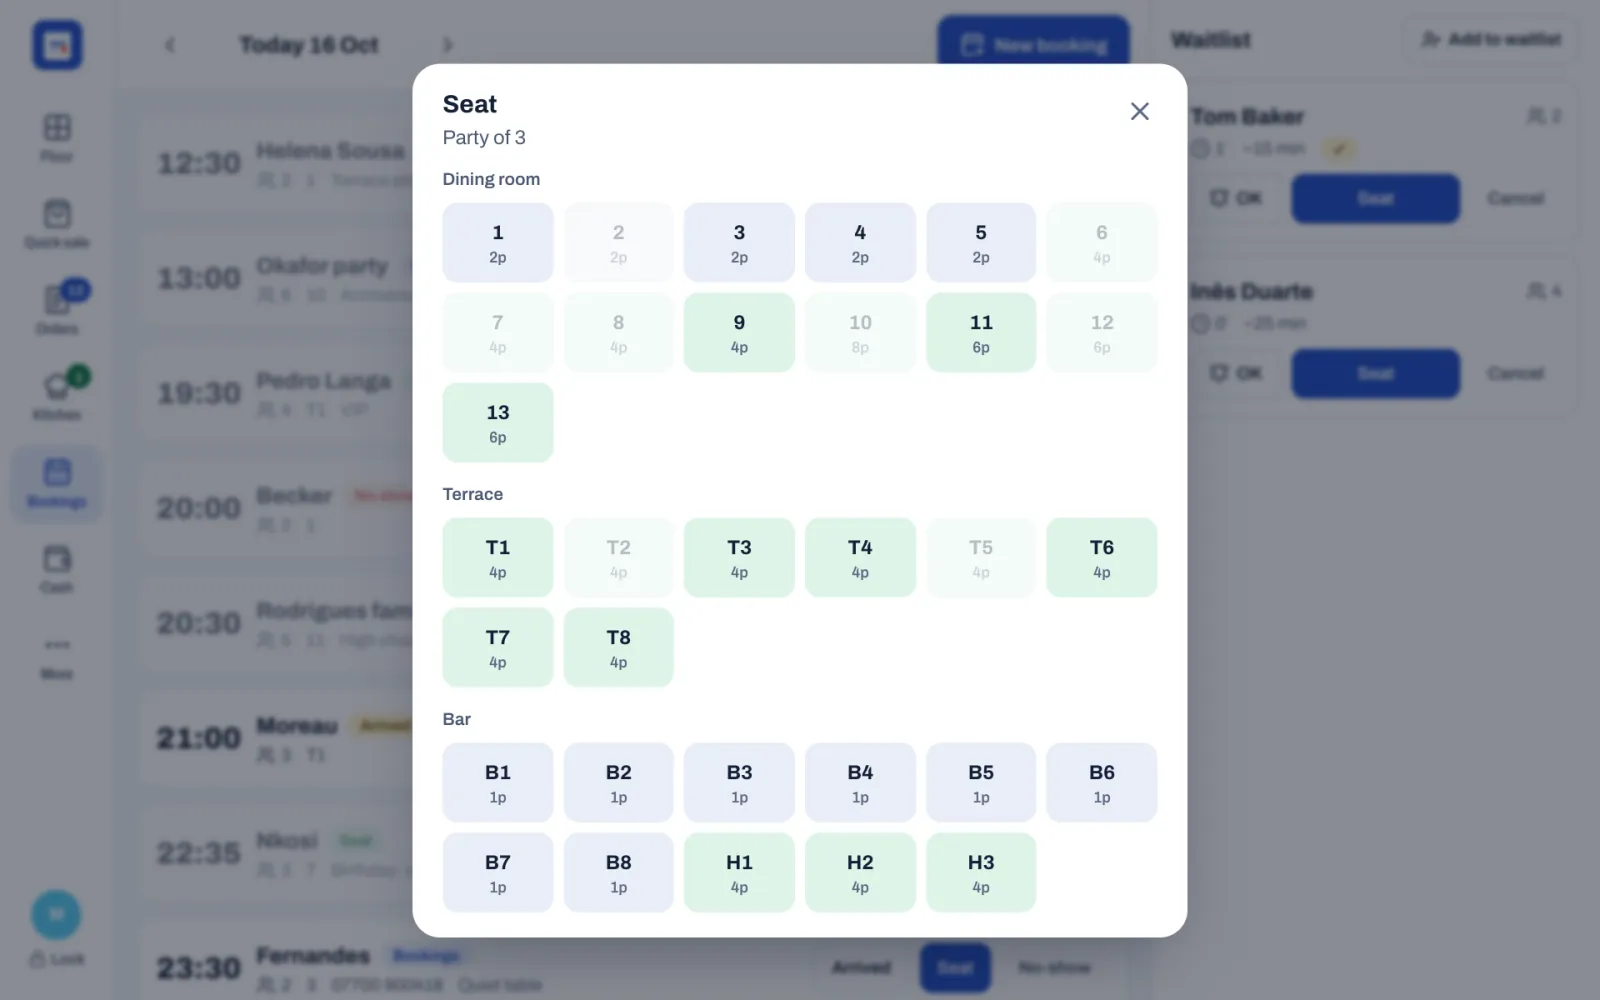
Marking a booking Seated in the back office only changes its status. To open the check too, seat the booking on the till.
#Mark a no-show
If the guests don't come, tap No-show on the till, or select No-show in the back office. In the back office, a booking that is still Booked or Confirmed 15 minutes after its time shows Late, so you know whom to call.
#Keep a waitlist for walk-ins
When the room is full, put walk-ins on the waitlist instead of turning them away.
On the till:
- Tap Bookings, then Add to waitlist.
- Type the guest's Name and Phone.
- Tap the party size, from 1 to 10.
- Tap Add.
Sofrito works out how long they will wait from the parties ahead of them and how long tables have been taking, and shows it as, for example, ~15 min. When enough tables are free, it shows No wait. Each party shows how long it has been waiting.
When a table is about to be free:
- Call or text the guest. Sofrito doesn't send the message for you.
- Tap Mark as called. The button goes, and a Called badge shows that you have called them.
- When they come back, tap Seat and tap the table. Sofrito opens a check on it and goes back to the floor plan.
- If they give up and leave, tap Cancel.
In the back office, the Waitlist is on the Bookings page for today. Add opens Add to the waitlist, where you can also type the Quoted wait (minutes) you gave the guest and Notes. Leave the quoted wait empty to use Sofrito's estimate. Each party shows the minutes waited against the minutes quoted, in red when they have waited longer. Mark as called records the time you called them, for example "Called at 22:46". Mark seated and Mark as left take them off the list, without opening a check.
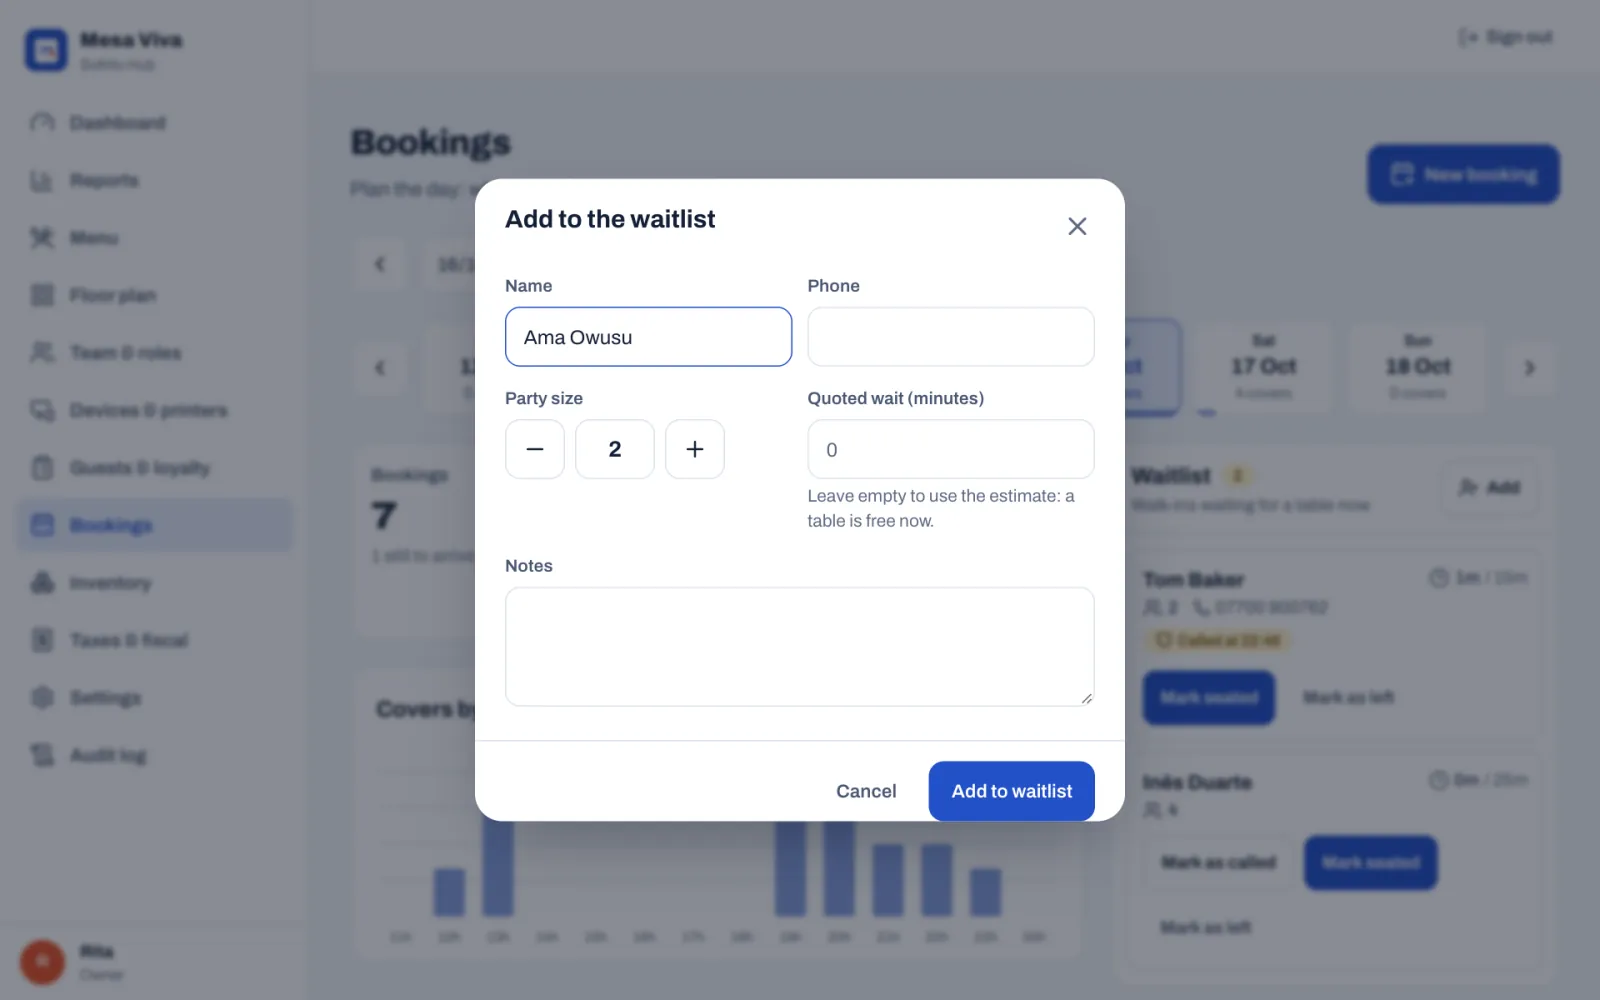
#Plan the day in the back office
Select Bookings. The page opens on today.
- Choose the day: use the arrows, the date box or the week strip under it, which shows the covers booked for each day. Today takes you back to today.
- The figures: Bookings, with how many are still to arrive; Covers, with the average party size; Arrived or seated, with their covers; and No-shows, with how many cancelled.
- Covers by arrival time: how many guests arrive in each hour, so you can see when the door and the kitchen get busy.
- Waitlist: today's walk-ins, as above.
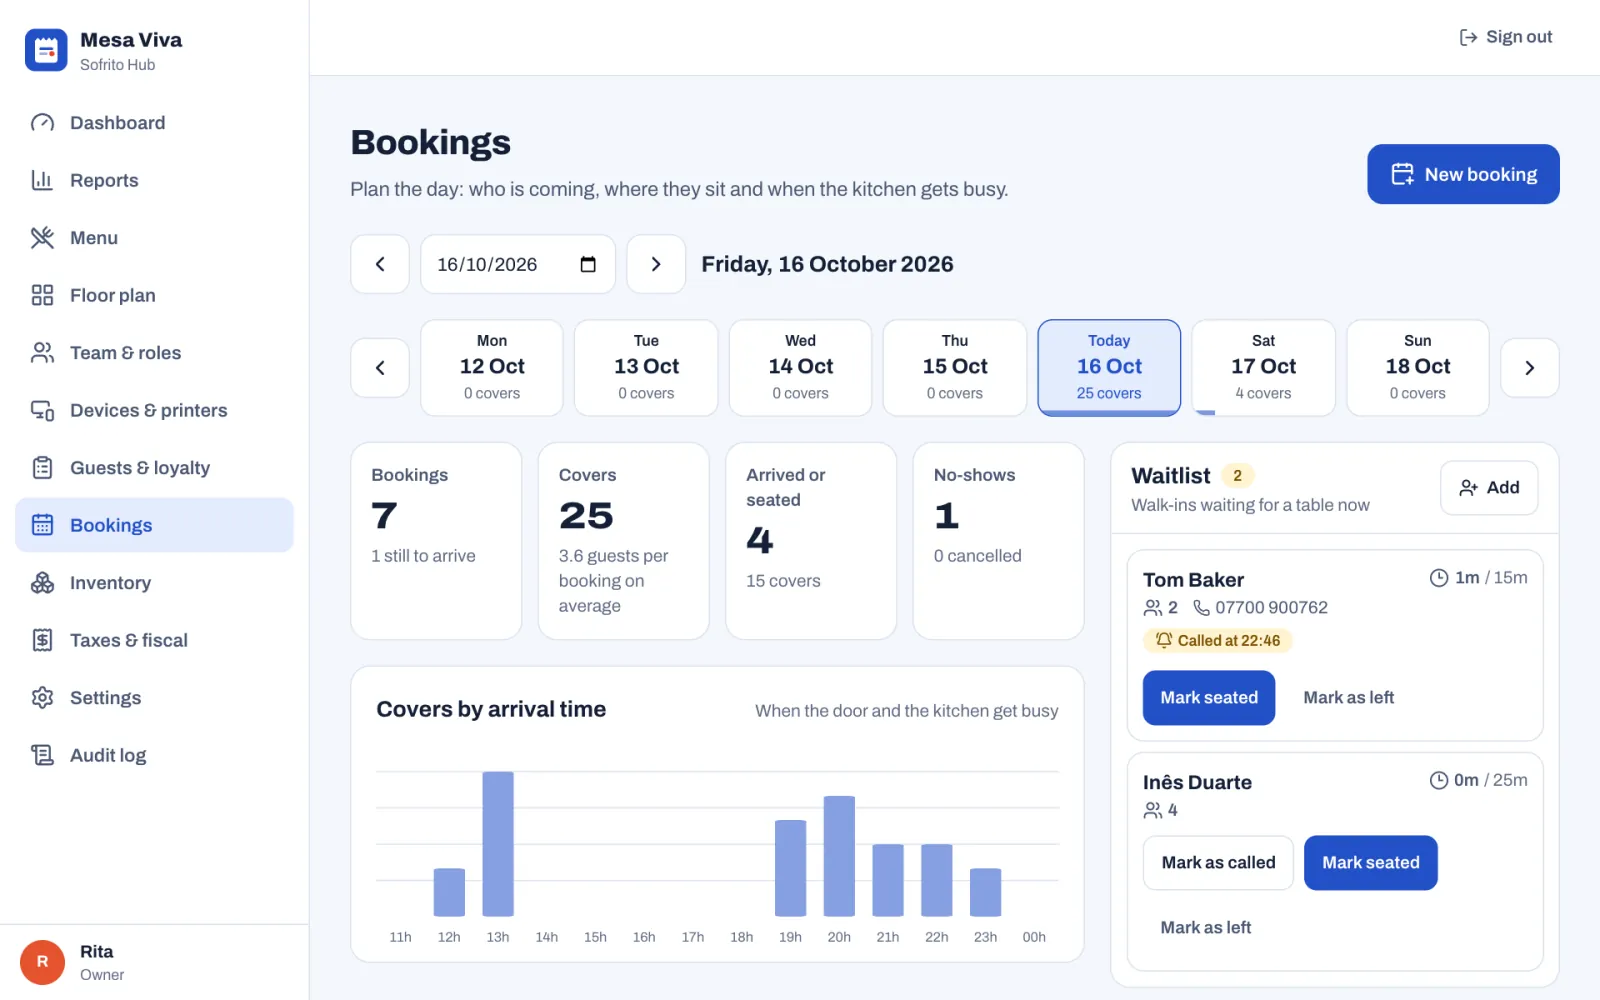
Under the figures, choose how to see the bookings:
- Timeline: a row for each table, grouped by area, with the hours across the top. Each booking is a bar from its time to the end of its table time, with the party size and the name. A blue line marks the time now, and a red ring marks a late booking. Bookings without a table are in a row of their own at the top, No table yet. Select a bar to open the booking, or select an empty slot to book that table at that time.
- List: every booking in time order, with its time and end time, tags, party size, tables, phone, source and notes, and its status, which you can change from the row. Show no-shows and cancellations adds those to the list.
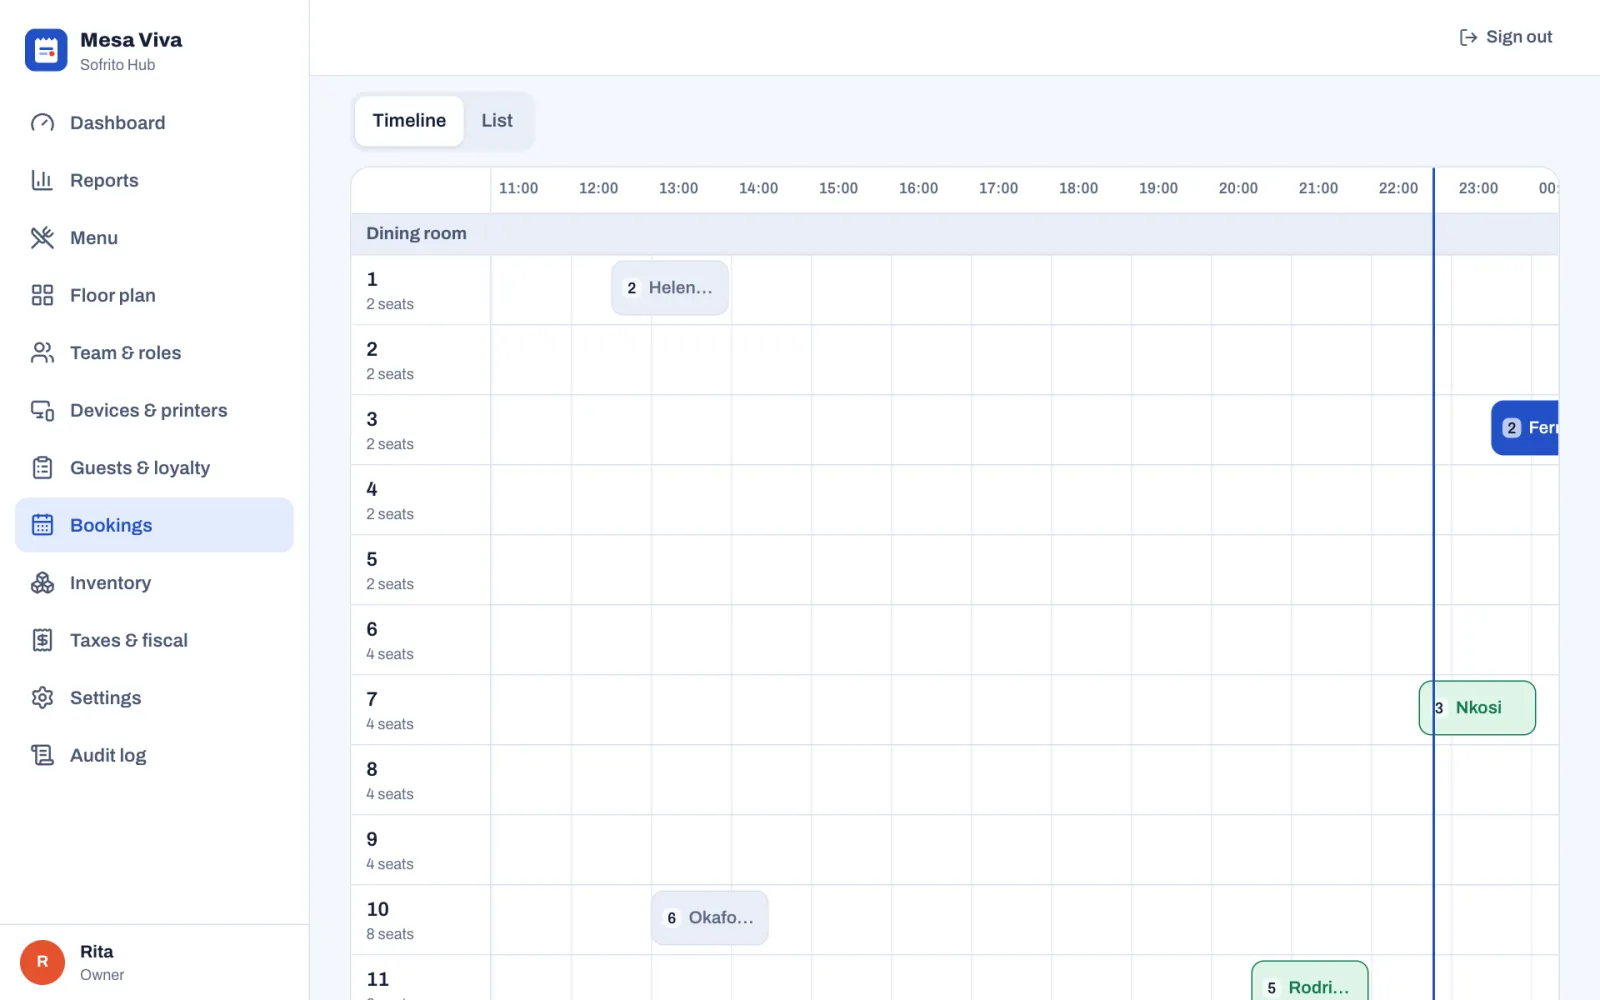
When Take bookings is off, the page says "Bookings are turned off for this restaurant, so the POS doesn't show them." Select Turn them on in Settings, under Bookings. to go to the booking settings.
#Choose your booking times and table times
A manager sets how the till takes bookings in Back office › Settings › Bookings, under Operations:
| Setting | What it changes |
|---|---|
| Take bookings | Shows Bookings on the till. When it is off, the till hides it, and the floor plan shows no reserved tables and no Bookings column; the back office still lists bookings. |
| Booking times | The periods the till offers times in, each with a From and a To time. Add a period adds one, and the cross removes it. A period can run past midnight, for example 22:00 to 01:00. With no period, the till offers no times and staff type the time. |
| Offer a time every | 10, 15, 20, 30, 45 or 60 minutes. The line under it shows the times the till offers, for example "The POS offers 12:00, 12:30, 13:00…". |
| Largest party | The party sizes the till offers, up to this number. The back office isn't limited by it. |
| Table time | How long a booking keeps its table: 90 minutes in a new restaurant. The back office can change it for one booking. |
| Hold the table | How long before a booking the floor plan shows its table as reserved: 30 minutes in a new restaurant. |
Select Save changes when you are done. Bookings after midnight belong to the business day until the hour set in Back office › Settings › Language and region › Business day ends at.
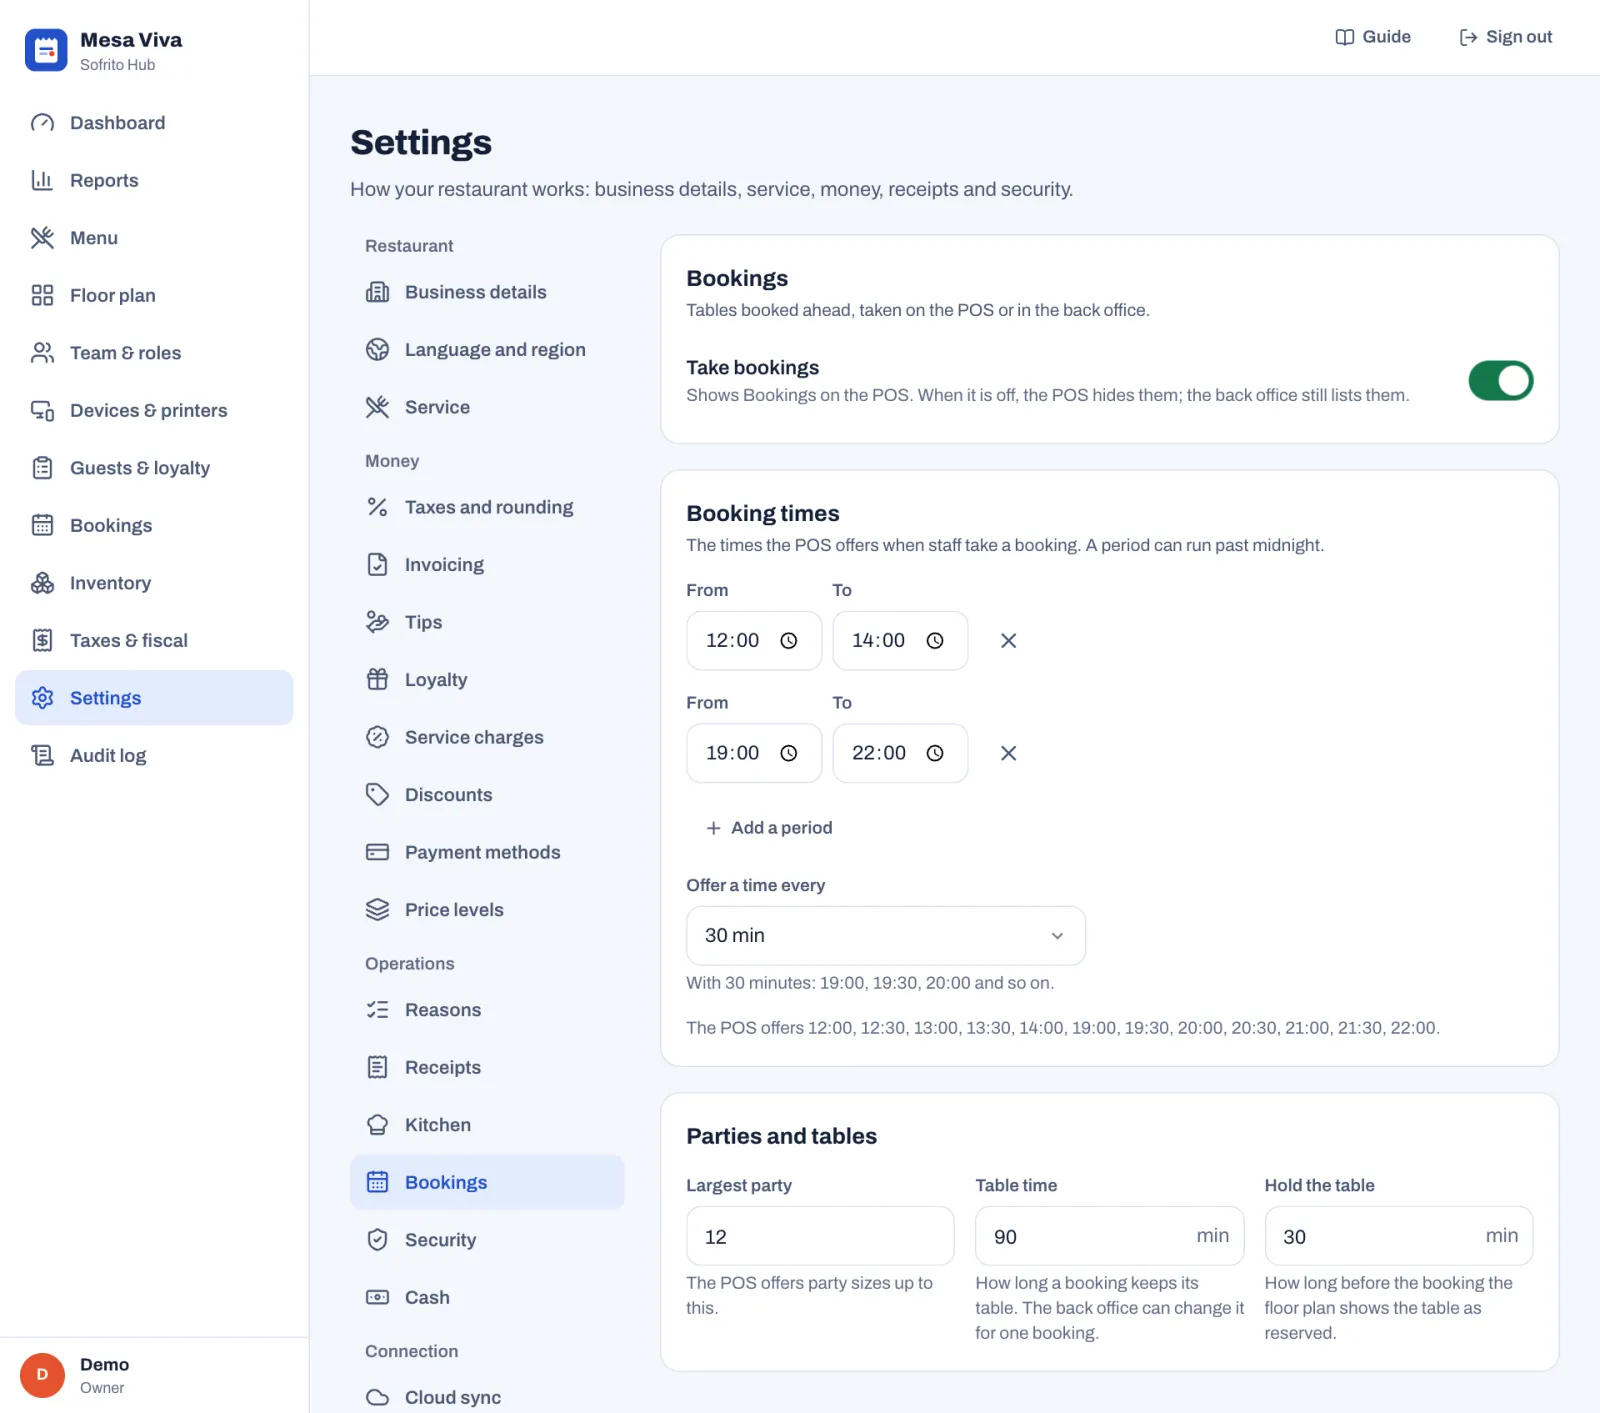
#Before service
- Look through today's bookings and their notes, and tell the kitchen about large parties and allergies.
- Give every booking a table, so the floor plan shows the table as reserved before the guests arrive, and nobody seats a walk-in there.
- Confirm large parties ahead and set them to Confirmed.
- Use Arrived for guests who wait at the bar, so everyone sees who is in.
- Take a phone number for every walk-in on the waitlist, so you can call them when their table is ready.
Close the day
This chapter covers the money side of the end of the night: cash put into or taken out of the drawer, paying out tips, counting and closing the drawer, the shift report (X) and the day close (Z), and what each figure on those reports means. Whoever closes a drawer counts it. A manager closes the day.
Before you start
- The drawer was opened with a counted float: see Open for service.
- Your payment methods and tips are set up: see Payment methods, tips and service charge.
#The closing routine
At the end of service, in this order:
- Make sure every check is paid or closed. The number on Orders shows how many are still open.
- Bump what is left on the kitchen display: see The kitchen display.
- Pay out the tips you pay from the drawer, and record any other cash still to come out of it: see Pay out tips.
- Count and close the cash drawer, and keep the cash report that prints.
- Close the day (Z), and keep the Z report that prints.
- Check the new day close in the back office.
- Lock the tills.
The sections below explain each step.
#Take cash in and out of the drawer
Record every amount that goes into or out of the drawer without a sale, so the count at the end matches.
- Pay in: cash put in, for example more change from the bank.
- Pay out: cash taken out to pay for something, for example a supplier or cleaning supplies.
- Cash drop: cash taken out during service and put in the safe, so the drawer never holds too much.
The Cash screen shows this till's drawer: the one chosen for the till under Cash drawer in Back office › Devices & printers. When the restaurant has more than one drawer, their names show at the top of the Cash drawer card: tap one to see that drawer.
- Tap Cash. On a phone, if Cash is not in the bottom bar, tap More, then Cash.
- Tap Pay in, Pay out or Cash drop.
- Type the amount. The last two digits are pence: 1, 5, 0, 0 is £15.00.
- Tap Confirm.
- For a pay-in or a pay-out, tap a reason, or type one under Other reason and tap Confirm. A cash drop asks for no reason.
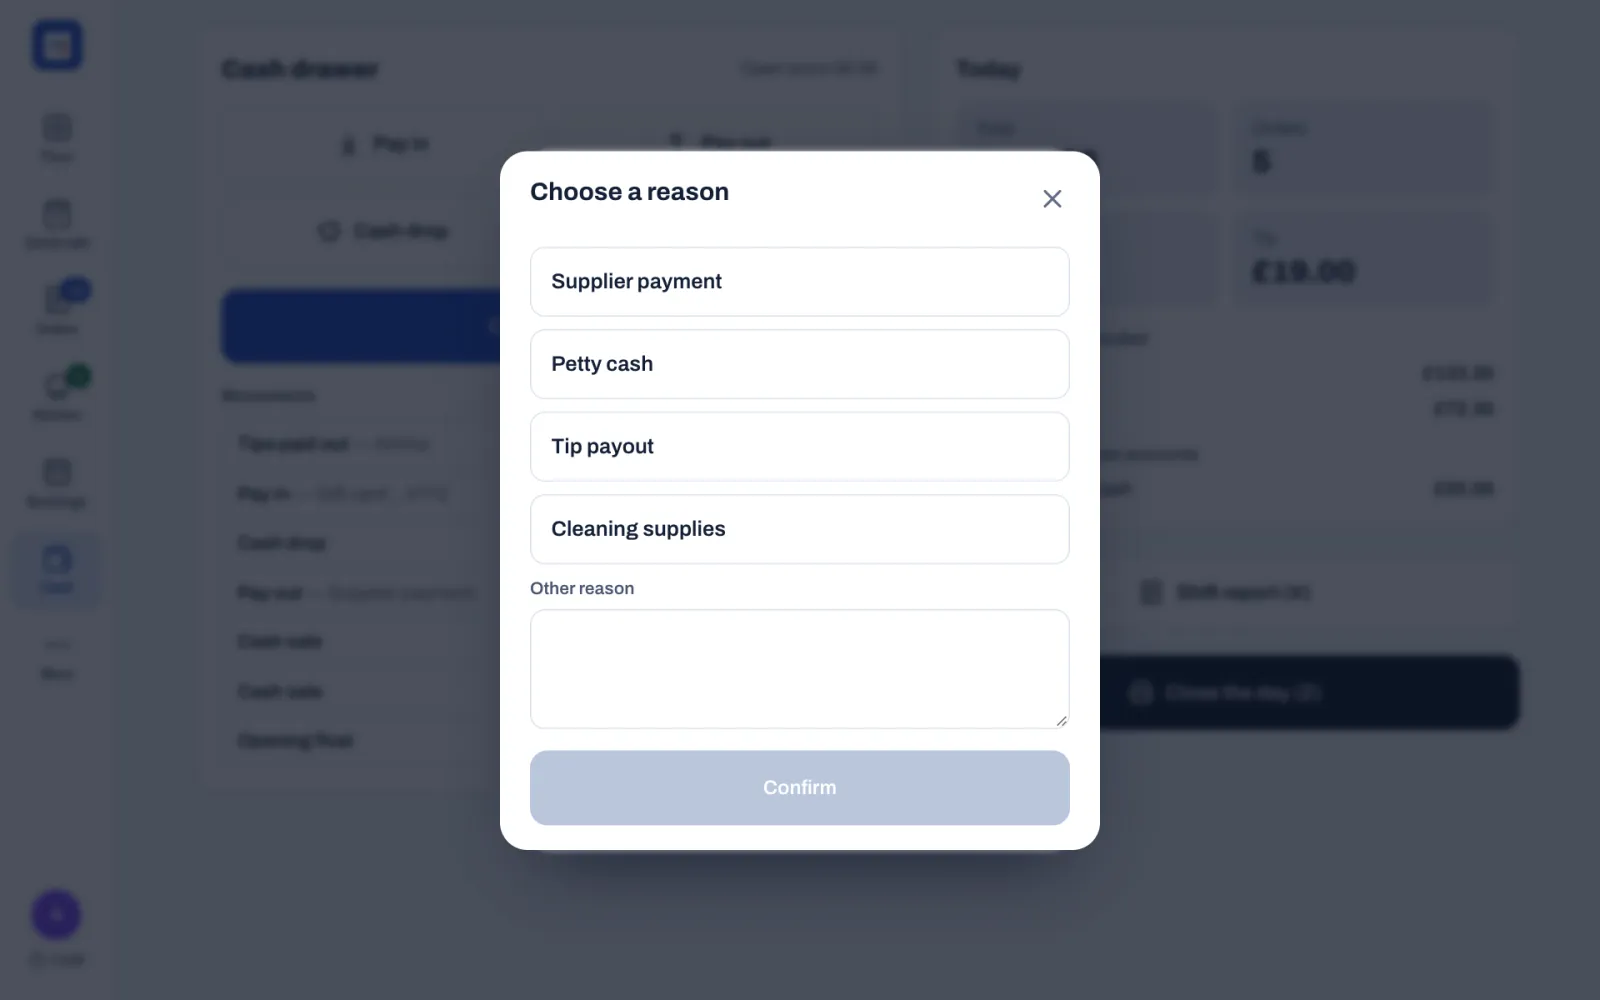
The drawer opens if it is connected, and the movement shows under Movements, for example Pay out — Supplier payment -£15.00 or Cash drop -£50.00. A manager sets the reasons in Back office › Settings › Reasons.
Cash taken for a gift card or a house account goes into the drawer too, as a pay-in such as Pay in — Gift card …4772: see Guests, loyalty and gift cards.
Pay-ins, pay-outs and cash drops need Pay-ins, pay-outs and drops, which only managers and owners have in a new restaurant. When someone else does one, Manager approval opens: a manager types their PIN and taps Approve. To open the drawer without a sale, see Voids, discounts, refunds and approvals.
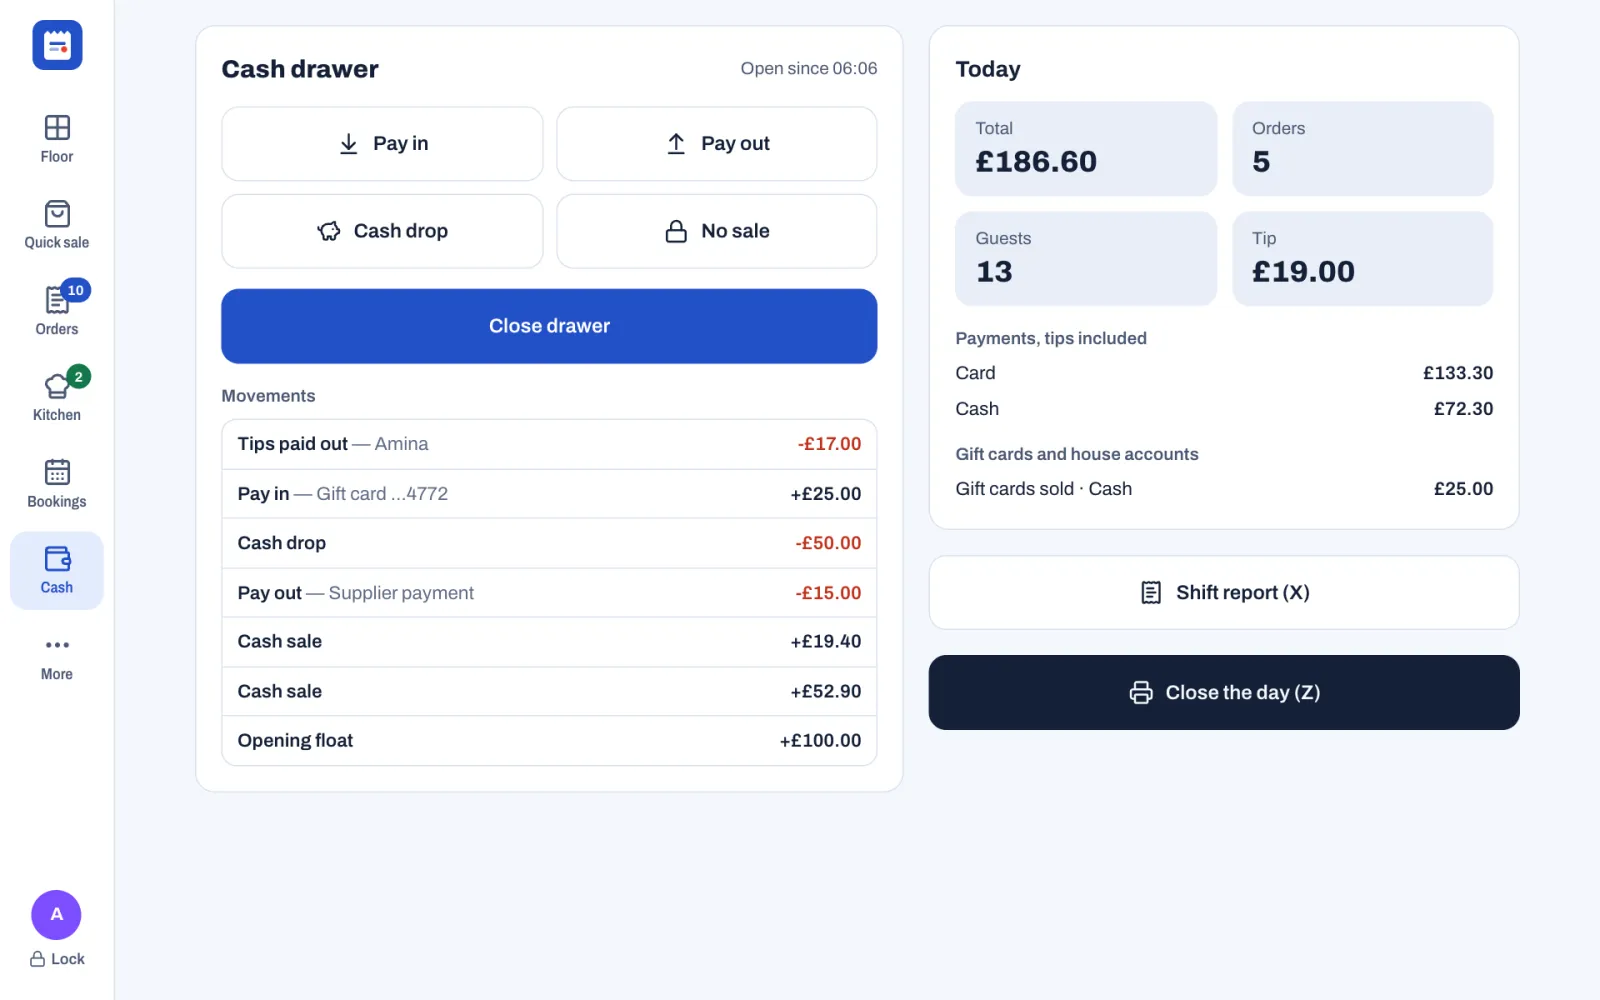
#Pay out tips
Tips are added when guests pay: see Taking payment. At the end of the night:
- The Today card on the Cash screen shows the day's tips under Tip, cash and card together.
- Cash tips added to a payment are already in the drawer, and they count in what the drawer should hold.
- Card tips are not in the drawer.
- Cash that guests leave on the table, outside a payment, stays with the staff. Each person declares it when they clock out, under Cash tips for this shift: see Clock in and out.
To pay someone the tips they are owed:
- In the back office, select Team & roles, then Tips.
- Select Pay out next to the person.
- The window Pay tips to and the person's name opens. Check the Amount, then choose From the cash drawer or With wages.
- For From the cash drawer, when more than one drawer is open, choose the one the cash comes out of under From which drawer.
- Select Pay and the amount, for example Pay £45.00.
From the cash drawer takes the money out of the open drawer: it shows as Tips paid out under Movements and on the cash report, so the count still matches. When no drawer is open, Sofrito says "Open the cash drawer before paying cash out.": open one on a till first. It needs Pay-ins, pay-outs and drops. With wages leaves the drawer alone: add the amount to their next pay. It needs Manage the team. Each payment is listed under Tips paid out on the same page.
For each person, the Tips page shows On their orders, what they are owed (Due, or Share of the pool when tips are pooled), Declared in cash, Paid out and Still to pay. With Pool tips on in Back office › Settings › Tips, each day's tips are shared by the hours each person worked. Service charges that count as a tip are owed with the tips. Cash tips that staff declare are listed, but they keep them: they are not shared or paid out.
Tips never count as sales. A service charge marked Counts as a tip is reported with the tips; other service charges have their own line on the reports.
#Check the day so far
The Today card on the Cash screen shows the business day so far: Total (what guests were charged, without tips), Orders, Guests and Tip. Under Payments, tips included is the amount taken with each payment method, tips included. When gift cards were sold or house accounts paid, Gift cards and house accounts lists that money by payment method, for example Gift cards sold · Cash or House accounts paid · Card. It is money taken, but not sales.
For the full figures on paper, tap Shift report (X). Sofrito prints the shift report on the receipt printer. It has the same lines as the Z report below, for the whole team's sales of the business day so far, and closes nothing: print it as often as you like, for example when a shift changes over.
You need Print shift reports (X) to see the Today card and print the report. Servers, bartenders, cashiers, managers and owners have it in a new restaurant.
#Count and close the cash drawer
Close the drawer at the end of each shift or of the day.
- Tap Cash, then Close drawer.
- Count the cash lists every note and coin. Type how many of each you have. Counted adds them up as you go.
- Count again. Once the drawer is closed, the count can't be changed.
- Tap Close drawer.
- Sofrito shows Expected, Counted and Over / short, and keeps them on the screen until you tap Done.
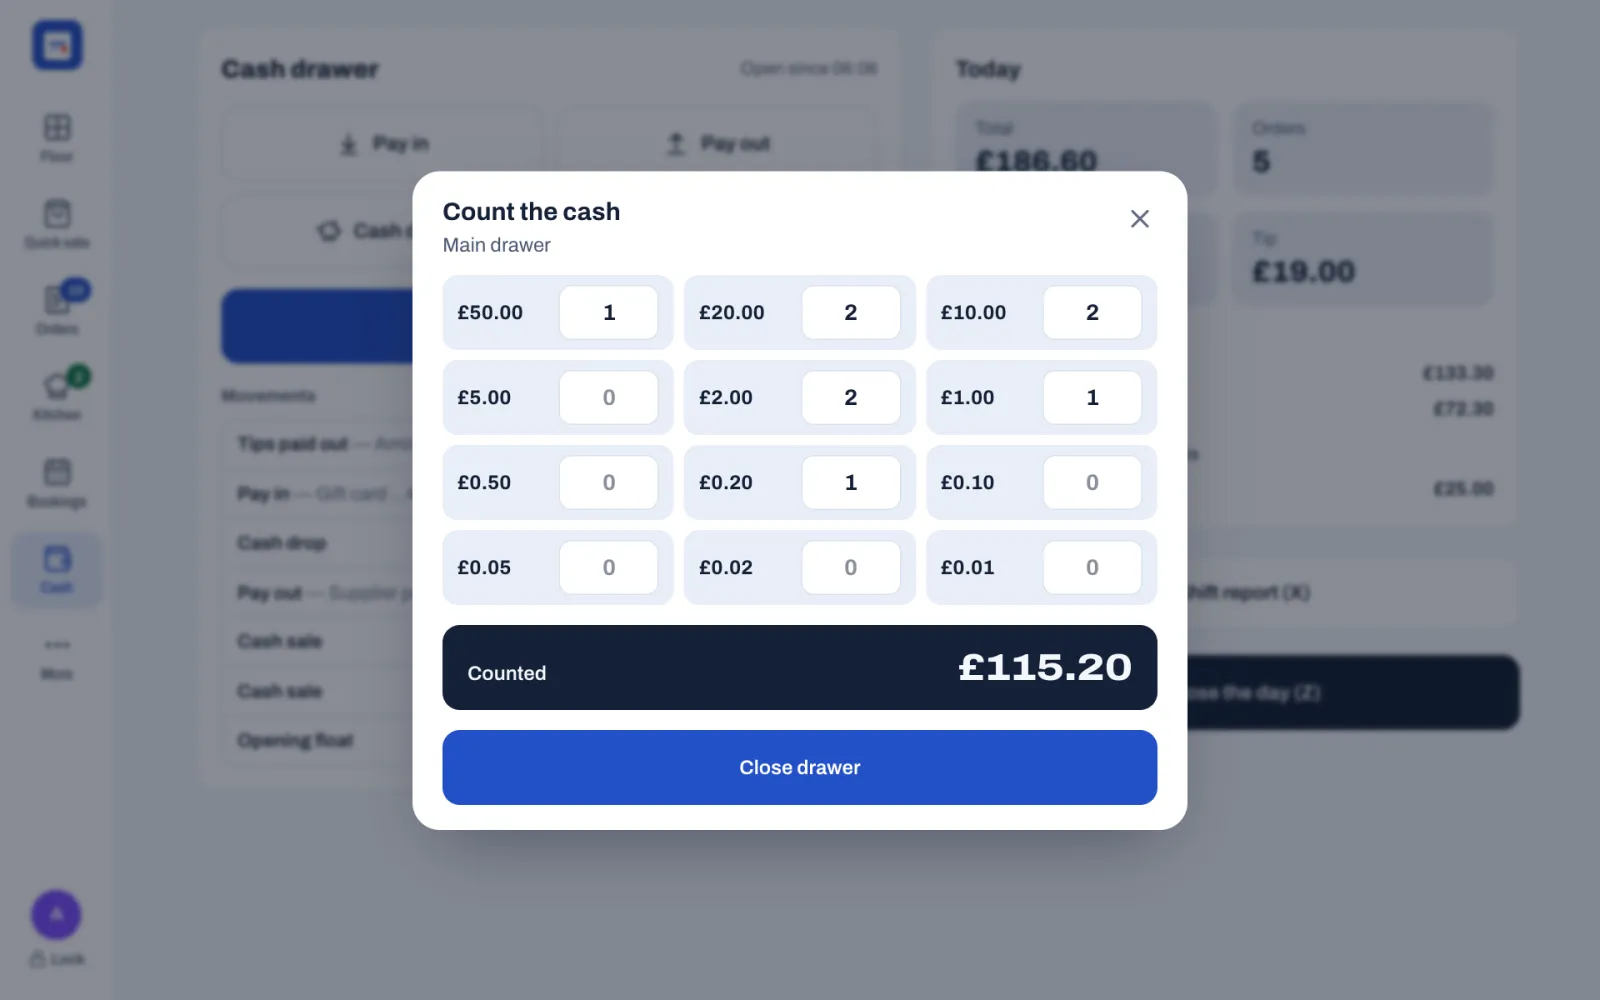
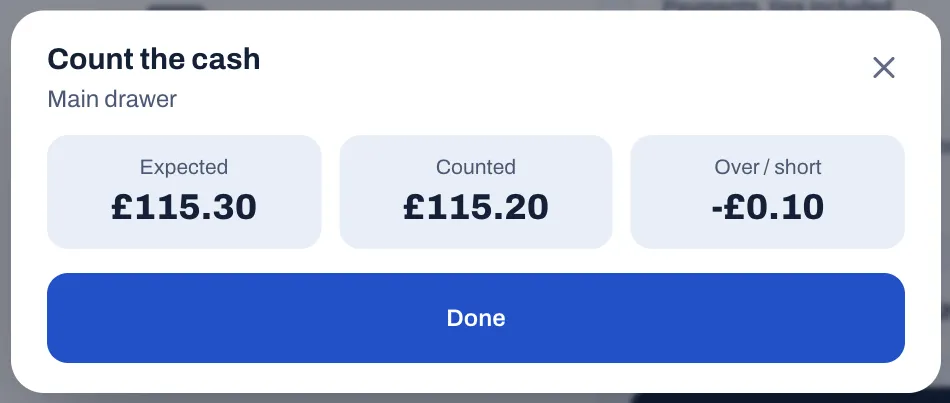
Sofrito prints the cash report, and the Cash drawer card shows No drawer is open until someone opens it again with Open drawer. To see the report again, tap More, then the drawer's name under Print queue.
In a new restaurant, staff count without seeing how much should be in the drawer, so nobody counts to a number. A manager can change this in Back office › Settings › Cash with Count without seeing the expected amount. When it is off, the Cash screen shows Expected while the drawer is open, and the count shows it too.
To close a drawer, you need Open and close the cash drawer. Servers, bartenders, cashiers, managers and owners have it in a new restaurant. Each close is also recorded in Back office › Audit log, with the amount counted and the difference: see Security, the audit log and your data.
#Read the cash report
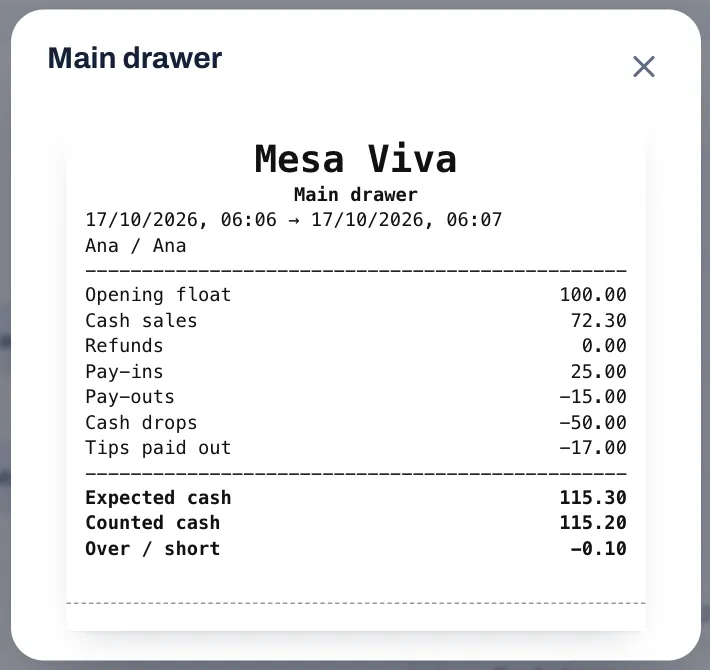
At the top: the restaurant, the drawer's name, when it was opened and closed, and who opened and who closed it.
| Line | What it is |
|---|---|
| Opening float | The cash in the drawer when it was opened. |
| Cash sales | The cash taken for sales, with the tips guests paid in cash. A cash payment that was voided is taken off. |
| Refunds | Cash given back to guests. |
| Pay-ins | Cash put into the drawer, including the cash taken for gift cards and house accounts. |
| Pay-outs | Cash taken out with Pay out. |
| Cash drops | Cash taken out to the safe with Cash drop. |
| Tips paid out | Tips paid to staff from the drawer. Only printed when there are some. |
| Expected cash | What the drawer should hold: the float, plus cash sales and pay-ins, minus refunds, pay-outs, cash drops and tips paid out. |
| Counted cash | What you counted. |
| Over / short | Counted cash minus expected cash. A minus sign means the drawer is short: -0.20 is 20p missing. Without a minus sign, there is more cash than expected. |
If the drawer is over or short by more than small change, look for a pay-out, a cash drop or a refund that nobody recorded, or a card payment that was rung up as cash.
#Close the day (Z)
The day close, or Z report, freezes the business day's totals for good. Sofrito numbers each close, adds the day to a grand total that runs from the very first close, and seals it to the close before it, so any later change would show.
- Tap Cash.
- Tap Close the day (Z). A window opens with the business day it closes, and asks, for example, "Close business day 17 Oct? Totals are locked and printed."
- If no check of that day is still open, tap Close the day (Z) in the window.
Sofrito prints the Z report on the receipt printer and shows, for example, "Day 22 closed" with the date and time. Each business day can be closed once.
Checks still open. If checks of that day are still open, the window lists them, for example under "Checks still open on this day: 3", each with its number, its table or name, the server and what is left to pay. Either:
- tap a check to open it, then pay or void it, and close the day once none is left; or
- tap Close the day, move the open checks. The day closes without them. They move to the day sales now go on, today or, when you close early, the next business day, and they are reported on the day they are paid. Dishes already voided on them stay on the day that was closed. Where order numbers restart every day, each one gets a new number on that day.
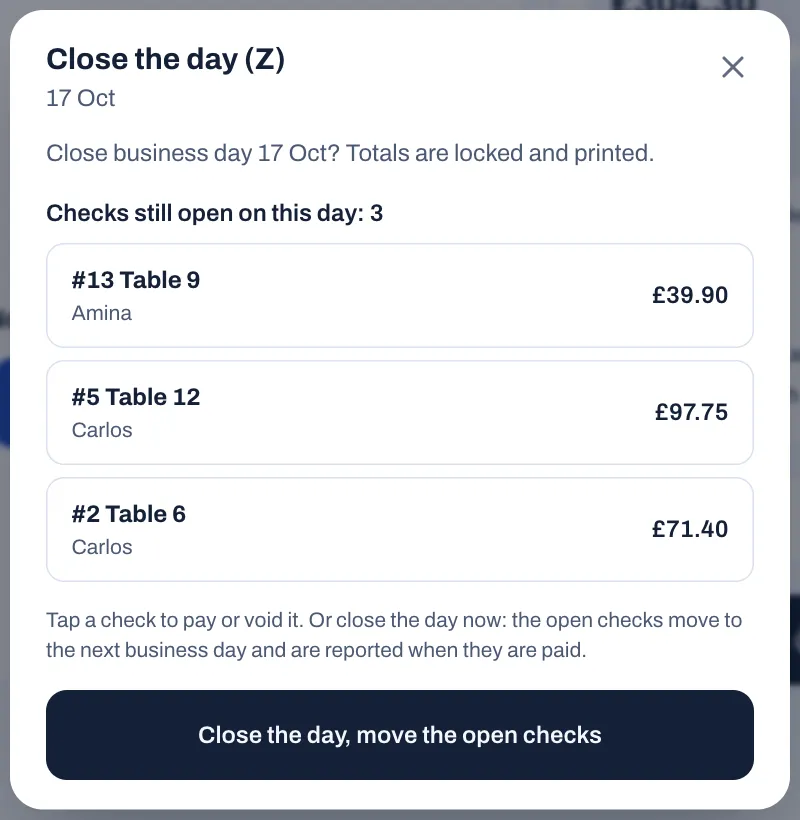
A day nobody closed. If an earlier business day was never closed, the window closes that day first and says so, for example "Business day 16 Oct was never closed. Close it before today's." Close it, then tap Close the day (Z) again for the next day.
After the close:
- New sales never go on a closed day: after an early close, they go on the next business day, even before the hour set in Back office › Settings › Language and region › Business day ends at. Today on the Cash screen starts again from zero and, where order numbers restart every day, they start again at 1.
- Tickets still open on the kitchen screens from the closed day are cleared, and their dishes count as served. Cleared tickets don't come back in Recall.
- Every dish marked sold out goes back on sale for the next day. Dishes whose stock is counted keep their count. To change this, see Mark a dish as sold out.
- Gift cards sold and house accounts paid after the close count on the next day.
Close the day (Z) shows only to people with Close the day (Z), which managers and owners have in a new restaurant.
Service after midnight still belongs to the day before until the hour set in Business day ends at, so close the day at the end of the night, not the next morning.
#Read the Z report
The Z report starts with the restaurant, its tax number, END OF DAY (Z) with its number, for example N.º 22, the business day, when it was closed and who closed it. The shift report says SHIFT REPORT (X) instead, has no number and no grand total.
| Line | What it is |
|---|---|
| Orders | The checks paid during the business day. |
| Guests | The guests on those checks. |
| Gross sales | The dishes sold, at menu price, before discounts and comps. |
| Discount | Discounts given. |
| Comps | Dishes given on the house. |
| Voids | Dishes voided that day after they were sent to the kitchen, even on checks still open. They were not charged; the line is there so you can keep an eye on them. |
| Refunds | Money given back to guests. |
| Net sales | What you charged, without tax, service charges and refunds. |
| Service charge | Service charges added to bills, except those that count as a tip. |
| Tax | The tax in your sales. When menu prices include tax, it is part of the total; when they don't, it is added on top. |
| TOTAL | What guests were charged on their bills, after refunds. Tips added when paying, and service charges that count as a tip, are not in it. |
| Tip | Tips for the team, with the service charges that count as a tip. Not part of sales, so not in TOTAL. |
| Average check | The average total of a check. |
| Payments, tips included | Each payment method, with the number of payments in brackets and the amount taken, tips included. |
| Gift cards and house accounts | Money taken for gift cards sold and house accounts paid, by payment method, for example "Gift card · Cash (1)". Not part of sales. Only printed when there is some. |
| Tax (second list) | Each tax rate, with the amount it was charged on (Base) and the tax. |
| DINE IN, TAKEAWAY and so on | The number of orders and the total of each order type. |
| Total on receipts | Only on the Z, and only when service charges that count as a tip were charged: TOTAL plus those charges, which is what the day's receipts add up to. The day close seals this amount. |
| Grand total | The running total of every day close since the first one. Each close adds what its receipts charged: Total on receipts when the Z prints it, otherwise TOTAL. |
#Check the day close in the back office
- Select Taxes & fiscal › Day closes.
- Check that the new close is at the top of the list, with the right business day, and that its Seal says Verified.
- Select it to see its full report.
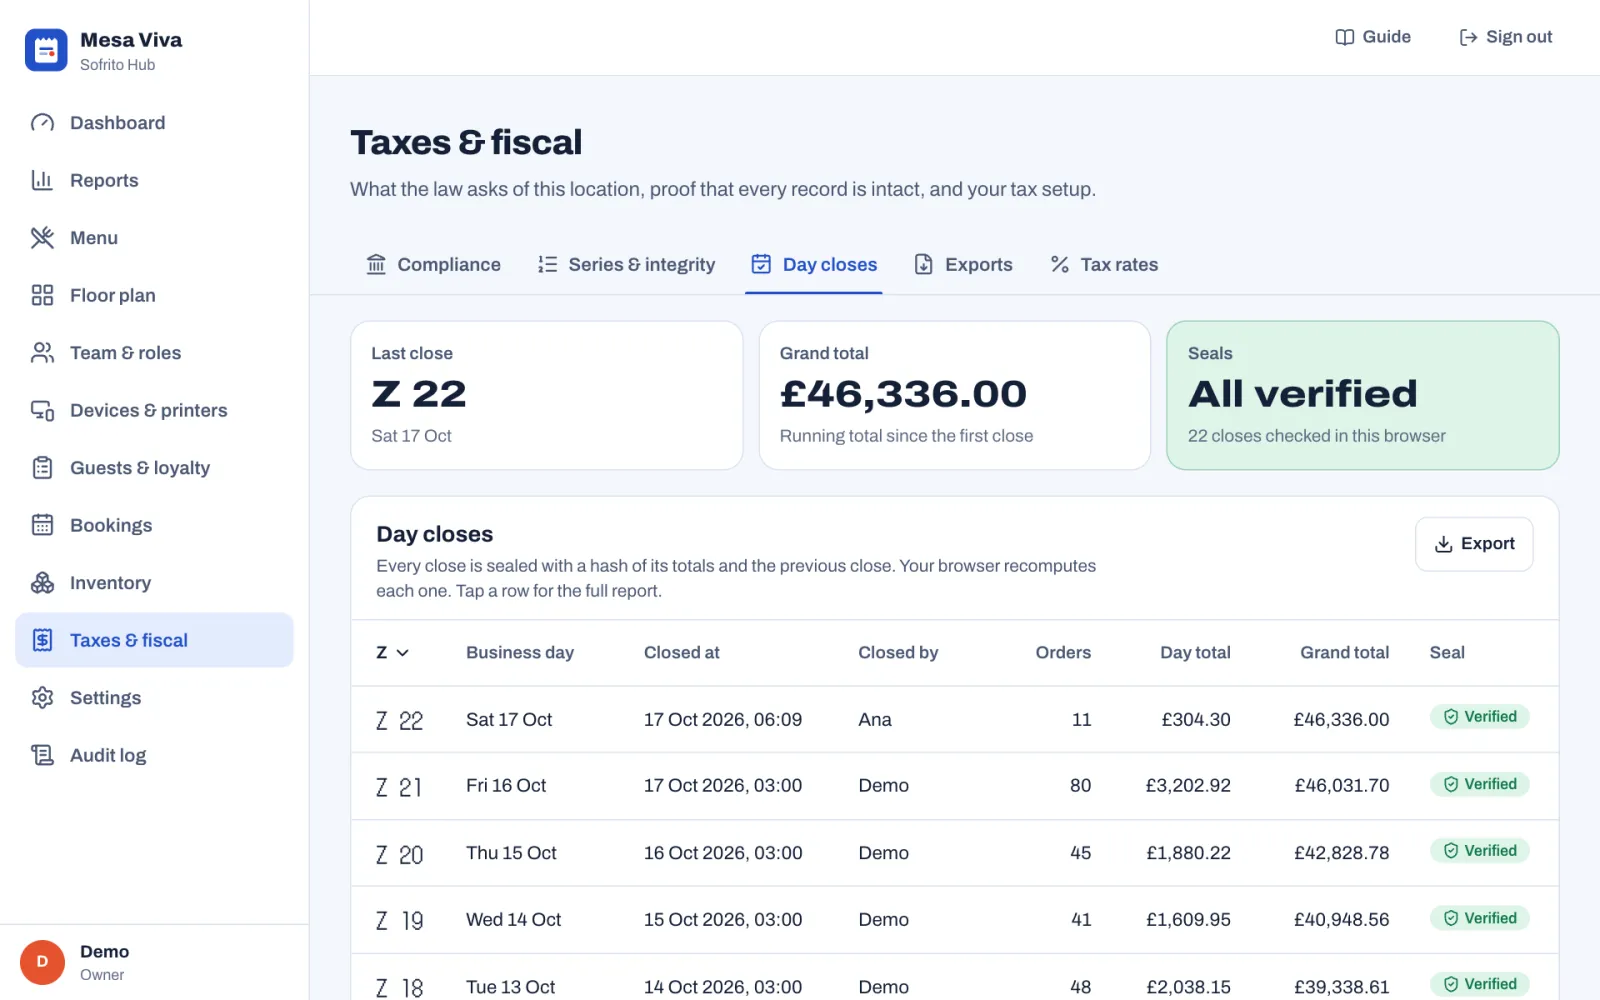
The full report shows the day's Sales, Orders, Guests and Average check, then each line from Gross sales to Total sales, the Tax included, Net sales, Tips and Voids, the Tax breakdown and Payments, tips included, with each method's tips, as on the printed report. When gift cards were sold or house accounts paid that day, Gift cards and house accounts lists them too, for example "Gift cards sold · Cash (1) £25.00". If checks were moved to the next day when the day was closed, a yellow line says how many, for example "3 orders were still open when the day was closed." Under Seal are the grand total, the Hash of this close and the Previous hash. Export downloads the report as a spreadsheet file.
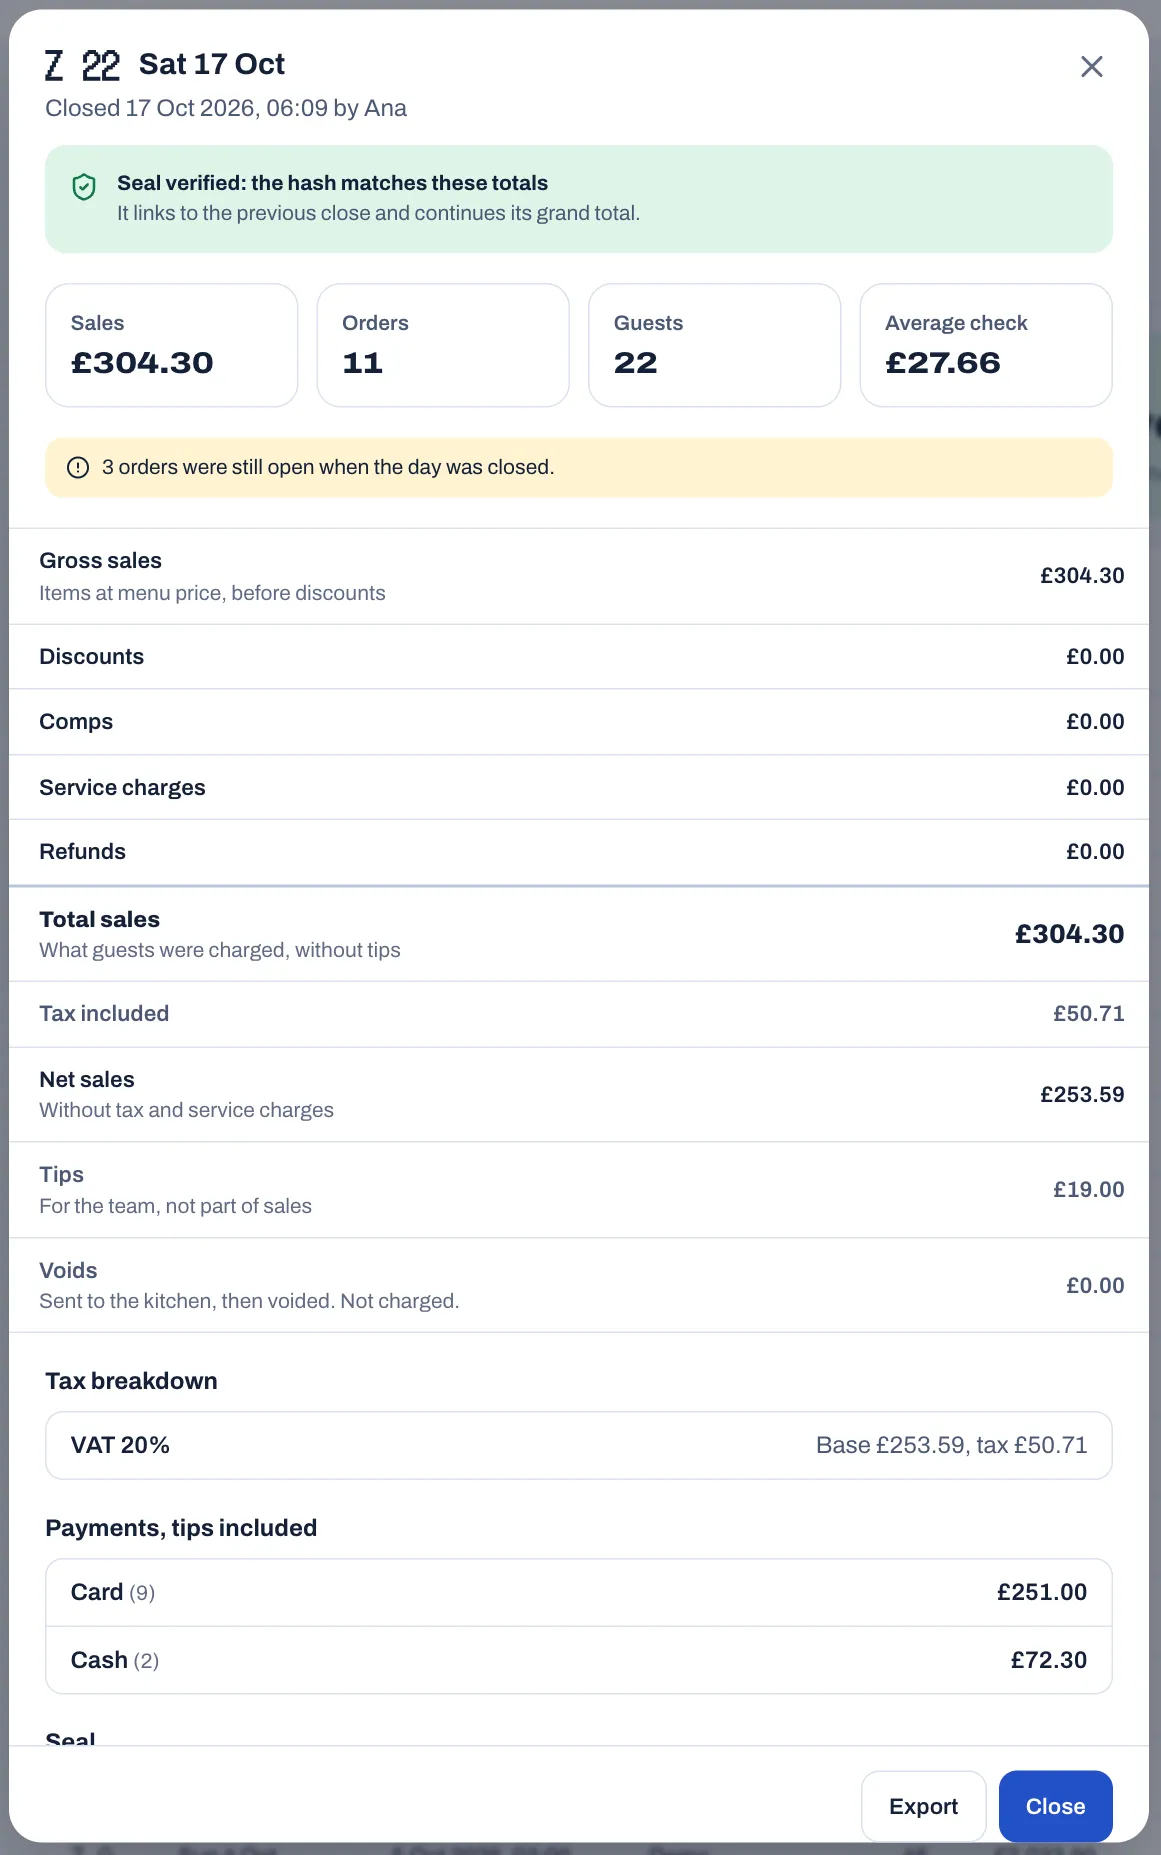
Verified means the close still matches its seal and follows on from the close before it. Does not match means a close no longer matches its seal. For what the seals protect, see Taxes, receipts and legal documents.
#Before you go home
- Orders shows no open checks.
- The kitchen display shows All caught up.
- In Bookings, no-shows are marked, and tomorrow's bookings have their tables: see Bookings and the waitlist.
- Tips paid from the drawer are recorded, so the count matches.
- The cash drawer is counted and closed, and its cash report is with the cash.
- The day is closed, the Z report is printed, and the close shows Verified in the back office.
- Every till is locked.
Dashboard and reports
The dashboard shows how today is going while service runs. The reports answer questions about any dates you choose: what you sold, when, which dishes earn their place, how each person did, where money left the till and how fast the kitchen worked. Every table exports to a spreadsheet. This chapter is for owners and managers.
Before you start
- Your role needs Open the back office and View reports. A new restaurant gives both to the Owner and Manager roles. See Your team, roles and PINs.
- Reports are only as good as what staff record. Make sure orders are paid on Sofrito, voids and discounts carry a reason, and the kitchen bumps tickets on the kitchen display.
#Know how Sofrito counts
A few rules apply to the dashboard and to every report:
- Paid orders only. An order counts in sales once it is paid in full. Checks still open show on the dashboard as open orders, not as sales.
- The business day. A day runs from the cut-off hour to the cut-off hour, not from midnight. With the usual cut-off of 04:00, a bill paid at 01:30 belongs to the evening before. You set the cut-off in Settings › Language and region › Business day ends at. Every date in the reports is a business day. When the day is closed with a Z report before the cut-off, sales from then on belong to the next business day.
- Tips are counted apart. Tips are shown on their own, because they belong to the team. Service charges marked Counts as a tip are tips too: they are counted once, with the tips, and not as sales or service charges.
- Voids are items sent to the kitchen and then removed. An item taken off an order before it was sent is not a void and is not counted anywhere. A void counts on the business day it was made, even when its check is still open or moves on to the next day.
- Refunds count on the day of the refund, not on the day of the original sale.
- Gift cards and house accounts are not sales. Money taken for a gift card, or paid off a house account, is shown on its own. The sale counts when the card or the account pays for an order.
#Check how today is going
- In the back office, select Dashboard.
The dashboard opens with the restaurant's name and today's business day. After the day is closed early with a Z report, "today" is already the next business day. The dashboard refreshes by itself every 30 seconds, so you can leave it open on a screen in the office.
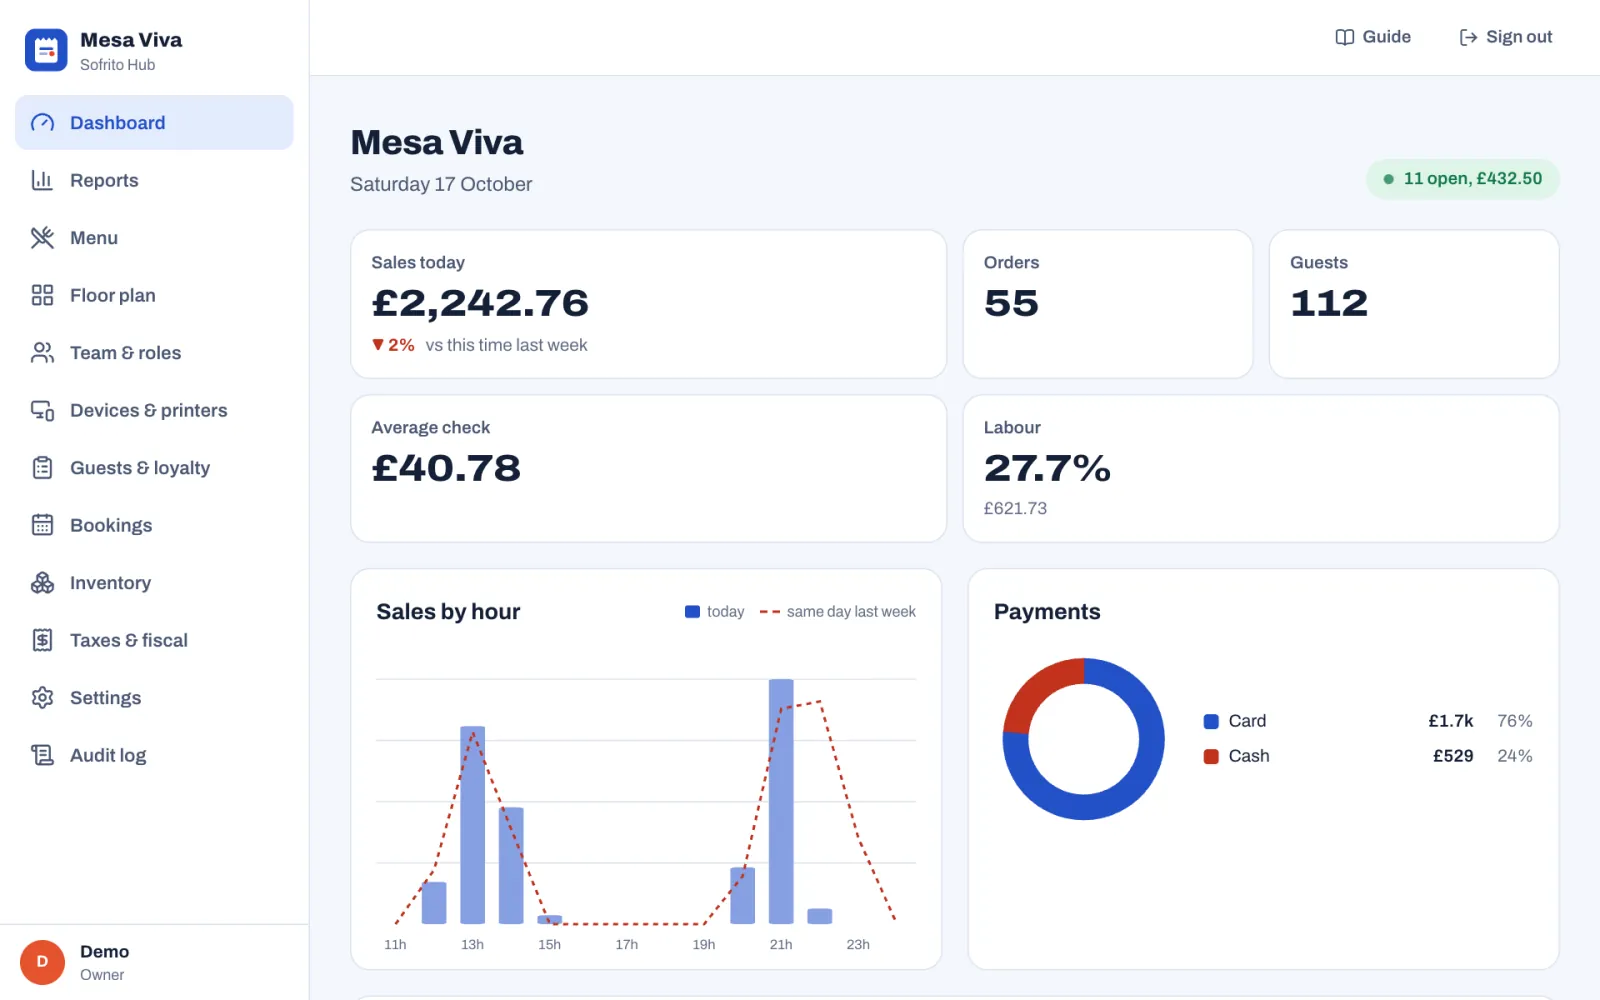
| Figure | What it shows |
|---|---|
| {n} open, {amount} (the green badge) | How many orders are open right now and what they add up to. This money is not in sales yet. |
| Sales today | What guests have paid today, with tax and service charges, without tips, after refunds. The arrow compares it with the same day last week up to the same time of day, so a Friday at 21:00 is compared with last Friday at 21:00. |
| Orders | How many orders were paid today. |
| Guests | The guest counts staff entered on today's paid orders. |
| Average check | The average paid order: what today's paid orders came to, divided by how many there were. |
| Labour | Today's labour cost as a share of today's sales. The amount under it is the cost: hours clocked today, including people still on the clock, times each person's hourly wage, without unpaid breaks. |
| Sales by hour | Today's sales by the hour each order was paid (bars), and the same day last week (dashed line), in the order of the business day: hours after midnight come after the evening. |
| Payments | How today's money was taken, by payment method. |
Scroll down for the rest of the day's picture.
| Figure | What it shows |
|---|---|
| Top dishes today | The five dishes that brought in the most money today, after discounts, with how many sold. |
| Kitchen: active | Tickets on the kitchen screens right now. |
| Kitchen: avg ticket | Today's average time, in minutes, from a ticket reaching its station until the kitchen marked it ready. |
| Kitchen: late | Tickets on the screens now that have waited longer than the late time in Settings › Kitchen. The box turns red when there are any. |
| Tips | Tips on today's paid orders, with the service charges that count as a tip. |
| Discounts & comps | Money given away today in discounts and free items, on paid orders. |
| Voids | The menu value of items sent to the kitchen and then voided today, on any order, open or closed. |
| Low stock | Up to six stock items at or below their reorder point. "Stock levels are healthy." means there are none. See Stock, recipes and suppliers. |
#Choose the dates for a report
- In the back office, select Reports.
- Choose the dates: Today, Yesterday, Last 7 days, Last 30 days or This month. For other dates, type them in the two date boxes.
- Select the tab with your question: Summary, Sales by day, By hour, Items & categories, Staff, Exceptions or Kitchen.
Reports open on the last 7 days. The tab and the dates stay in the page address, so you can bookmark a report or send its link to another manager.
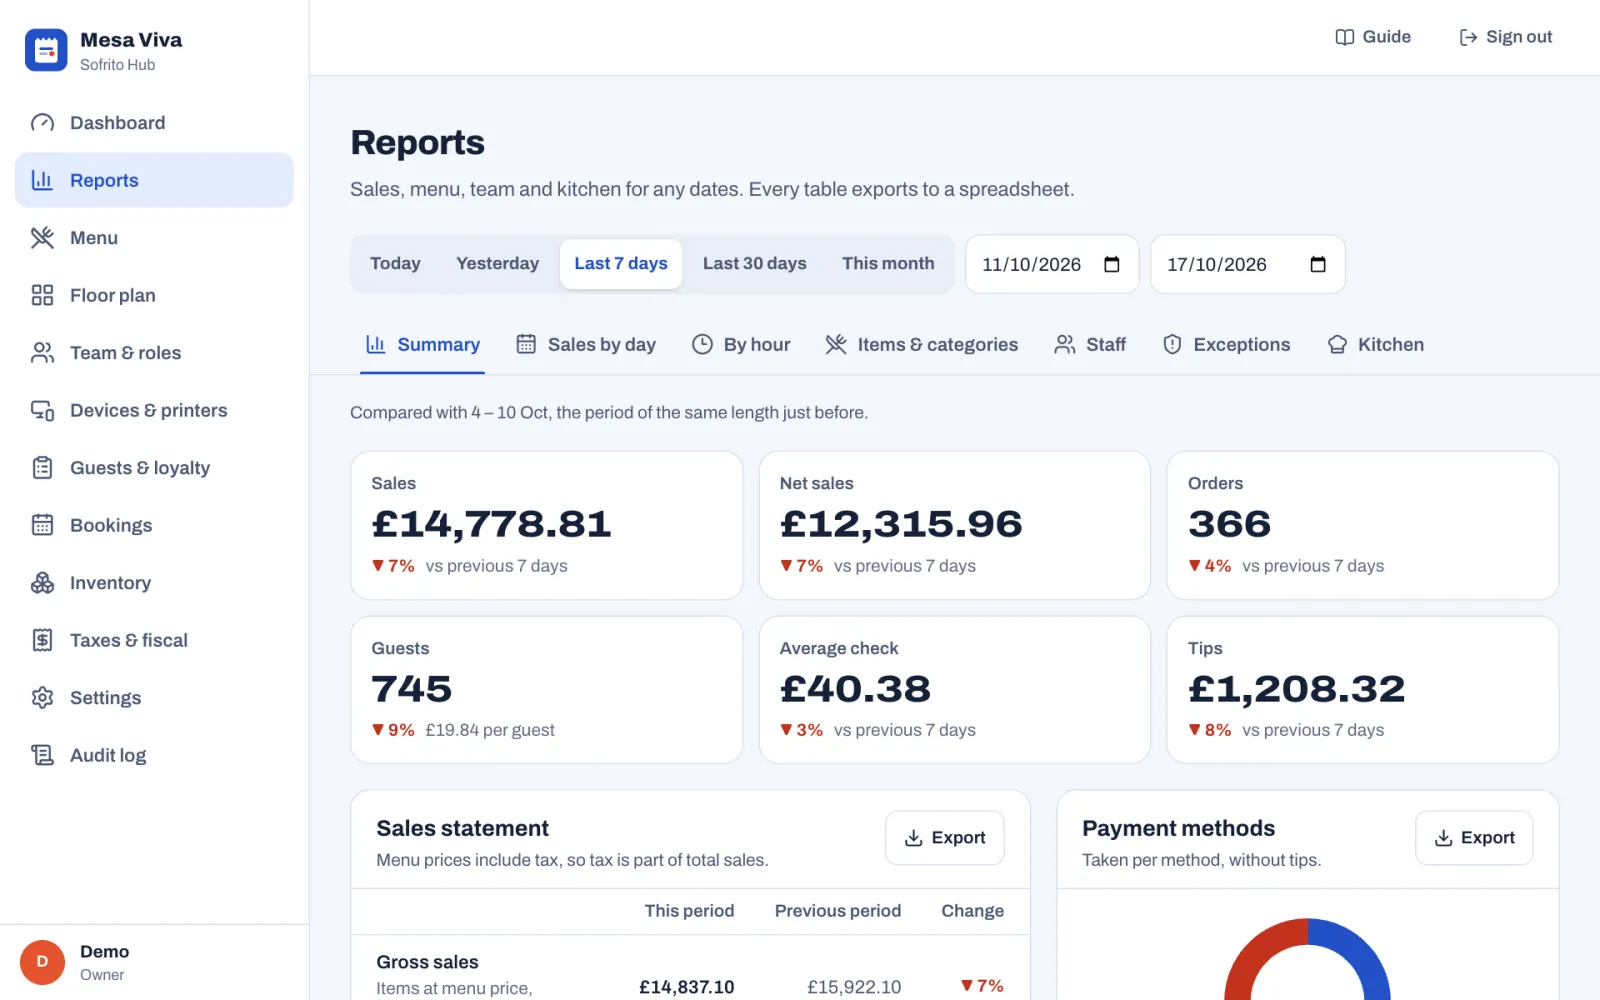
The tiles on Summary and the sales statement compare your dates with the period of the same length just before. A green arrow means better, red means worse. In the sales statement, discounts, comps, refunds and voids work the other way round: less is better, so a fall shows in green.
#Export a report to a spreadsheet
Every table has an Export button at its top right.
- Open the report and choose the dates.
- To change the order of the rows, select a column heading. Select it again to reverse the order.
- Select Export.
Your browser downloads a CSV file that opens in Excel, Numbers or Google Sheets. The file holds exactly what the table shows, in the same order, with a Total row where the table has one. Money columns name the currency in their heading, for example "Sales (GBP)". The file name says what it is and which dates it covers, for example sales-by-day_2026-10-10_2026-10-16.csv.
To keep a copy of everything at once, select Settings › Account, then Everything, as CSV files. It downloads one ZIP file with your menu, orders, payments, team, time cards, guests, gift cards and stock, as CSV files. The button only shows when your role has Export data.
#See what you sold
Select Reports › Summary. It answers "How much did we sell, and where did the money come from?"
The six tiles at the top are Sales, Net sales, Orders, Guests (with the spend per guest), Average check and Tips, each against the previous period.
The Sales statement walks from the menu value of what you sold to what guests paid. Its first line under the heading says whether your menu prices include tax.
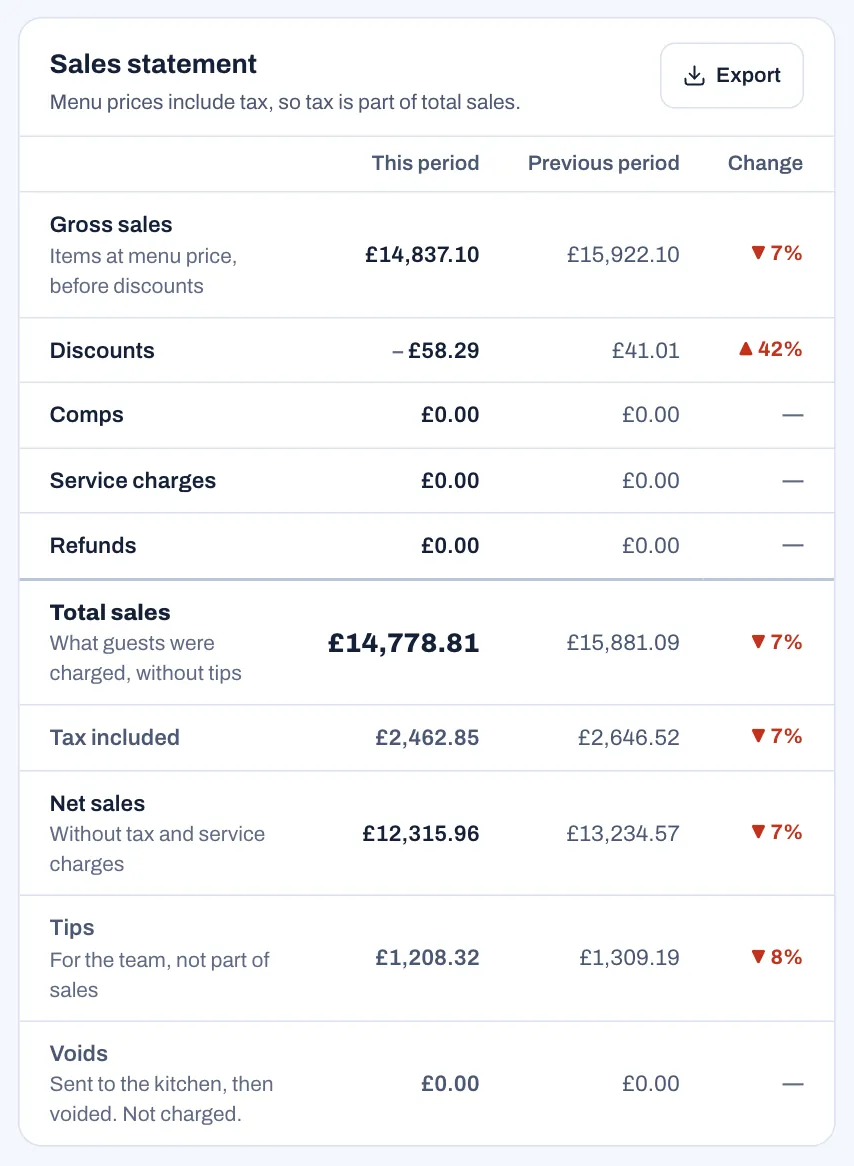
| Line | What it means |
|---|---|
| Gross sales | Items at menu price, before discounts. |
| Discounts | Discounts given on paid orders, without comps. |
| Comps | The menu value of items given on the house. |
| Service charges | Service charges added to bills, without the ones that count as a tip. |
| Tax | Only when tax is added at payment: the tax added to bills. |
| Refunds | Money given back to guests in these dates. |
| Total sales | What guests were charged, without tips. This is the Sales tile. |
| Tax included | Only when menu prices include tax: the tax inside total sales. |
| Net sales | Total sales without tax and service charges. |
| Tips | For the team, not part of sales: tips added to payments, and service charges that count as a tip. |
| Voids | Items sent to the kitchen, then voided. Not charged. |
Below the statement:
- Payment methods shows how the money was taken, as a ring and a table: Method, Payments (how many), Amount, Tips and Share. Amounts are without tips. The printed X and Z reports, and the Cash screen on the till, list Payments, tips included, so their amounts are higher by the tips.
- Gift cards and house accounts appears when gift cards were sold or house accounts paid in these dates: Gift cards sold and House accounts paid, by Method, with Payments and Amount. This money is not a sale, but it went into the drawer or through the card terminal: count it with the payments when you check them.
- Order types splits sales between dine in, takeaway, delivery, bar tabs and counter: Orders, Sales, Average check and Share.
- Tax breakdown shows, for each tax rate, the Taxable base, the Tax and the Total with tax, as on your fiscal documents. Send this table to your accountant with the fiscal files.
The Export button on the sales statement downloads it with both periods and the change.
#Compare days
Select Reports › Sales by day. It answers "Which days are strong, and how does this period compare with the last?"
- Sales for the whole period.
- Average per day, counting only days with sales, and how many days that was, for example "7 of 7 days with sales".
- Best day and its date.
- Orders, with the number of guests under it.
The chart shows each day's sales as bars, with the previous period as a dashed line. The Day by day table lists every day, including days with no sales: Date, Orders, Guests, Sales, Net sales and Average check.
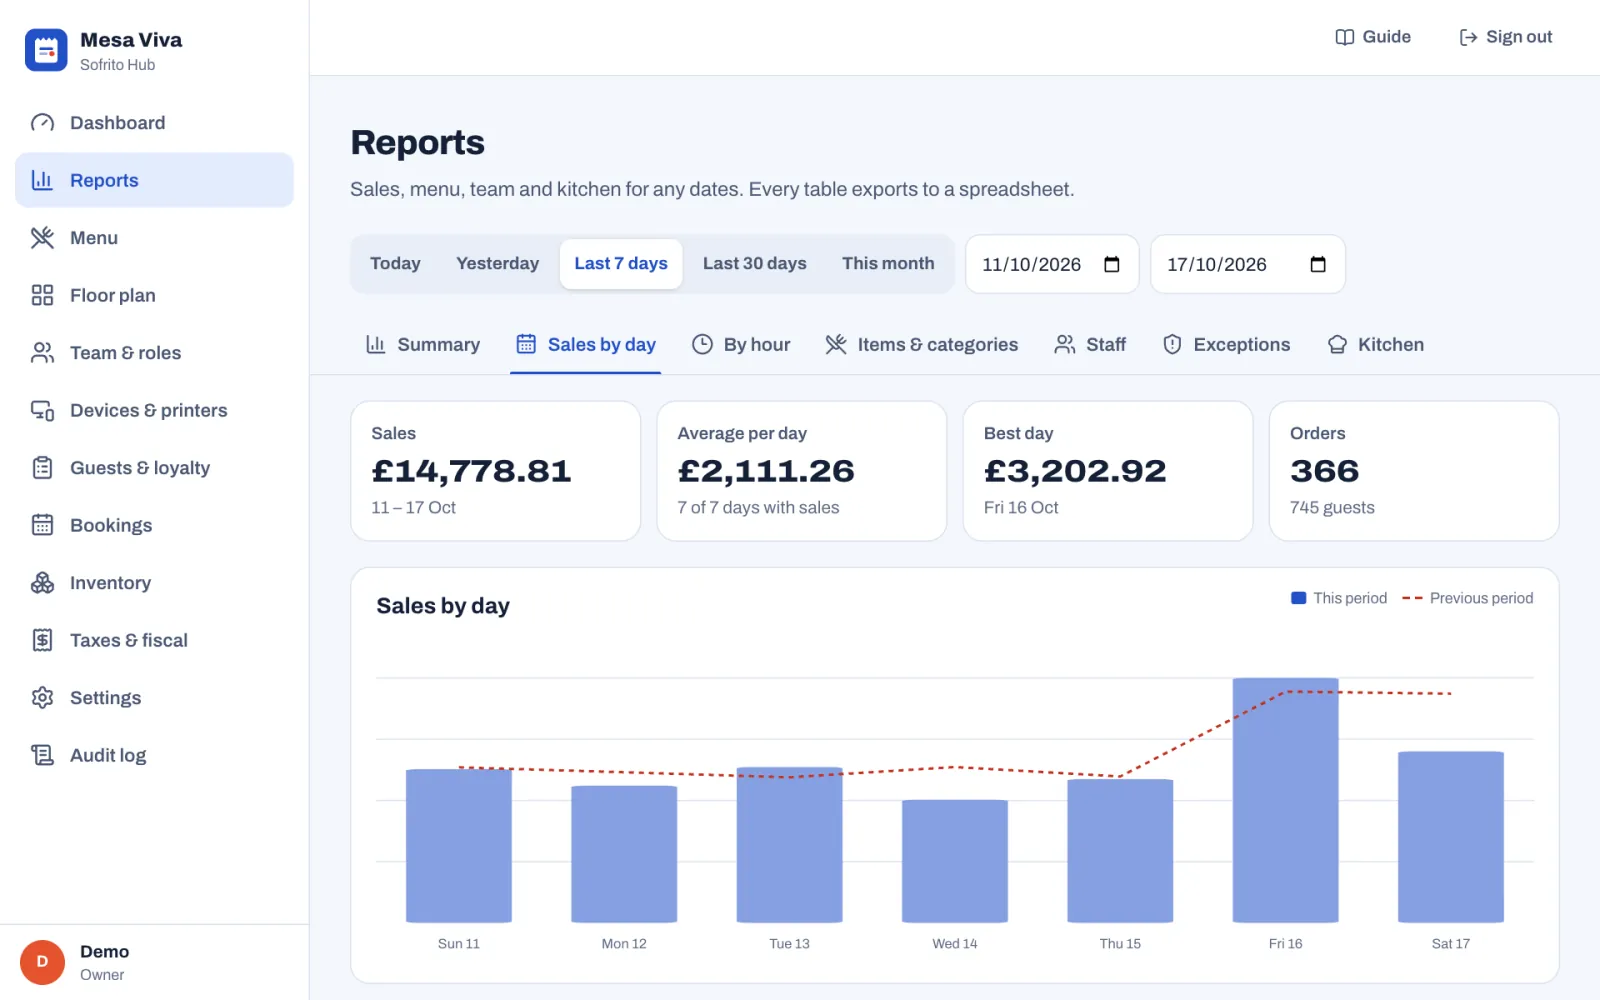
#Find your busy hours
Select Reports › By hour. It answers "When are we busy, and when are we not?"
- Top hour for sales and Top hour for orders.
- Hours with sales: how many hours of the day had at least one sale.
- A strip of 24 boxes, one per hour of the business day. The darker the box, the more you sold.
- A bar chart of the hours you were open, with the previous period as a dashed line.
- The Hour by hour table: Hour, Orders, Sales, Average check and Share of the day.
Each order counts in the hour it was paid, not the hour it was opened. The strip, the chart and the table follow the business day: they start at the cut-off hour in Settings › Language and region › Business day ends at, so sales after midnight come after the evening, at the end of the day they belong to.
Use this report with Team & roles › Timesheets to put people on the floor when the guests are there.
#See which dishes earn their place
Select Reports › Items & categories. It answers "Which dishes sell, which make money, and which should change?" Choose Items or Categories at the top.
On Items, the Menu engineering panel sorts every dish into a group. Each dish is compared with the others in its own category. Categories with fewer than three dishes are compared with the whole menu.
- A dish is popular when it sold at least 70% of an even share of its category's units. For example, in a category of 10 dishes that sold 1,000 portions, an even share is 100, so a dish needs 70 to be popular.
- A dish is profitable when its margin per portion (price without tax, minus cost) is at or above the average for its category.
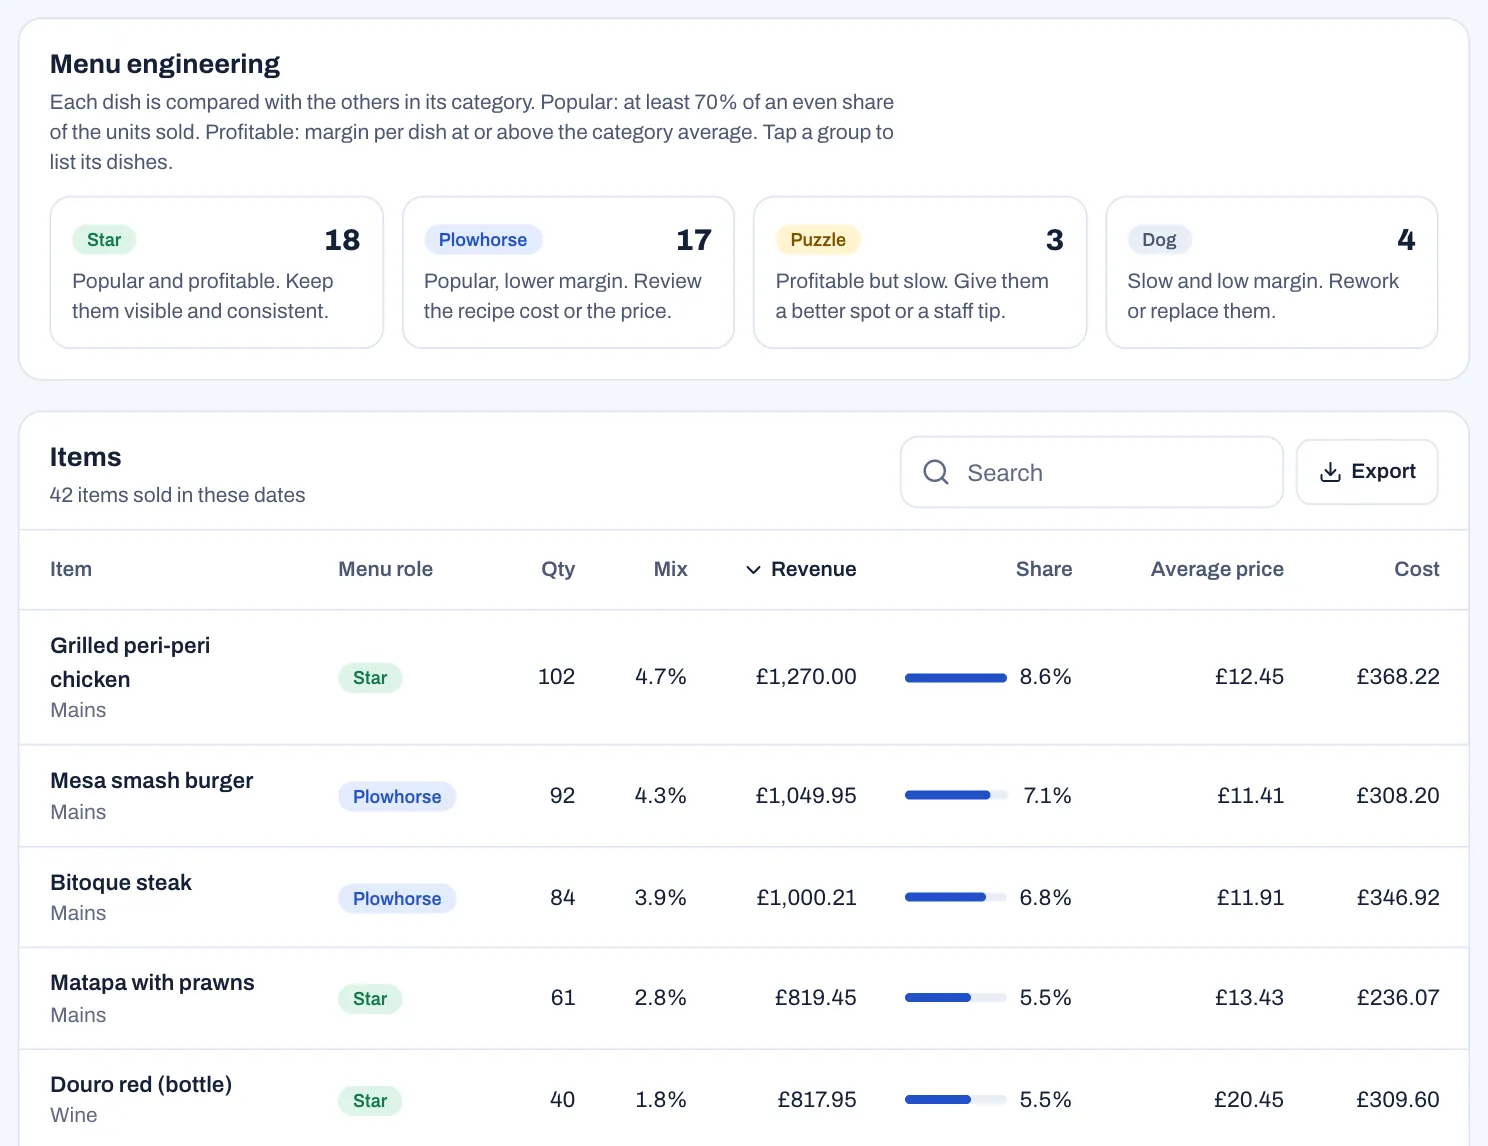
| Group | Means | What to do |
|---|---|---|
| Star | Popular and profitable. | Keep them visible and consistent. |
| Plowhorse | Popular, lower margin. | Review the recipe cost or the price. |
| Puzzle | Profitable but slow. | Give them a better spot or a staff tip. |
| Dog | Slow and low margin. | Rework or replace them. |
Select a group to list only its dishes. Select it again to show them all.
Margins need costs. A dish gets its cost from Cost to make in the menu (see Build your menu) or from its recipe, and the options chosen on it add the cost of their own recipes (see Stock, recipes and suppliers). When no dish has a cost, the panel only splits dishes into Popular and Slow seller. When some dishes have no cost, the panel says how many.
The Items table shows, for each dish: Menu role, Qty, Mix (its share of all units sold), Revenue (after discounts), Share (of revenue) and Average price. When dishes have costs, it adds Cost, Margin and Margin %. Type in Search to find a dish or a category. The export also includes the category.
On Categories, the tiles show the Top category, how many Categories sold and how many Items sold. The table lists each category's Qty, Revenue and Share.
#Check each person's sales
Select Reports › Staff. It answers "How did each person do?"
- Top seller and their sales.
- Highest average check, among people with at least 5 orders.
- Tips, with how many people shared them.
The table shows, for each person: Orders, Guests, Sales, Average check, Tips, Discounts, Comps and Voids. The number in brackets after voids is how many items they voided. Everything counts on the orders each person owned, so an order handed over to another server counts for the person who had it at the end. On a narrow screen, swipe the table sideways to see every column.
#Check voids, comps and discounts
Select Reports › Exceptions. It answers "Where did money leave the till, who did it, and who approved it?" This is the report to read every morning.
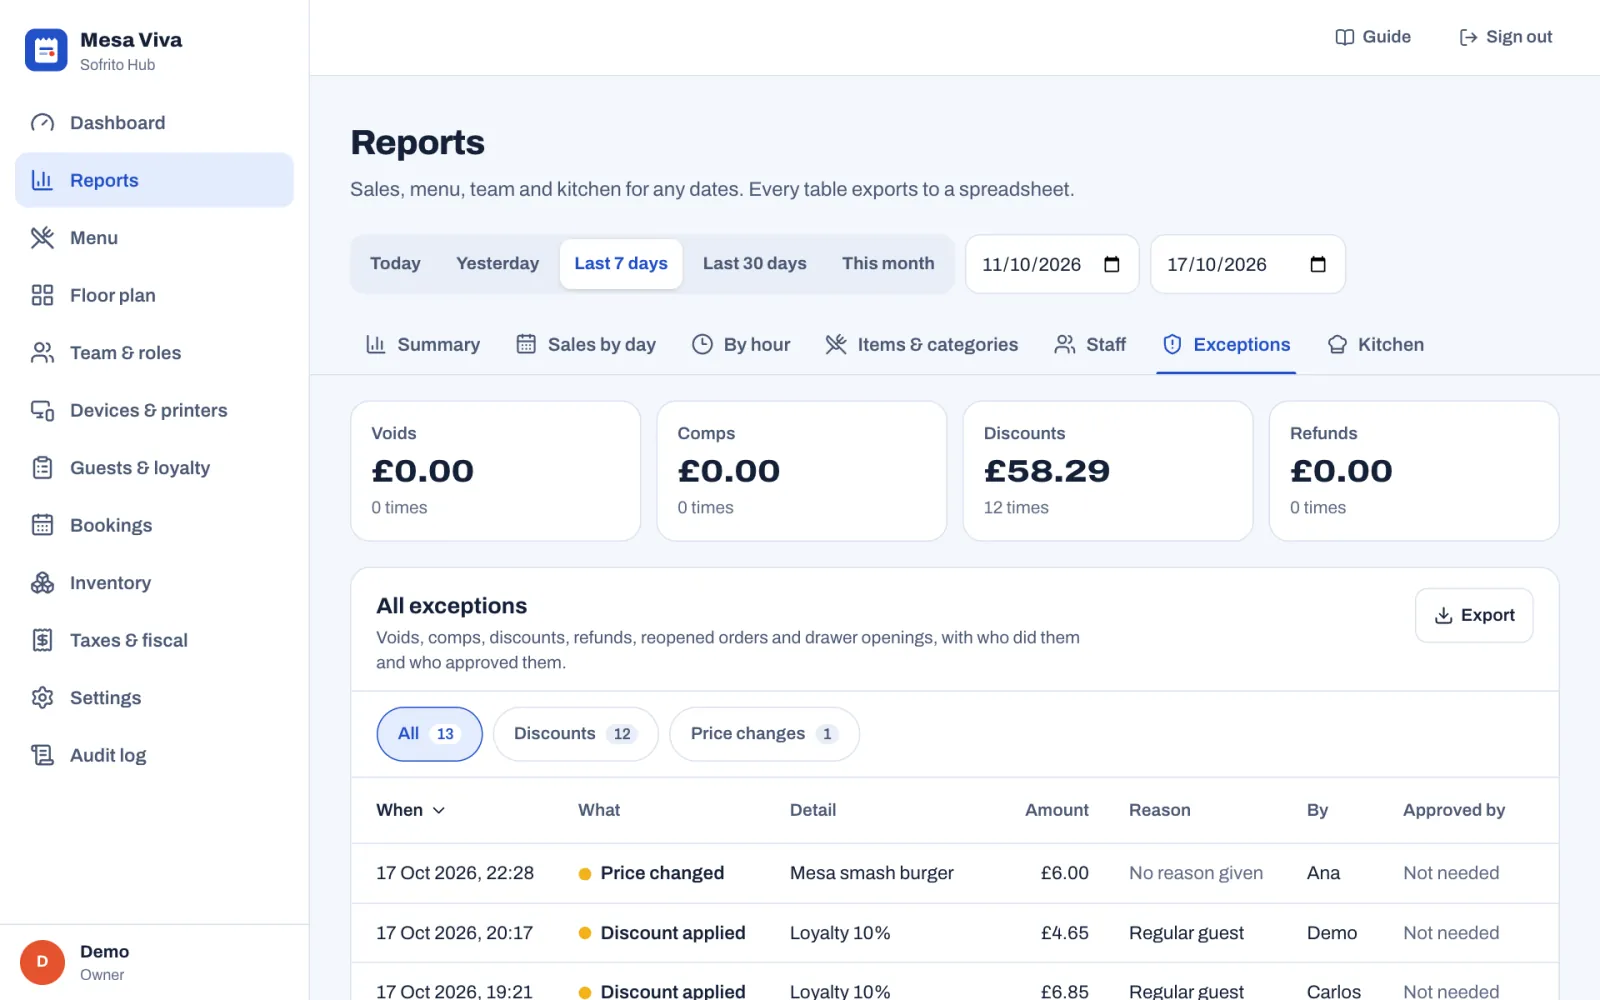
- The four tiles add up Voids, Comps, Discounts and Refunds, and say how many times each happened. Select a tile to list only those.
- All exceptions lists every void, comp, discount, price change, refund, voided payment, reopened order, drawer opened without a sale and cash pay-out. Use the buttons above the list (All, Voids, Comps, Discounts, Price changes, Refunds, Voided payments, Reopened orders, Cash drawer) to narrow it down. A button only shows when the dates have that kind of exception.
- Each row shows When, What, Detail (the item, order number or payment method), Amount, Reason, By (who did it) and Approved by. For a price change, the amount is the old price minus the new one, times the quantity. Not needed means the person's role allowed it without a manager. No reason given means nobody chose a reason.
- By employee counts, for each person, how many exceptions they made and for how much.
Exceptions appear the moment they happen, even on orders that are still open. The list shows the latest 500. If you reach that, choose fewer days.
#Check kitchen speed
Select Reports › Kitchen. It answers "How long do guests wait for their food?"
- Tickets: how many tickets the stations finished on a kitchen screen.
- Average ticket time, with your target under it ("Aim for under 10 min").
- Late tickets, with the late time under it ("Late after 20 min"), and Share late.
Average ticket time by station draws one bar per station. A bar turns amber over the warning time and red over the late time, which is the dashed line. The Stations table lists Tickets, Average (min), Late and Late share for each station.
A ticket's time runs from the moment it reaches the station until the kitchen marks it ready. Only tickets finished on a kitchen screen are timed: tickets that only print, at stations no kitchen screen shows, are not. You set the warning and late times in Settings › Kitchen (see Settings, section by section). For the kitchen display itself, see The kitchen display.
#When to look at what
| When | Look at | Why |
|---|---|---|
| During service | Dashboard | Open orders, late tickets and how today compares with last week. |
| Every morning | Reports › Exceptions for Yesterday | Every void, comp, discount, price change and refund, with who did it and why. |
| Every morning | The day close (Z report) | That the day was closed and the drawers balanced. See Close the day. |
| Every week | Summary and Sales by day for Last 7 days | Sales against the week before, and your strong and weak days. |
| Every week | By hour and Staff | Whether the rota matches the busy hours, and how each person did. |
| Every week | Kitchen | Whether ticket times are slipping, and at which station. |
| Every month | Summary for This month | The month's sales statement, payment methods and tax breakdown for your accountant. Export them. |
| Every month | Items & categories | Which dishes to promote, reprice, rework or drop. |
| Every month | Taxes & fiscal › Exports | The fiscal files your country asks for. See Taxes, receipts and legal documents. |
Stock, recipes and suppliers
Inventory follows what you buy: flour, oil, coffee, takeaway boxes. You record what arrives, what is thrown away and what is on the shelves when you count. With recipes linked to your dishes, every dish sold takes its ingredients out of stock, and Sofrito tells you what is running low and suggests what to order. This chapter is for owners, managers and head chefs.
Before you start
- Your role needs Manage inventory. To turn on taking ingredients out of stock as dishes sell, you also need Restaurant settings. See Your team, roles and PINs.
- Your menu should be in Sofrito, so you can link recipes to dishes. See Build your menu.
#Understand stock items and units
A stock item is one thing you buy and count, such as "Olive oil" or "Burger buns". Each one has:
| Field | What it means |
|---|---|
| Counted in | The unit you count it in: units, kg, g, L or ml. Recipes, counts and deliveries all use this unit. |
| Purchase unit | Optional. How your supplier sells it, such as a case, bag or bottle. With One {unit} holds you say how much of the counted unit is inside, for example one crate holds 12 L. |
| Cost | What you pay before tax. It is shown per purchase unit when there is one, otherwise per kg for items counted in grams, per litre for items counted in millilitres, or per unit. |
| Par level | How much you want on hand after a delivery. |
| Reorder at | At or below this, the item shows as low and goes on suggested orders. |
The Value of an item is what is on hand times its cost. When a delivery comes in at a new price, Sofrito updates the cost to the average of the old stock and the new delivery. When an item's cost changes, the cost of every dish whose recipe uses it is worked out again.
#Open inventory
- In the back office, select Inventory.
The page has six tabs: Stock, Movements, Stock count, Recipes, Suppliers and Purchase orders. Stock opens first.
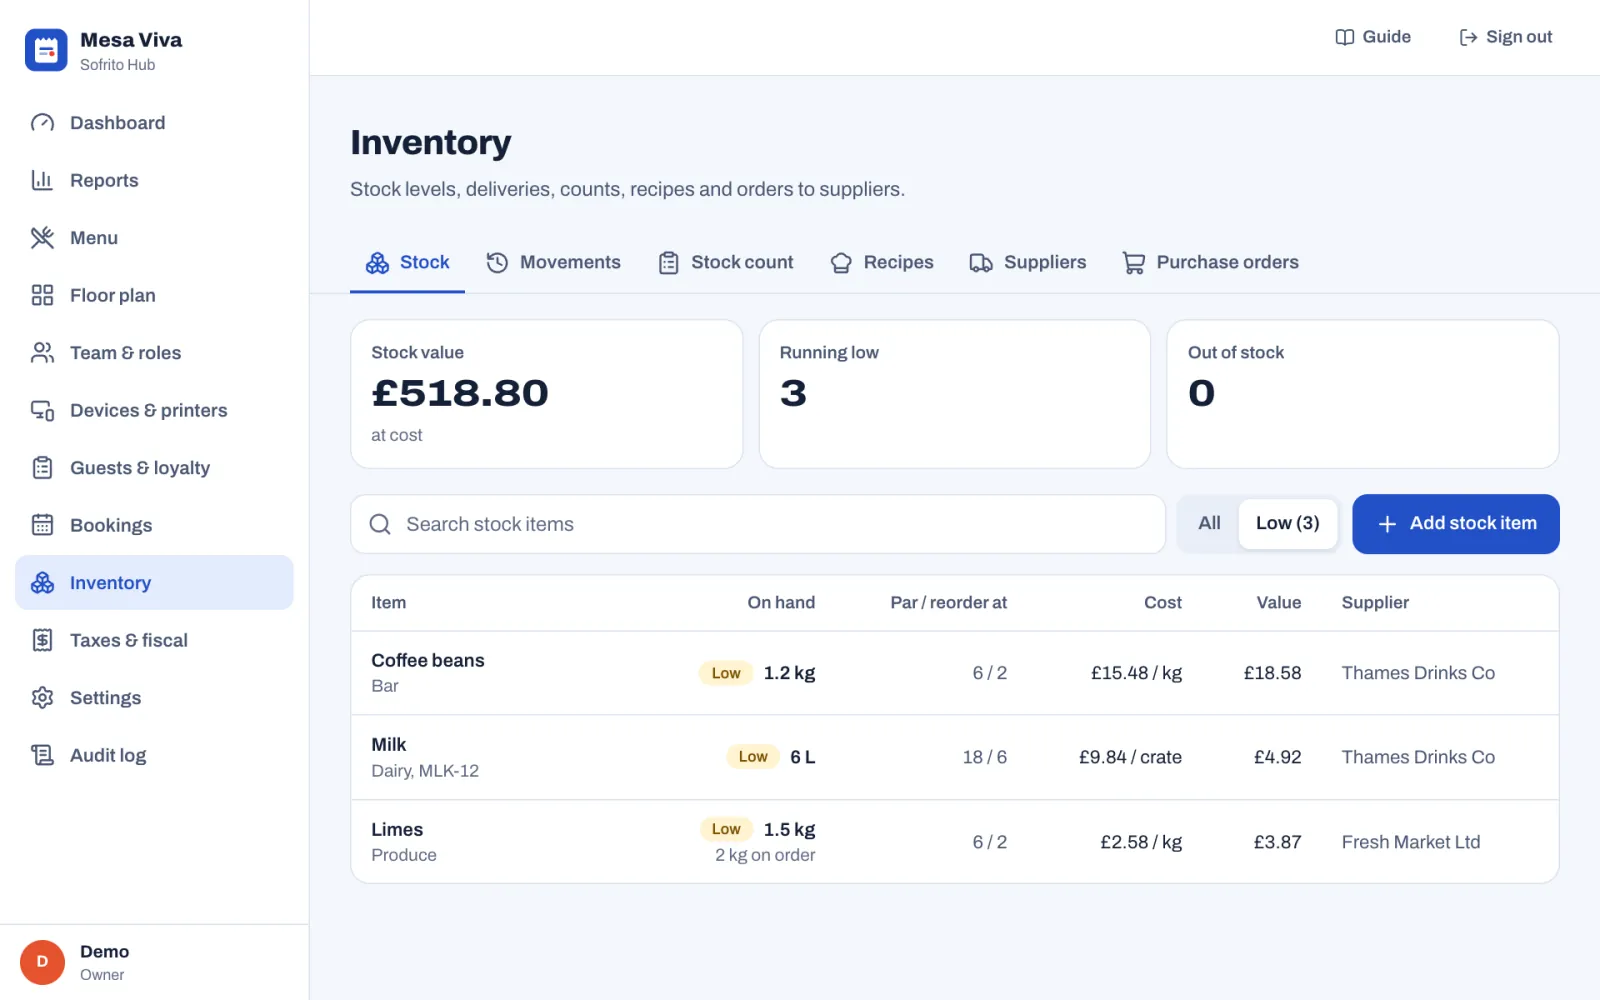
- The tiles show the Stock value at cost, how many items are Running low and how many are Out of stock.
- The list shows each item's On hand quantity, its Par / reorder at levels, Cost, Value and Supplier. A yellow Low badge means it is at or below its reorder point. A red Out badge means nothing is left. A line under the quantity, such as "2 kg on order", shows what open purchase orders will still bring.
- Select Low to see only the items running low or out. Use the search box to find an item by name, category or code.
#Add a stock item
- In Inventory › Stock, select Add stock item.
- Type the Name.
- Optional: type a Category, such as "Dairy". Categories group items on lists and count sheets. Sofrito suggests the categories you already use.
- Optional: type a Code, such as the supplier's product code.
- Under Counted in, choose the unit you count it in.
- Optional: if your supplier sells it in packs, type the Purchase unit, such as "case", then how much One case holds in the counted unit.
- Type the Cost per purchase unit, kg, litre or unit, before tax.
- Type the Par level and the Reorder at level, in the counted unit.
- Choose the Supplier, or leave No supplier.
- Optional: type how much is In stock now. Sofrito records it as the first count, with the note "Opening stock".
- Select Add stock item.
If the reorder level is higher than the par level, Sofrito warns you: "The reorder point is above the par level."
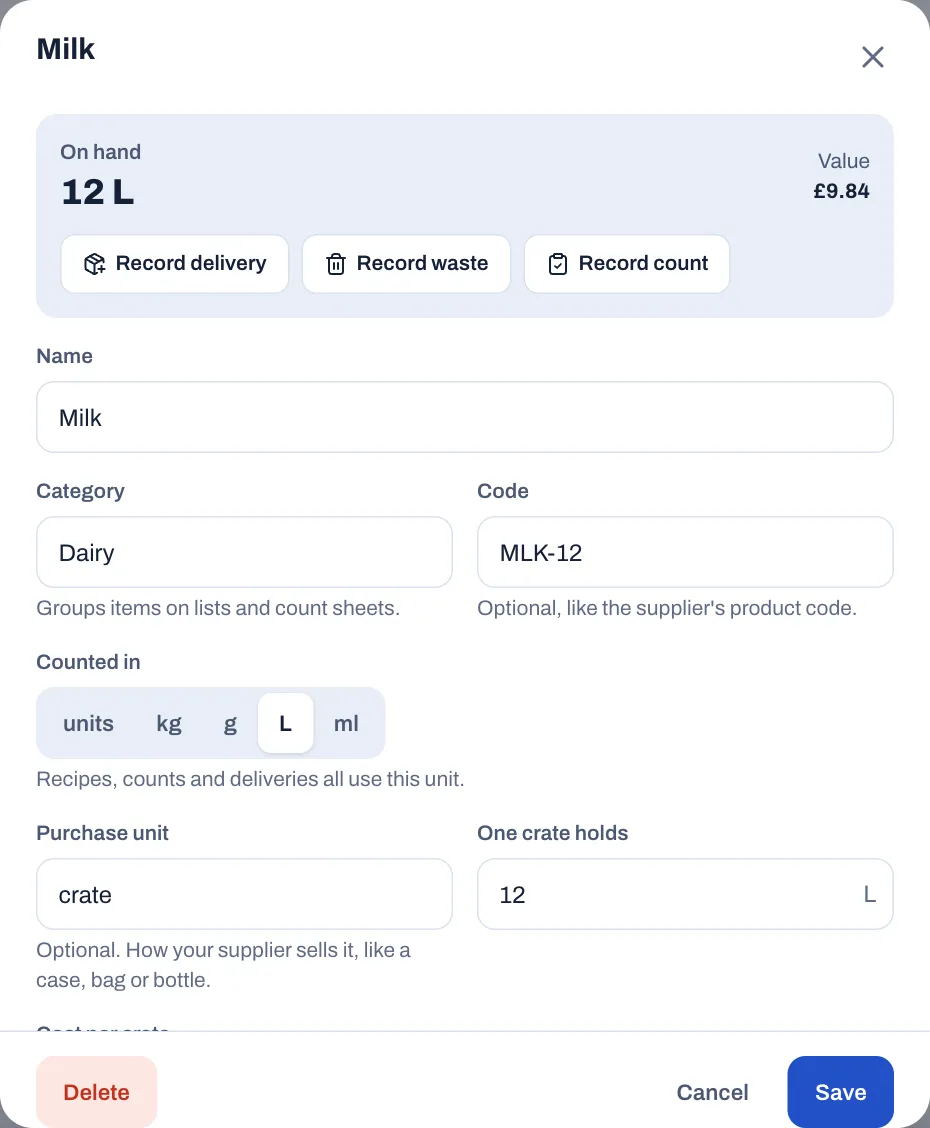
To change an item, select it in the list, change it and select Save. The box at the top of the item shows what is on hand and its value, with buttons to Record delivery, Record waste and Record count for that item.
To stop using an item, open it and select Delete, then Tap again to delete. It leaves the lists, counts and suggested orders, but its movements and past orders stay.
#Record deliveries, waste and corrections
Every change to stock is a movement. Sofrito records sales by itself (see Take ingredients out of stock as dishes sell). You record the rest:
| Type | Use it when | What happens to stock |
|---|---|---|
| Delivery | Stock arrived from a supplier. | Adds to what is on hand. |
| Waste | Thrown away, spoiled or broken. | Takes it out of stock. |
| Count | You counted it. | On hand becomes exactly what you enter. |
| Adjustment | You need to correct stock up or down. | Adds or takes away the amount. |
| Transfer out | Sent to another of your locations. | Takes it out of stock here. |
| Transfer in | Received from another of your locations. | Adds to stock here. |
- In Inventory › Movements, select Record movement. From a stock item, you can also select Record delivery, Record waste or Record count.
- Choose the type.
- Choose the Item. The list shows how much of each is on hand.
- Type the Quantity, in the item's counted unit. For a count, type the Counted quantity. For an adjustment, choose Add to stock or Take out of stock first.
- For a delivery, type the Cost per unit if the price has changed. It is optional. A new price updates the average cost.
- Check the line under the fields: On hand now and what it will be After this.
- For waste and adjustments, choose a Reason, such as Spoiled, Past its date, Dropped or broken, Over-portioned, Staff meal or Sent back by a guest for waste.
- Optional: add a Note. For a delivery, the invoice number is a good note.
- Select the button at the bottom, for example Record delivery.
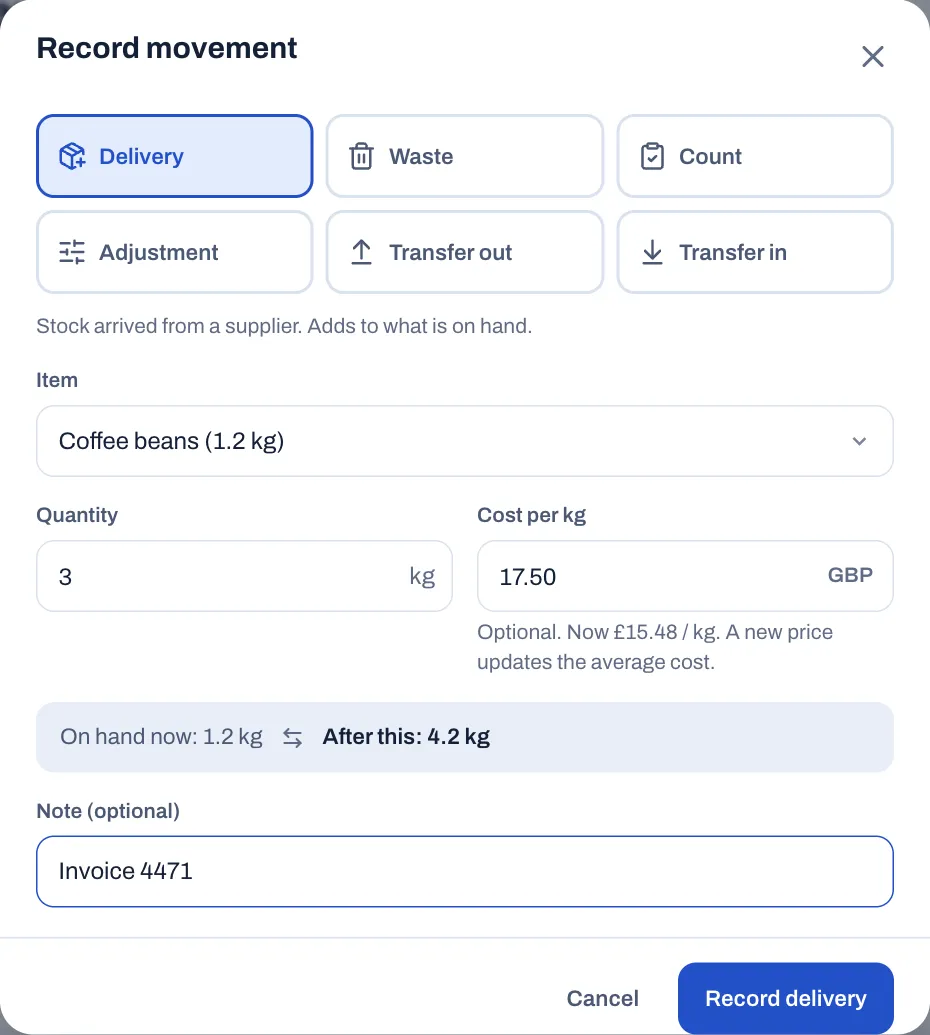
For a transfer between your locations, choose where it went (Sent to) or came from (Received from). The other location records its own side of the transfer.
To see what happened to stock, open Inventory › Movements. Each line shows When, the Item, the Type, the Quantity (in green when stock went up), its Value, a Note, such as your reason, "Sold on order 1042" or "Purchase order 3 received", and By: who recorded it, or for a sale, who sent or closed the order. Filter by item or by type (Deliveries, Waste, Counts and adjustments, Transfers, Sales), and select Show older movements to go further back. Movements you record by hand also go in the audit log, as Stock movement recorded.
#Count your stock
A stock count sets each item to what is really on the shelves and records the difference.
- Select Inventory › Stock count.
- Optional: choose a category, or search for an item.
- Count each item and type the quantity in its row. Leave a row empty to skip that item.
- Optional: select Show expected to see what Sofrito expected and the difference for each item, in quantity and at cost.
- When you have finished, select Review and post.
- Check the list and the Difference at cost, then select Post {n} counts. To go back, select Keep counting.
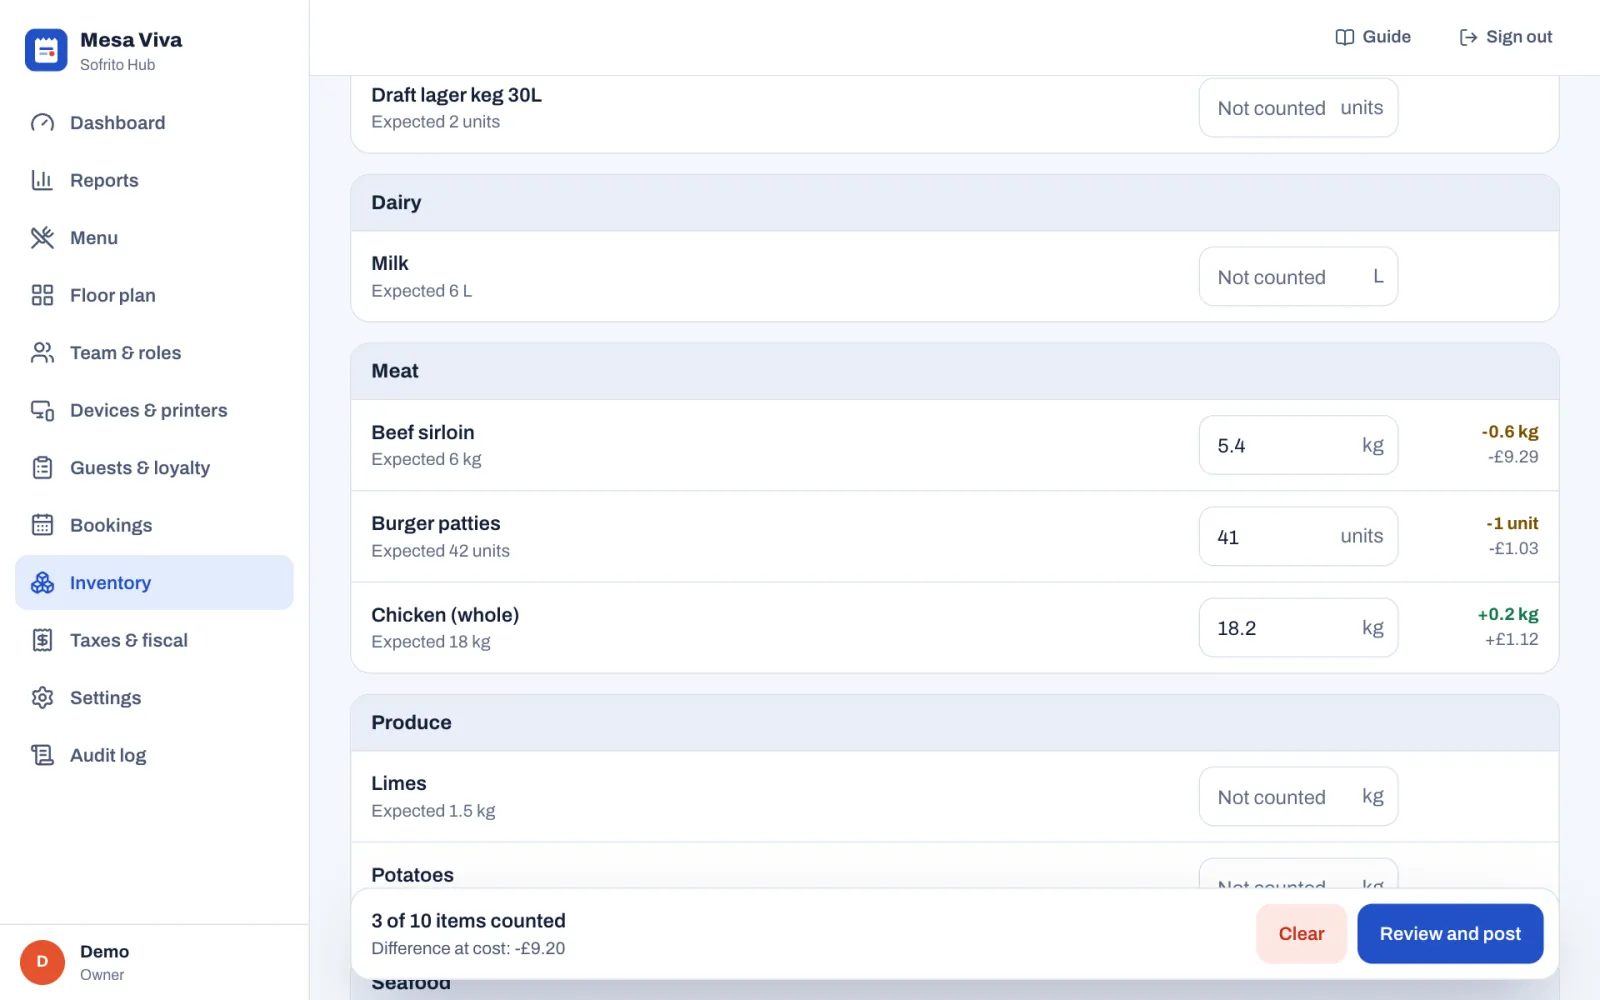
Sofrito records each counted item as a Count movement with the note "Stock count". Items you skipped don't change.
The count sheet stays in this browser until you post it or select Clear, so you can count the dry store today and the cold room tomorrow on the same device. If some items can't be posted, they stay on the sheet so you can try again.
#Link recipes to dishes
A recipe says which stock items go into one portion of a dish. It gives the dish its plate cost, and, when you turn it on, takes the ingredients out of stock every time the dish sells.
- Select Inventory › Recipes, and keep Dishes selected at the top.
- Select the dish. Use the search box or the category list to find it.
- Select Add ingredient.
- Choose the Ingredient and type how much goes into one portion under Per portion, in the unit the stock item is counted in. Each line shows its cost and how much is on hand.
- Repeat for each ingredient.
- Check the Plate cost, Food cost and Margin at the bottom.
- Select Save recipe.
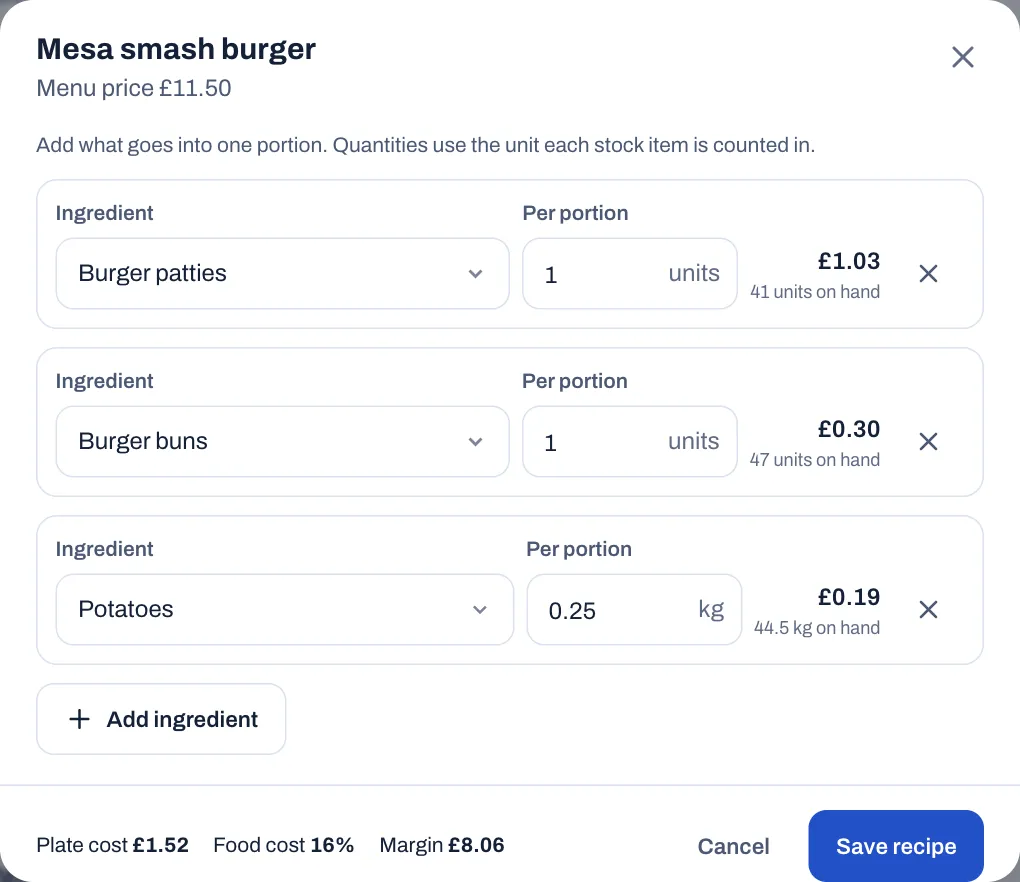
Saving a recipe replaces the dish's Cost to make in the menu with the recipe's cost. To remove a recipe, remove all its lines and save: the dish's cost goes back to zero.
The dish's cost follows its ingredients. When an ingredient's cost changes, for example after a delivery at a new price, Sofrito works out the cost of every dish that uses it again. Reports keep the cost each dish had when it was ordered.
The Recipes tab lists every dish with its Menu price, Plate cost, Food cost (plate cost as a share of the price) and Margin. When your prices include tax, food cost and margin use the price without tax. Dishes above 35% food cost are highlighted. No recipe means the dish has neither a recipe nor a cost. Dishes where staff type the price aren't listed.
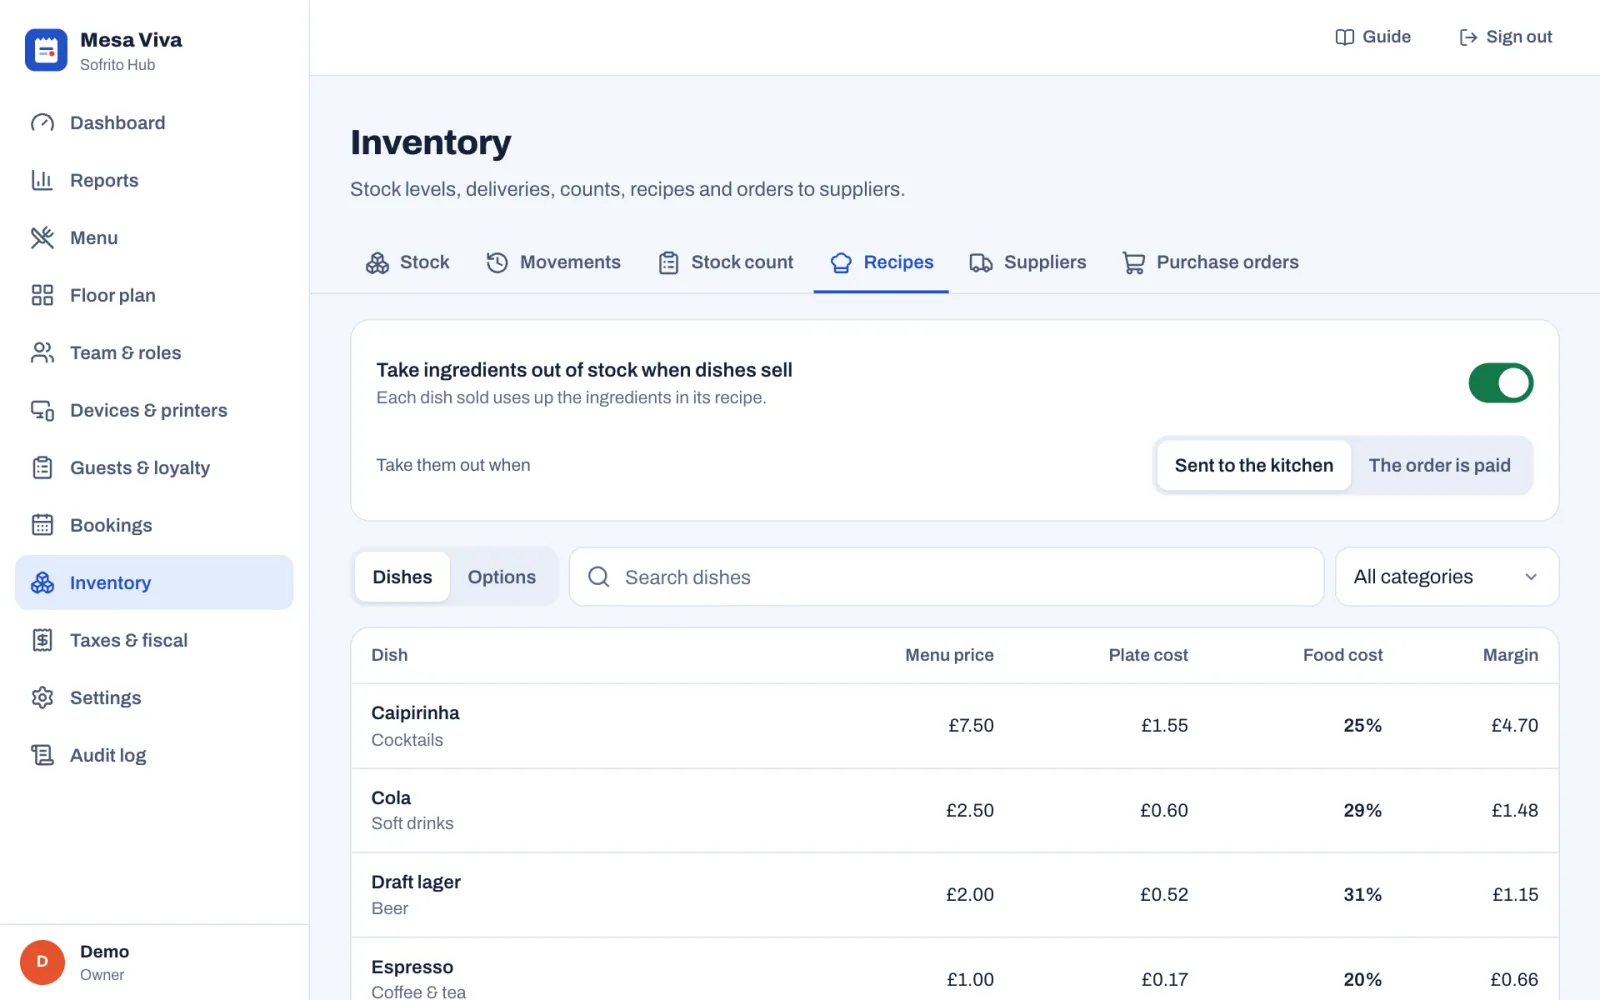
#Give options a recipe
Options chosen on a dish can use stock too, like the bacon of an extra bacon. Give them a recipe for what one of them adds on top of the dish:
- In Inventory › Recipes, select Options at the top. The list shows every option of every option group, with its Extra charge and Ingredient cost.
- Select the option.
- Select Add ingredient, choose the Ingredient and type how much one of the option uses under Per portion, in the unit the stock item is counted in.
- Repeat for each ingredient, then select Save recipe.
An option with a recipe takes its ingredients out of stock when it sells, and its cost counts with the dish in menu engineering (see Dashboard and reports).
#Take ingredients out of stock as dishes sell
Until you turn this on, stock only changes when you record deliveries, waste and counts, and the Stock tab says so.
- Select Inventory › Recipes.
- Turn on Take ingredients out of stock when dishes sell.
- Under Take them out when, choose:
- Sent to the kitchen: as soon as staff send the dish. Stock is right during service.
- The order is paid: when the bill is paid. Only dishes still on the order at that moment count.
The change applies straight away.
What happens from then on:
- Each dish with a recipe takes its ingredients times the quantity sold out of stock, and so does each option with a recipe chosen on it. Each ingredient gets a Sale movement with a note such as "Sold on order 1042".
- Dishes without a recipe take nothing.
- With Sent to the kitchen, a dish voided after it was sent has already been taken out of stock, and stays out: it was made. With The order is paid, voided dishes are never taken out.
- Items on the house still use their ingredients, so they are taken out like any other.
- A refund doesn't put anything back in stock.
- With The order is paid, reopening a paid order puts back what its sale took, with a note such as "Order 1042 reopened", and paying it again takes it out again.
- Nothing else changes stock by itself. Receiving a purchase order adds the delivery. Waste, counts, adjustments and transfers are the ones you record.
Stock can go below zero when more sells than Sofrito expected, for example when a delivery wasn't recorded. A count puts it right.
#Add your suppliers
- Select Inventory › Suppliers.
- Select Add supplier.
- Type the Name, the Contact person, Phone and Email.
- Optional: type their Tax number and Notes, such as "Delivers Tuesdays and Fridays. Order by 16:00 the day before."
- Select Add supplier.
The list shows each supplier's phone and email, which you can select to call or write, and how many stock items they supply. To link an item to a supplier, choose the Supplier on the stock item. Suggested orders use it.
To remove a supplier, open it and select Delete, then Tap again to delete. Stock items and past orders keep pointing at it.
#Order from a supplier
Purchase orders list what you want from a supplier. When the delivery arrives, you receive the order and stock goes up by what came.
#Let Sofrito suggest an order
- Select Inventory › Purchase orders.
- Select Suggest an order.
- Choose the Supplier, or All suppliers.
- Check the list. It has every item at or below its reorder point, topped up to its par level, counting what is on hand and what is already on order. An item without a par level is topped up to twice its reorder point. Items that need nothing more are left out.
- Select Create order, or Edit before creating to change quantities and prices first.
Each line says what is on hand, what is already on order if anything, and the par level, for example "1.2 kg on hand, 2 kg on order, par 6 kg". When an item has a purchase unit, such as a case or a crate, Sofrito orders whole ones, so the quantity may go a little over the par level. When nothing needs ordering, the window says so and there is nothing to create: "Nothing is running low. Every item is above its reorder point.", or, when your open purchase orders already cover what is low, "What is running low is already on order: open purchase orders cover it."
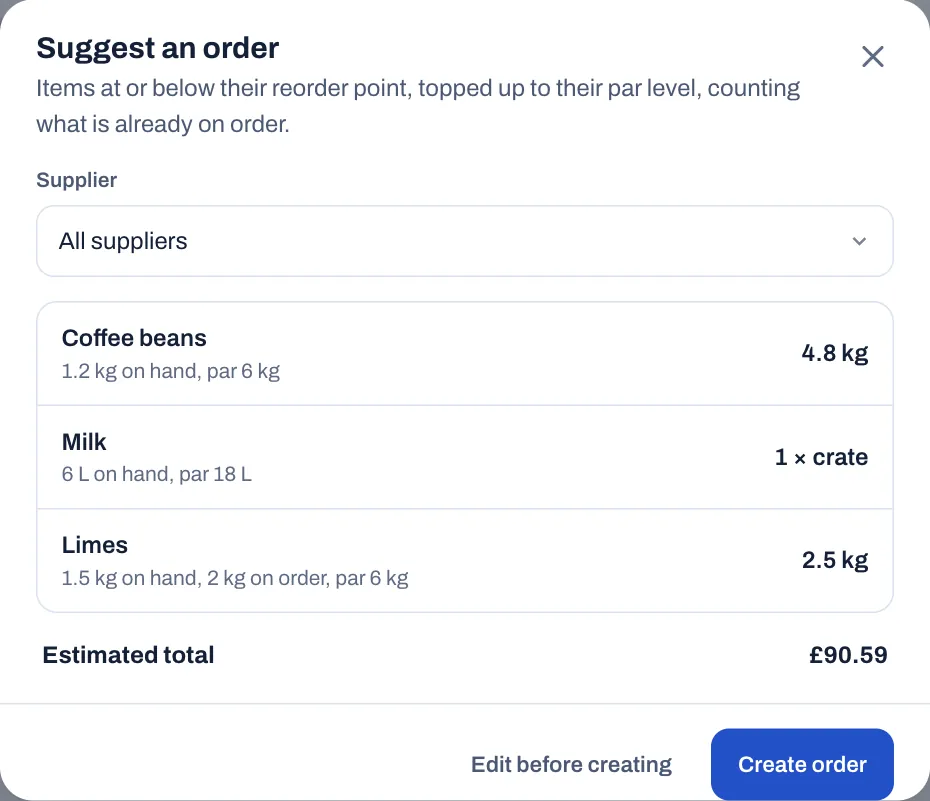
#Write an order yourself
- In Inventory › Purchase orders, select New purchase order.
- Choose the Supplier.
- Select Add item, choose the Item, then type the Quantity and the Price per unit. The price starts at the item's current cost.
- Repeat for each item. Add items running low adds every low item from that supplier with the suggested quantity.
- Optional: type Notes for the supplier, such as "Deliver before 10:00".
- Select Create order.
Orders count in the unit your supplier sells and prices: cases or crates when the item has a purchase unit, kg or litres for items counted in grams or millilitres, otherwise the unit the item is counted in. The unit shows next to each quantity. Sofrito turns it into the counted unit when the delivery goes into stock.
#Send the order
- Open the order in Inventory › Purchase orders.
- Select Email supplier to open your email app with the order written out. The button appears when the supplier has an email address. Or select Copy as text and paste the order into a message.
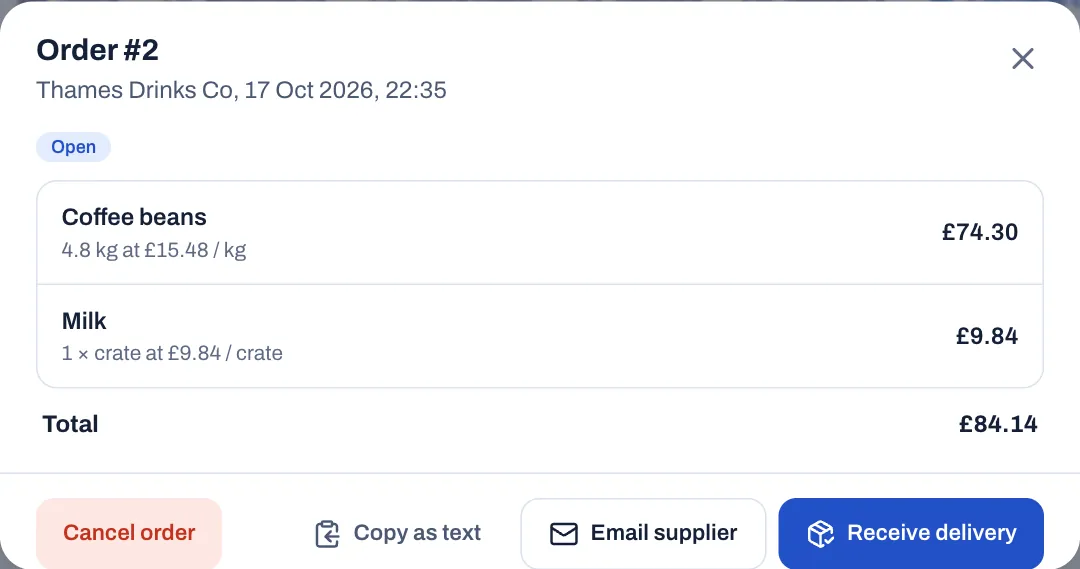
#Receive the delivery
- Open the order and select Receive delivery.
- Check the delivery against the order. Change any quantity that is different from what you ordered. Quantities are in the same unit as the order, such as cases.
- Check the Received value, then select Add to stock.
Stock goes up by what you entered, the average cost of each item is updated with the order's prices, and the order shows as Received with the date. Its total becomes the value of what was received. Where a quantity differed, the order shows what you received. In Movements, each item of the delivery has a note such as "Purchase order 3 received".
To cancel an order that hasn't arrived, open it and select Cancel order, then Tap again to cancel the order. Nothing changes in stock.
The list shows Open orders first. Select All to see received and cancelled ones too.
#Find what is running low
Sofrito shows low stock in three places:
- The Low stock card on the Dashboard lists up to six items at or below their reorder point.
- Inventory › Stock marks them Low, or Out when nothing is left, and counts them in the Running low and Out of stock tiles. Select Low to list only them.
- Suggest an order puts them on an order for you.
An item only shows as low when it has a Reorder at level. Give one to everything you don't want to run out of.
#Good practice
- Start with the items that cost the most or run out most often. You don't need every grain of salt in Sofrito.
- Give each item a par level and a reorder level, and link it to its supplier, so suggested orders are right.
- Receive every delivery through a purchase order, or record it as a delivery the same day.
- Record waste when it happens, with a reason. At the end of the month, filter Movements by Waste to see what you threw away.
- Count at the same time each week or month, before service, with Show expected off.
- Write recipes for your best sellers first. They move the most stock and the most money.
Guests, loyalty and gift cards
Sofrito keeps a guest book: everyone you add to an order or a booking, with their visits, what they spend, their preferences and their allergies. When loyalty is on, guests earn points on every paid order and spend them as a discount on a later visit. Gift cards are sold on the till and spent like money. A house account lets a regular charge orders and pay later. This chapter also covers how to look after guests' personal data. Managers set things up in the back office. Staff add guests, spend points and sell gift cards on the till.
Before you start
- To add, change, import, export and erase guests, to adjust points, to give and correct gift cards and to open house accounts, your role needs Manage guests and loyalty. To find and add guests on the till, staff need Look up guests. Selling gift cards and taking house account payments need Take payments. See Your team, roles and PINs.
- To turn loyalty on, you need Restaurant settings.
#Open the guest book
- In the back office, select Guests & loyalty.
- Keep Guests selected at the top. Gift cards opens the gift cards instead (see Manage gift cards in the back office).
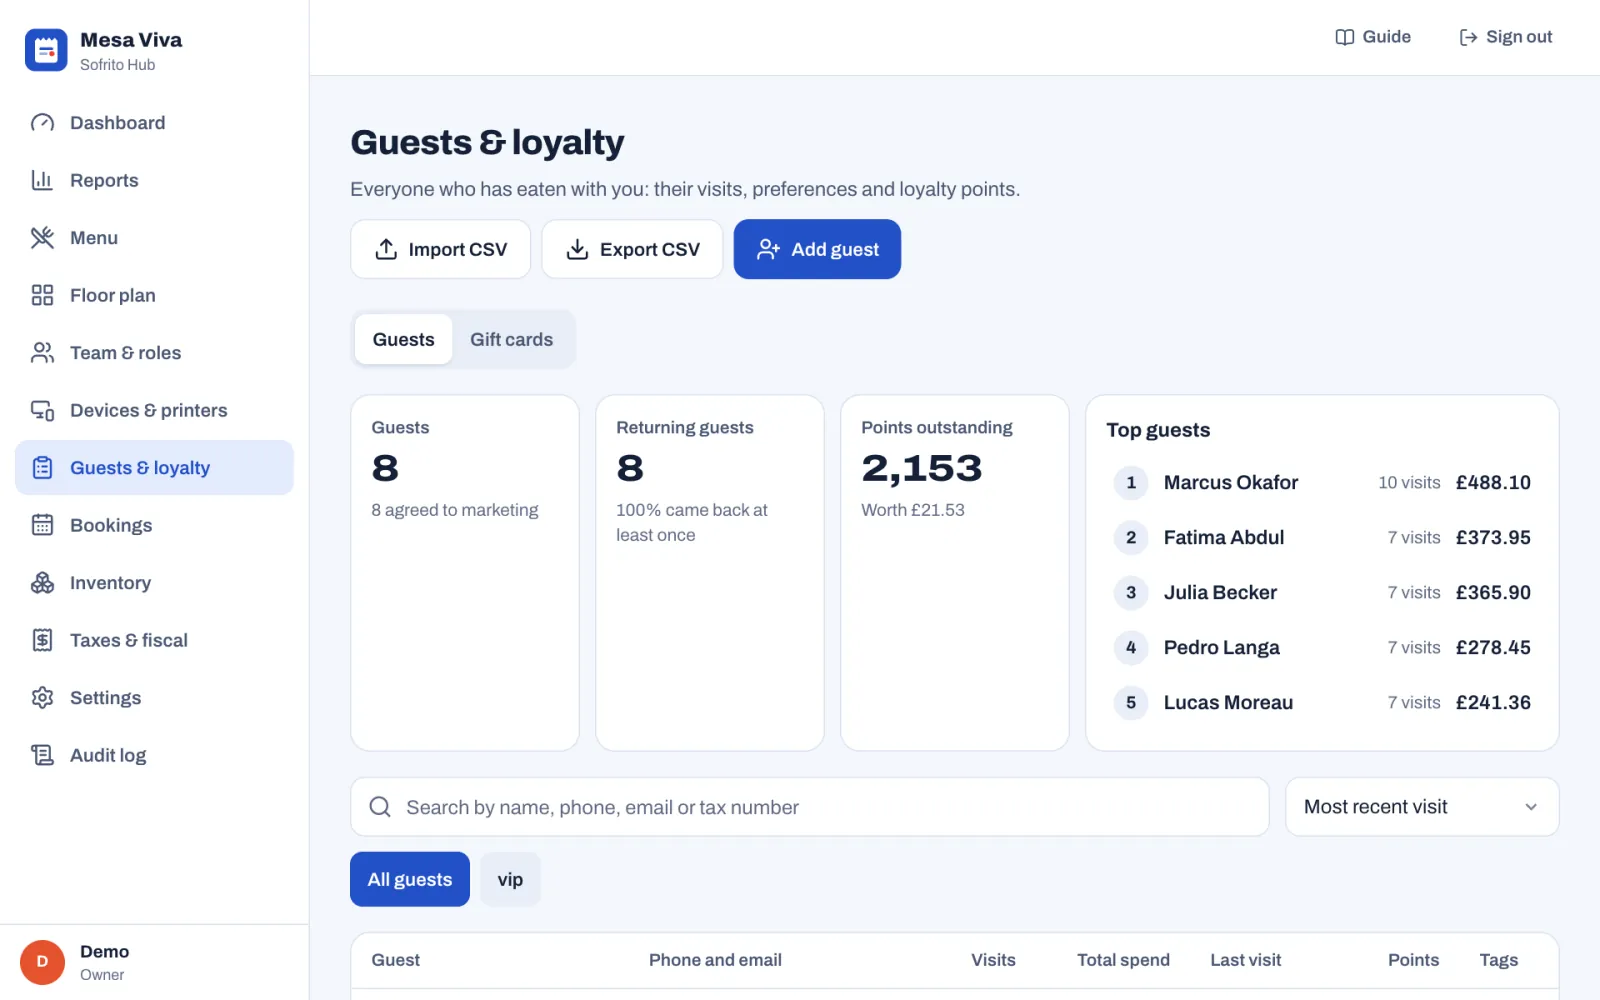
At the top:
- Guests: how many guests you have, and how many agreed to marketing.
- Returning guests: how many came at least twice, and their share.
- Points outstanding: the points your guests hold, and what they are worth as discounts.
- Top guests: your five best guests by total spend. Select one to open their profile.
The tiles count every guest in the book. The list shows each guest's phone and email, Visits, Total spend, Last visit, Points and Tags. A small megaphone next to a name means the guest agreed to marketing.
- Search by name, phone, email or tax number.
- Sort by Most recent visit, Highest spend, Most visits, Most points or Name.
- Select a tag under the search box to list only the guests with that tag.
The list loads 100 guests at a time. Select Show more at the bottom to load more: it says how many are shown.
#Add a guest in the back office
- In Guests & loyalty, select Add guest.
- Under Contact, type the First name and Last name, and if you have them the Phone, Email and Birthday. Only a name is needed: a first name, a last name or a company.
- Under Preferences, add Allergies and dietary needs, Notes (a favourite table, the usual order) and Tags. Type a tag and press Enter. Tags such as "vip" or "regular" let you filter the list.
- Under Consent, turn on Agreed to marketing only if the guest said yes to offers and newsletters.
- Under Invoice details, add the Company, the tax number, Address, Postal code and City if the guest asks for invoices in a company's name. The tax number field uses your country's name for it, such as VAT No.
- Select Add guest.
Notes show under the guest's name when staff search for them on the till. Write notes you would be happy for the guest to read.
#Let allergies reach the kitchen
A guest's Allergies and dietary needs travel with them. When the guest is on an order, or the order was seated from their booking:
- the check on the till shows a red band, "Allergies:" and what you wrote;
- every kitchen ticket for that order shows it, on the kitchen display, on the till's Kitchen screen and on paper, where tickets start with "ALLERGY:";
- on the till, the guest's button under More shows a warning triangle, and their card says that every kitchen ticket shows the allergies.
When staff search for a guest on the till, guests with allergies show them under their name. The allergies show on the guest's bookings in the back office too.
#Add a guest to an order on the till
Add the guest before the bill is paid. That is what counts the visit, adds to what they spend and gives them points.
- On the order, tap the ••• button (next to Send).
- Tap Add guest.
- Type part of the guest's name, phone, email or tax number, then tap the guest. Without a search, the list shows the most recent guests.
- If the guest is new, tap New, type their First name, and if you can their Last name, Phone and Tax number, then tap Save.
The guest is now on the order. Under More, the Add guest button now shows their name. Tap it to see their visits and points, what they owe on a house account, or to choose another guest.
When a booking is linked to a guest, seating the booking opens the table's order with the guest already on it. See Bookings and the waitlist.
#See a guest's profile and history
- In Guests & loyalty, select the guest.
The top of the profile shows their Visits, Total spend, Average spend and Last visit, and badges for their birthday, marketing consent, points and house account.
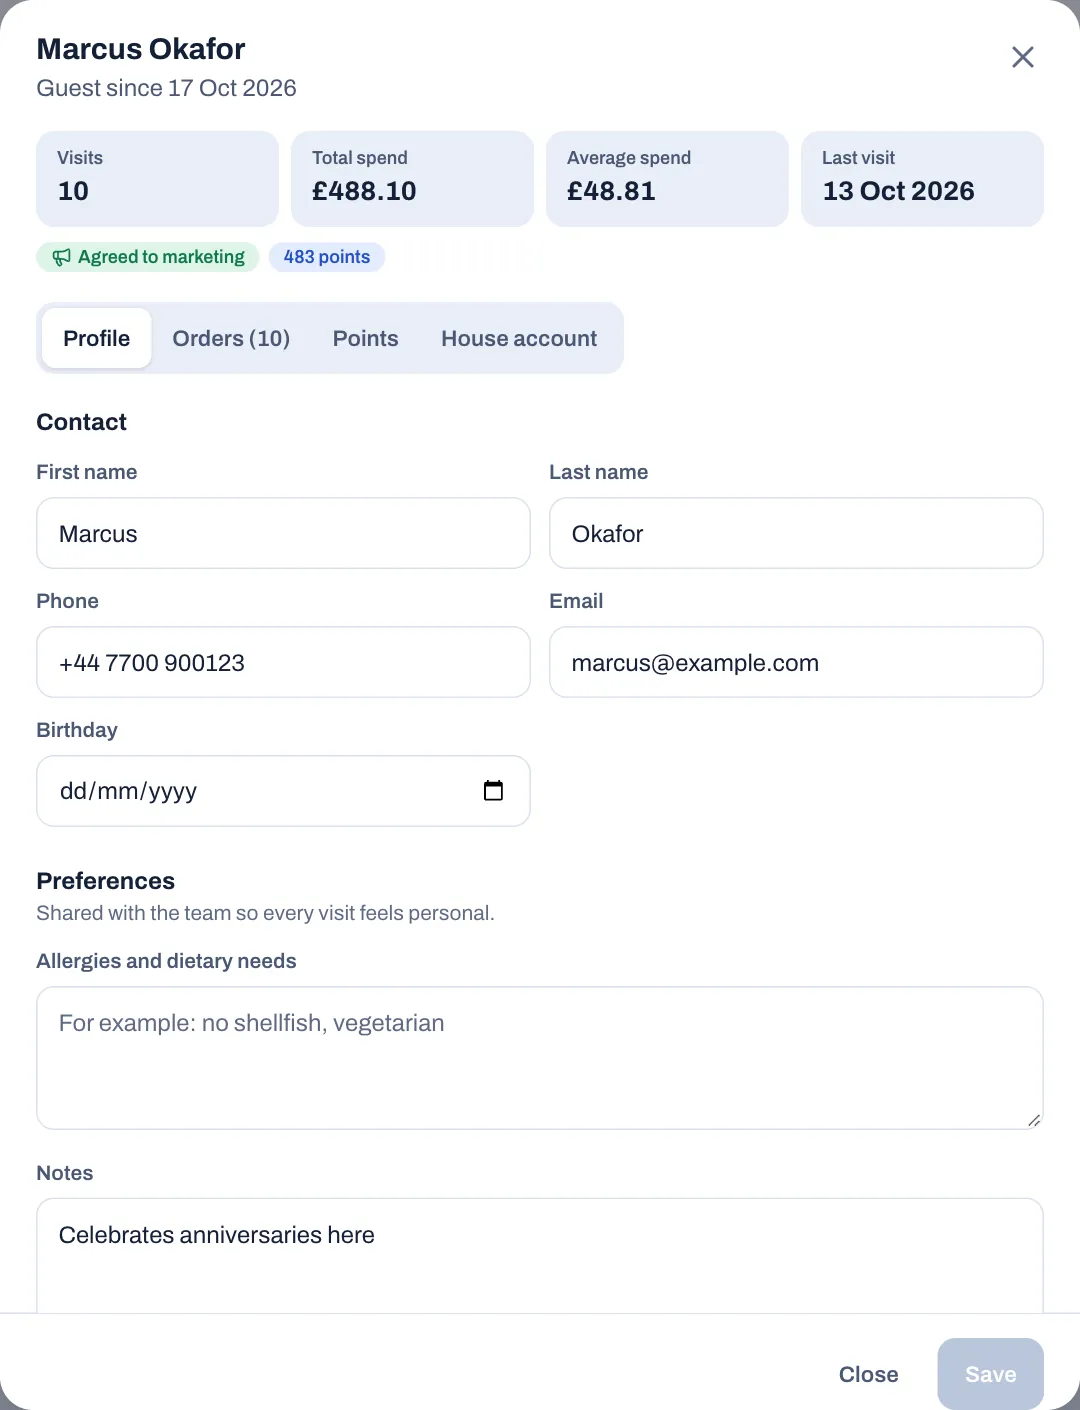
- Profile holds the details you can change. Change them and select Save.
- Orders lists their last 50 orders with the order number, date, type and table, and marks open and voided ones.
- Points shows their points balance and history, and lets you adjust it (see Adjust a guest's points).
- House account opens and runs their house account (see Run a house account).
A visit counts when an order with the guest on it is paid. Total spend adds up those orders, with tax, without tips. If a paid order is reopened, its visit, spend and points come off until it is paid again.
#Turn on loyalty points
- In the back office, select Settings › Loyalty.
- Turn on Give loyalty points.
- Under Earning and spending, set:
- One point for every: how much a guest spends to earn one point, in whole amounts of your currency, for example 1 for one point per pound.
- Each point is worth: the discount one point gives when a guest spends it, for example 0.01 for one penny.
- Spend from: the smallest number of points a guest can spend at once, for example 100.
- Read the example under the fields. It shows what your rules give back, for example "A guest who spends £100.00 earns 100 points, worth £1.00 off a later visit: 1% back."
- Select Save changes.
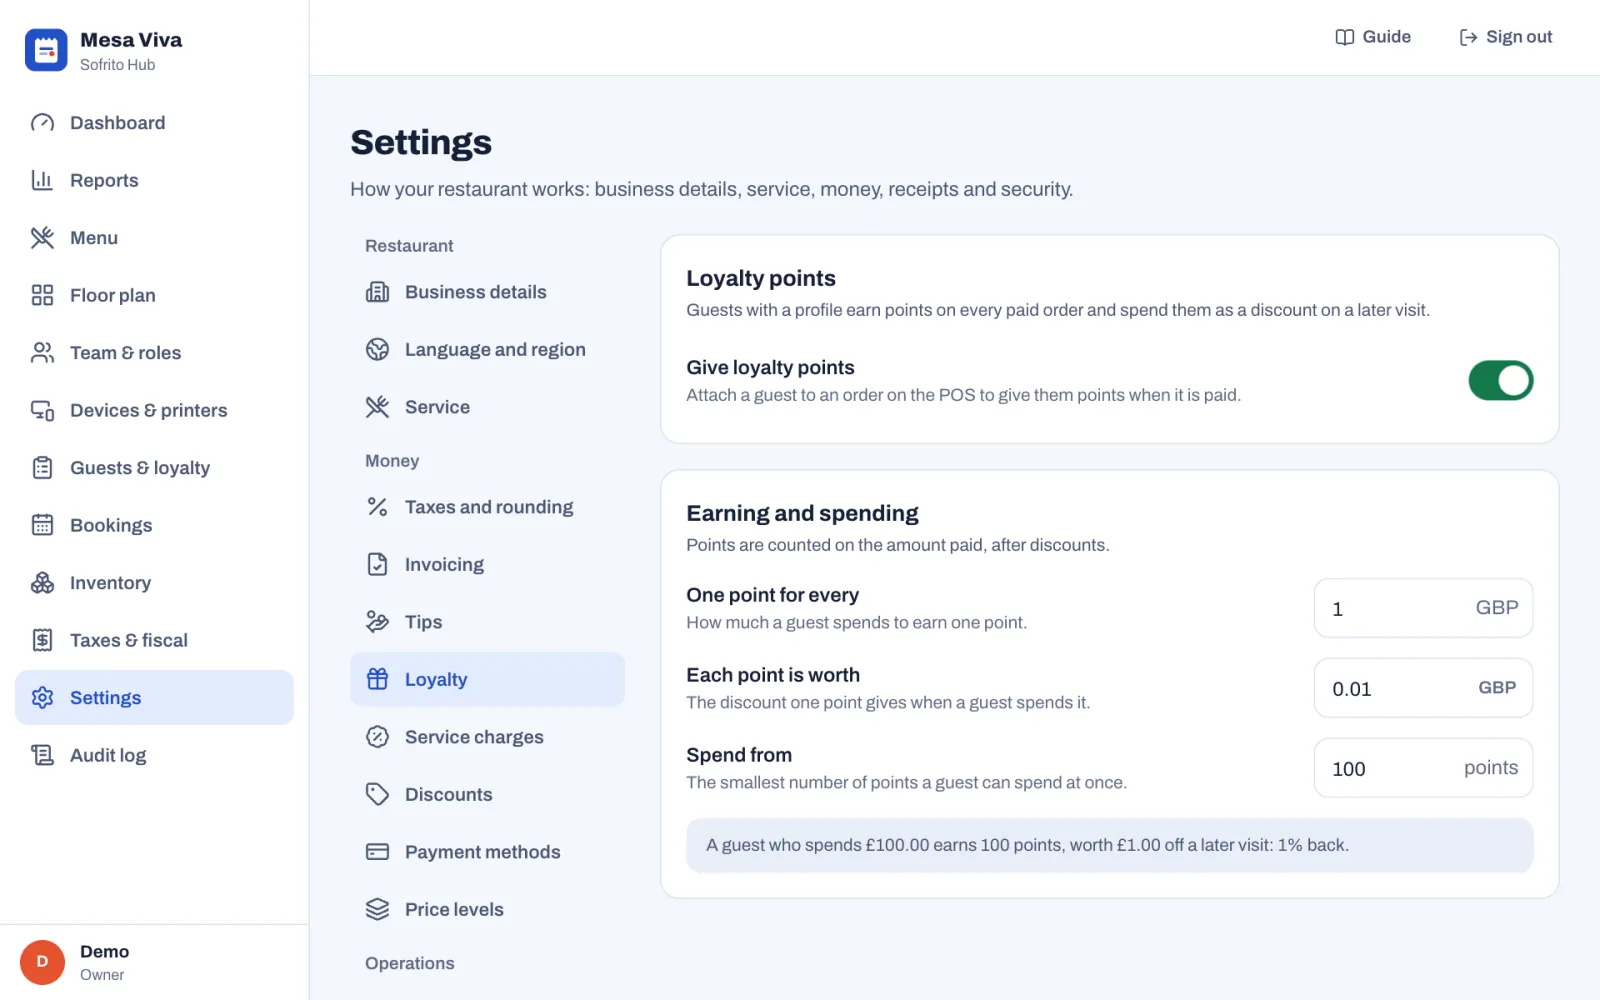
When you turn loyalty off, guests keep their points, but new visits don't earn any and staff can't spend them.
#Earn points
There is nothing to tap. When an order with a guest on it is paid in full, the guest earns points on the bill total, after discounts and without tips, rounded down to whole points. With one point for every £1, a bill of £35.80 earns 35 points.
Orders without a guest earn nothing, and points can't be added to an order after it is paid. If that happens, add the points by hand (see Adjust a guest's points). When part of an order is refunded, the guest loses the same share of the points it earned.
#Spend points at the till
- Open the order and add the guest, if they are not on it yet (see Add a guest to an order on the till).
- On the order, tap the ••• button (next to Send), then tap the guest's name.
- The guest's card shows their visits and their points, for example "371 points, worth £3.71".
- Tap Use {n} points: {amount} off, for example Use 371 points: £3.71 off.
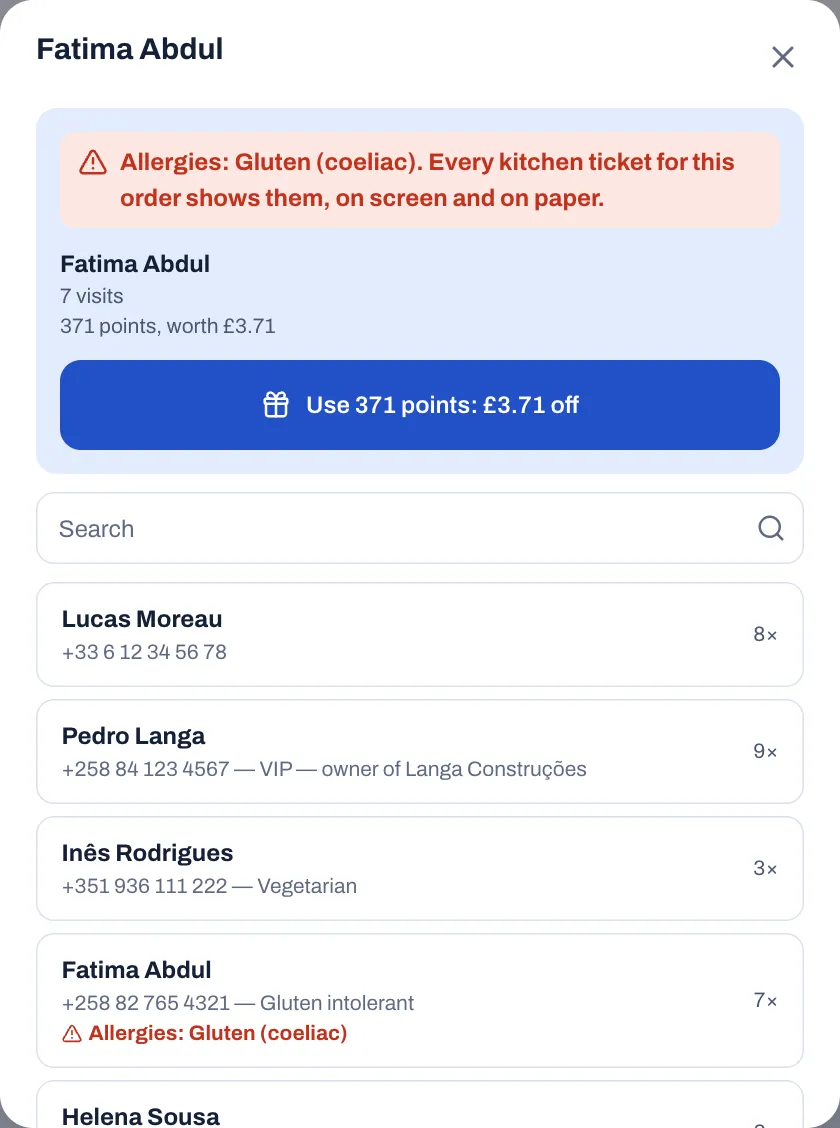
Sofrito spends as many points as the bill allows: all of them, or just enough to cover what is still due. The points become a discount on the order, named in your restaurant's language, for example "Loyalty (371 points)". Staff don't need Apply discounts for it, and it shows in the reports and the audit log like any other discount. The guest then earns new points on what they pay.
The button only appears when the guest can spend at least the Spend from number of points. Below it, the card says, for example, "Points can be spent from 100."
Spent points come back by themselves when someone removes the loyalty discount from the order or voids the order. When the order is refunded, the guest gets back the same share of the points they spent.
#Adjust a guest's points
Use this for a goodwill gesture, a birthday bonus, or to correct a mistake.
- In Guests & loyalty, select the guest.
- Select Points.
- Under Adjust points, choose Add or Remove.
- Type the number of Points.
- Type a Reason, or tap Goodwill gesture, Birthday bonus or Correction. A reason is required.
- Select Add {n} points or Remove {n} points, for example Add 50 points.
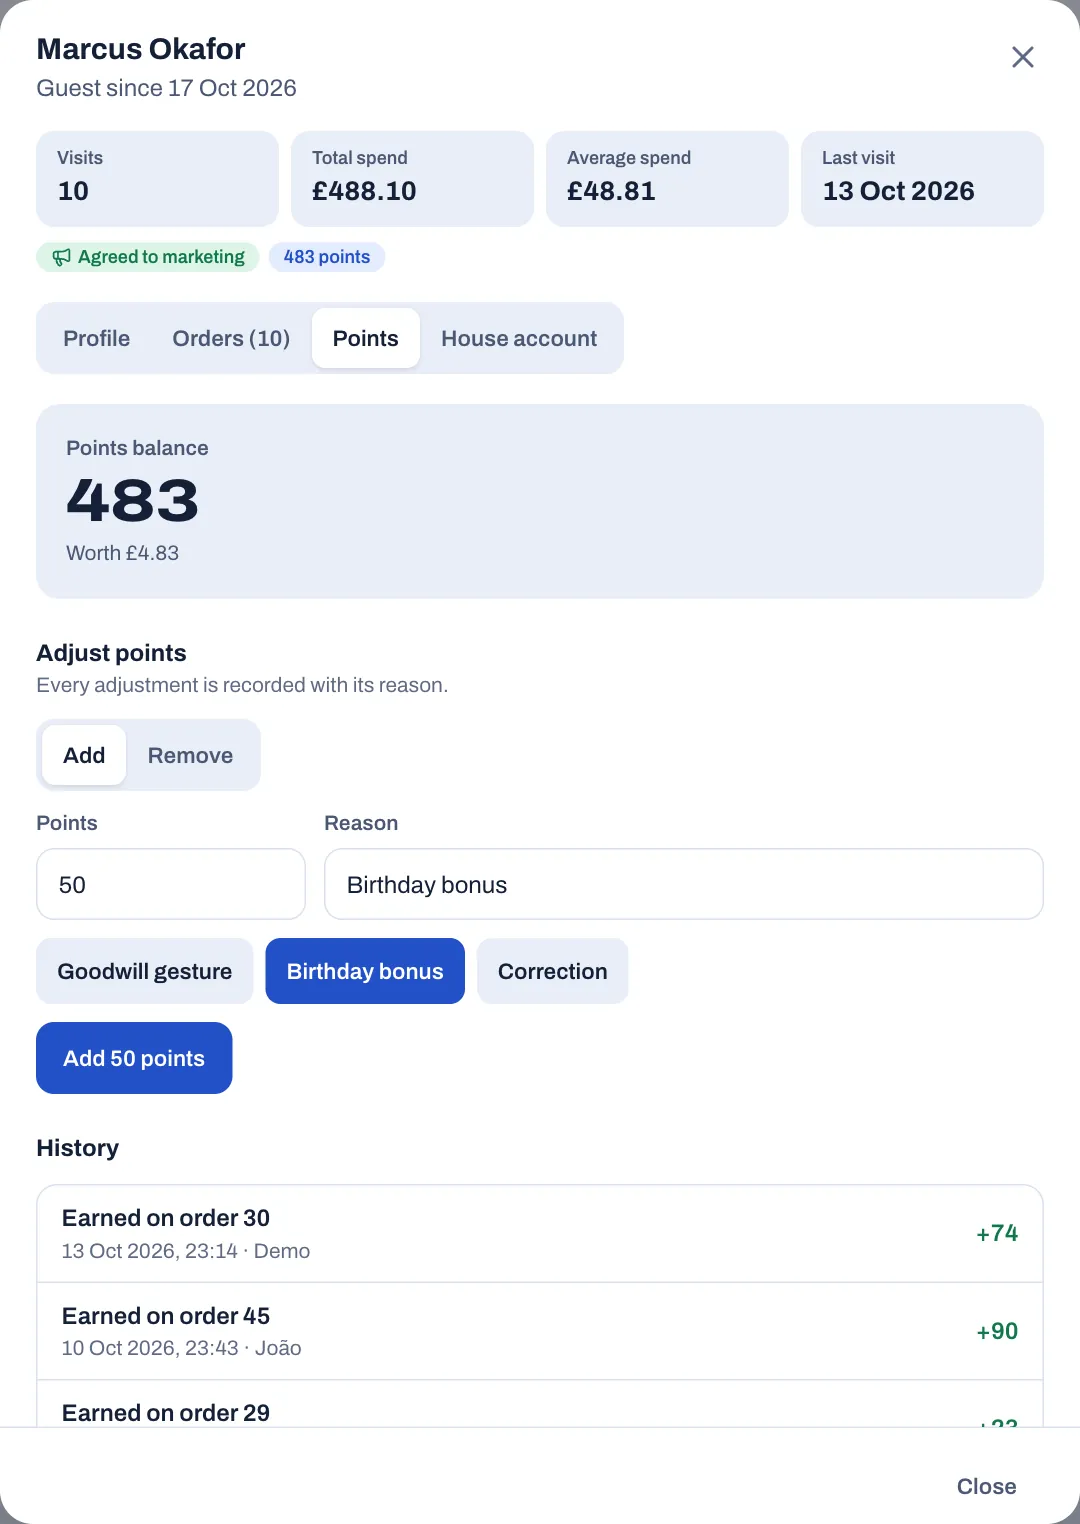
You can't remove more points than the guest has. Each adjustment goes in the audit log, as Loyalty points changed by hand, with your reason.
History, under it, lists every change to the guest's points, newest first, with the date, the reason or who made it: Earned on order and its number, Spent on order, Changed by hand, Given back from order (points spent that came back) and Taken back from order (points earned that went, after a refund or a reopened order).
#Sell gift cards and take them as payment
Gift cards are sold, topped up and checked on the till, under More › Gift cards, by anyone whose role can take payments. Guests spend them on the payment screen with the Gift card method, and Sofrito takes the amount off the card's balance. The steps are in Sell a gift card or check its balance and Take a gift card.
Selling a gift card is not a sale: Sofrito issues no receipt or invoice for it and charges no tax. The tax is charged on the order the card pays for. The money taken shows on its own in the reports and on the X and Z reports, under Gift cards and house accounts (see Dashboard and reports). Cash taken for a card goes into the open cash drawer. A gift card or a house account can't pay for a gift card.
If a gift card payment was a mistake, it can be voided under Payments taken before the order is paid in full: the amount goes back on the card. After the order is closed, a refund with the Gift card method puts the money back on the card that paid, never more than it paid. For voids and refunds, see Voids, discounts, refunds and approvals.
#Manage gift cards in the back office
- In the back office, select Guests & loyalty.
- Select Gift cards at the top.
The tiles show how many Gift cards you have, how many have money left, and the Money on cards: what guests can still spend. The list shows each card's Code, Guest, Balance, what it was Issued for and its Last change. Search by code or guest.
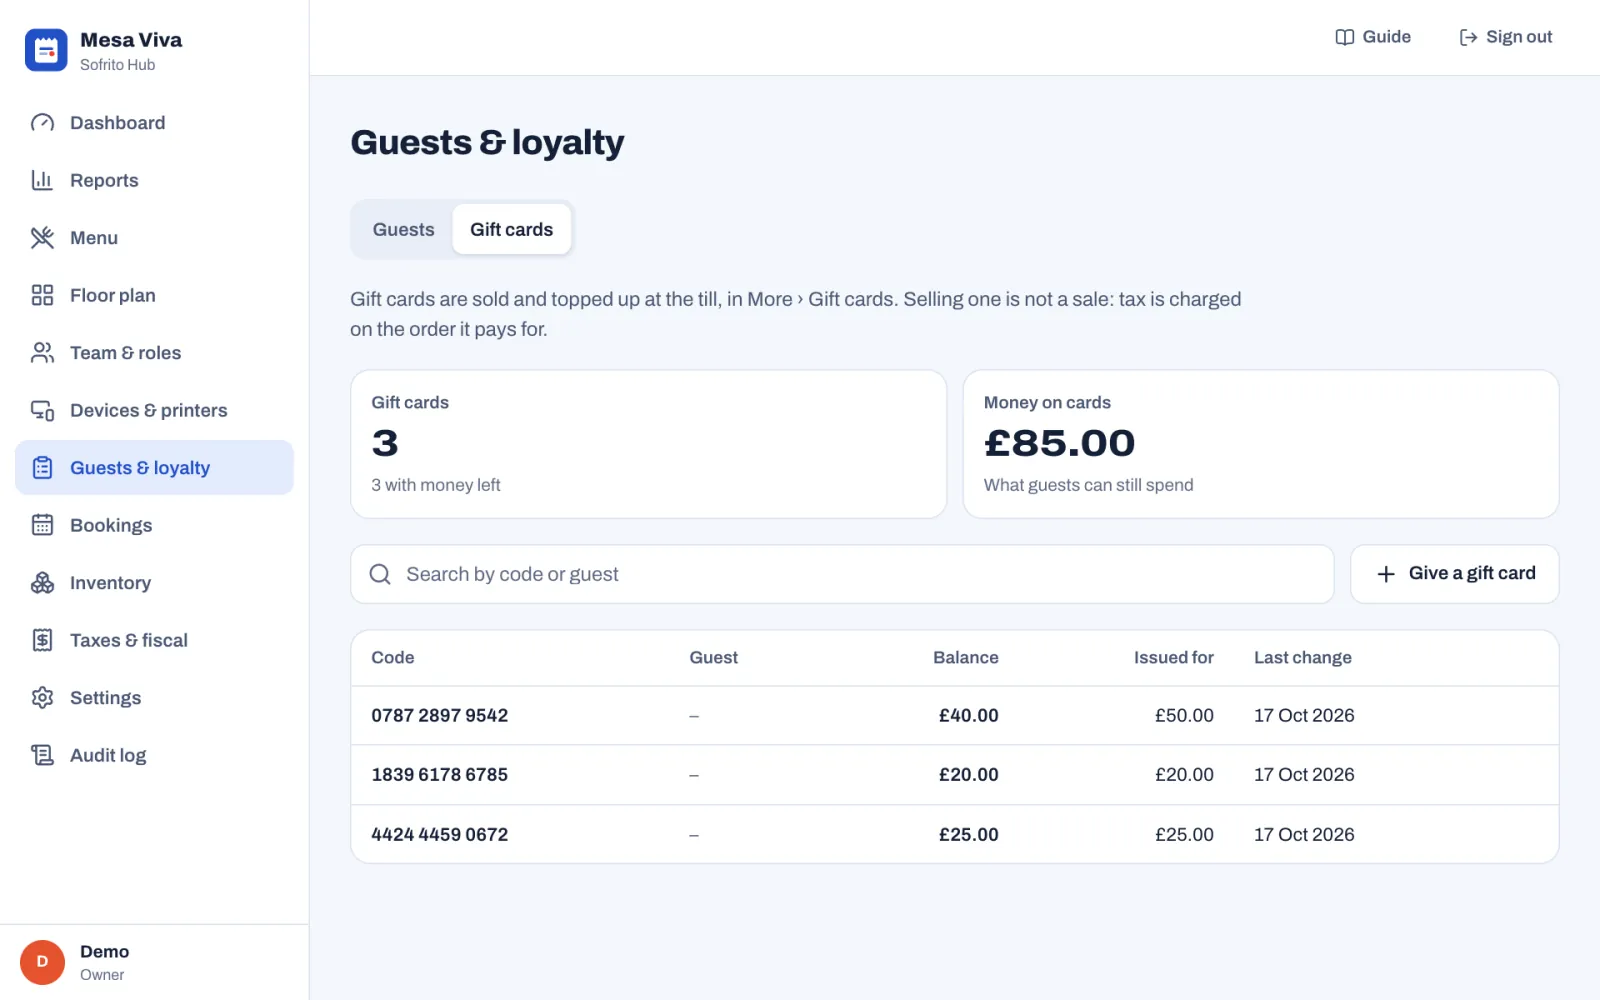
Select a card to see its balance and its History: issued, topped up, spent, payment voided, refunded and corrected, with the date, the order number, how it was paid and who did it.
To give a gift card away, for a prize or a goodwill gesture, without taking money:
- Select Give a gift card.
- Type the Amount.
- Under Code on the card, type the code of the card you hand over, or leave it empty for a new code.
- Type a Reason, such as "Competition prize".
- Select Create the gift card.
To correct a card's balance, open the card. Under Correct the balance, choose Add or Take off, type the Amount and a Reason, then select Save the correction. Every correction stays in the card's history with its reason, and in the audit log.
#Run a house account
A house account lets a guest, such as a regular or a company, charge orders and pay later, up to a credit limit. Your restaurant needs a House account payment method first: see Payment methods, tips and service charge.
To open one:
- In Guests & loyalty, select the guest, then House account.
- Type the Credit limit: orders can be charged to the account until the guest owes this much.
- Select Open a house account.
On the till, staff add the guest to the order, then choose the house account method on the payment screen: see Charge a guest's house account. The guest's card under More shows what they owe and what is left, for example "House account: £120.00 owed, £380.00 left".
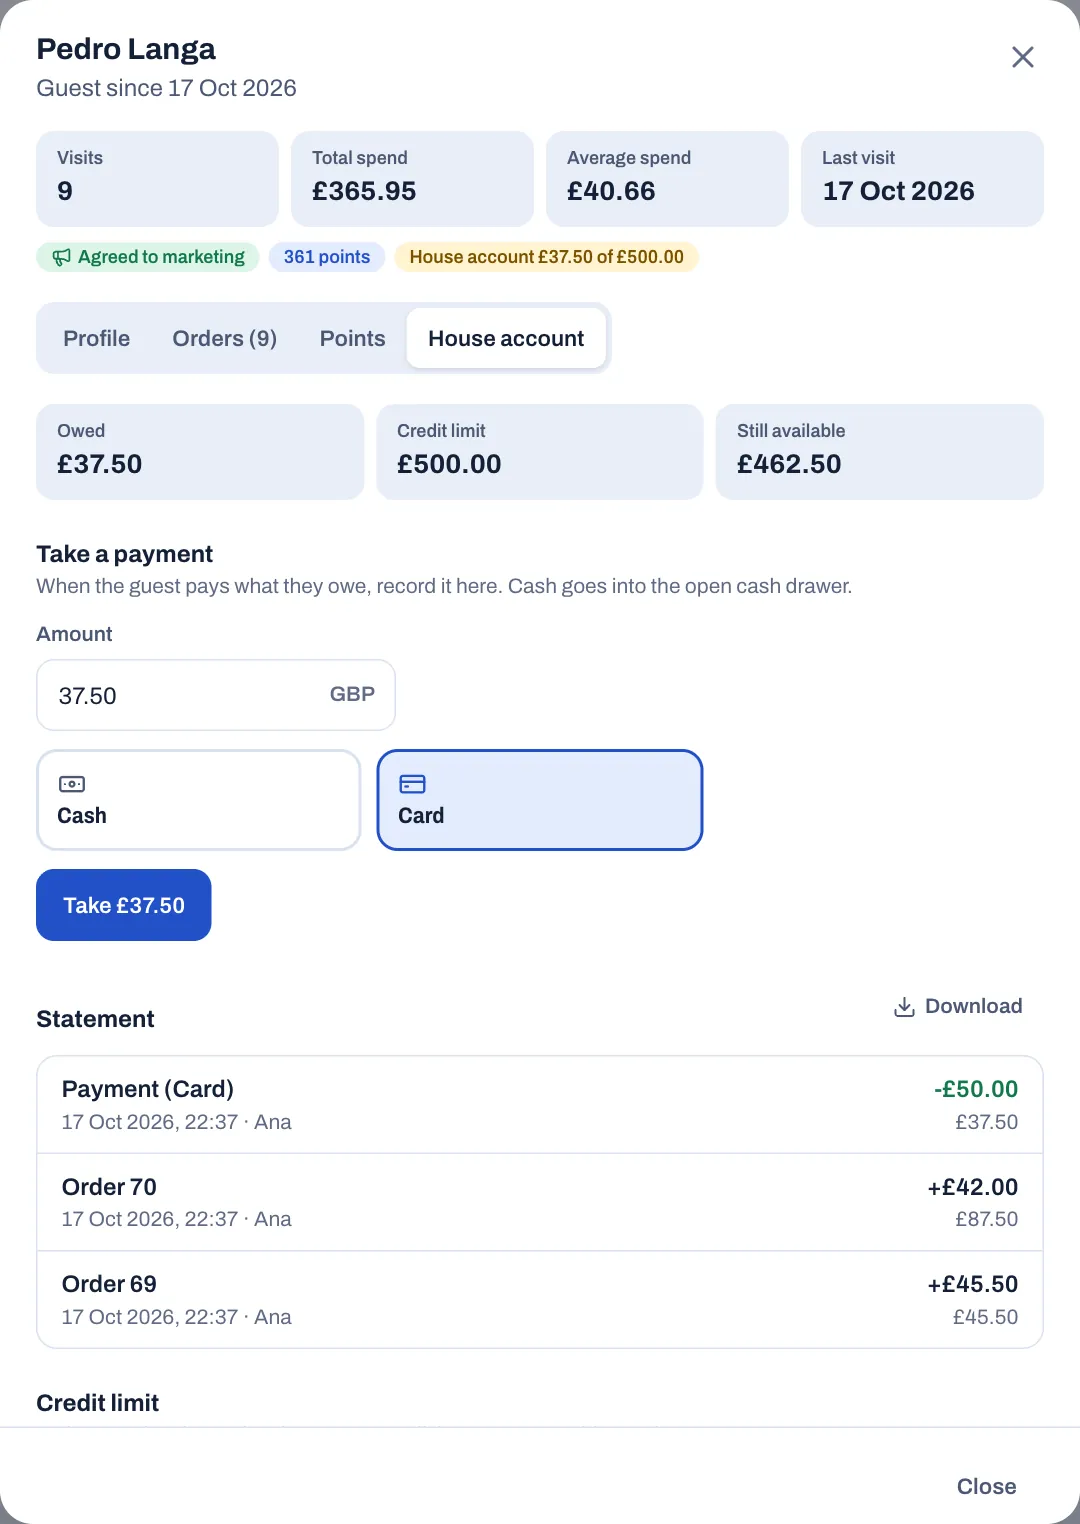
On the guest's House account tab:
- Owed, Credit limit and Still available say where the account stands.
- Take a payment: when the guest pays what they owe, type the Amount, choose how they pay and select Take {amount}, for example Take £37.50. Cash goes into the open cash drawer. Like a gift card sale, it is not a sale: the orders charged to the account were the sales.
- Statement lists every order charged and every payment, with the Date, What, Amount and what is Owed after. Download saves it as a CSV file you can send to the guest.
- Credit limit: type a new limit and select Save the limit. The change goes in the audit log.
- Close the house account, then Tap again to close it, once the guest owes nothing.
A void or a refund of an order paid on the account takes the money off what the guest owes. A guest who still owes money can't be erased.
#Import guests from a spreadsheet
Bring your existing guest list into Sofrito from a CSV file. Most spreadsheets and booking systems can save one.
- In Guests & loyalty, select Import CSV.
- Not sure about the format? Select Download template and fill it in.
- Drop the file on the window, or select it from your computer. It must be under 10 MB.
- Check which columns Sofrito found (Using) and which it will leave out (Ignoring). The first row should name the columns: first name, last name (or just name), phone, email, birthday, tags, allergies, notes and marketing. Column names in English, Portuguese, Spanish and French all work.
- Choose what to do with guests already in your list. Sofrito matches them by email or phone number. With Skip guests already in your list on, they are left as they are. With it off, their details are updated from the file.
- Check the rows. Each one is Ready, Already a guest, skipped (or Updates the guest), Repeated in the file, skipped or No name, skipped.
- Select Import {n} guests.
The file is read on your device, and nothing is saved until you import. When guests are updated, Sofrito says how many were added and how many updated. An update never creates a second profile: empty cells keep what the guest already has, and tags in the file are added to theirs.
#Export guests
- In Guests & loyalty, select Export CSV.
- Read the note about personal data.
- To send a newsletter, turn on Only guests who agreed to marketing.
- Select Download {n} guests.
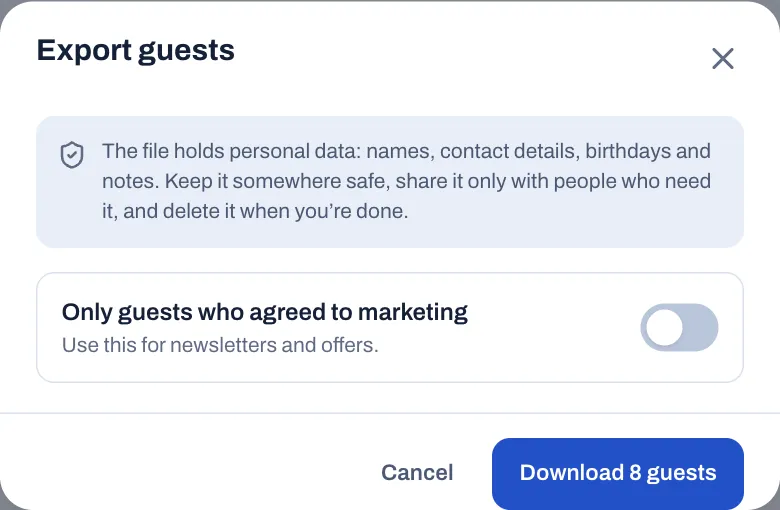
The file has each guest's name, company, contact details, tax number, birthday, tags, allergies, notes, marketing consent and address, then their visits, total spend, last visit, points and the date they were added. Its columns match what the import reads, so you can import it again.
#Look after guests' personal data
Names, phone numbers, birthdays and allergies are personal data. Data protection laws, such as the GDPR in Europe and the UK, give guests rights over it.
- Ask before you record. Tell guests why you keep their details: to recognise them, to remember their allergies, to give them points.
- Marketing needs a yes. Turn on Agreed to marketing only when a guest agrees, and send offers only to those guests. Turn it off when they ask you to stop.
- Keep exports safe. A guest export holds everyone's details. Share it only with people who need it, and delete it when you are done.
- Who sees guests. Staff with Look up guests can find guests on the till and see their phone, notes and allergies there. Managers with Manage guests and loyalty can see and change everything in the back office.
- One guest book for all your locations. If you have several locations, they share the same guests.
#Erase a guest who asks you to
When a guest asks you to delete their data:
- In Guests & loyalty, select the guest.
- At the bottom of Profile, under Erase this guest, select Erase guest.
- Select Tap again to erase for good.
Sofrito removes the guest's name, contact details, birthday, notes, allergies and tags for good, including from their bookings and the waitlist, and takes them off every list. Their visits and spend stay in your reports without a name. Invoices already issued keep what tax law requires. The audit log records who erased a guest, but not the guest's details. A guest who still owes money on a house account can't be erased: settle the account first.
Settings, section by section
Settings decides how your restaurant works: what prints on receipts, how service runs, how money is handled and how the tills are kept safe. This chapter goes through every section in the order the back office lists them, with what each setting changes. It is a reference for owners and managers. The step-by-step setup is in the chapters linked from each section.
Before you start
Who may change what depends on their role:
| Sections | Permission needed to change them |
|---|---|
| Business details, Language and region, Service, Taxes and rounding, Tips, Loyalty, Receipts, Kitchen, Bookings, Security, Cash, Cloud sync, API access | Restaurant settings |
| Prices and tax and Round tax, in Taxes and rounding, and the whole of Invoicing | Taxes and fiscal settings, as well as Restaurant settings |
| Service charges, Discounts, Price levels, Reasons | Edit the menu |
| Payment methods | Manage payment methods |
| Account | The Owner role to close the account, and Export data to download everything |
Without the permission you can open a section and read it, but not change it. Sofrito then says "You can see these settings, but your role can't change them." See Your team, roles and PINs.
#Find your way around Settings
- In the back office, select Settings.
- Select a section in the list on the left. On a phone, choose it in the Section menu at the top of the page.
The sections come in five groups:
| Group | Sections |
|---|---|
| Restaurant | Business details, Language and region, Service |
| Money | Taxes and rounding, Invoicing, Tips, Loyalty, Service charges, Discounts, Payment methods, Price levels |
| Operations | Reasons, Receipts, Kitchen, Bookings, Security, Cash |
| Connection | Cloud sync (on Sofrito Hub only), API access |
| Account | Account |
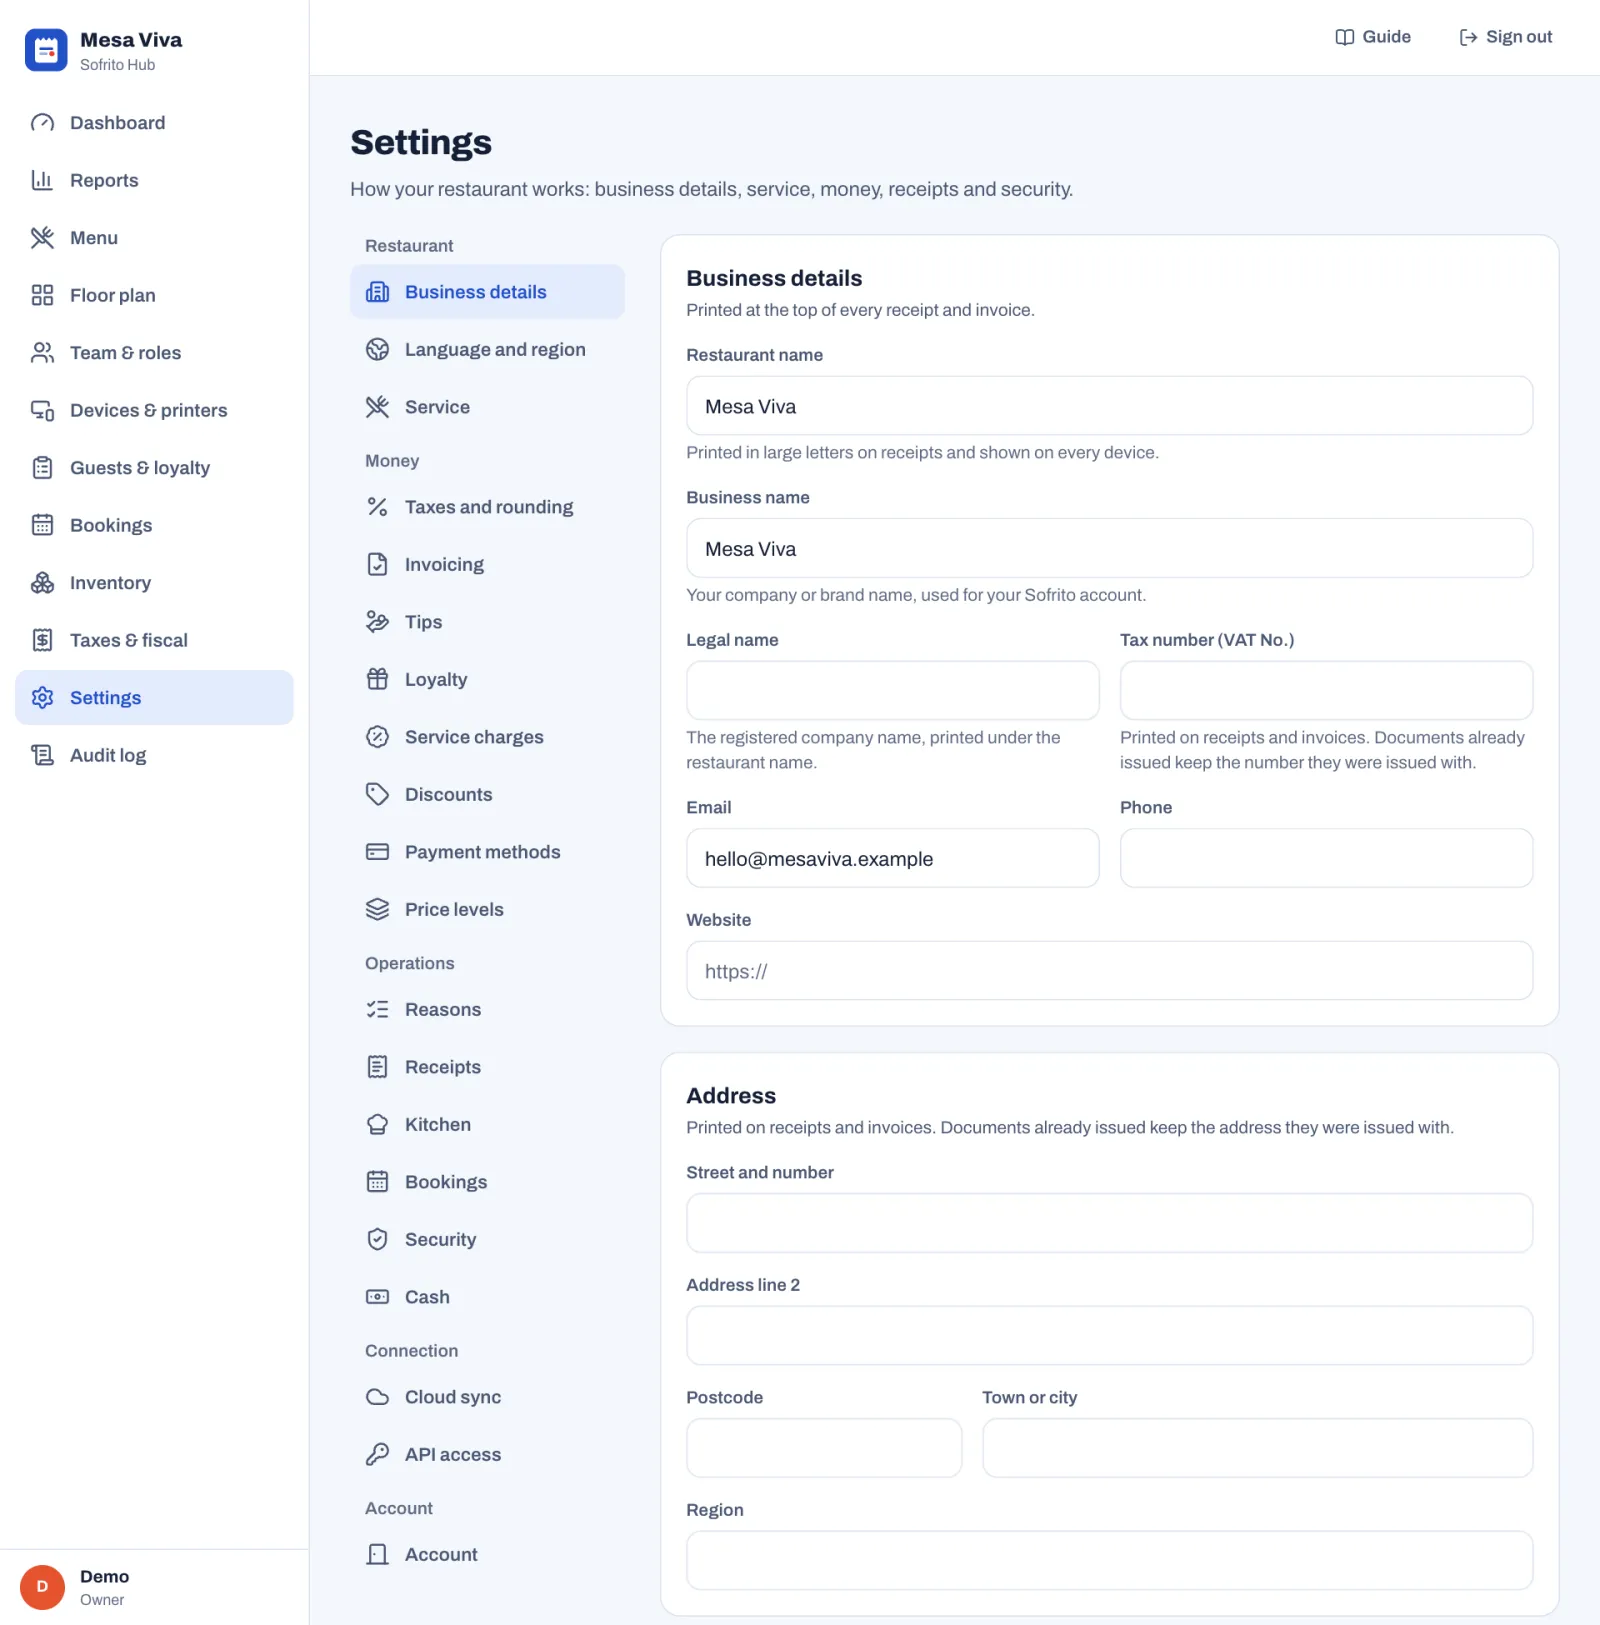
If your business has more than one location, the settings apply to the location you are working in. The page says so under its title. Business details are shared by all your locations.
Changes reach every till, handheld and kitchen display within moments of being saved.
#Save your changes
Settings saves in two ways.
Form sections (Business details, Language and region, Service, Taxes and rounding, Invoicing, Tips, Loyalty, Receipts, Kitchen, Bookings, Security and Cash) keep your changes until you save them:
- Change what you need. A bar appears at the bottom of the page: "You have unsaved changes".
- Move to other sections and change them too, if you like. A yellow dot marks each section with unsaved changes.
- Select Save changes. To undo everything instead, select Discard, then Tap again to discard.
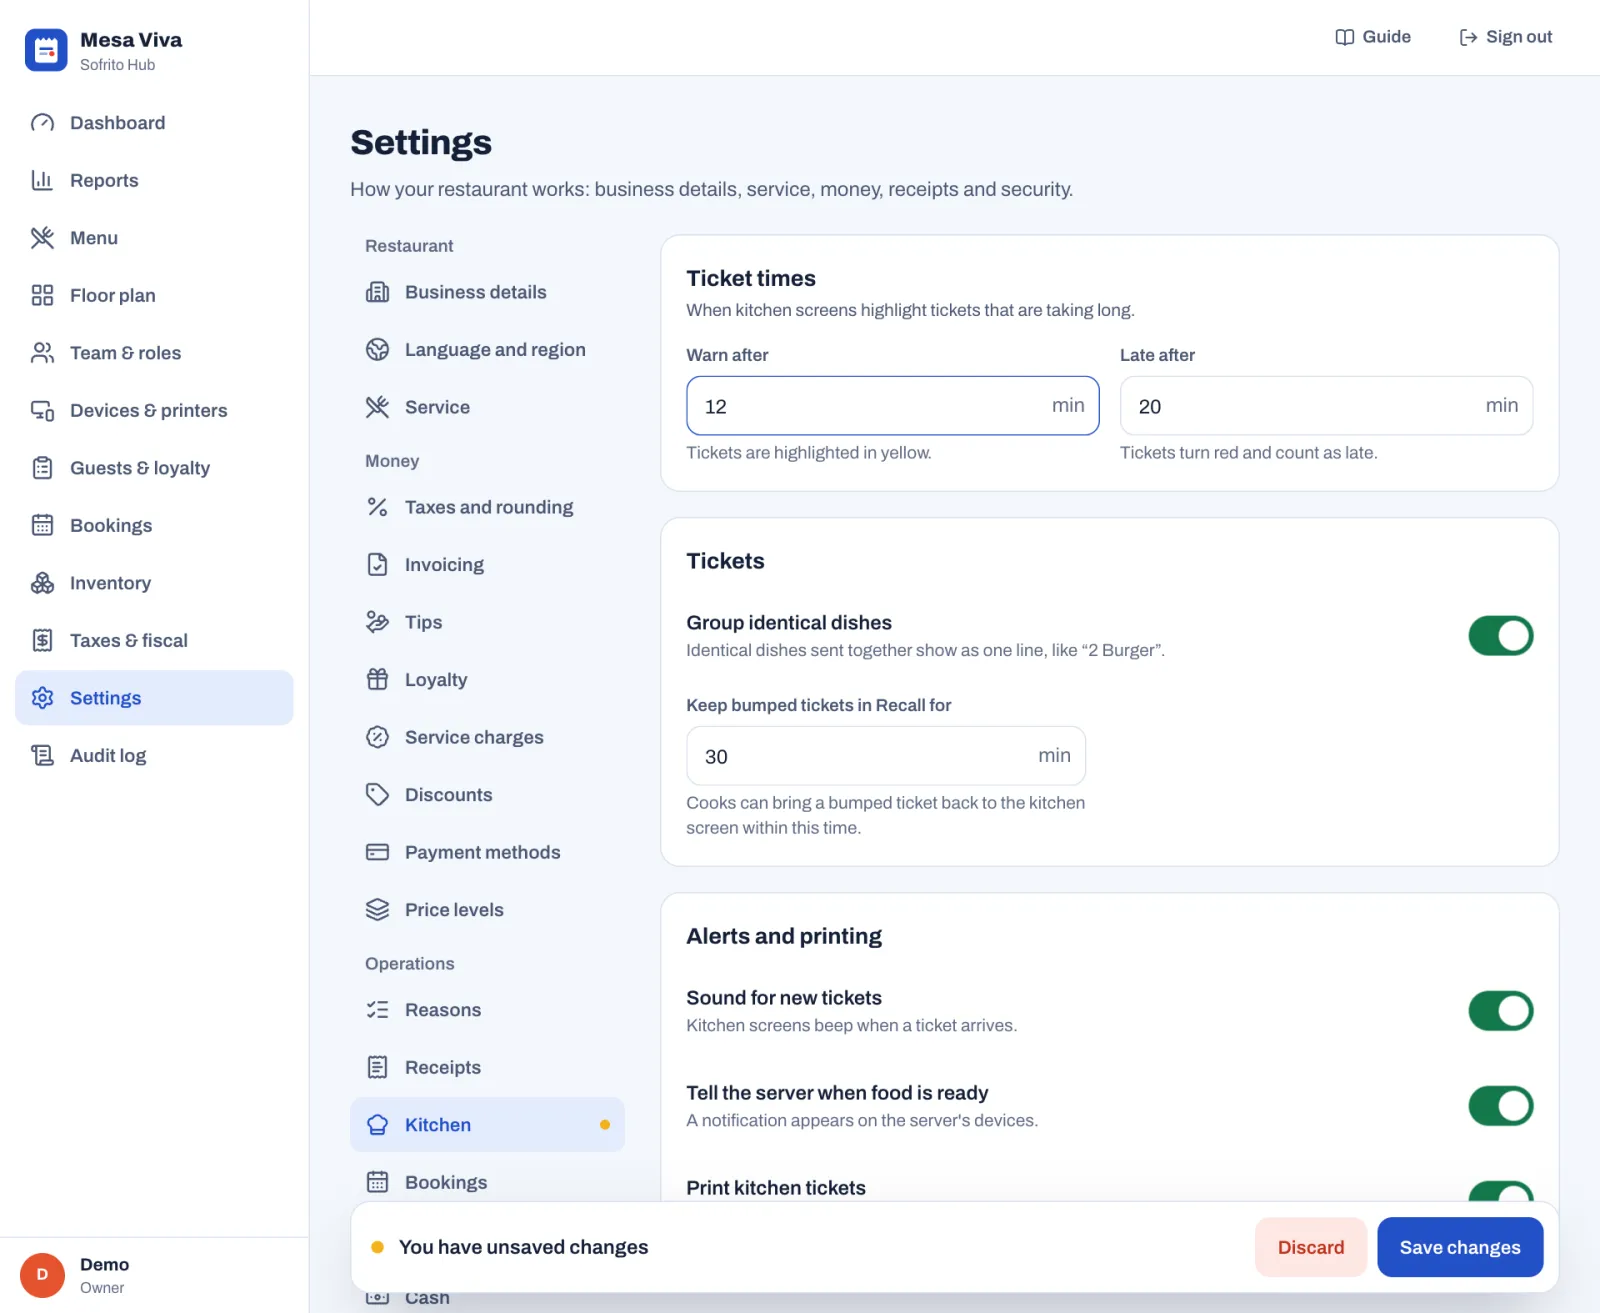
If something stops the save, the bar says what, for example "Turn on at least one order type." Select the message to go to the section that needs it.
If you open another back-office page, or go back to the till, with unsaved changes, Sofrito asks Leave without saving?: select Save and leave, Leave without saving or Keep editing. If you close or reload the page, your browser asks before it leaves.
List sections (Service charges, Discounts, Payment methods, Price levels and Reasons) open each item in its own window. Each window saves on its own when you select Save, or the Add button for a new item. To delete an item, open it and select Delete, then Tap again to delete.
Cloud sync, API access, Account and the logo also act straight away, when you select their buttons.
#Business details
What prints at the top of every receipt and invoice. The how-to is in Taxes, receipts and legal documents.
| Setting | What it changes |
|---|---|
| Restaurant name | Printed in large letters on receipts and shown on every device. |
| Business name | Your company or brand name, used for your Sofrito account. Closing the account asks you to type it. |
| Legal name | The registered company name, printed under the restaurant name. |
| Tax number | Printed on receipts and invoices, with your country's name for it, such as Tax number (VAT No.). If the number fails your country's check, Sofrito warns you, but still lets you save it. |
| Email, Phone, Website | Your contact details. |
| Address | Street and number, Address line 2, Postcode, Town or city and Region. Printed on receipts and invoices. |
| Logo | Upload logo, Replace logo or Remove logo. A PNG, SVG, JPG or WebP image. Saved as soon as you choose it, without the save bar. It prints on receipts and shows on the screens guests see. |
Documents already issued keep the details they were issued with.
With more than one location, a section called This location lets each location print its own legal name, tax number, email, phone and address. Leave a field empty to use the business details, shown in grey.
#Language and region
| Setting | What it changes |
|---|---|
| Country | Set when your restaurant was created, and locked. It decides your tax and fiscal rules. |
| Currency | Set when your restaurant was created, and locked, so your sales history and fiscal records never mix two currencies. Contact support if it is wrong. |
| Language and formats | The language new devices start in, and how dates, numbers and money are written. The Example under it shows today's date and an amount in the chosen format. |
| Time zone | Set when your restaurant was created: the time zone of the device used for setup when that device is in the restaurant's country, otherwise the country's usual time zone. Used for business days, reports and the times printed on receipts. Change it only if it is wrong: times already recorded stay as they are. |
| Business day ends at | Sales after midnight and before this hour count towards the day before. A new restaurant starts with 04:00. Reports, the dashboard, the kitchen screens and the day close all use it. |
#Service
How staff take orders on the tills. The how-to for each part is in Table service and Counter, takeaway and pickup.
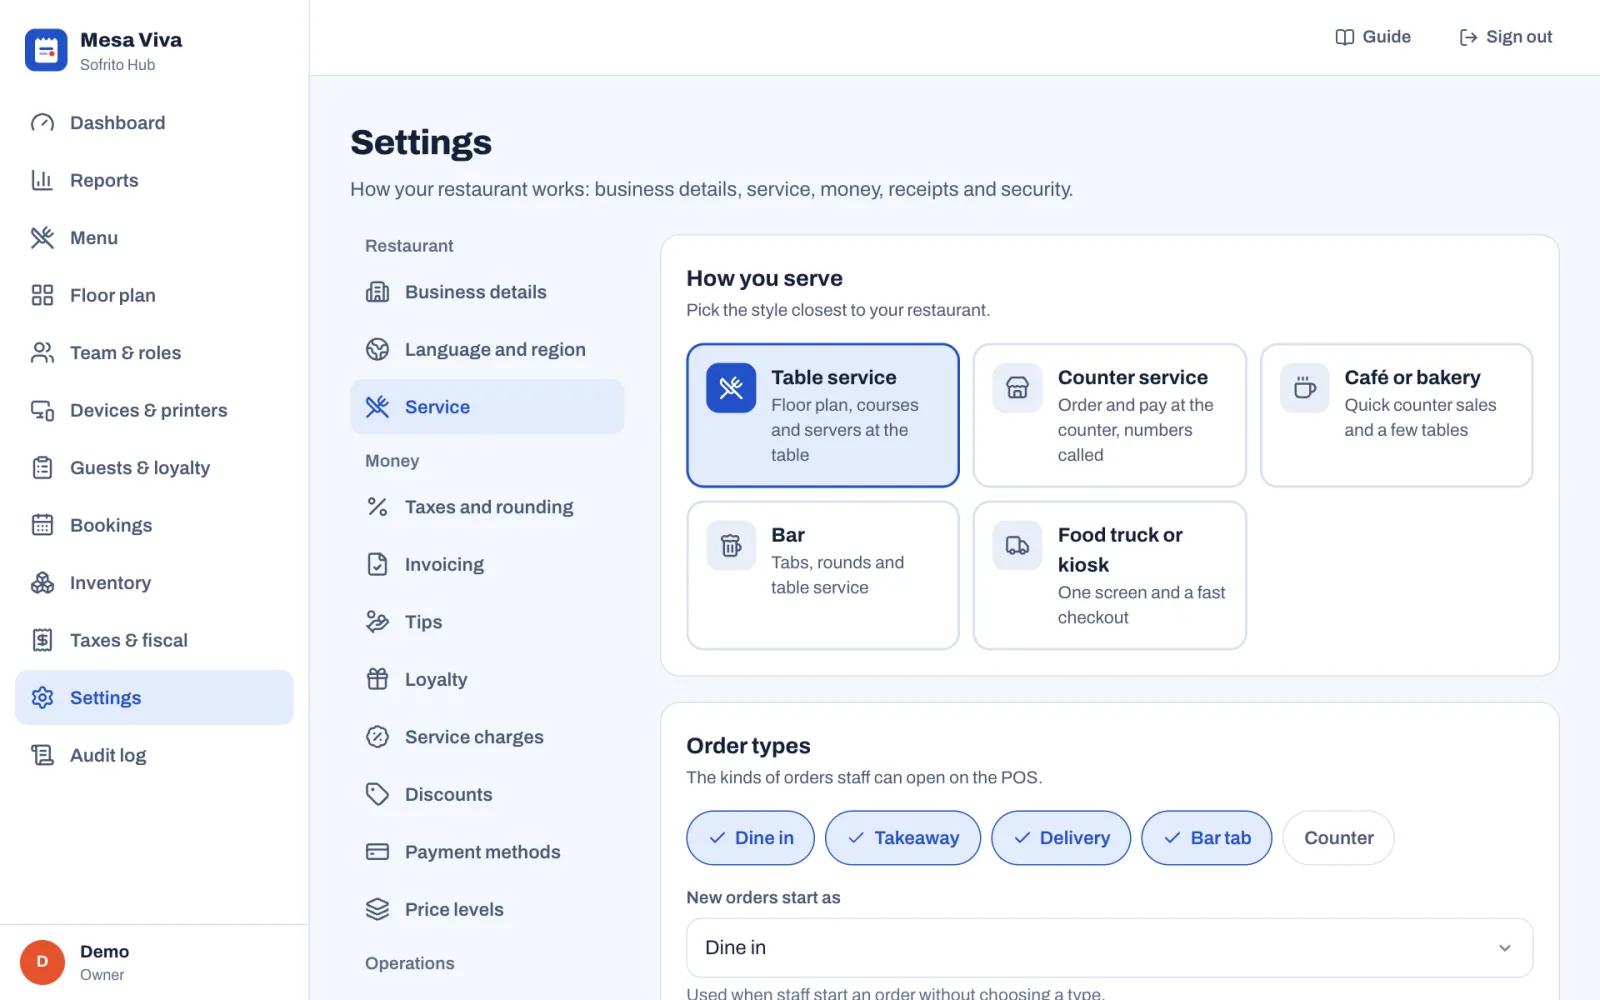
| Setting | What it changes |
|---|---|
| How you serve | Table service, Counter service, Café or bakery, Bar or Food truck or kiosk. When you choose a new style, Sofrito offers to set up the till for it: select Apply these settings to change the order types, the starting order type, guest count, seats, courses and Lock after each payment to suit that style. |
| Order types | The kinds of orders staff can open: Dine in, Takeaway, Delivery, Bar tab and Counter. At least one must be on. |
| New orders start as | The order type used when staff start an order without choosing one. |
| Ask for the guest's name on | The order types where the till asks for a name. It shows on kitchen tickets and is called out when the order is ready. |
| Ask how many guests | Staff enter the number of guests when they open a table. |
| Seat numbers | Staff can put each item on a seat, which makes splitting the bill easy. |
| Courses | Items are grouped by course on the order and on kitchen tickets. |
| Course names | The names of your courses, up to 10. Dishes keep their course number, so renaming is safe. Only the last course can be removed. Select Add course to add one. |
| Hold later courses | Shown when Courses is on, and off in a new restaurant. The first course (Drinks) always goes straight away. Send then sends the course being served, and later courses wait on the check until someone taps Fire. Only dine-in checks taken on the till are held: takeaway, delivery, counter and bar tab orders, and orders that come in through an API key, such as online orders, go to the kitchen at once. See Hold items and send them later. |
| Mark tables for clearing | Once the bill is paid, the table shows as needing to be cleared. |
| Send to the kitchen on payment | Items not sent yet go to the kitchen when the order is paid. |
| Restart order numbers every day | Order numbers go back to 1 at the start of each business day, and after each day close. |
| Show dish photos on the POS | Menu buttons show the dish's photo when it has one. |
| Put sold-out dishes back on sale each day | Closing the day puts every dish marked sold out back on sale. Dishes whose stock is counted keep their count. On by default. |
| Welcome message | Shown on the customer display between orders, up to 80 characters. |
#Taxes and rounding
The how-to is in Taxes, receipts and legal documents and, for cash rounding, Payment methods, tips and service charge.
| Setting | What it changes |
|---|---|
| Prices and tax | Prices include tax: guests pay the price on the menu and tax is worked out from it. Tax is added at payment: menu prices are before tax and tax is added to the bill. The example under each choice uses your own tax rate. Changing it changes what every price on your menu means. |
| Round tax | Once per receipt (once per rate on each receipt, as most tax offices expect) or On every line. |
| Tax rates | Not set here. Select Open Taxes & fiscal to manage rates, tax groups and fiscal documents. |
| Round cash payments to | No rounding, or the nearest coin you still use, such as The nearest £0.05. Card payments are never rounded. The example shows what a bill is paid as in cash. |
Only people with Taxes and fiscal settings can change Prices and tax and Round tax.
#Invoicing
The documents Sofrito issues and what your tax authority gave you. The section shows only what applies in your country, and only people with Taxes and fiscal settings can change it. The how-to is in Choose your documents and invoicing details and, country by country, Country notes.
| Setting | What it changes |
|---|---|
| Sale | The document issued for a paid bill, chosen from the types your country allows. |
| Invoice on request | The document issued when a guest asks for an invoice or gives a tax number, or issued by itself above an amount, where your country has that rule. Shown only where it applies. |
| Credit note and Table check | Shown for information. Sofrito picks these as your country's rules ask. |
| DAF authorisation | In Mozambique: the reference of the authorisation your Direcção de Área Fiscal gave for computer-processed invoices. It is printed on every document. |
| Software certificate | In Portugal and Angola: the certificate number of the software. When it is set on the server, it is shown here and can't be changed. |
| Tax region | In Portugal: Mainland Portugal (PT), Madeira (PT-MA) or Azores (PT-AC). Printed in the QR code and written in the SAF-T file. When you change it, Sofrito reminds you to change your tax rates too. |
| Printed on every document | Extra lines your accountant asks for, one per line. They print after the mentions the law requires, which Sofrito adds itself. |
| Issue training documents | Under Training mode. For practice before you open: documents go to a separate training series and say they are not valid for tax purposes. Once saved, every till issues training documents until you turn it off. |
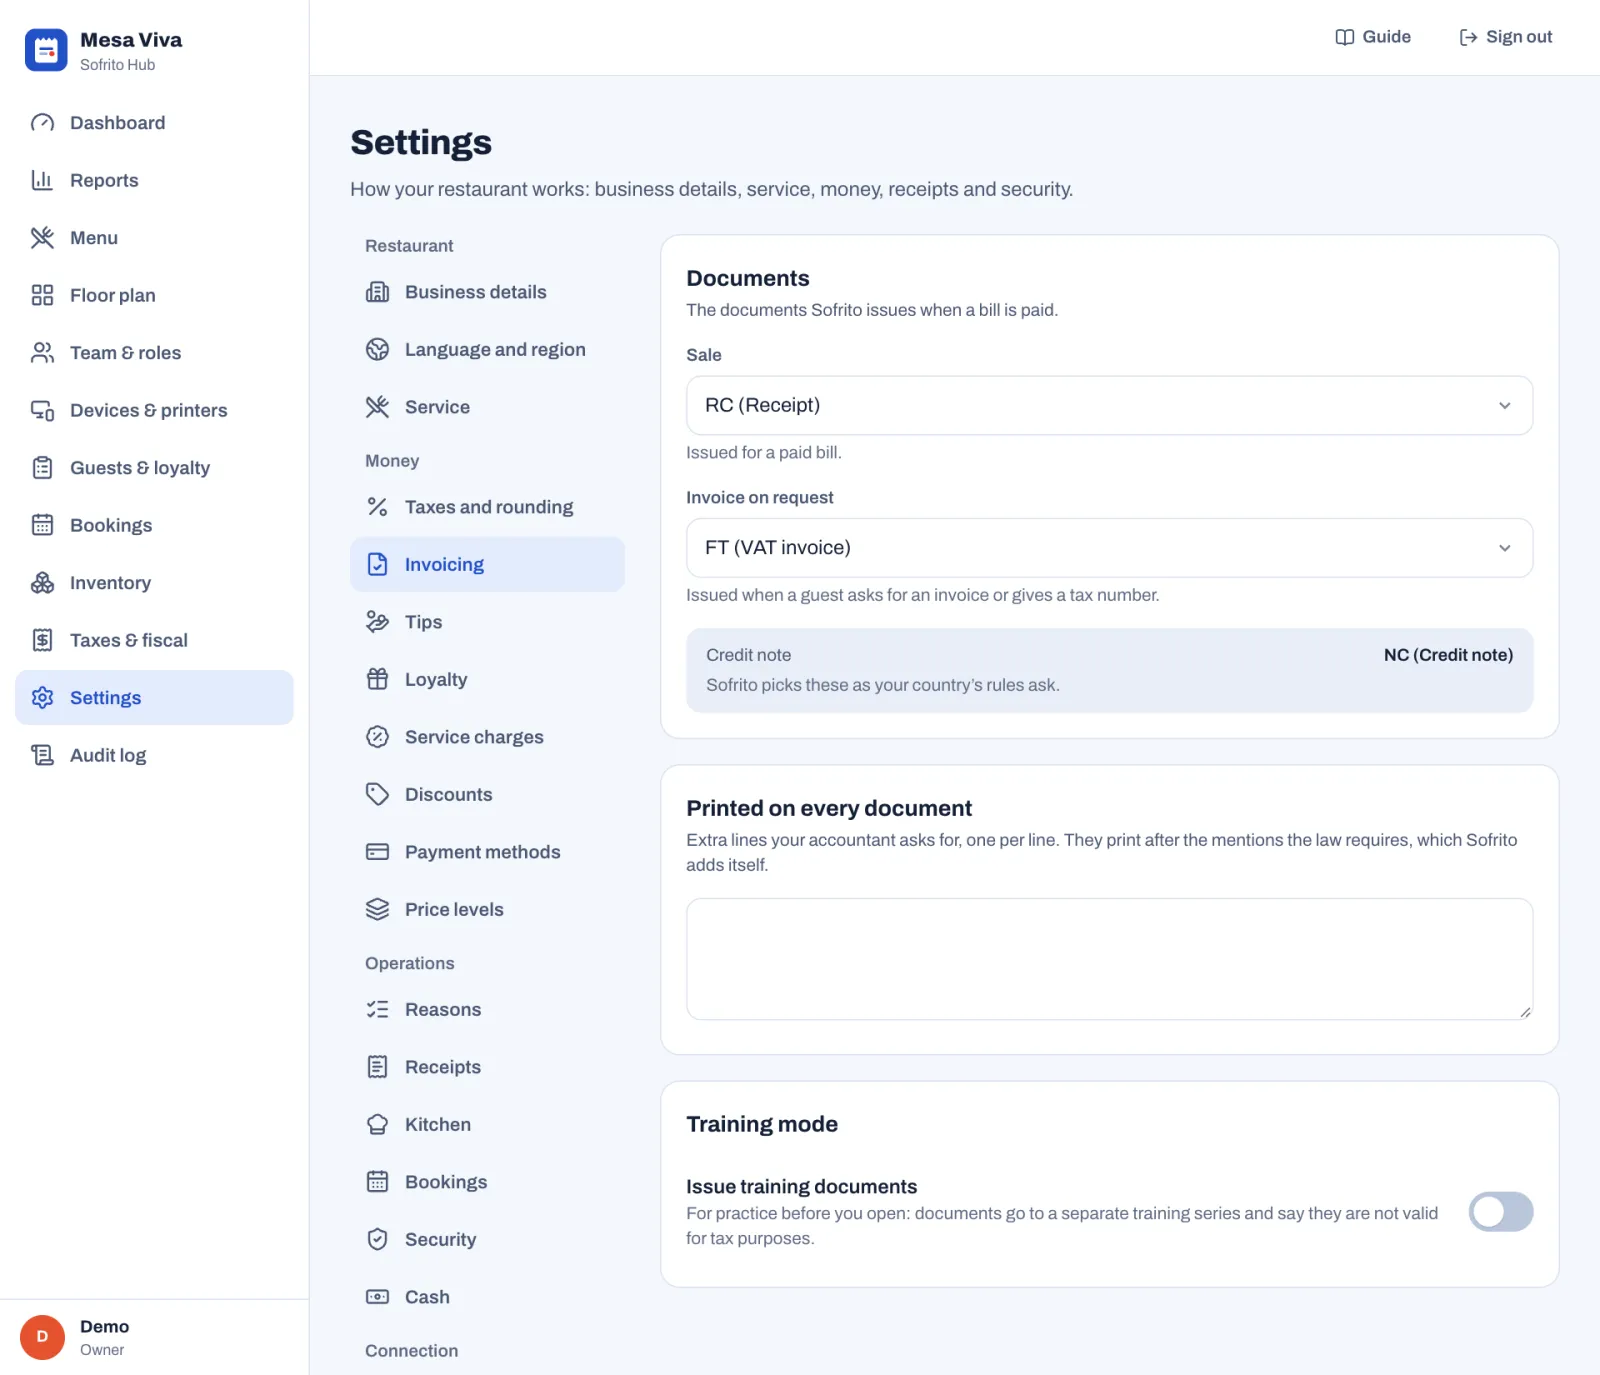
#Tips
The how-to is in Payment methods, tips and service charge.
| Setting | What it changes |
|---|---|
| Ask for a tip | Tip buttons appear on the payment screen, and staff are asked for their cash tips when they clock out. |
| Pool tips | Each day's tips are shared by the hours each person worked, instead of staying with whoever served the order. You pay them out in Team & roles › Tips. It works even when Ask for a tip is off, for service charges that count as a tip. Cash tips that staff declare stay with them and are not shared. |
| Tip options | Up to four percentages offered as one-tap buttons. Select Add option to add one, or the cross to remove one. |
| Work out tips on | Total before tax or Total with tax: the amount the percentage is taken from. |
| Allow other amounts | Staff can type any tip amount. |
Tip options, Work out tips on and Allow other amounts show only when Ask for a tip is on. Tips only appear for payment methods with Allow tips on. To pay tips out, see Pay out tips: From the cash drawer takes them out of an open drawer, and asks From which drawer when more than one is open.
#Loyalty
The how-to is in Guests, loyalty and gift cards.
| Setting | What it changes |
|---|---|
| Give loyalty points | Guests on a paid order earn points, and staff can spend them as a discount. |
| One point for every | How much a guest spends to earn one point, in whole amounts of your currency. |
| Each point is worth | The discount one point gives when a guest spends it. |
| Spend from | The smallest number of points a guest can spend at once. |
Points are counted on the amount paid, after discounts. The sentence under the fields works out what your rules give back, for example "1% back".
#Service charges
Extra charges added to the bill, such as a service charge for large groups. The how-to is in Payment methods, tips and service charge.
Each charge in the list shows its value, and badges for Automatic, Tip and Off. Select Add service charge, or select a charge to change it:
| Setting | What it changes |
|---|---|
| Name | Printed on the bill, for example "Service 10%". |
| Percentage or Fixed amount, and Value | How much the charge adds. |
| Tax | The tax group the charge is taxed with, or No tax. |
| Counts as a tip | The money goes to the team: reports show it with the tips, not with sales, and Team & roles › Tips counts it as owed to the team. |
| Add automatically | Adds the charge to matching orders without anyone tapping it. Fill in For groups of at least (a number of guests), Only for (order types), or both. Staff can still remove it. |
| Available on the POS | Staff can add the charge to orders. Turn it off to stop using it for a while. |
Deleting a service charge also takes it off the floor areas that added it: their orders then get no charge from the area.
#Discounts
Ready-made discounts staff apply with one tap. For applying discounts and approvals during service, see Voids, discounts, refunds and approvals.
Each discount in the list shows its value, what it applies to, and badges for Manager PIN, its promo code and Off. Select Add discount, or select a discount to change it:
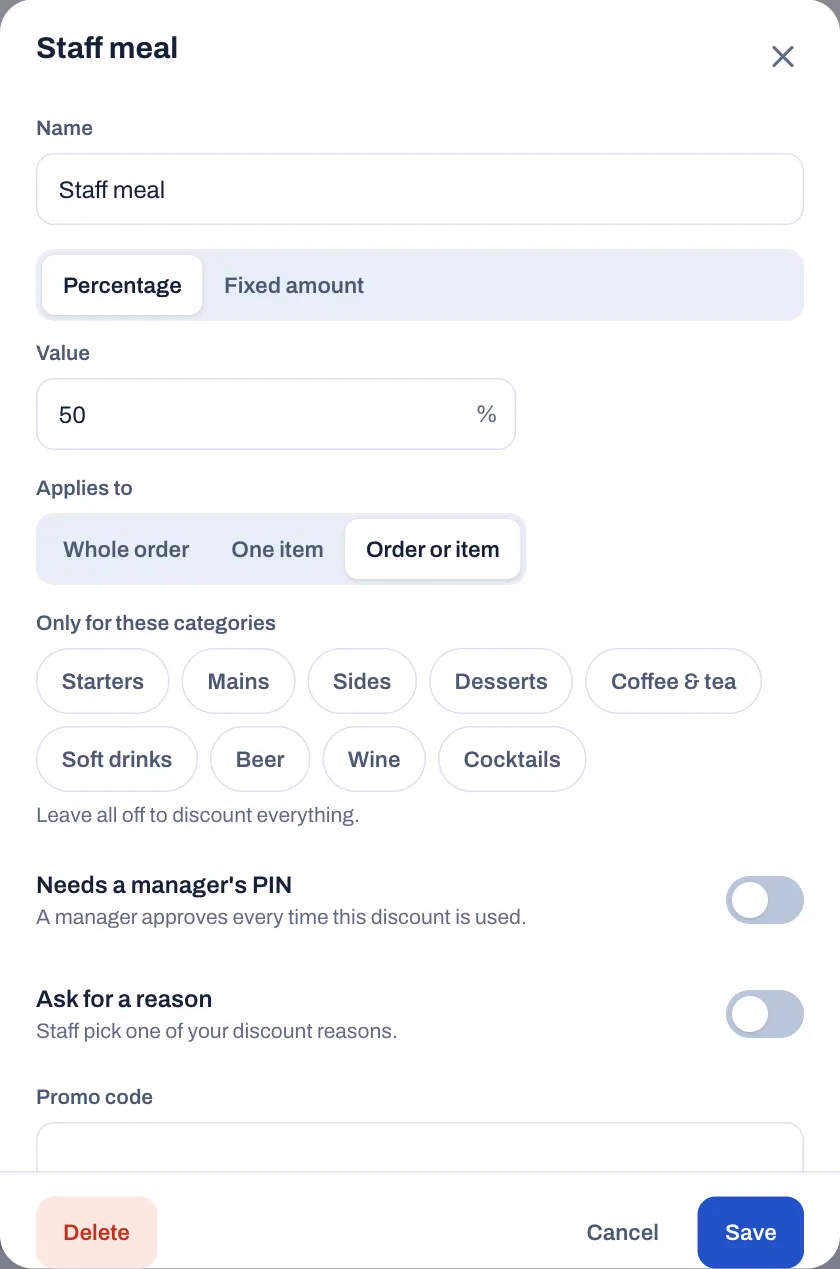
| Setting | What it changes |
|---|---|
| Name | The button staff tap, and the line on the bill. |
| Percentage or Fixed amount, and Value | How much it takes off. |
| Applies to | Whole order, One item, or Order or item. |
| Only for these categories | The discount only takes money off dishes in these categories. Leave all off to discount everything. |
| Needs a manager's PIN | Staff whose role doesn't have Discount above the limit need a manager's PIN every time they use it. |
| Ask for a reason | Staff pick one of your discount reasons (see Reasons). |
| Promo code | Optional. Staff type the code in the order's Discount window, under Promo code, and tap Add. Codes match in capitals or small letters. The Promo code box shows on the till only when a discount has a code. |
| Colour | Makes the button easy to spot on the POS. |
| Available on the POS | Staff can apply it to orders. |
Any discount bigger than Discounts up to in Security also needs Discount above the limit or a manager's PIN.
#Payment methods
The buttons on the payment screen. The how-to, with a table of the payment types, is in Payment methods, tips and service charge.
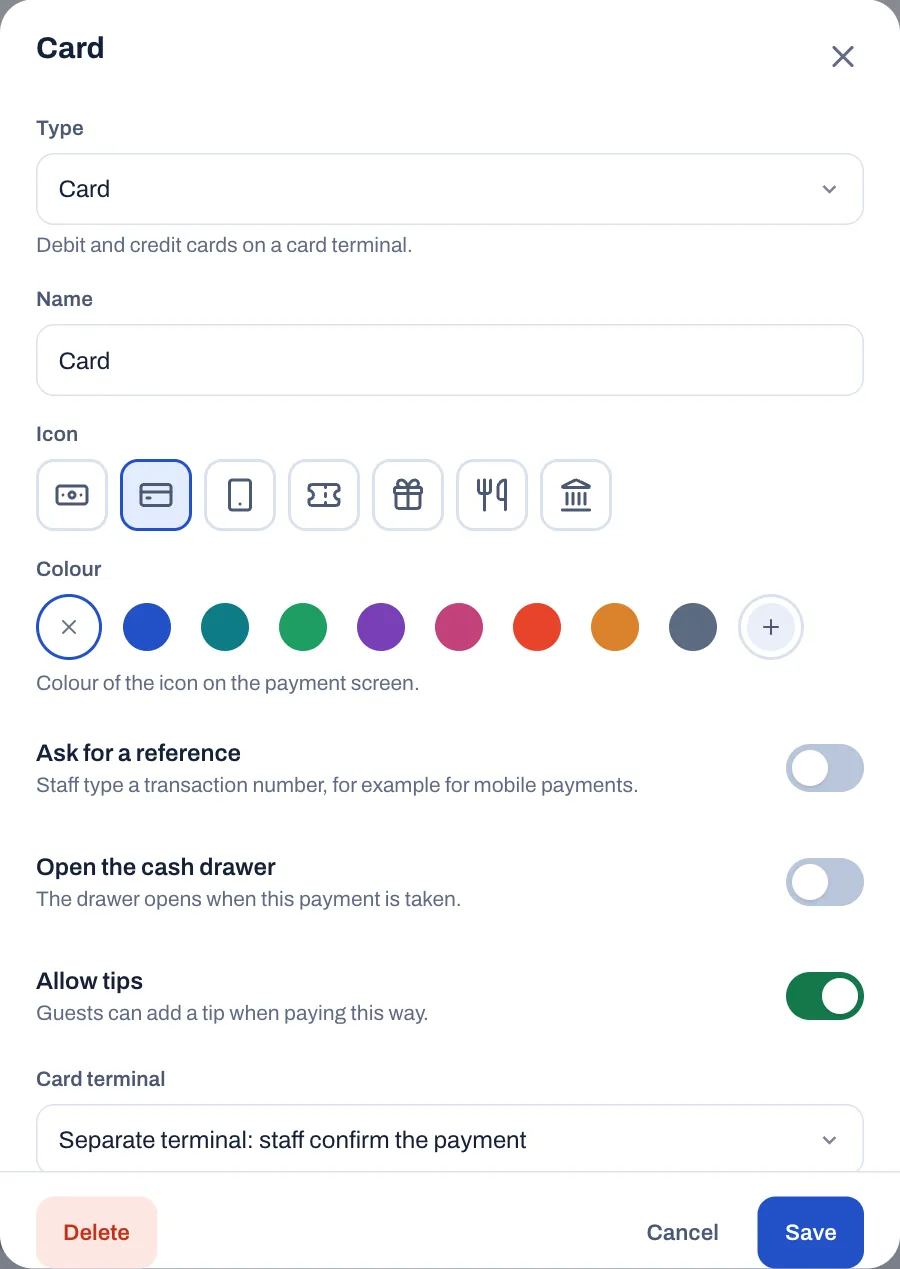
| Setting | What it changes |
|---|---|
| Type | Cash, Card, Mobile money, Voucher, Gift card, House account or Other. A new method starts with the usual settings for its type. |
| Name | The name on the button and on the receipt. |
| Icon and Colour | How the button looks on the payment screen. |
| Ask for a reference | Staff must type a transaction number, for example for mobile payments. |
| Open the cash drawer | The drawer opens when this payment is taken. |
| Allow tips | Guests can add a tip when paying this way. |
| Give change | Cash only. Staff can take more than the bill and hand back the difference. |
| Card terminal | Card and mobile money only. Separate terminal: staff confirm the payment, or Demo: payments are approved automatically, for training only. |
| Fiscal payment code | The code this method has in your tax files, such as NU for cash in Portugal. Leave it as it is if you are not sure. |
| Available on the POS | Shown on the payment screen. Turn it off to hide the method. It stays in your reports. |
#Price levels
Different prices for the same dish, for example on the terrace or during happy hour. The how-to is in Build your menu.
Each level in the list shows how many dishes have a price at that level, its order types, and Set times when it applies at certain times. Select Add price level, or select a level to change it:
| Setting | What it changes |
|---|---|
| Name | Shown at the top of the order while the level applies. |
| Colour | Helps tell levels apart. |
| Order types | The order types the level is for. Leave all off for every order type. |
| Times | Select Add times, then choose the days and the From and To times. Leave the days off for every day. Select Remove these times to delete a time slot. |
A level with order types or times applies by itself when they match, for example every takeaway order, or weekdays from 17:00 to 19:00. A level with neither applies only to the floor areas that use it as their price level. You give each dish its price at a level in the menu, and choose an area's price level in the floor plan. Deleting a price level also takes it off the floor areas that used it: their tables go back to standard prices.
#Reasons
The choices staff see when they must say why. Short and clear works best. Reports and the audit log show the reason with each action.
There is one list for each kind:
| List | Used when staff |
|---|---|
| Voids | Remove items already sent to the kitchen. |
| Items on the house | Give an item for free. |
| Refunds | Give money back on a paid order, or void a payment. |
| Reopening orders | Reopen a paid order to change it. Its receipt is cancelled and a new one is issued. |
| Discounts | Apply a discount that asks for a reason. |
| Pay-outs | Take cash out of the drawer, for example to pay a supplier. |
| Pay-ins | Put extra cash into the drawer. |
| Opening the drawer | Open the cash drawer without a sale. |
To add one, select Add reason under the list, check Used for, type the Reason and select Add reason. Select a reason to change or delete it. When a list is empty, staff type the reason themselves. A cash drop asks for no reason.
Whether staff must give a reason for voids, free items and refunds is set in Security.
#Receipts
What your receipts say and when they print. The how-to is in Taxes, receipts and legal documents.
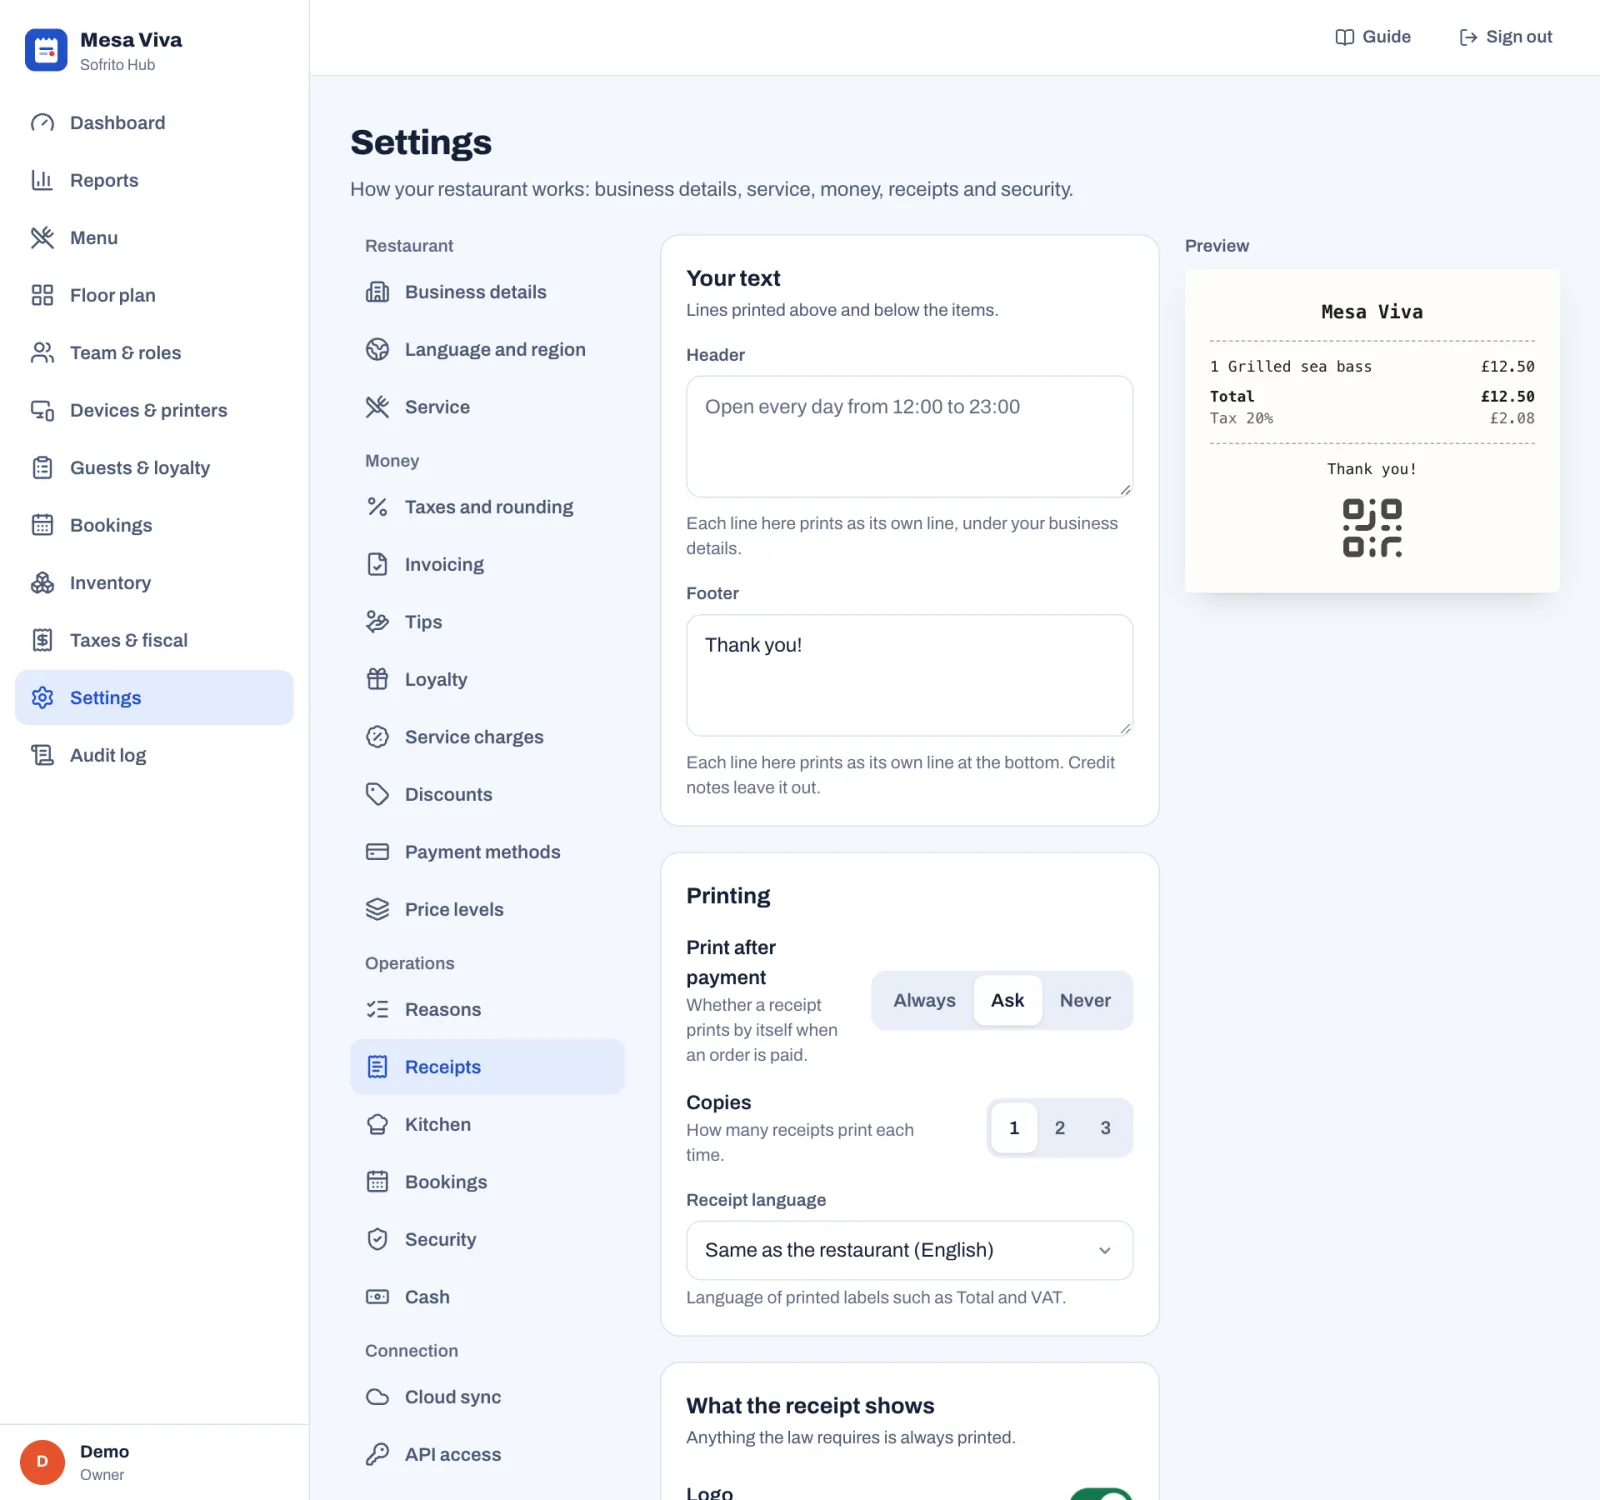
| Setting | What it changes |
|---|---|
| Header | Lines printed under your business details, such as your opening hours. Each line prints as its own line. |
| Footer | Lines printed at the bottom, such as "Thank you!". Credit notes leave the footer out. |
| Print after payment | Always prints a receipt by itself when an order is paid. Ask shows "Print a receipt?" with No receipt and Print. Never shows only Done: print it later from the order with Reprint receipt. A receipt that never printed comes out as the original the first time. |
| Copies | 1, 2 or 3 receipts each time. With more than one, the first is marked as the original and the others as copies. If the receipt printer's own Copies setting is higher, that number prints: the two don't multiply. A reprint is always one copy. |
| Receipt language | The language of printed labels such as Total and VAT, and of titles such as Receipt where the law doesn't set them. Same as the restaurant, or English, Português, Español, Français, Deutsch, Italiano or Nederlands. |
| QR code | A code guests can scan to check the document. Where the law requires a QR code on every document, it can't be turned off: "Required here: every document carries the fiscal QR code." |
| Logo, Tax summary, Order number, Table, Server, Prices of extras | Turn each one on or off. Anything the law requires is always printed. |
The Preview on the right shows where your header and footer go.
#Kitchen
How the kitchen displays and kitchen printers behave. The how-to is in The kitchen display.
| Setting | What it changes |
|---|---|
| Warn after | After this many minutes, tickets are highlighted in yellow. |
| Late after | After this many minutes, tickets turn red and count as late. It must be more than Warn after. |
| Group identical dishes | Identical dishes sent together show as one line, like "2 Burger". On in a new restaurant. |
| Keep bumped tickets in Recall for | How long cooks can bring a bumped ticket back to the kitchen screen. 30 minutes in a new restaurant. |
| Sound for new tickets | Kitchen screens beep when a ticket arrives. |
| Tell the server when food is ready | A notification appears on the server's devices. |
| Print kitchen tickets | Stations with a printer get a paper ticket as well as the screen. With it off, a station that no kitchen screen shows gets no ticket at all: Devices & printers › Stations marks it Tickets go nowhere. |
A new restaurant starts with 10 and 20 minutes. The dashboard and Reports › Kitchen use the same times. See Dashboard and reports.
#Bookings
How the till takes bookings. The how-to is in Bookings and the waitlist.
| Setting | What it changes |
|---|---|
| Take bookings | Shows Bookings on the till. When it is off, the till hides it, and the floor plan shows no reserved tables and no bookings; the back office still lists bookings. |
| Booking times | The periods the till offers times in, each with a From and a To time. Select Add a period to add one. A period can run past midnight. |
| Offer a time every | The gap between the times the till offers, from 10 to 60 minutes. The line under it lists them, for example "The POS offers 12:00, 12:30…". |
| Largest party | The till offers party sizes up to this. |
| Table time | How long a booking keeps its table. The back office can change it for one booking. |
| Hold the table | How long before a booking the floor plan shows its table as reserved. |
#Security
How the tills lock and when staff need a manager. The how-to is in Your team, roles and PINs.
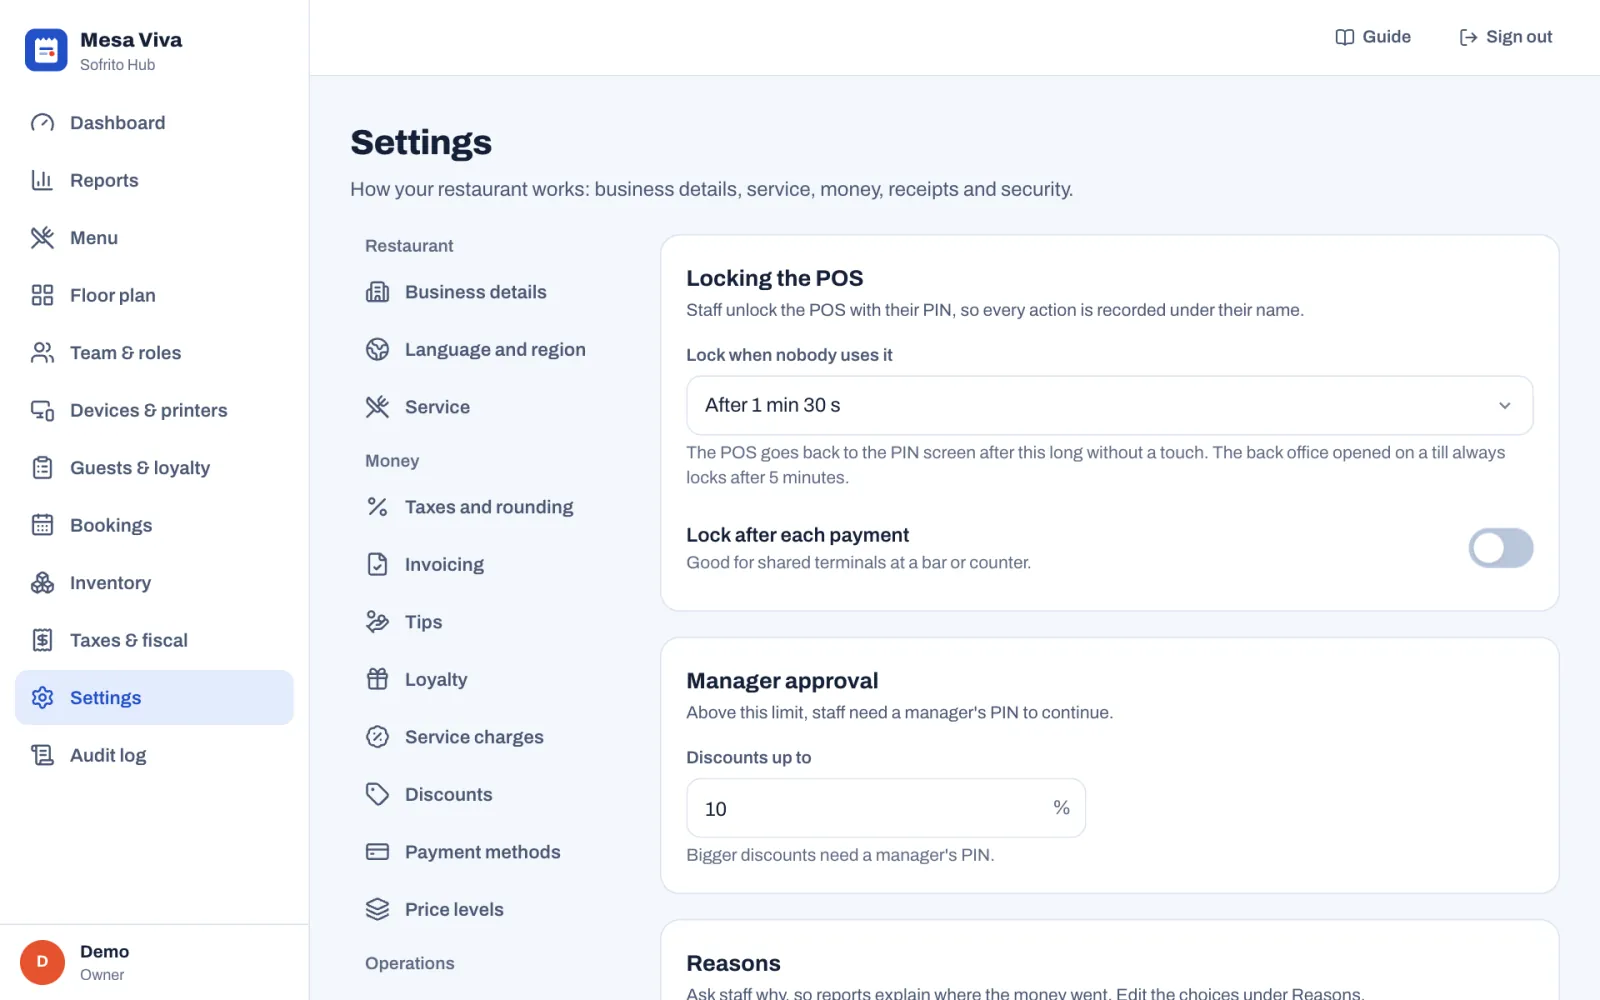
| Setting | What it changes |
|---|---|
| Lock when nobody uses it | The till goes back to the PIN screen after this long without a touch: from 30 seconds to 30 minutes, or Never. The back office opened on a till always locks after 5 minutes, whatever you choose here. |
| Lock after each payment | The till locks after every payment. Good for shared terminals at a bar or counter. |
| Discounts up to | The biggest discount, in per cent, staff may give on their own. Bigger discounts need Discount above the limit or a manager's PIN. |
| Ask why an item is voided | Staff choose a reason when they remove items already sent to the kitchen. |
| Ask why an item is free | Staff choose a reason when they give an item on the house or type their own discount. |
| Ask why money is refunded | Staff choose a reason when they refund a paid order. |
#Cash
How cash is counted in and out of the drawer. The how-to is in Open for service and Close the day.
| Setting | What it changes |
|---|---|
| Open the drawer before taking cash | Cash payments, cash refunds and gift cards sold for cash need an open drawer. If none is open, the till shows Starting cash first: staff count the float, tap Open drawer, and the payment goes on. |
| Starting float | The amount suggested when someone opens the drawer. |
| Count without seeing the expected amount | When closing the drawer, staff count the cash before Sofrito shows what it should be. |
#Cloud sync
Only on Sofrito Hub. It links your hub to Sofrito Cloud, so sales are backed up and you can manage the restaurant from anywhere while the hub keeps working without internet.
- When the hub is not linked, the section shows Link to Sofrito Cloud: type the Cloud address and a Pairing code created in Sofrito Cloud with Pair a new device, then Sofrito Hub. Then select Link this hub.
- When it is linked, the section shows Linked to Sofrito Cloud, the Last sync, how many changes are Waiting to upload, Sync now and Unlink. Unlinking stops syncing. Nothing is deleted on the hub or in the cloud.
The full steps are in Sofrito Hub and working offline.
#API access
Keys for your own tools, such as accounting, an online shop or a delivery service. See Security, the audit log and your data.
#Account
Your data, and on Sofrito Cloud the restaurant's account.
- Everything, as CSV files, on Sofrito Cloud and on Sofrito Hub, downloads one ZIP file with the menu, orders, payments, team, time cards, guests, gift cards and stock. It needs Export data.
- On Sofrito Cloud, Before you close also links to the reports, the fiscal files and the guest list, and the owner closes the restaurant's account under Close the account.
- On Sofrito Hub, the section explains that the data stays on the restaurant's own computer, and how to delete it there.
See Security, the audit log and your data.
#Good practice
- Go through every section once before you open, in the order of this chapter.
- Decide Prices and tax, the Business day ends at hour and the Time zone before your first sale. Changing them later changes how your history reads.
- Give staff the reasons they really need, in their own words, so reports explain where the money went.
- After a change that affects service, such as order types or courses, check it on a till before the next shift.
Sofrito Hub and working offline
Sofrito Hub keeps your restaurant trading when the internet stops, because every device talks to a computer in the restaurant instead of the internet. This chapter explains what keeps working during an outage, and how to look after the hub: running it, backing it up, updating it and moving it. It is for owners, managers and the partners and IT staff who install hubs.
Before you start
- Set up the hub. See Create your restaurant on Sofrito Hub.
- Prepare the network. See Plan the network and Wi-Fi.
#Know what keeps working when the internet drops
With Sofrito Hub, the tills, handhelds, kitchen displays and network printers all talk to the hub over the restaurant's own network. The internet is only needed for things outside the restaurant.
| Keeps working without the internet | Waits for the internet |
|---|---|
| Unlocking with PINs, and clocking in and out | Cloud sync, if the hub is linked to Sofrito Cloud: the hub keeps every change and sends it when the internet is back |
| The floor plan, orders and sending them to the kitchen | Card terminals and mobile money that use your internet connection |
| Kitchen displays, network printers and printers built into handhelds | The Sofrito Cloud back office away from the restaurant |
| The customer display and the pickup board | |
| Payments, receipts and invoices with their legal numbering | |
| The cash drawer, the shift report and the close of the day | |
| Bookings, the waitlist, guests, loyalty points, gift cards and house accounts | |
| The back office, on any device on the restaurant's network |
#When a device cannot reach Sofrito
A device goes offline when it cannot reach its server: with Sofrito Cloud, when the internet drops; with Sofrito Hub, when the hub computer is off or the device has left the staff Wi-Fi.
- The lock screen says Offline — reconnecting… in red.
- The till, handhelds and kitchen displays show a red crossed-out Wi-Fi sign.
- Dishes already tapped but not yet sent stay on that device, ready to send, as long as Sofrito stays open on it.
- Nothing else that needs the server works: unlocking with a PIN, opening a table, sending to the kitchen, taking payment and printing all wait until the device reconnects.
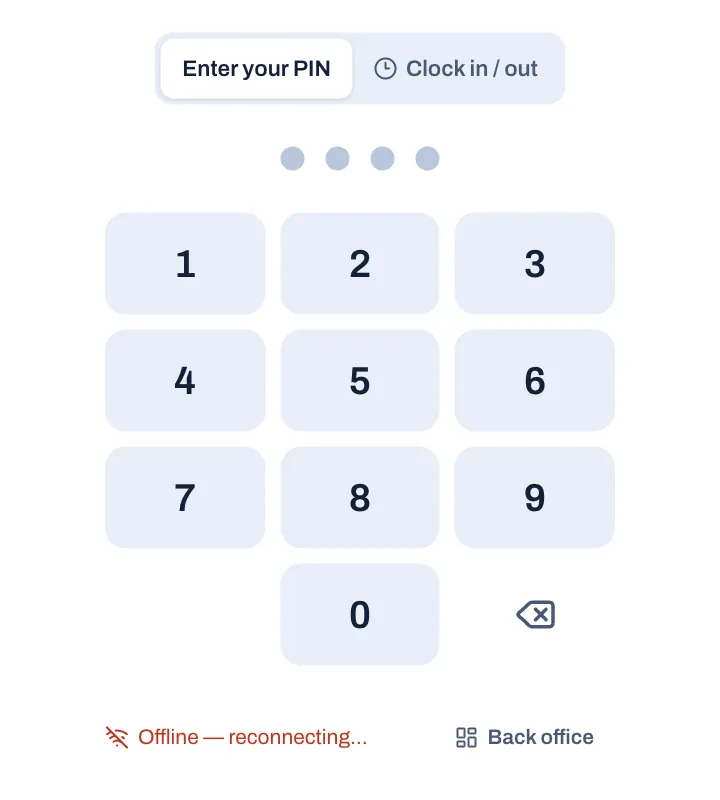
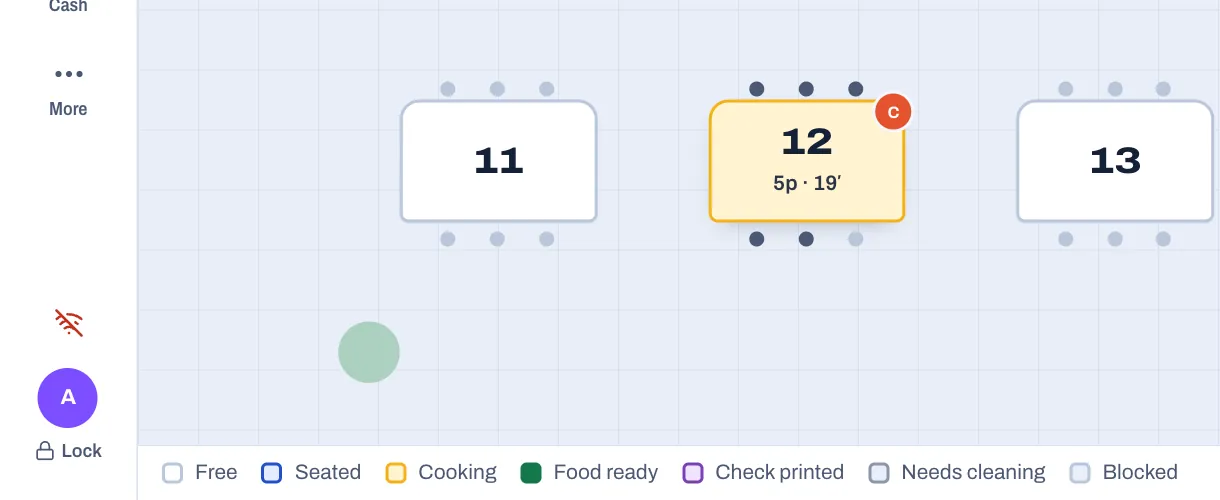
Devices reconnect by themselves. When they do, they show Back online and load the open orders again, so every screen catches up.
#Keep service going during an outage
If you use Sofrito Hub and the internet drops, carry on as normal. If the hub itself stops:
- Check that the hub computer is on. With the desktop app, open Sofrito on it.
- Check that the router and the switch are on, and that the devices are on the staff Wi-Fi.
- Wait for the devices to show Back online.
If you use Sofrito Cloud and the internet drops:
- Keep Sofrito open on every device, so dishes not yet sent are not lost.
- Take new orders on paper, with the table and the time.
- Take card payments on a terminal with its own mobile data, and note each one.
- When the devices show Back online, send the waiting dishes, enter the paper orders, and record the payments.
Tickets for a print bridge that could not print within 15 minutes are not printed late: they show as failed in the print queue under More › Printers, where you can reprint them. See Devices, printers and stations.
#Run the hub as a service
A hub must be running whenever the restaurant trades. How it runs depends on how it was installed.
The desktop app as the main computer. The hub runs while the Sofrito app is open on that computer, and stops when you quit it. While other devices are connected, Quit Sofrito and closing the window ask first: Quit Sofrito? says how many devices are connected, with Keep Sofrito open and Quit anyway. Quitting from the Dock on a Mac, or shutting the computer down, does not ask. Set the computer to open Sofrito when it starts, never to sleep, and to restart after a power cut if its settings allow it.
The hub program, for a mini PC or a server. Sofrito, or your Sofrito partner, gives you a zip file for your
system, for example sofrito-hub-linux-x64-1.0.0.zip. There are versions for Linux (linux-x64, linux-arm64),
Windows (windows-x64) and macOS (macos-arm64, macos-x64). The zip holds the sofrito-hub program and a web
folder. On Linux it also holds sofrito-hub.service, and on Windows start-sofrito-hub.cmd.
When the hub starts, it shows the restaurant's name, its data folder and its addresses, for example Open on any device: http://192.168.1.20:7420.
#Find the hub's data folder
Everything the hub knows is in one folder: the database mise.db, the file hub.json and the backups folder.
| How the hub runs | Data folder |
|---|---|
| Desktop app on Windows | %APPDATA%\com.lefamtech.mise.desktop\hub |
| Desktop app on macOS | ~/Library/Application Support/com.lefamtech.mise.desktop/hub |
| Desktop app on Linux | ~/.local/share/com.lefamtech.mise.desktop/hub |
| Hub program on Linux | /var/lib/sofrito |
| Hub program on Windows | %PROGRAMDATA%\Sofrito\data |
| Hub program on macOS | ~/Library/Application Support/Sofrito/data |
If there is a folder called data in the folder you start the hub program from, the hub uses that instead.
#Change how the hub program starts
| Setting | Option | Or set | Default |
|---|---|---|---|
| Port | --port | SOFRITO_PORT | 7420 |
| Network address it listens on | --host | SOFRITO_HOST | 0.0.0.0, every network connection |
| Data folder | --data | SOFRITO_DATA | See the table above |
| Screens folder | --web | SOFRITO_WEB | The web folder next to the program |
If you change the port, every device needs the new address. If you give --host one address, the hub listens
only there and shows only that address when it starts. With an address that only this computer can reach, such as
127.0.0.1, it says Open on this computer: instead of Open on any device:.
In Portugal and Angola, documents are signed with the software producer's key. When Sofrito, or your Sofrito
partner, gives you the key and the certificate number, set them for the hub program before it starts:
SOFRITO_PT_PRIVATE_KEY and SOFRITO_PT_CERTIFICATE in Portugal, SOFRITO_AO_PRIVATE_KEY and
SOFRITO_AO_CERTIFICATE in Angola, where the certificate is the AGT validation number, such as 25/AGT/2019. Your
partner may also give you SOFRITO_PT_KEY_VERSION or SOFRITO_AO_KEY_VERSION, and SOFRITO_PT_PRODUCER_TAX_ID or
SOFRITO_AO_PRODUCER_TAX_ID. Without the key, documents print that the program is not certified by the AT
(Portugal) or not validated by the AGT (Angola). The certificate number can also be typed in
Back office › Settings › Invoicing, under Software certificate: it prints only once the hub has the key. See
Taxes, receipts and legal documents.
#Install it as a Linux service
Unzip the hub, then run these two commands in its folder. The service starts the hub when the computer starts and restarts it if it stops.
sudo useradd --system --home /var/lib/sofrito sofrito && sudo mkdir -p /opt/sofrito /var/lib/sofrito && sudo chown sofrito /var/lib/sofrito
sudo cp -r sofrito-hub web /opt/sofrito/ && sudo cp sofrito-hub.service /etc/systemd/system/ && sudo systemctl enable --now sofrito-hub
Use sudo systemctl stop sofrito-hub and sudo systemctl start sofrito-hub to stop and start it, and
journalctl -u sofrito-hub to read what it printed.
#Install it as a Windows service
start-sofrito-hub.cmd runs the hub in a window, which stops when someone closes it. To run it in the background
whenever Windows starts, register it with a service manager such as NSSM, for example:
nssm install SofritoHub "C:\Sofrito\sofrito-hub.exe" --port 7420
#Run it in Docker
IT teams that already use Docker can run the hub from the Sofrito Hub container image, with the compose file Sofrito
provides. It uses the host's network, so the hub can reach the printers, and keeps the data in a volume called
sofrito-data.
#Keep backups
Every day at 04:00 in the restaurant's time zone, the hub saves a complete copy of the restaurant in the backups
folder of its data folder. If the hub computer was off at 04:00, the hub makes the copy later that day, as soon as
no order is open, so a backup never pauses service. Each copy is one file named with the restaurant's date, for
example sofrito-2026-10-16.db. The hub keeps the newest 30 copies and deletes older ones by itself. Nothing is
copied before the restaurant is set up.
Each copy also holds the hub's keys from hub.json: the keys to everyone's PIN and to every paired device. A copy
is all you need to restore the restaurant, on this computer or on a new one.
The copies are on the same computer as the hub, so they are lost with it. Copy the backups folder somewhere else
regularly: a USB drive kept away from the restaurant, another computer, or online storage.
#Restore a backup
Restoring takes the restaurant back to the day of the copy. Do it only when the hub's database is lost or damaged.
- Stop the hub: quit Sofrito on the hub computer, or stop the service.
- In the data folder, make a new folder, for example
old, and movemise.dbinto it, withmise.db-walandmise.db-shmif they are there. Keep them until you are sure the restore worked. - Copy the backup you want from
backupsinto the data folder, and rename the copymise.db. - Start the hub.
The hub takes its keys back from the backup: it writes them to hub.json by itself, and keeps the hub.json it
replaces as hub.json.old. Devices paired before the day of the copy reconnect by themselves, and everyone's PIN
works as it did that day. Pair any newer devices again.
#Update Sofrito Hub
Update outside service, after you close the day.
- Make a copy of the hub's data folder first (see Move the hub to a new computer for which files).
- Install the new version:
- Desktop app: quit Sofrito, install the new version over the old one, and open it again.
- Hub program: stop the hub, replace the
sofrito-hubprogram and thewebfolder with the new ones, and start it again. - Docker: start the new container image in place of the old one.
- The hub updates its database by itself when it starts.
- Reload Sofrito on each device: close and open the app, or reload the page in the browser. On a desktop app connected to the hub, choose Sofrito › Reload.
- Check Back office › Devices & printers: the App version column shows which version each device runs.
The Sofrito apps for phones and tablets update through their app store. Keep them up to date too.
#Link the hub to Sofrito Cloud
Cloud sync connects a hub to a Sofrito Cloud account. While the internet is up, every few seconds the hub sends its orders, payments, receipts, day closes, kitchen tickets, cash movements, time cards and tips paid out, stock movements and purchase orders, loyalty, gift card and house account movements, and its audit log. It receives the menu, the team, taxes, payment methods, the floor plan, printers, stock items, recipes, suppliers and the settings edited in Sofrito Cloud. Guests, bookings, the waitlist and gift cards go both ways. Service never waits for it.
You need the owner or a manager who can change settings, and a Sofrito Cloud account.
In Sofrito Cloud:
- Sign in to the back office at go.sofritopos.app.
- Select Devices & printers, then Pair a new device.
- Select Sofrito Hub, then Create pairing code. Keep the code on screen: it expires after 15 minutes.
In the hub's back office:
- Select Settings, then Cloud sync. This section appears only on a hub.
- Check the Cloud address. It shows https://go.sofritopos.app already.
- Type the code in Pairing code.
- Select Link this hub.
If the link fails, the section says why: for example that Sofrito Cloud can't be reached from this computer, that the address is not a Sofrito Cloud address, or that Sofrito Cloud did not accept the code. Create a new code and try again.
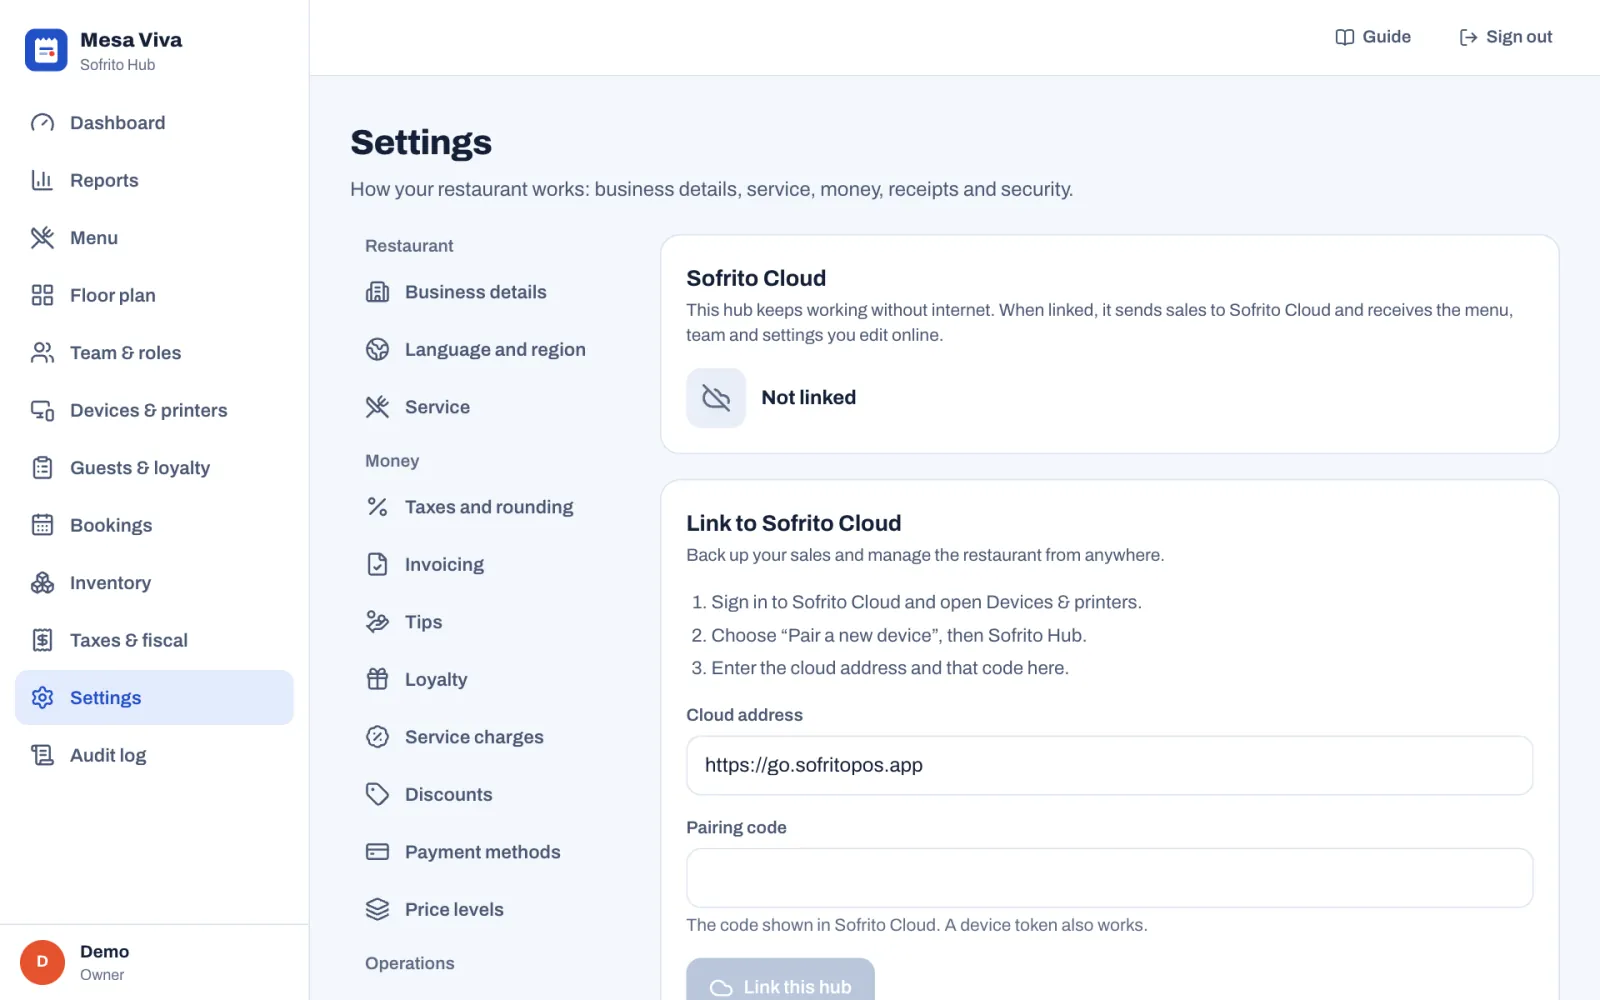
Once linked, the section shows Linked to Sofrito Cloud with:
- Last sync: when the hub last sent or received changes.
- Waiting to upload: how many changes have not been sent yet, or Everything is up to date.
- Needs attention, with the reason, when the last sync did not finish. Sofrito tries again every few seconds.
- Sync now, to send and receive at once.
In Sofrito Cloud, the hub is listed under Devices & printers › Devices as a Sofrito Hub, Online while it keeps syncing. It never prints and is never offered as a print bridge: the hub prints for itself.
To stop syncing, select Unlink, then Tap again to unlink. Nothing is deleted on the hub or in the cloud. From Sofrito Cloud, Revoke access on the hub's device unlinks it too.
#Protect the hub from power cuts
- Put the hub computer, the router and the switch on a small UPS, a battery that keeps them running through a short power cut. If the main till runs the hub, it goes on the UPS too.
- Connect the hub computer to the switch with a network cable, not Wi-Fi.
- Give the hub computer a fixed address with a DHCP reservation in the router. If you change the router, set up the same reservation on the new one.
- Turn off "client isolation" on the staff Wi-Fi, so devices can reach the hub.
- Set the hub computer never to sleep, and to switch on again after a power cut if its settings allow it.
#Move the hub to a new computer
- Close the day on the old hub.
- Stop the hub: quit Sofrito on that computer, or stop the service.
- Copy the whole data folder:
mise.db,mise.db-walandmise.db-shmif they are there,hub.jsonand thebackupsfolder. - Install Sofrito on the new computer the same way.
- Desktop app: open it, select Run Sofrito Hub on this computer, then quit it straight away. Do not set up a restaurant.
- Hub program: install it, but do not start it yet.
- Empty the new computer's data folder, which only holds the empty hub you just created, then put the copied files in it.
- In the router, give the new computer the old computer's fixed address.
- Start the hub on the new computer and check that every device shows Online in Back office › Devices & printers.
If the new computer has a different address, devices cannot find it: pair each one again. See Devices, printers and stations.
#Start again with an empty hub
If the hub runs the demo restaurant, you don't need this: unlock a till with 1234, tap More, then Leave the demo and Tap again to leave. The hub erases the demo, and its welcome screen offers Set up a restaurant again.
To start again from scratch with a restaurant you set up yourself:
- Stop the hub.
- Move the whole data folder somewhere safe, or delete it if you are sure you do not need it.
- Start the hub. It creates an empty data folder, and its welcome screen offers Set up a restaurant again.
Devices paired with the old restaurant, or with the demo, must be paired again.
Security, the audit log and your data
Sofrito records who did what, on which device, and who approved it. This chapter shows how to keep sign-ins and devices safe, how to read the audit log, how to give your own tools limited access with API keys, how to take your data out, and how an owner closes a Sofrito Cloud account. It is for owners and managers.
Before you start
- The audit log needs View the audit log. API keys need Restaurant settings. Exports need the permission of the page they come from (see Export your data). Closing the account needs the Owner role. See Your team, roles and PINs.
#Know what owners and managers can do
A new restaurant has two roles that run the business:
| Owner | Manager | |
|---|---|---|
| Permissions | Every permission. The owner role can't be changed, so nobody can lock the restaurant out. | Everything except Manage roles and permissions and Subscription and billing. |
| Change an owner's details, PIN or password | Yes | No |
| Make someone an owner | Yes | No |
| Close or keep the Sofrito Cloud account | Yes | No |
The restaurant always keeps at least one owner. Nobody can change their own role or turn off their own sign-in.
#Keep sign-ins safe
In the back office, people sign in with their email and a password of at least 8 characters, from any browser. Only roles with Open the back office can sign in. If the same email and password open more than one Sofrito Cloud restaurant, Sofrito asks which one to open (Choose a restaurant). A sign-in lasts 30 days on that browser, so on a shared computer select Sign out at the top right when you finish.
The back office on a till or handheld never stays signed in. Back office on the lock screen asks for the PIN of someone whose role has Open the back office, or their email and password (Use email and password instead). Any other PIN gets "Your role can't open the back office." The back office locks again when the till locks, and after 5 minutes without a touch, whatever the till's own lock time. Sign out locks the till. To stay signed in, use your own computer, not a till.
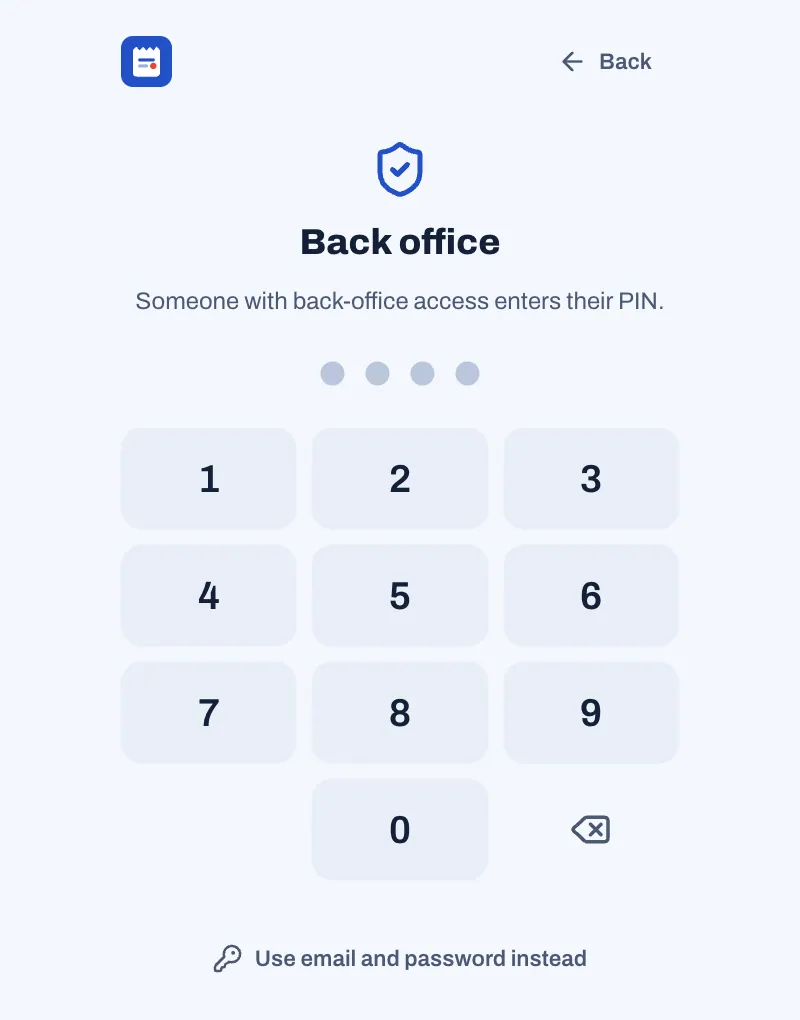
On tills and handhelds, everyone unlocks with their own PIN:
- Everyone needs a different 4-digit PIN. Sofrito never shows a PIN once it is saved, and stores it so that a copy of the database alone doesn't reveal it.
- A PIN signs in only where its role may work: tills and handhelds need Use the POS, so a kitchen PIN is refused there ("Kitchen can't sign in on this device."). The audit log records it as "PIN refused on this device".
- After five wrong PINs in a row, the device stops accepting PINs for 15 seconds, then longer with each wrong PIN, up to 5 minutes. Each wrong PIN is recorded in the audit log as "Wrong PIN entered".
- A PIN sign-in on a device lasts up to 16 hours. The till also locks by itself when nobody touches it, and after each payment if you choose. See Settings, section by section.
- When a manager approves an action with their PIN, Sofrito records both names: who asked and who approved.
#If you forget your password
Sofrito has no password-reset email. Instead:
- Sign in on a till with your PIN.
- Tap More, then Back office. The back office opens as you.
- Select Team & roles, then your name.
- Select Change password, type a new one and select Save.
An owner can also set a new password for anyone else. Only an owner can change an owner's password.
#Revoke a device
Do this straight away when a till, handheld or kitchen screen is lost, stolen or replaced.
- In the back office, select Devices & printers › Devices.
- Select the device.
- Select Revoke access, then Tap again to revoke.
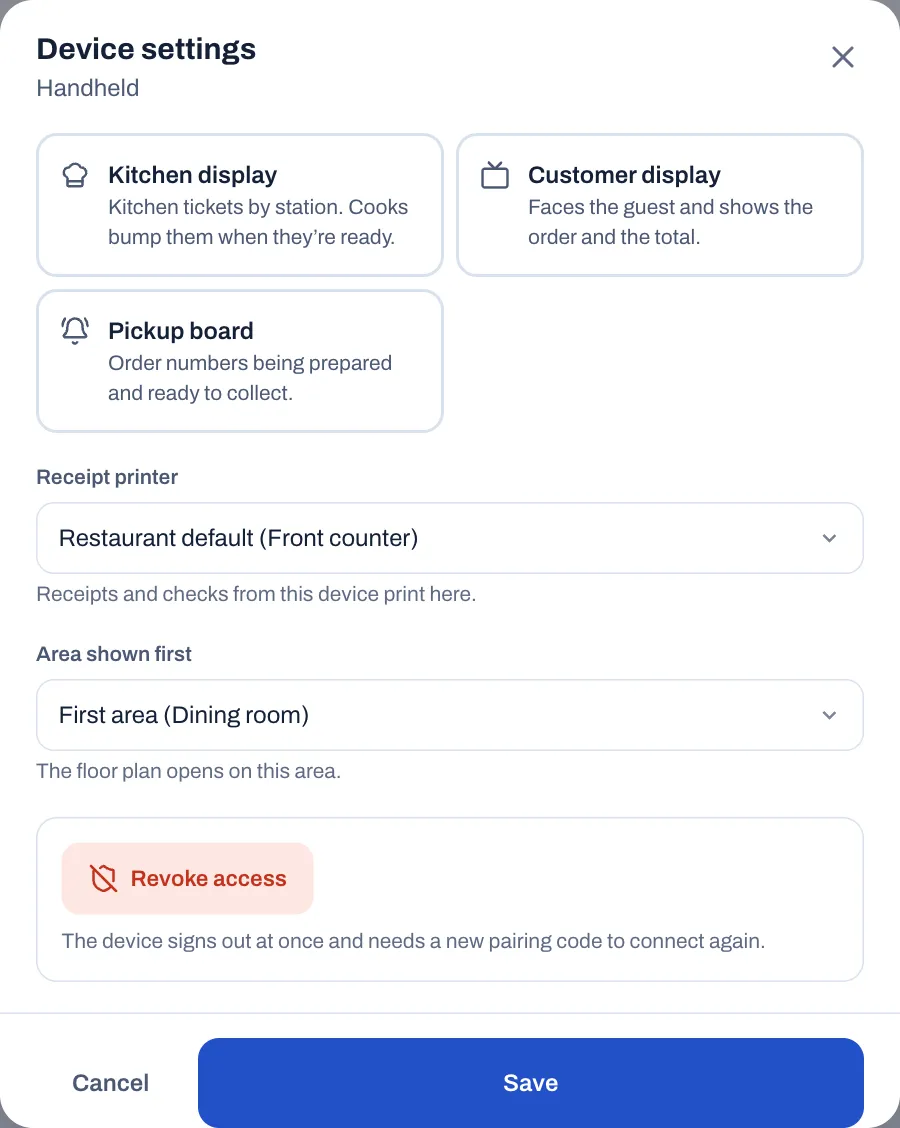
The device signs out at once, everyone signed in on it is signed out, and it needs a new pairing code to connect again. The audit log records it as "Device removed". On the device itself, someone with Manage devices and printers can do the same with More › Unpair this device. See Devices, printers and stations.
#When someone leaves
- Archive them in Team & roles, the same day. Sofrito deletes their PIN and signs them out everywhere, in the back office too. See Your team, roles and PINs.
- If they set up API keys for a tool they managed, check the keys in Settings › API access and revoke the ones you no longer need.
- If they had a device of their own, such as a phone paired as a handheld, revoke it.
Their orders, shifts and audit entries stay, under their name.
#Read the audit log
The audit log lists everything that changed money, records or settings: who did it, who approved it, when, and on which device.
- In the back office, select Audit log.
- Choose the dates: Today, Yesterday, Last 7 days, Last 30 days, This month, or your own dates in the two date boxes. It opens on the last 7 days.
- Optional: under Activity, choose an area or a single action.
- Optional: under Employee, choose a person. You see what they did and what they approved.
- Optional: under Search, type an item, a reason, a document number or a person.
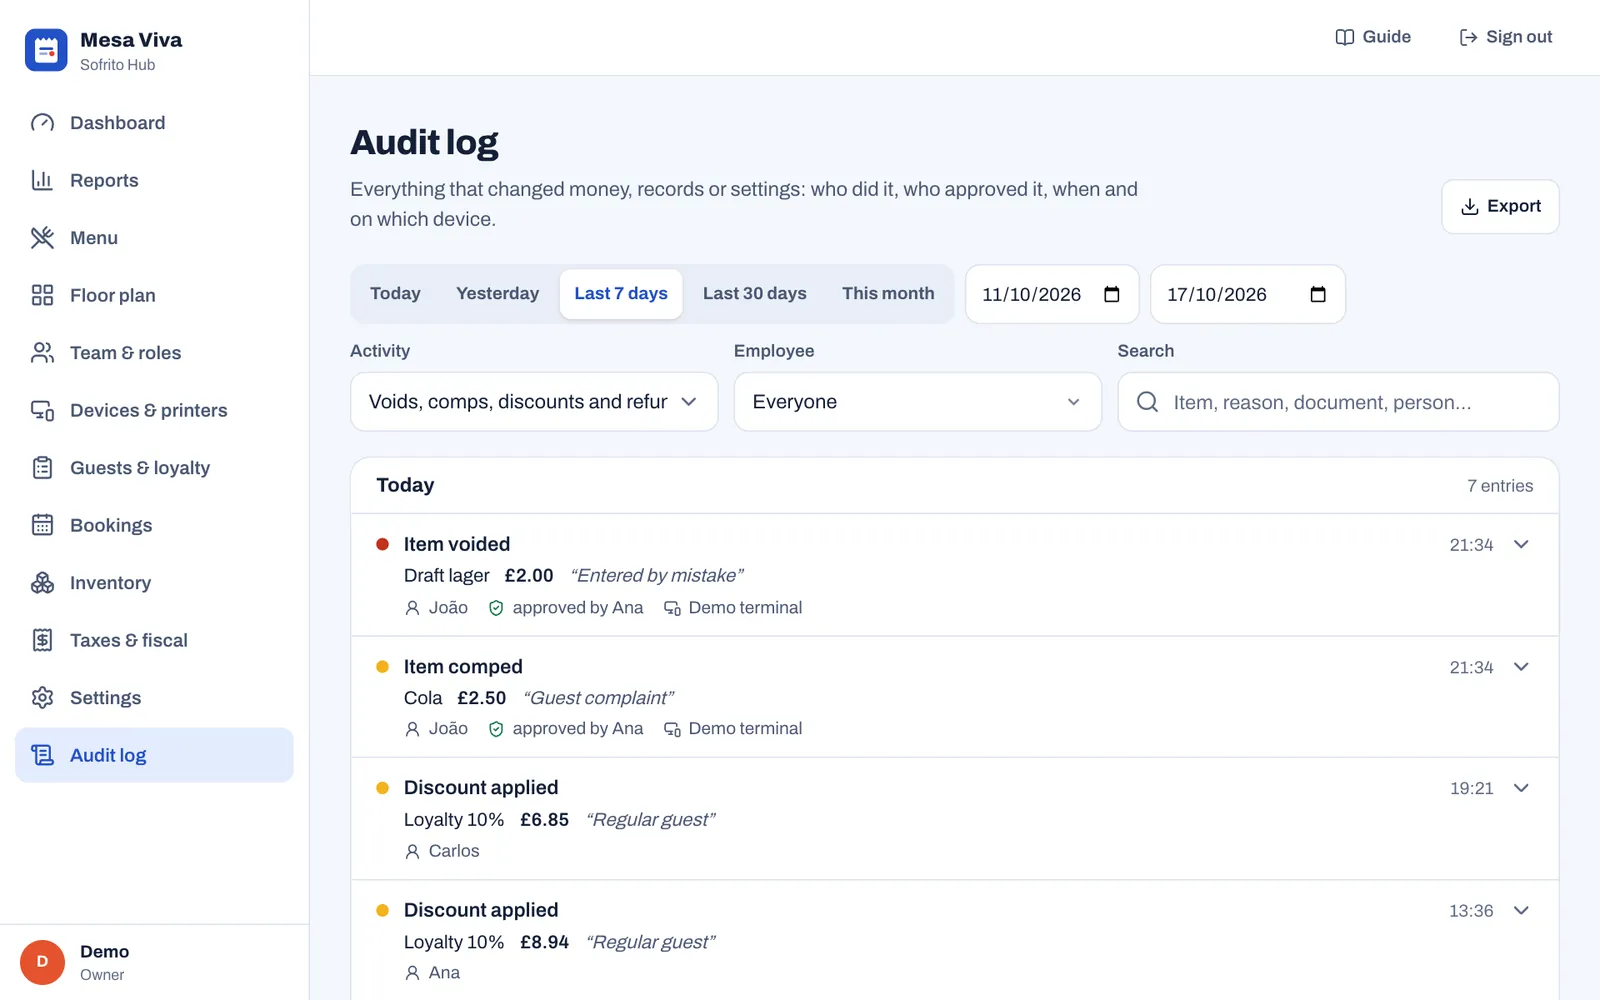
Entries are grouped by business day, newest first, with how many there are. Each entry shows what happened and when, the key facts (the item, the amount, the reason in quotes), who did it, who approved it and on which device. Sofrito (automatic) means nobody did it by hand. Select Load more at the bottom to go further back.
Select an entry to see everything recorded about it.
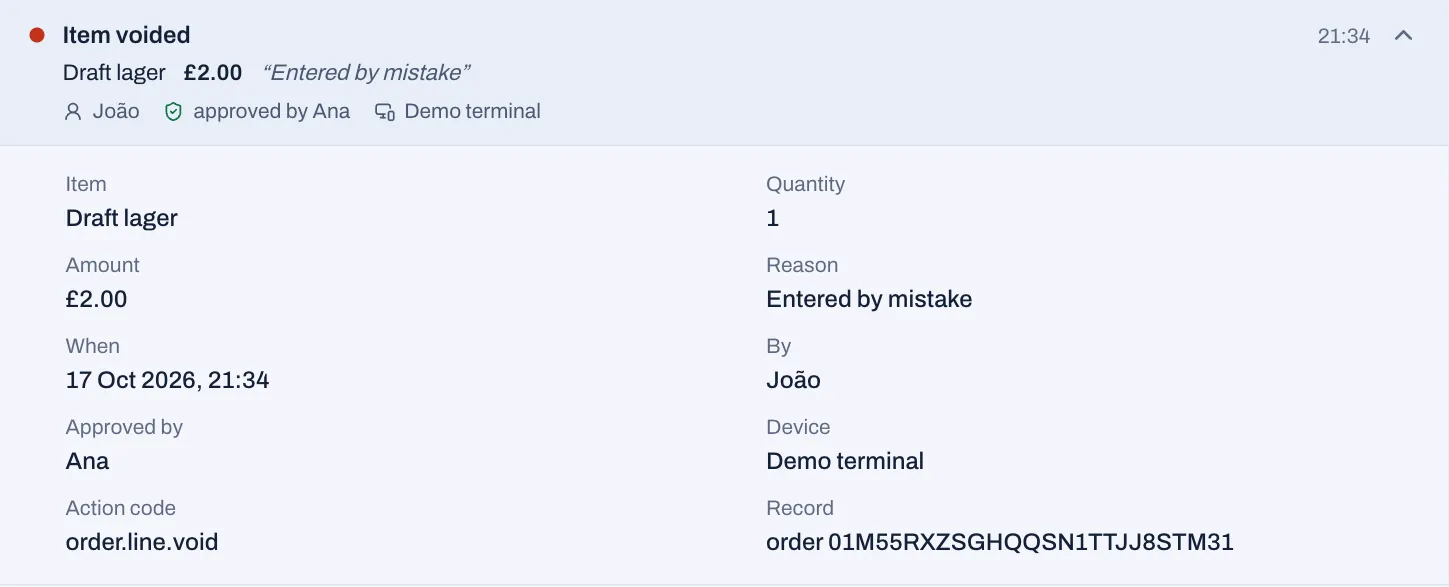
The areas under Activity are:
| Area | What it covers |
|---|---|
| Voids, comps, discounts and refunds | Items voided and comped, prices changed on a check, discounts, refunds, orders voided and reopened, payments voided, the drawer opened without a sale, cash paid out. |
| Orders and payments | Everything that happened to orders and payments. |
| Cash drawer and day close | Drawers opened and closed, pay-ins, pay-outs and drops, tips paid out of the drawer, day closes. |
| Fiscal documents | Documents issued and cancelled with a credit note, validation codes added to series, and day closes. |
| Menu, prices and taxes | Dishes, prices, sold-out dishes, categories, modifiers, tax rates, stations, discounts, service charges, price levels, reasons and payment methods. |
| Team and time cards | Team members, roles, clocking in and out, cash tips declared, tips paid, and corrected time cards. |
| Devices, printers and sign-in | Wrong and refused PINs, pairing codes, devices paired and removed, API keys, and printers. |
| Guests and gift cards | Guests added, changed, imported and erased, loyalty points changed by hand, house accounts, and gift cards issued, sold, topped up and corrected. |
| Stock and suppliers | Stock items, suppliers, recipes and purchase orders, and stock movements entered by hand, such as waste and counts. |
| Settings and floor plan | Settings, business details, the floor plan, closing or keeping the Sofrito Cloud account, and full exports of your data. |
Stock taken by sales and deliveries against a purchase order is not in the audit log: it is listed in Inventory › Movements (see Stock, recipes and suppliers).
The back office has no way to change or delete an entry.
To keep a copy, select Export. The file holds every entry that matches your filters, up to 10,000: the date and time, the activity, its details, who did it, who approved it, the device, the action code and the record. If there are more, Sofrito exports the latest 10,000 and asks you to pick fewer days.
#Connect your own tools with API keys
An API key lets one of your own tools talk to Sofrito: an accounting sheet that reads the day's sales, a website that shows your menu, an online shop that sends orders to the kitchen. Each key can only do what you choose.
- In the back office, select Settings › API access.
- Select Create a key.
- Under Name, type the tool or company that will use it, such as "Accounting".
- Under What it can do, choose only what the tool needs.
- Select Create key.
- Select Copy key and give the key to whoever builds the connection, safely. It is shown only once.
- Select Done.
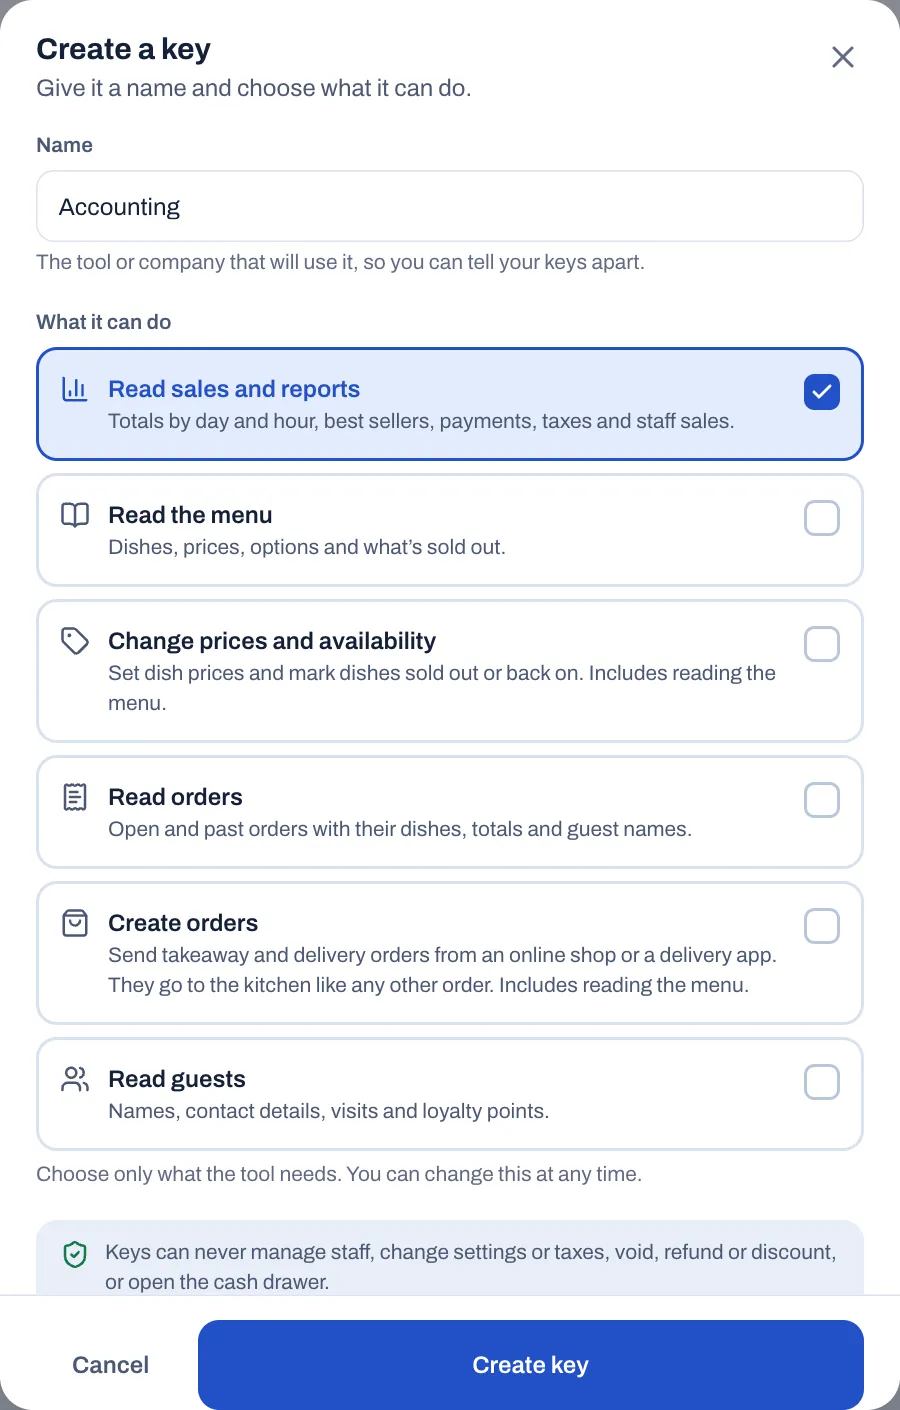
| Choice | What the tool can do |
|---|---|
| Read sales and reports | Totals by day and hour, best sellers, payments, taxes and staff sales. |
| Read the menu | Dishes, prices, options and what's sold out. |
| Change prices and availability | Set dish prices and mark dishes sold out or back on. Includes reading the menu. |
| Read orders | Open and past orders with their dishes, totals and guest names. |
| Create orders | Send takeaway and delivery orders from an online shop or a delivery app. They go to the kitchen like any other order. Includes reading the menu. |
| Read guests | Names, contact details, visits and loyalty points. |
Whatever you choose, a key can never manage staff, change settings or taxes, void, refund or discount, take payments, open the cash drawer, close the day, export fiscal files, read the audit log or use a manager's PIN. You can only give a key what your own role may do.
The API keys list shows each key with what it can do, when it was created and when it was last used.
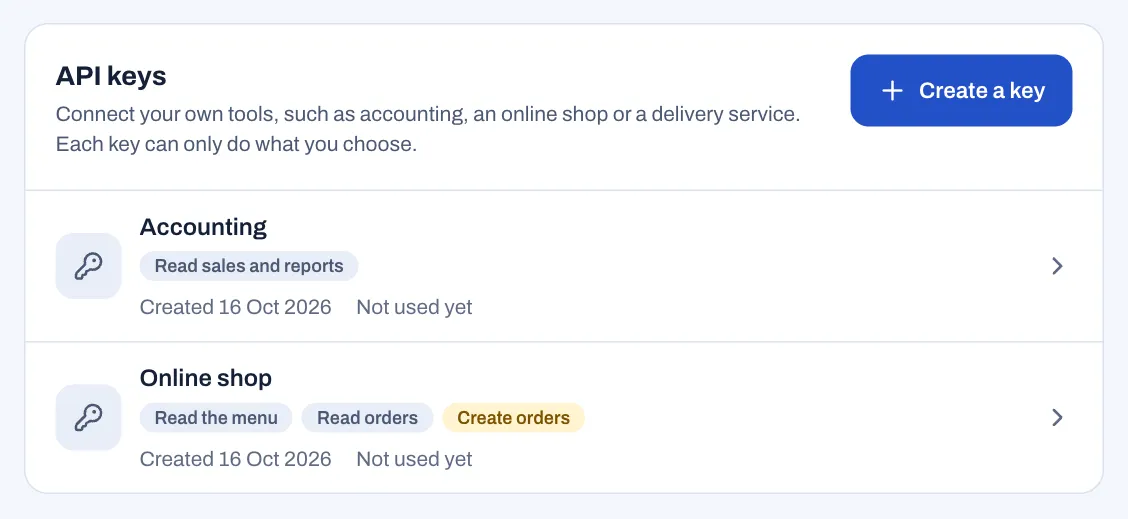
- Change a key: select it, change its Name or what it can do, and select Save. The change applies to the tool's next request.
- Revoke a key: select it, then Revoke key and Tap again to revoke. Anything using the key stops working straight away. This can't be undone.
Good to know:
- Each key works for one location: the one you are in when you create it. A business with several locations creates one key per location.
- A key works on the server where it was made. Keys made in Sofrito Cloud work with Sofrito Cloud. Keys made on a hub work with that hub only, on the restaurant's network.
- A key can make 120 requests a minute.
- Price and sold-out changes made with a key appear in the audit log under the key's name, and the audit log records when keys are created, changed and revoked.
- Under API guide, the Address is where tools send their requests, ready to copy. Select Read the API guide for the full guide with examples, and share it with your developer.
#Export your data
Your data is yours. Everything below downloads as a file you keep:
| What | Where | Who can |
|---|---|---|
| Everything: the menu and its prices and options, orders and their dishes, payments, refunds, the team and roles, time cards, guests, gift cards, stock items, stock levels and suppliers | Settings › Account › Everything, as CSV files, one ZIP file | Export data |
| Sales, payments, dishes, staff and kitchen figures | Reports, the Export button on each table | View reports |
| Fiscal documents (CSV) and the SAF-T file, where your country has one | Taxes & fiscal › Exports | Export data |
| Guests and loyalty points | Guests & loyalty › Export CSV | Manage guests and loyalty |
| A guest's house account statement | Guests & loyalty, the guest, House account › Statement › Download | Manage guests and loyalty |
| Hours, labour cost and tips per shift | Team & roles › Timesheets › Export CSV | Manage the team |
| The audit log | Audit log › Export | View the audit log |
Everything except the SAF-T file comes as CSV files that open in Excel, Numbers or Google Sheets. Everything, as CSV files is on Sofrito Cloud and on Sofrito Hub, and the audit log records each one as "Everything exported". Fiscal documents have their own export in Taxes & fiscal. See Dashboard and reports, Taxes, receipts and legal documents, Guests, loyalty and gift cards and Your team, roles and PINs.
On Sofrito Hub, all your data lives in the hub's data folder on the restaurant's computer. Every day at 04:00, the hub copies its database into the backups folder inside the data folder, and keeps the last 30 copies. Copy that folder somewhere else from time to time, so a broken disk doesn't take your data with it. See Sofrito Hub and working offline.
#Close your Sofrito Cloud account
Only an owner can do this, and only on Sofrito Cloud. Everything keeps working for 30 days, and you can change your mind until then. After that, Sofrito Cloud deletes the restaurant, its team, guests, menu and orders for good.
- In the back office, select Settings › Account.
- Under Before you close, download what you need to keep. Everything, as CSV files downloads one ZIP file at once. Reports, Fiscal files and Guest list open the page with that export.
- Under Close the account, type the restaurant's name exactly as shown above the box. It is the Business name from Settings › Business details.
- Type Your password.
- Select Close the account.
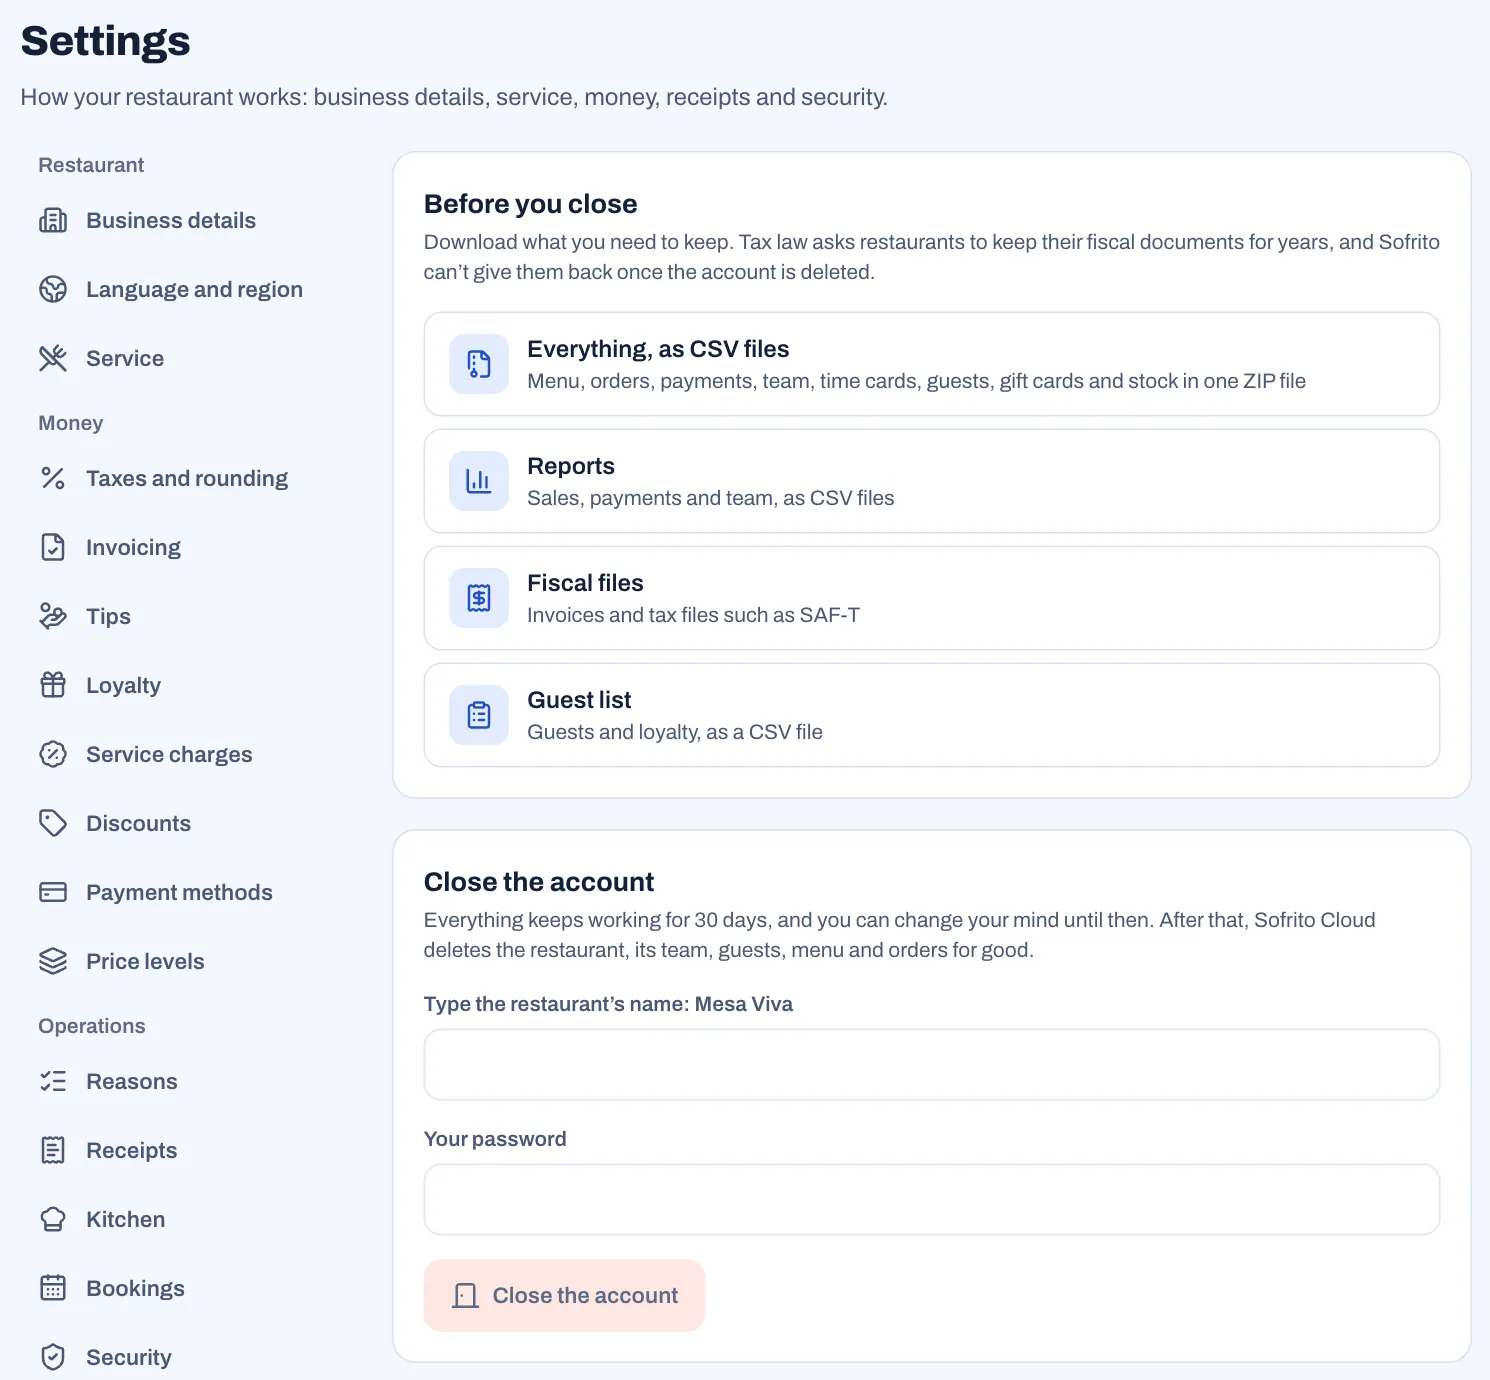
From then on, every back-office page shows "This Sofrito Cloud account closes on {date}. Its data will then be deleted." with a See details link. Tills and handhelds keep working until that date.
To change your mind before the date:
- Select See details, or Settings › Account.
- Select Keep the account.
The account stays open, and the message goes away. The audit log records both closing and keeping the account.
On Sofrito Hub there is no account to close. Settings › Account says "Your data stays on this computer" and offers Everything, as CSV files. To delete the data, export what you need to keep, uninstall Sofrito Hub and delete its data folder on that computer.
#Good practice
- Give everyone their own PIN, and back-office passwords only to the people who need the back office.
- Read Reports › Exceptions every morning and look at the audit log when something doesn't add up.
- Revoke lost or replaced devices the same day.
- Create one API key per tool, with only what it needs, and revoke keys you no longer use.
- Download your fiscal files and reports every month, and keep a copy of Everything, as CSV files.
For partners and installers
Partners are POS dealers, IT firms and consultants who set Sofrito up for restaurants and look after them. The partner portal is where you add a restaurant for a client in about a minute, hand the owner their sign-in details, put your own brand on the restaurants you add, share your referral code, and see which restaurants are busy and which have gone quiet. This chapter is for partners and installers.
Before you start
- The partner portal is part of Sofrito Cloud, at go.sofritopos.app/partners. A Sofrito Hub runs one restaurant on site and has no partner portal: its /partners page says "The partner portal is on Sofrito Cloud" and offers Open Sofrito Cloud.
- Your partner account is separate from any restaurant's back office. To sign in to a restaurant, use the restaurant's own sign-in page (see Support a restaurant).
#Become a partner
- Open go.sofritopos.app/partners in your browser.
- Select Become a partner.
- Type your Company name, your Email and a Password of at least 10 characters.
- Select Create partner account.
You start as a Registered partner and can add restaurants straight away. Your company name and partner level show at the top right of every page.
Next time, select Sign in, type your email and password, and select Sign in. You stay signed in on that browser for 30 days. After that, the portal says "Your partner session has ended. Please sign in again." Select Sign out at the top right when you use a shared computer. The globe button at the top switches the portal between English, Portuguese, Spanish and French.
#See your restaurants
Restaurants opens first. It lists the restaurants you set up for your clients, and those that signed up with your referral code.
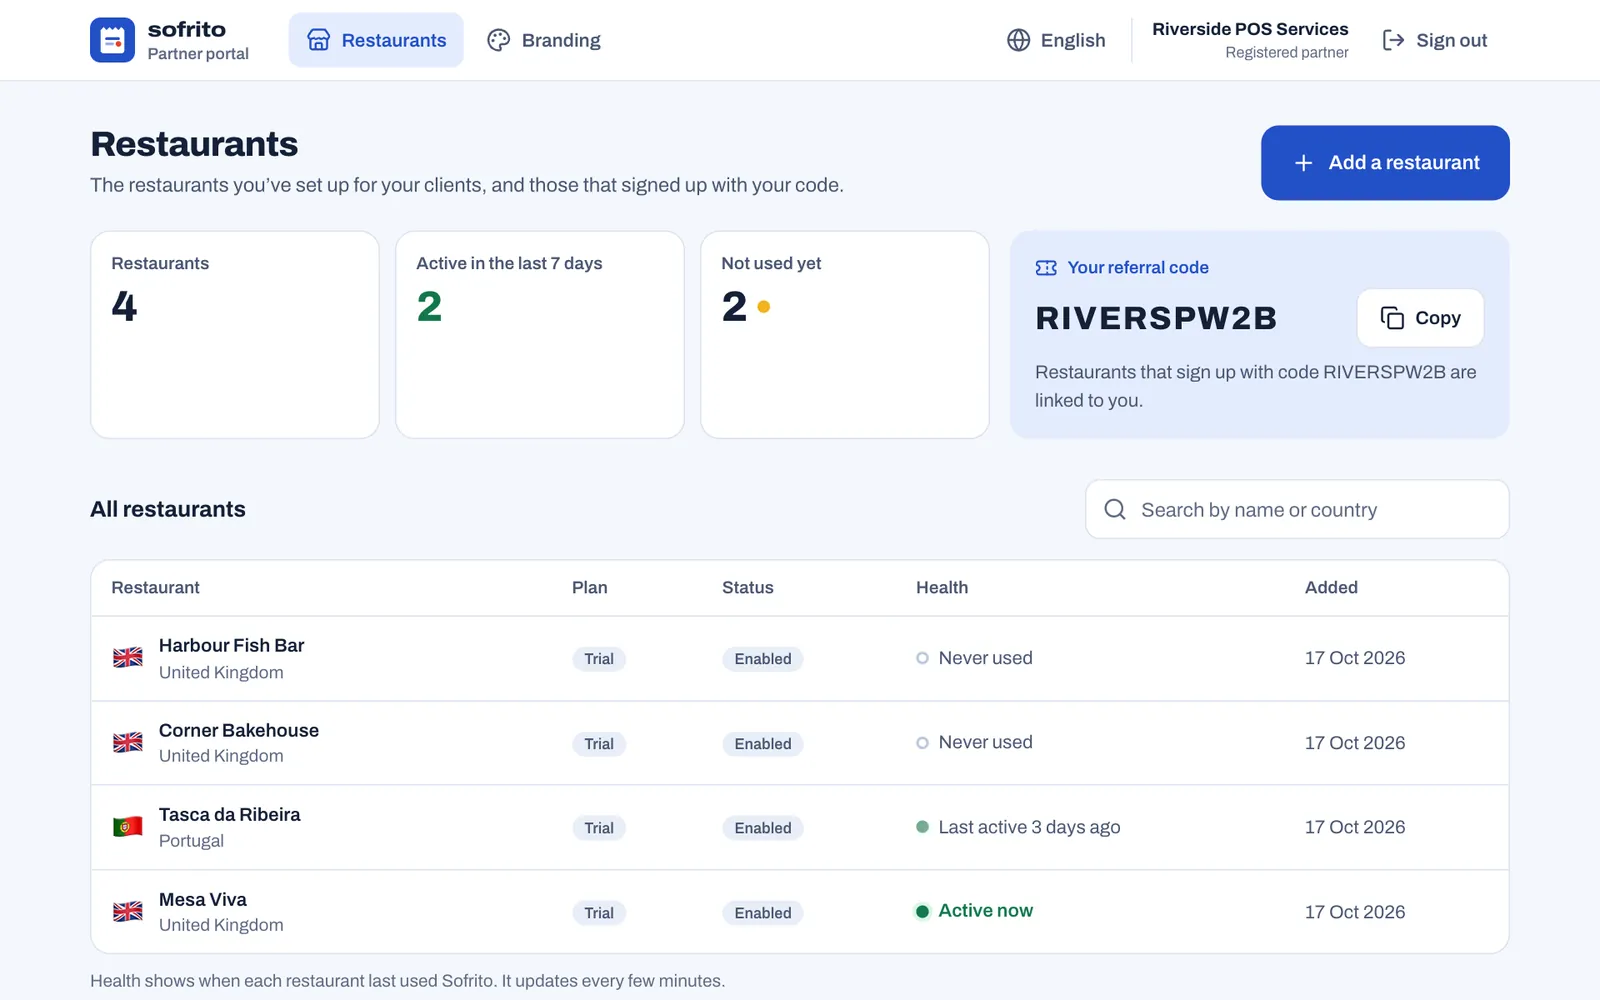
- Restaurants: how many restaurants are linked to you.
- Active in the last 7 days: how many used Sofrito in the past week.
- Not used yet: how many have never been used since you added them.
- Your referral code, with a Copy button (see Link restaurants with your referral code).
The list shows each restaurant's country, Plan, Status (Enabled, Suspended or Closed), Health and the date it was Added. Search by name or country.
Health shows when each restaurant last used Sofrito:
| Health | Means |
|---|---|
| Active now (green) | Someone used Sofrito there in the last 15 minutes. |
| Last active (green dot) | Used within the last week, for example "Last active 3 days ago". |
| Last active (yellow dot) | Nobody has used Sofrito there for more than a week. |
| Never used | Nobody has signed in since you added it. |
Health updates every few minutes while the page is open.
#Add a restaurant for a client
- On Restaurants, select Add a restaurant.
- Type the Restaurant name.
- Choose the Country. It sets the currency, taxes and receipts.
- Under How do they serve?, choose Table service, Counter service, Café or bakery, Bar or Food truck or kiosk. It sets the order types and how the till works.
- Under Owner, type the owner's First name, Last name and Owner's email. The owner signs in with this email.
- Optional: turn on Add a sample menu and team, for a demo or training. It can be removed in one step later, even after practice sales.
- Select Add restaurant.
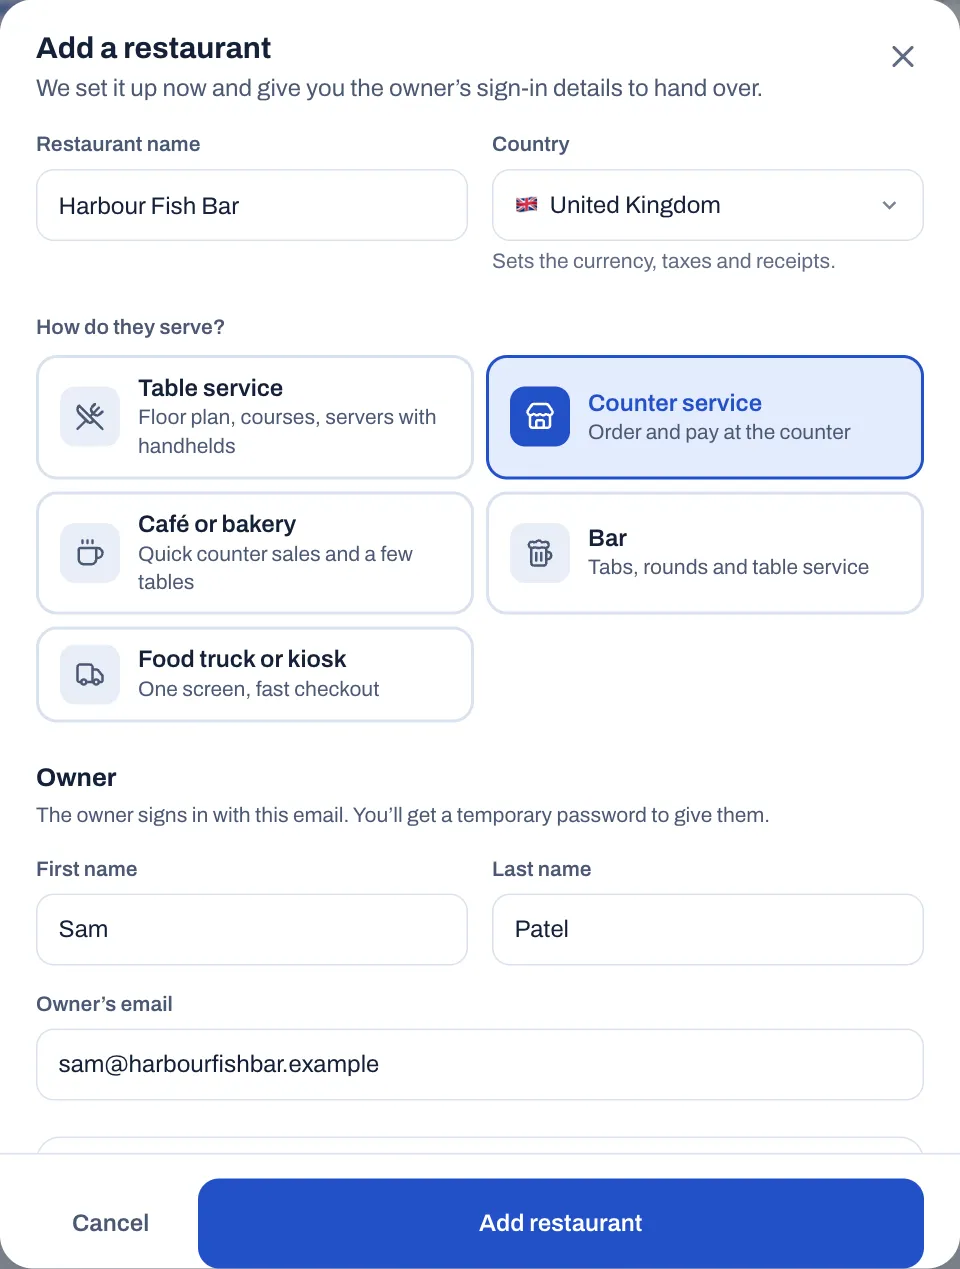
Sofrito Cloud sets the restaurant up as if the owner had done it: the country's taxes, receipts and payment methods, the service style, and the owner's account with a temporary password and a PIN. Your branding is applied (see Put your brand on your restaurants).
#Hand the restaurant over
As soon as the restaurant is ready, the window shows the owner's sign-in details:
| Detail | What it is |
|---|---|
| App address | Where the owner signs in: the Sofrito Cloud address. |
| Owner's email | What the owner signs in with. |
| Temporary password | For the owner's first sign-in to the back office. |
| PIN | Unlocks the tills for the owner. |
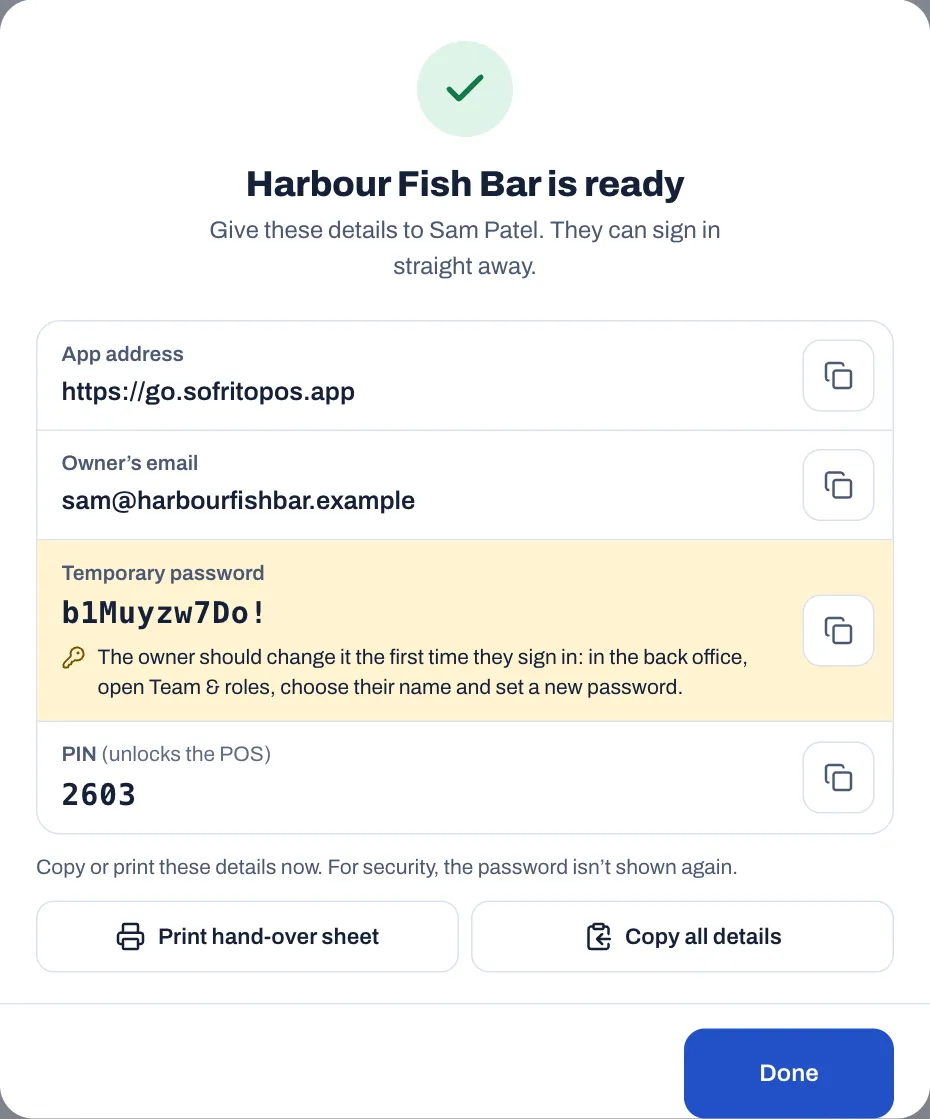
- Select Print hand-over sheet to print a page for the owner, or Copy all details to paste them into a message. Each detail also has its own copy button.
- Select Done.
The printed sheet carries your brand, your company name and your support email and phone, and walks the owner through their first sign-in:
- Open the app address in the browser of a computer or tablet.
- Choose Sign in to the back office and sign in with the email and the temporary password.
- Change the password straight away: open Team & roles, choose your name and set a new one.
- At the till, unlock with the PIN.
Ask the owner to keep the sheet safe and throw it away once they have changed the password. The restaurant now shows in your list as Never used until the owner signs in.
#Put your brand on your restaurants
White label puts your product name and colour on the restaurants you add, in place of Sofrito's.
- Select Branding.
- Type your Product name, up to 40 characters. Leave it empty to keep Sofrito.
- Under Primary colour, select a colour, select the last circle to choose another, or type its code, such as #0F766E, in the box under the colours. It is used for the logo and the main buttons. If the colour is light, Sofrito warns that white text on it may be hard to read.
- Type your Support email and Support phone.
- Select Save branding. To go back to what you had, select Undo changes.
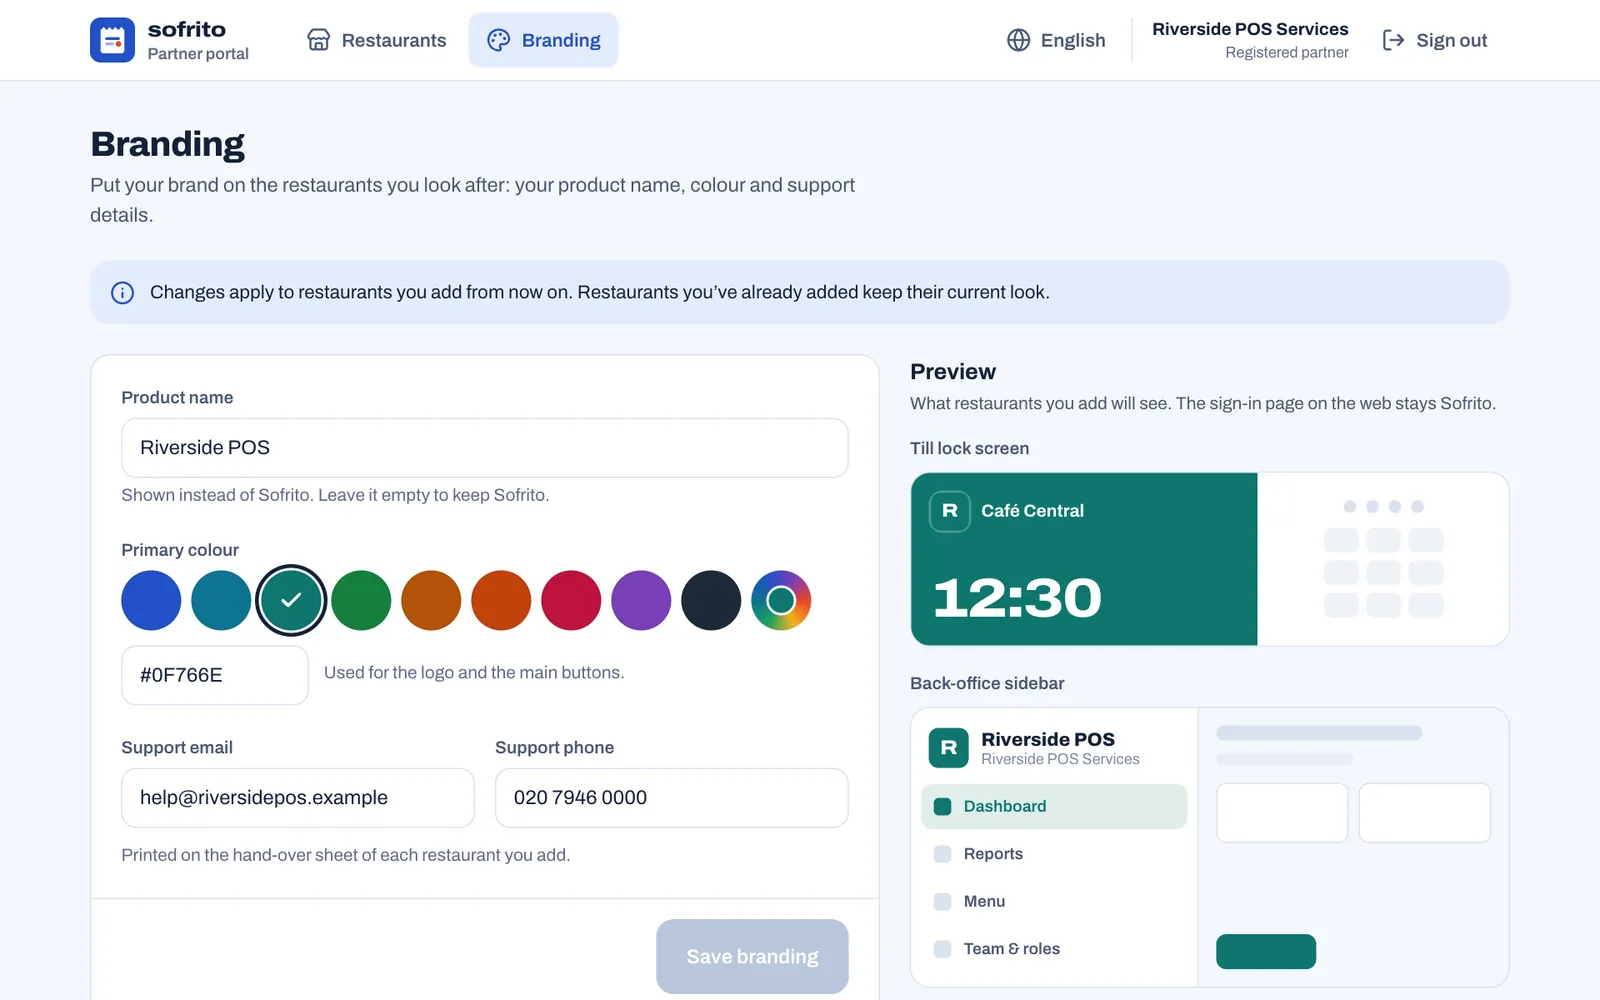
Branding applies to restaurants you add from now on. Restaurants you added before keep the look they had, and restaurants that sign up with your referral code keep the Sofrito look.
The Preview on the right shows what restaurants you add will see: the Till lock screen, the Back-office sidebar and the Printed hand-over sheet. In a restaurant you add, the owner and staff see:
- on the till's lock screen, your colour, with the first letter of your product name as the logo;
- at the top of the back-office sidebar, your product name and its first letter on your colour, with your company name under it;
- your colour instead of Sofrito's blue for the main buttons and highlights, in the back office and on the tills.
Guests never see your product name: the customer display and the pickup board show the restaurant's own logo, or its first letter, and its name. Your support email and phone are printed on the hand-over sheet. The restaurant's sign-in page on the web keeps the Sofrito look, because it opens before the restaurant is known.
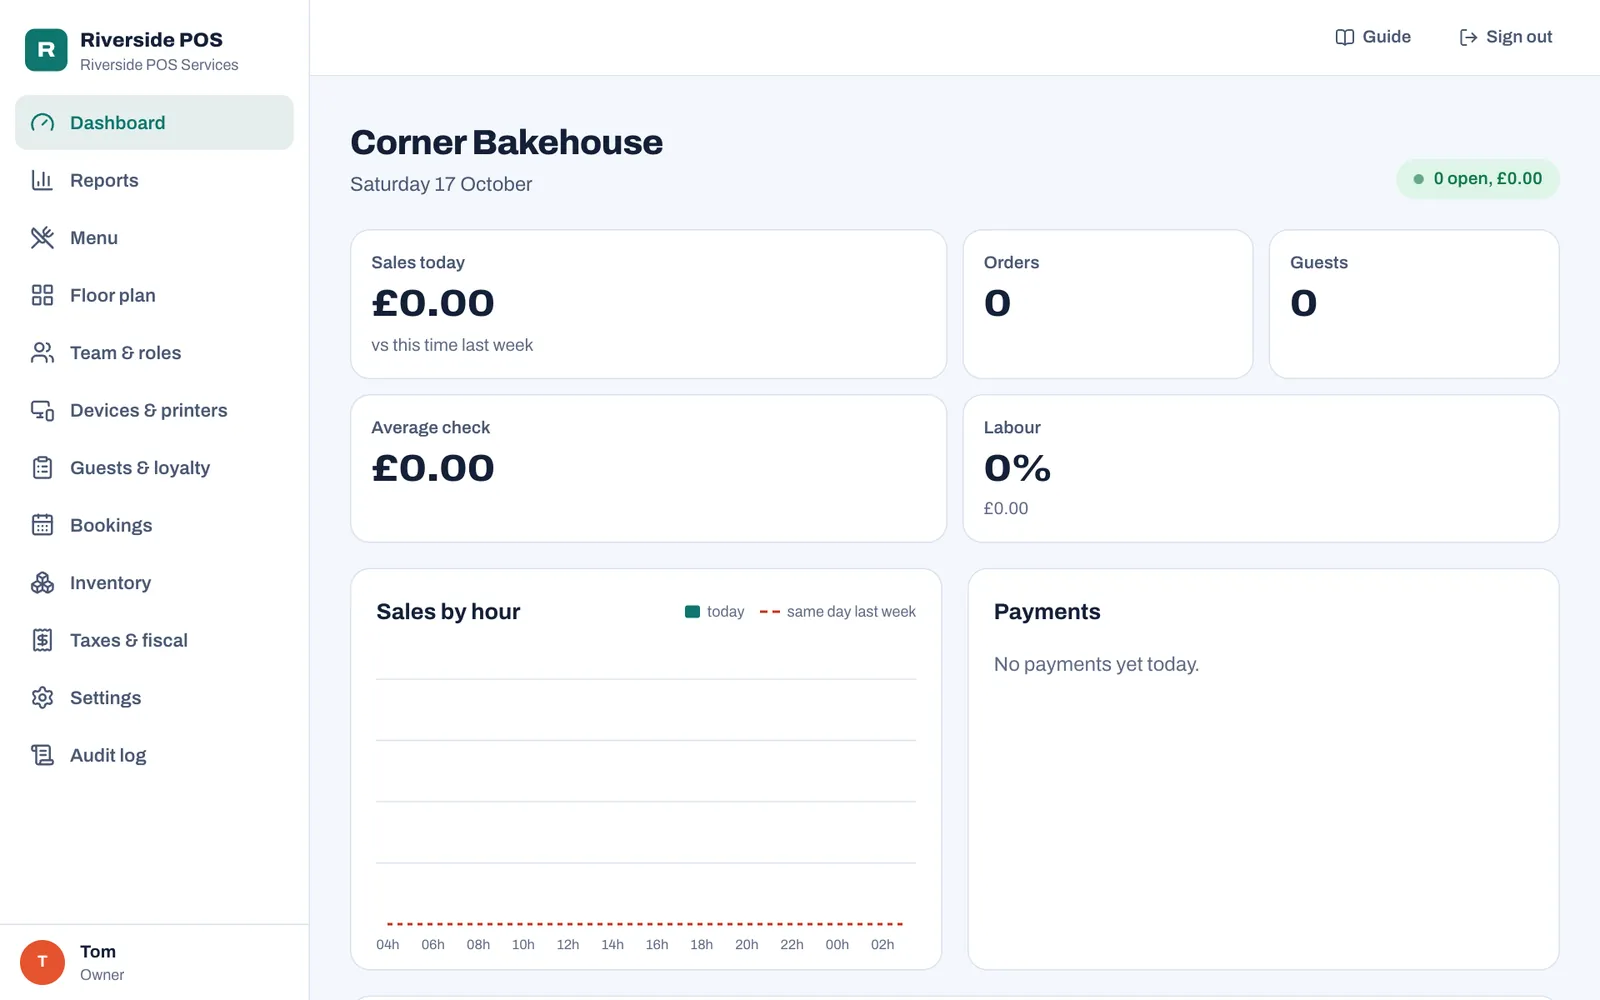
Even without branding, restaurants you add show your company name at the top of their back-office sidebar.
#Link restaurants with your referral code
Some restaurants prefer to create their own account. Your referral code links them to you, so they appear in your list.
- On Restaurants, select Copy next to Your referral code.
- Give the code to the restaurant. When they create their restaurant on Sofrito Cloud, they type it in Partner code (optional), on the last step.
Or send a link that fills the code in for them: add ?partner= and your code to the Sofrito Cloud address, for example https://go.sofritopos.app/?partner=RIVERSPW2B. Sofrito keeps the code while the visitor looks around, and fills it in when they create their restaurant.
Restaurants linked this way show in your list with their health, like the ones you add. They keep the Sofrito look. The code only works when the restaurant is created on Sofrito Cloud. For creating a restaurant, see Create your restaurant.
#Support a restaurant
- Watch Health. A restaurant still Never used a few days after the hand-over needs a call to get started. A yellow dot means nobody has used Sofrito there for over a week.
- Work in their back office. The portal doesn't sign you in to a restaurant. Ask the owner to add you to their team in Team & roles, with a role that can open the back office, your email and a password. Then sign in on the restaurant's sign-in page, Sign in to the back office. The owner can remove you at any time by archiving you. See Your team, roles and PINs.
- Several restaurants, one email. If you are on the team of several restaurants with the same email, Sofrito Cloud asks which one to open when your password works for more than one: select it under Choose a restaurant. With a different password for each, Sofrito opens the restaurant whose password you type.
- Common problems. Most questions from restaurants are answered in Troubleshooting and questions.
#Before you hand over
- Set up the menu, floor plan, team, devices, printers, payment methods and taxes with the owner, or check what they did. Most set-up chapters of this guide end with a list of what to check before going live.
- If you added the sample menu and team, select Remove sample data in the banner at the top of the back office, before the first sale. See Remove the sample data.
- Set every card payment method to Separate terminal: staff confirm the payment. See Payment methods, tips and service charge.
- Take a test order and payment on each till, and check the receipt and the kitchen ticket.
- Print the hand-over sheet, and stay with the owner while they sign in and change their password.
Quick cards for every role
Sofrito creates seven roles with every new restaurant: Owner, Manager, Server, Bartender, Cashier, Host and Kitchen. This chapter gives each role a short card that you can print or keep next to the till. The cards describe the roles as Sofrito sets them up. If your owner has changed a role in Back office › Team & roles › Roles and permissions, what you see may be different.
Before you start
- Everyone has their own PIN. See Your team, roles and PINs.
- The tills, handhelds and kitchen display are paired. See Devices, printers and stations.
#Every role: start and end a shift
Every till and handheld opens on the lock screen. Staff use it to clock in and out, and to sign in with their PIN. The kitchen display has no lock screen: it works as soon as it is paired.
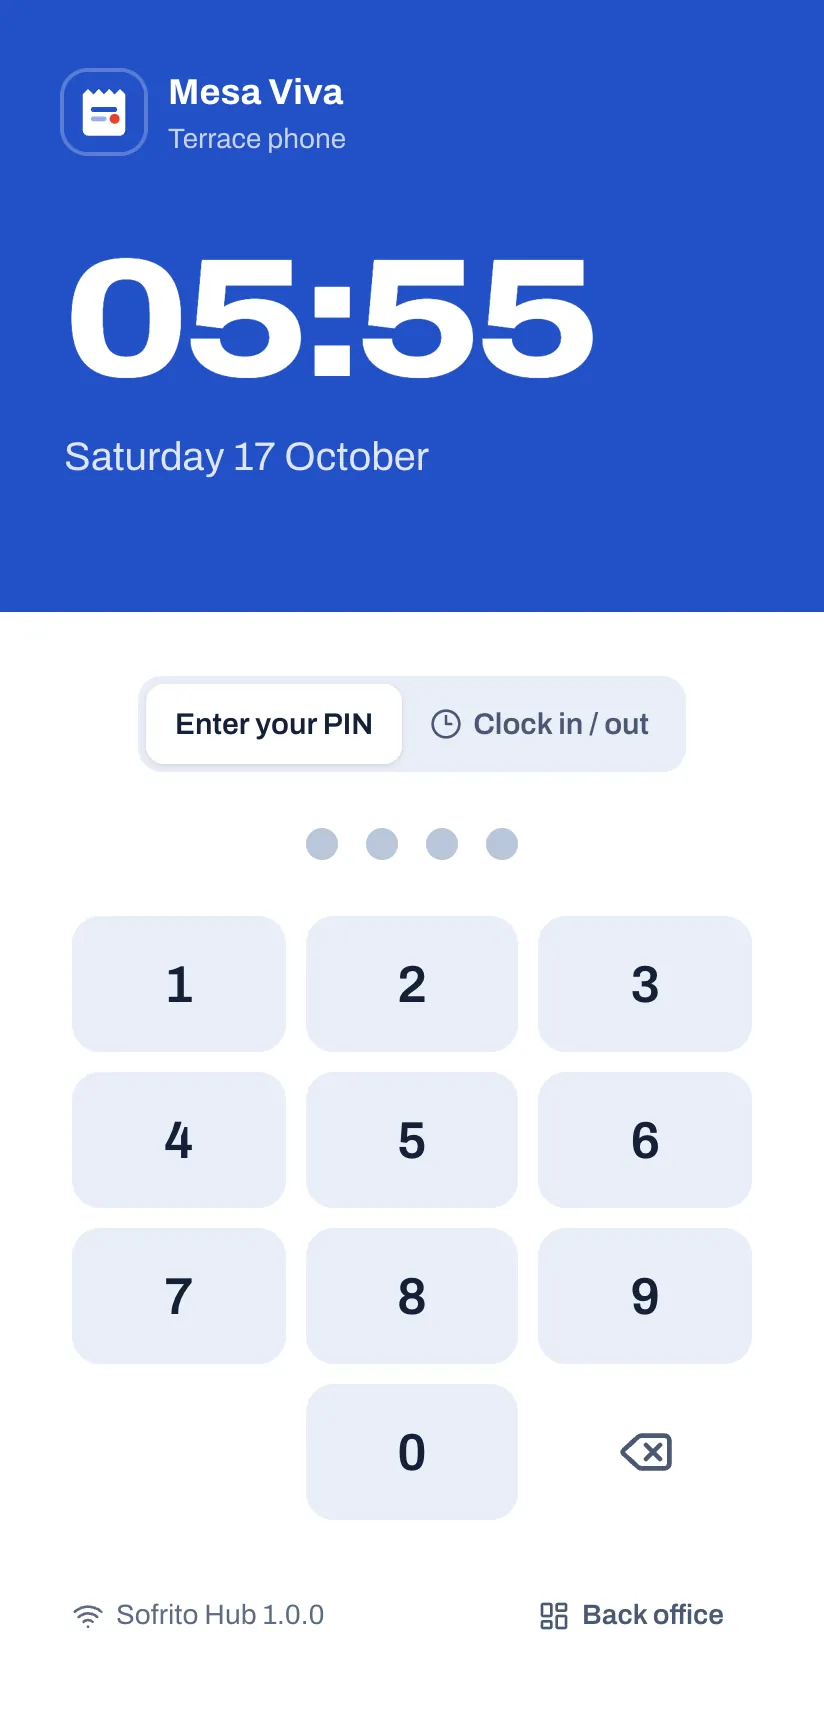
To clock in or out:
- On the lock screen, tap Clock in / out.
- Type your PIN. The till shows, for example, "Ana clocked in".
When you clock out and the restaurant asks guests for tips, the till asks for your Cash tips for this shift: type what guests left you in cash and tap Declare with the amount, or tap No cash tips.
To sign in:
- Tap Enter your PIN.
- Type your 4-digit PIN. The till opens on Floor, or on a new order if your restaurant has no floor plan.
Your PIN only opens devices your role works on. A Kitchen PIN on a till shows "Kitchen can’t sign in on this device.", but it still clocks in and out there.
To lock the till when you walk away, tap your name with Lock at the bottom of the left-hand bar. On a phone, tap the round button with your initial and a padlock at the top right. The till also locks itself after 90 seconds without a touch. In counter service and food trucks, it locks after every payment too. A manager changes both in Back office › Settings › Security.
More has your shift card. Once you are signed in, it shows Clock in if you haven't clocked in yet. During the shift it has Unpaid break and Paid break (tap End break when you are back), Declare cash tips and Clock out. More also has the Language (English, Português, Español or Français) and Theme for that device.
On a phone, the bottom bar shows the first four buttons and More. The others, such as Bookings and Cash, are buttons at the top of More.
If you type a wrong PIN, the dots shake. After five wrong PINs in a row, that device stops taking PINs for a short time and shows "Too many wrong PINs. Try again in a moment." If you forget your PIN, a manager gives you a new one in Back office › Team & roles.
#Server
Takes orders at the table on a handheld or the till, sends them to the kitchen and bar, and takes payment.
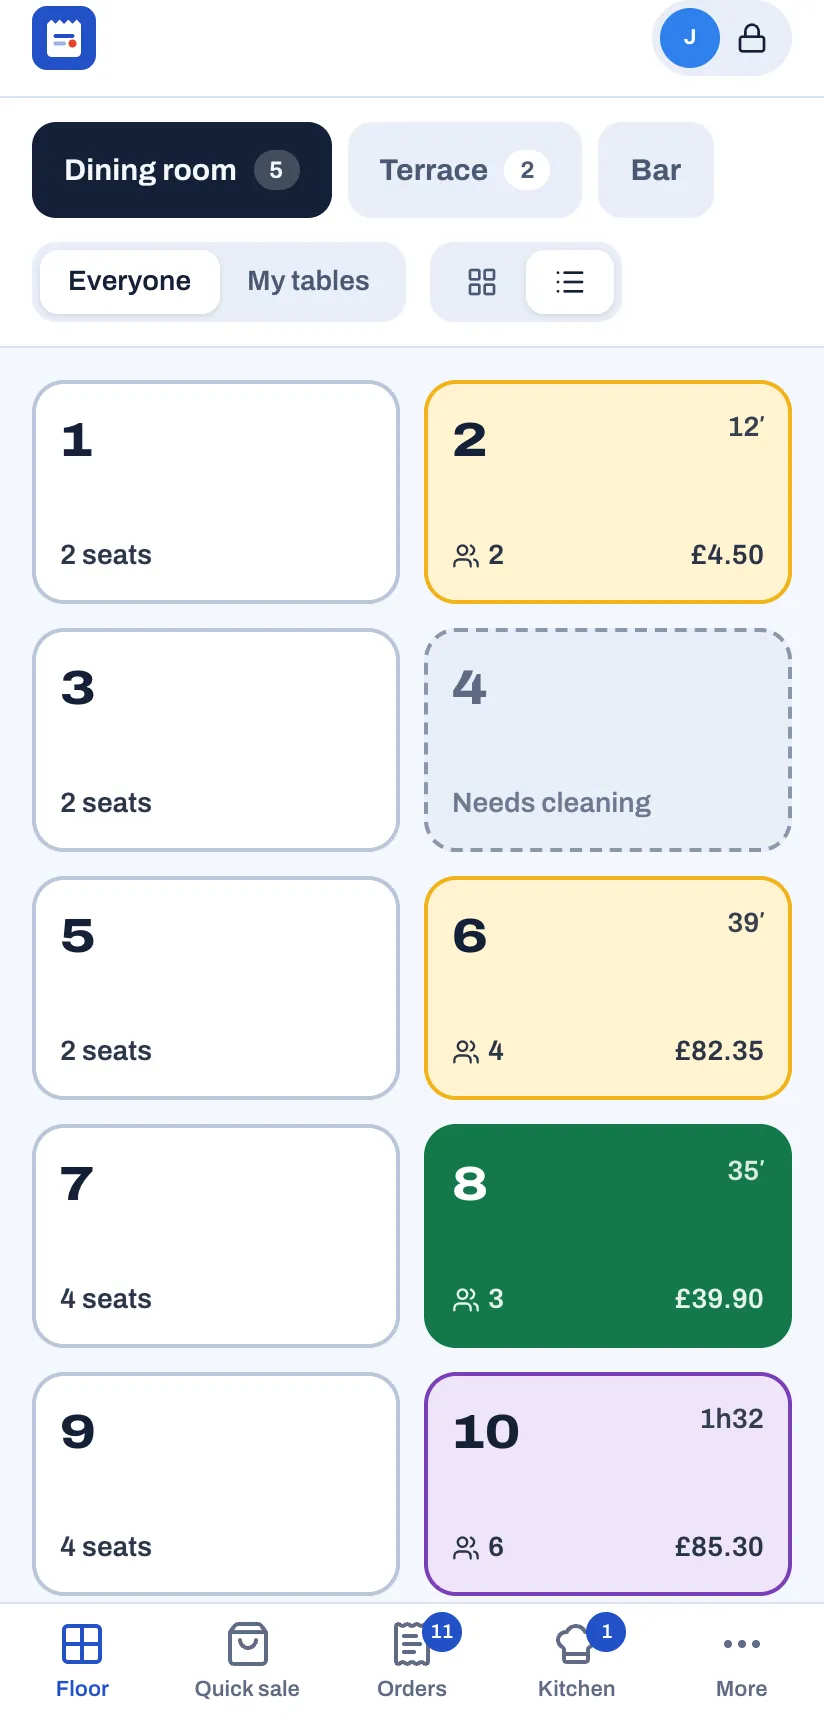
Your buttons
- Floor: the tables. My tables shows only yours and Everyone shows them all. Tap a free table, answer How many guests? and the order opens.
- On the order, tap dishes to add them. Pick a seat (Shared, S1, S2 and so on) before you tap the dishes. On a till you can also pick the course; otherwise each dish takes its course from the menu (By menu).
- Send (or Send 3) sends the new items to the kitchen and bar. The hourglass (Hold) holds them back: they show Held until you tap Fire with the course, for example Fire Mains.
- Pay takes payment. Print check prints the bill.
- The ••• button on the order opens its other actions: Discount, Service charge, Rename, Print check, Guests, Move table, New separate check, Hand over to…, Split check, Merge checks, Add guest, Rush and Void order.
- Tap an item already saved or sent to change it, for example Change price or Void.
- Kitchen lists the food that is ready (Food ready) and still cooking (Cooking). Tap Done when you take a dish out. On the order, Served: 2 ready on the pass does the same.
- When the kitchen marks your food ready, your device chimes and shows, for example, "Table 6 is ready".
- Press and hold a dish to see its price, description and allergens, or to mark it sold out (Mark sold out, Put back on sale).
Needs a manager's PIN
When you need a manager, the till opens Manager approval. The manager types their PIN and taps Approve. You need one for:
- voiding items already sent to the kitchen, or voiding an order that has sent items
- comps (items on the house)
- discounts above the limit (10% unless your owner changed it) and discounts marked Manager PIN, such as Manager 10% and Friends & family 20%
- charging a different price from the menu (Change price)
- refunds and reopening a closed order
- Pay in, Pay out, Cash drop and No sale on the cash drawer
- changing a check another server opened: adding items, voids, discounts, moving, splitting or merging it. Sending, printing the check and taking payment don't need a manager. A check with nothing on it yet, such as one a host opened, becomes yours when you add its first dishes.
Only managers and owners see Close the day (Z).
Start of shift
- Clock in and sign in.
- Check your handheld is charged and shows no red, crossed-out Wi-Fi symbol.
- On Floor, check your section, the Reserved tables and any table that Needs cleaning.
- Ask the kitchen what is sold out. Sold-out dishes show Sold out on their tiles.
- Look at Bookings for large parties and notes.
End of shift
- Make sure every check you opened is paid. Give tables that stay open to a colleague: on the order, tap the ••• button, then Hand over to….
- Open Orders and check nothing is left under your name.
- Give any cash you collected to the cashier or manager. Sofrito has already counted it in the open cash drawer.
- Lock the handheld, then clock out and declare your cash tips.
#Bartender
Serves drinks, runs bar tabs and takes payment at the bar. A bartender has the same permissions as a server.
Your buttons
- Quick sale starts an order without a table. The buttons at the top choose its kind, for example Takeaway or Bar tab. Type the guest's name in the box at the top ("Called out when ready"), add the drinks and tap Send.
- Orders lists every open tab. Search by name or order number to find one.
- Drinks set up for the Bar station print on the bar printer, or appear on a kitchen display that shows the bar.
- Pay splits a tab evenly (÷2 to ÷6) or takes Other amount. Tip buttons appear when tipping is on.
- Floor, Kitchen, Bookings and the ••• button work as they do for servers.
Needs a manager's PIN
The same actions as a server: voids of sent items, comps, discounts above the limit, price changes, refunds, reopening, Pay in, Pay out, Cash drop and No sale, and changes to a tab someone else opened.
Start of shift
- Clock in and sign in.
- Tap Cash. If it shows No drawer is open, tap Open drawer, count the cash, type it as Starting cash and tap Open drawer.
- Tap More. Under Printers, the bar printer should show Online. Tap Print test page if in doubt.
- Check which drinks are Sold out.
End of shift
- Close every tab, or hand open tabs to a colleague with the ••• button and Hand over to….
- If you are responsible for the drawer, count it: see the cashier's end of shift below.
- Tap Cash › Shift report (X) if your manager wants the takings so far on paper.
- Lock the till, then clock out and declare your cash tips.
#Cashier
Takes payment at the counter or the till, looks after the cash drawer and counts it at the end of the shift.
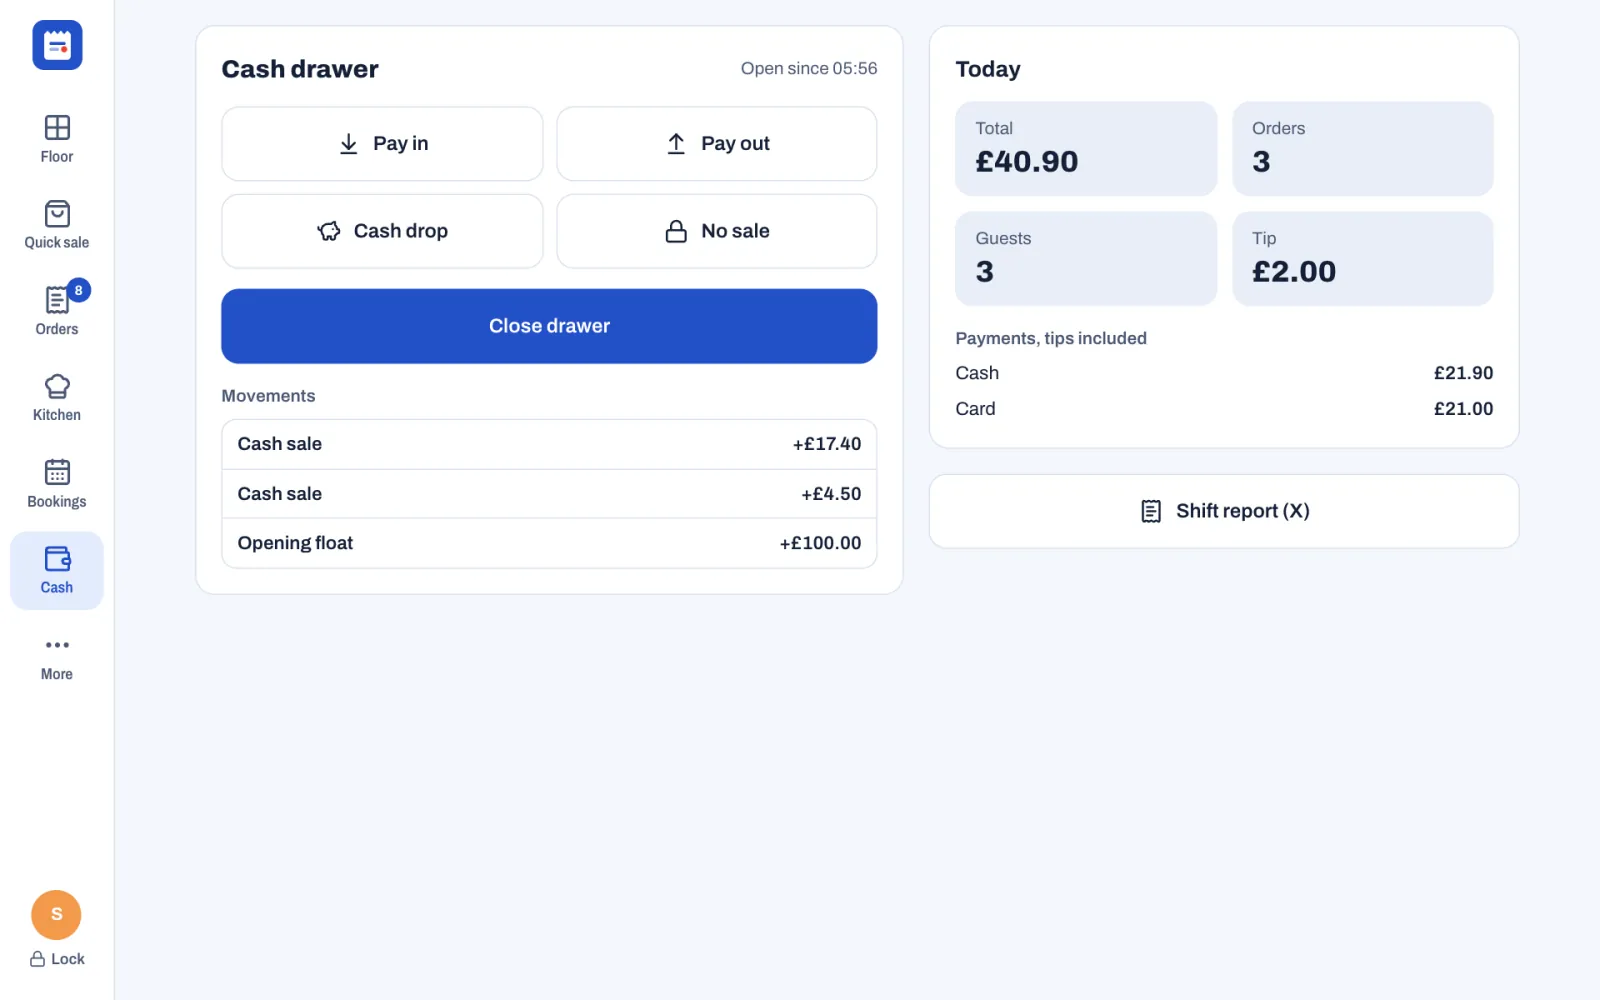
Your buttons
- Quick sale (or New order when there is no floor plan) for counter orders. Type the guest's name when the till asks: it is called out when the order is ready.
- Pay, then the payment method:
- Cash: type the Cash received or tap a quick amount such as Exact. Sofrito shows the Change to give back.
- Card: tap Charge with the amount (for example Charge £24.50), take the card on your card terminal, then tap Approved once the terminal shows it approved.
- Mobile money: type the transaction Reference from the guest's phone.
- You can take payment for any server's check: paying never needs a manager.
- Invoice with VAT No. adds the customer's tax number, name and address to the document. The button uses your country's name for the number, such as Invoice with NIF in Portugal.
- Cash: Pay in, Pay out, Cash drop, No sale, Close drawer, today's totals and Shift report (X).
- More › Sell or check under Gift cards sells a gift card, tops one up or checks what is left on it.
- Orders › Closed: open a paid order to Reprint receipt.
Needs a manager's PIN
- any discount, because the Cashier role has none
- Move table, Hand over to… and Merge checks
- voids of sent items, comps and price changes
- Refund and Reopen on a closed order
- Pay in, Pay out, Cash drop and No sale
- adding to or changing a check a server opened, once it has items on it
Only a manager signed in as themselves sees Close the day (Z).
Start of shift
- Clock in and sign in.
- Tap Cash. If it shows No drawer is open, tap Open drawer. Count the cash in the drawer, type it as Starting cash (Sofrito suggests the float from Settings, £100.00 in the demo) and tap Open drawer. The drawer opens.
- Check the receipt printer has paper. More › Printers › Print test page prints a test.
If someone takes cash, refunds cash or sells a gift card for cash before the drawer is open, the Starting cash window opens first. Count the drawer, type the amount and tap Open drawer: the payment then goes ahead.
End of shift
- Open Orders and make sure no counter order is left open.
- Tap Cash › Close drawer. Type how many of each note and coin you have. The total shows as Counted.
- Tap Close drawer. Sofrito shows Expected, Counted and Over / short, and prints the drawer report. You see the expected amount only after you count. Tap Done.
- Tell your manager about any difference.
- Tap Shift report (X) if your manager wants it, then lock the till and clock out.
#Host
Welcomes guests, takes bookings, runs the waitlist, seats guests and keeps an eye on the tables.
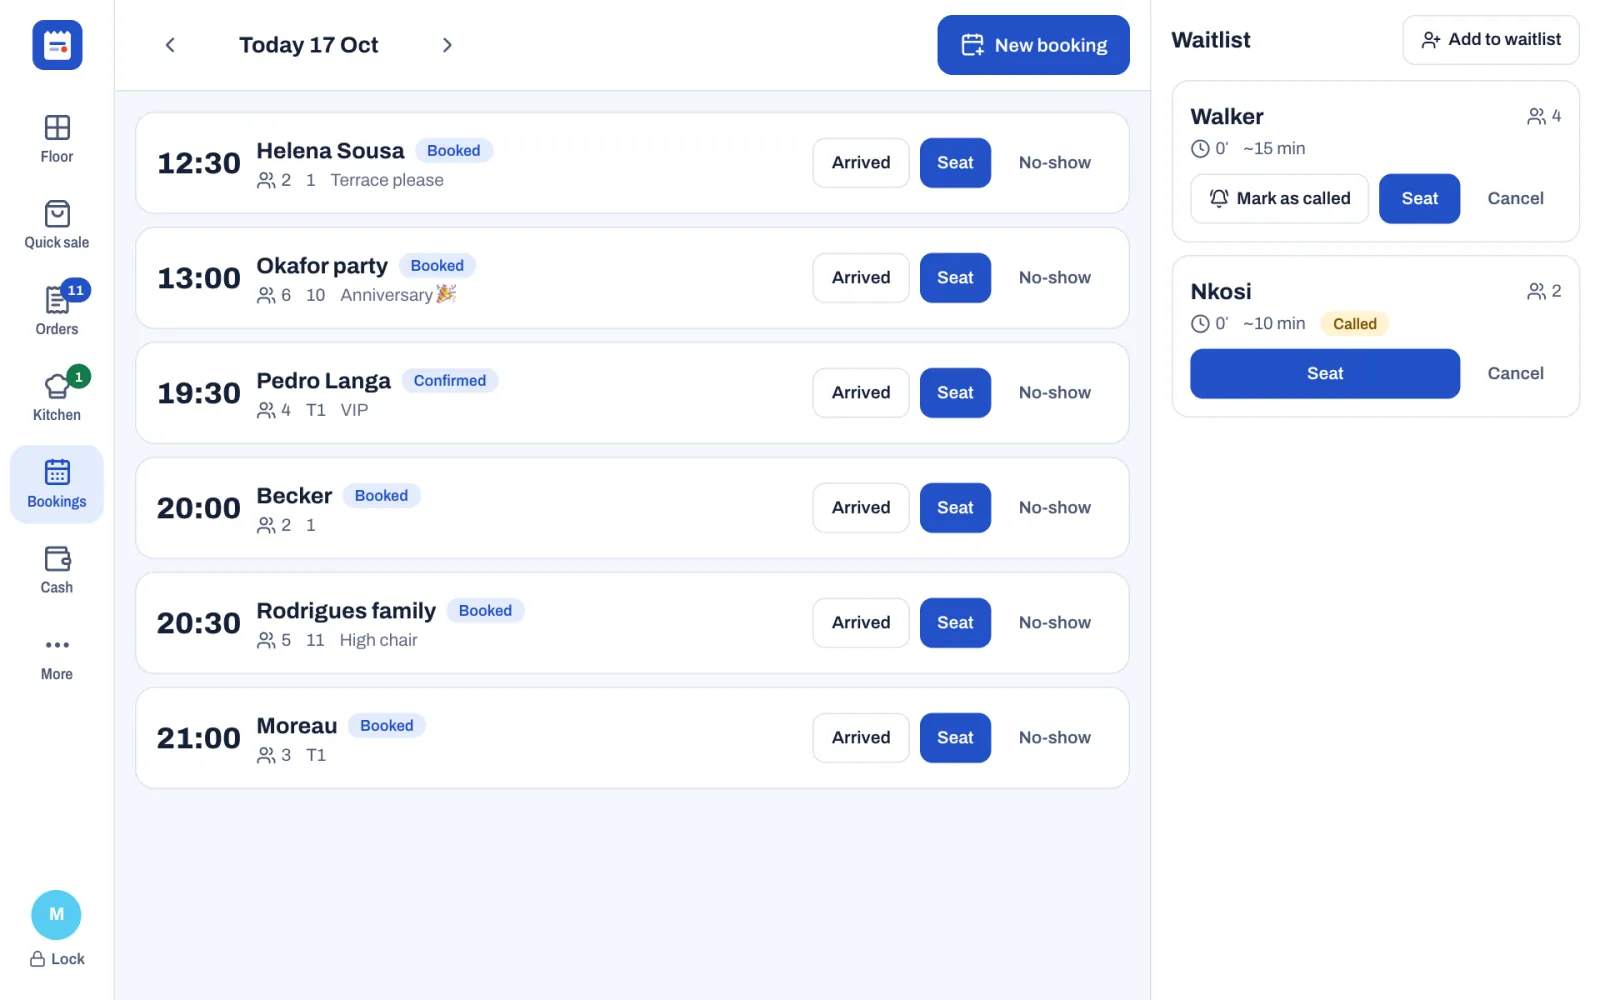
Your buttons
- Bookings: today's bookings, each with its status, such as Booked, Confirmed or Arrived. The arrows change the day. New booking adds one. On each booking: Arrived, Seat and No-show. Tap a booking to change it, move it with Date, or cancel it with Cancel booking (tap again to confirm).
- Seat on a booking: choose the table. Sofrito opens the table's check and you stay on the floor plan.
- Waitlist: Add to waitlist records the party and quotes a wait, for example "~15 min", or No wait when a table is free. Tap Mark as called when you have told the guests their table is ready (the party then shows Called), Seat to give them a table, and Cancel if they leave.
- Floor: what each table is doing: Free, Seated, Cooking, Food ready, Check printed, Needs cleaning, Blocked or Reserved with the booking time. To seat guests who walk in, tap a free table and answer How many guests?: the till shows Seated with the table, for example "Table 3". Tap a table that Needs cleaning and then Mark as clean once it is ready.
Needs someone else
- Taking orders and payments: a server or a manager does that once the guests are seated.
- A check you open when you seat guests is in your name until a server adds the first dishes to it. It then becomes theirs, without a manager's PIN.
Start of shift
- Clock in and sign in.
- Read today's Bookings: large parties and notes such as "High chair".
- On Floor, check the Reserved tables and any table that Needs cleaning.
End of shift
- Mark guests who never came as No-show.
- Cancel waitlist parties that have left.
- Look at tomorrow's bookings with the arrow.
- Lock the till and clock out.
#Kitchen
Cooks and plates the food from the kitchen display.
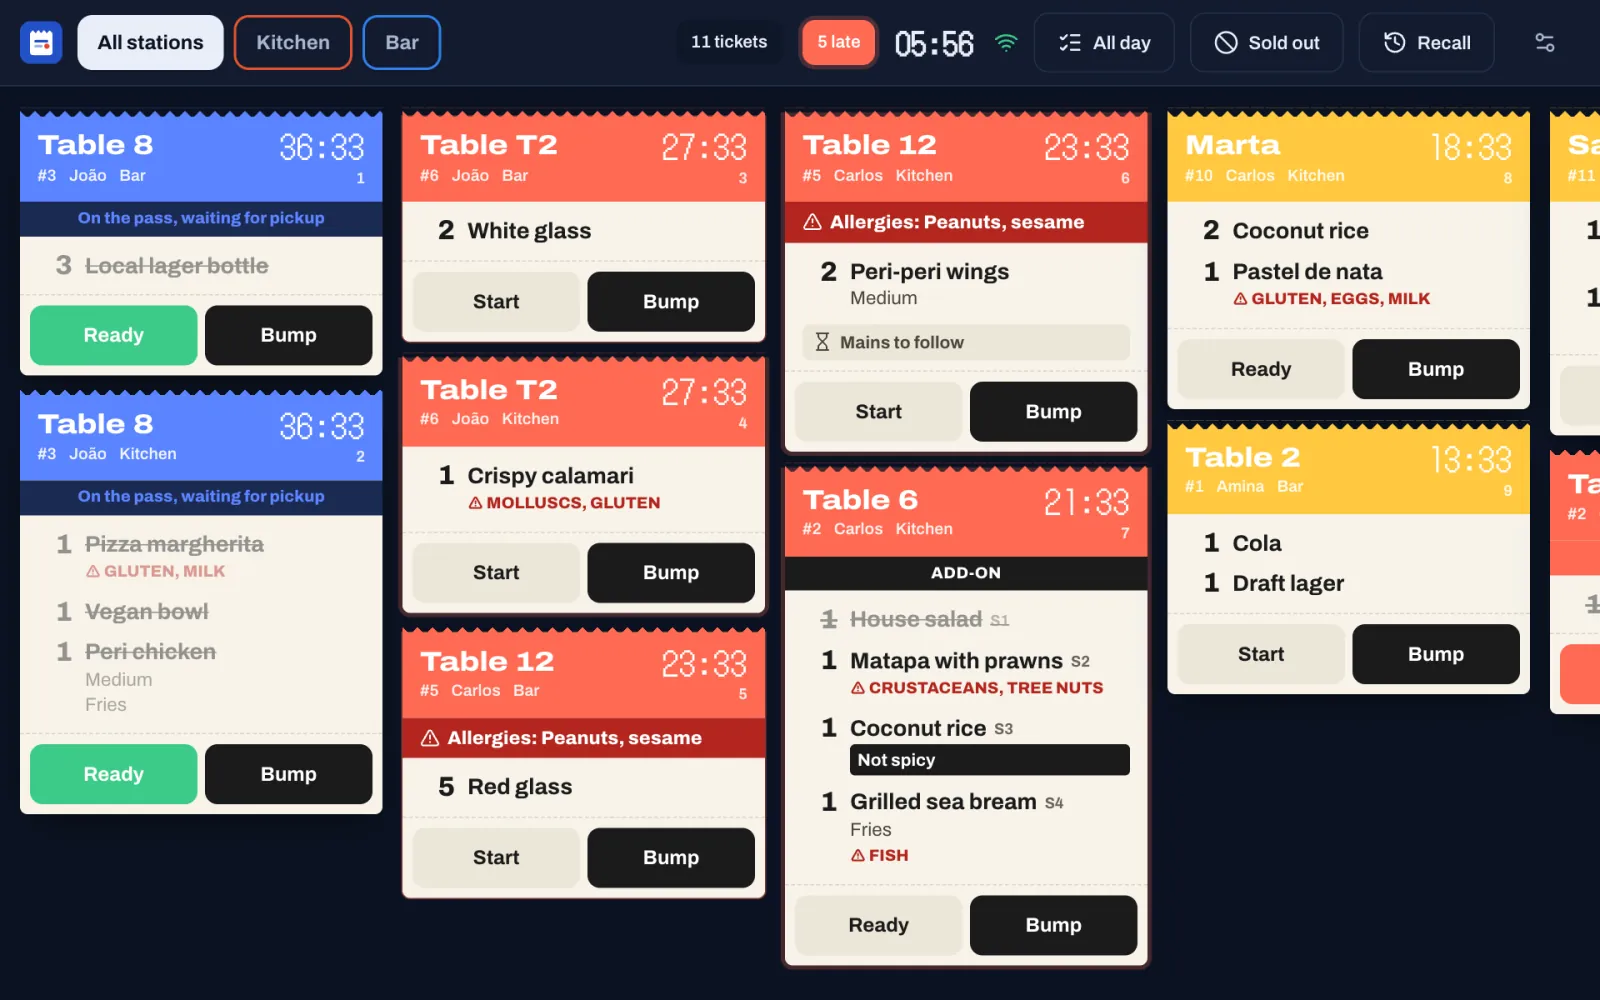
Your buttons (on the kitchen display)
- Tickets arrive by themselves, with a beep. Each shows the table or the guest's name, the order number, the server, the station and the minutes since it was sent.
- The ticket turns from green to yellow after 10 minutes and to red after 20 minutes, when it counts as late. A manager changes the times in Back office › Settings › Kitchen.
- Tap Start when you start cooking and Ready when the food is on the pass. The ticket turns blue ("On the pass, waiting for pickup") and the server is told. Tap Bump to clear it.
- Tap a dish on a ticket to cross it out when it is done. Once every dish is crossed out, the ticket counts as ready.
- Banners: RUSH, FIRE (cook the next course) and ADD-ON (items added to a table you are already cooking for). "Mains to follow" means the server is holding the next course: its dishes arrive when they fire it.
- A VOID ticket means stop: those dishes were cancelled. It stays, with its own sound, until you tap Got it, even if you had already bumped the dish.
- A red "Allergies: …" band lists the guest's allergies on every ticket of their order. Allergens show in red with a warning sign, kitchen notes in a black box, and options such as "NO onion" in red.
- All day counts every dish still to cook. Recall brings back a ticket you bumped by mistake.
- All stations and the station buttons (Kitchen, Bar) choose which tickets this screen shows.
- With a bump bar or a keyboard, keys 1 to 9 bump the first to ninth ticket, and R recalls the last one.
- Sold out lists the dishes your stations make. Tap a dish to mark it sold out, put it back on sale or set how many are left. Every till and handheld follows at once.
Needs a manager
Nothing on the kitchen display. Servers and managers cancel dishes on the till; you then see a VOID ticket.
Start of shift
- Clock in on a till: Clock in / out, then your PIN. Your Kitchen PIN doesn't open the till itself.
- Check the kitchen display shows a green Wi-Fi symbol and the right stations.
- Tap the screen once. A kitchen display that has just started stays silent until someone touches it.
End of shift
- Bump every ticket that has gone out. Check Recall for anything bumped by mistake.
- Tell the manager what has run out, or mark it in Sold out.
- Clock out on a till.
#Manager
Runs the shift: approves voids, comps and discounts, looks after the cash, closes the day and uses the back office.
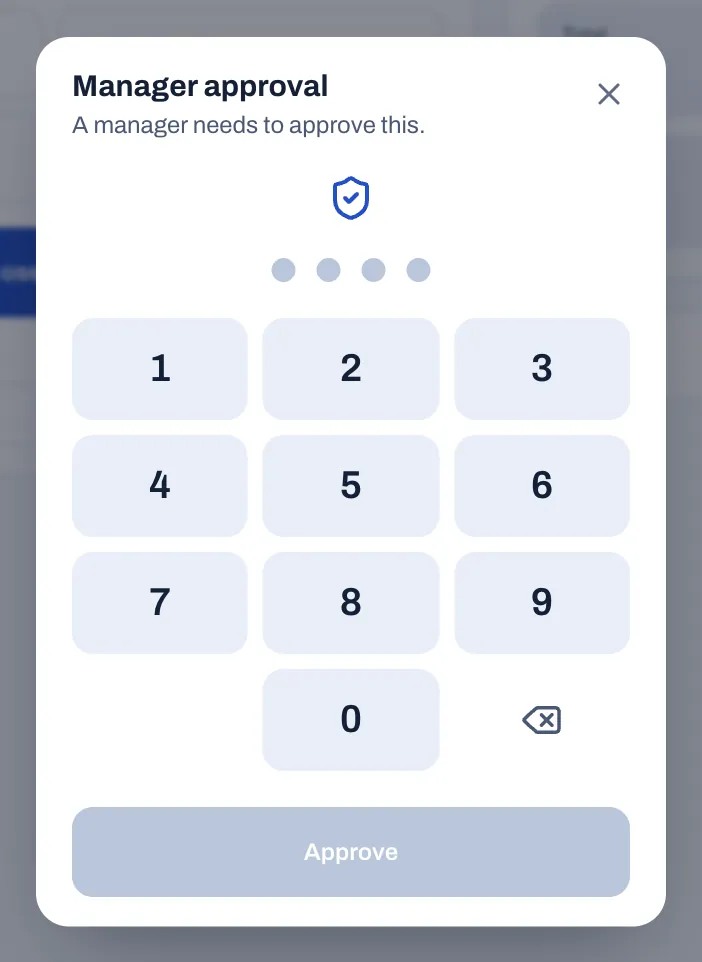
Your buttons
- Everything servers and cashiers use, with no approvals needed.
- Manager approval: when staff need you, type your PIN on their device and tap Approve. Sofrito records you as the person who approved.
- Cash: Pay in, Pay out, Cash drop, No sale, Close drawer, Shift report (X) and Close the day (Z).
- Orders › Closed: Refund, Reopen and Reprint receipt.
- The back office: tap More › Back office while you are signed in, or sign in from any browser with your email and password. On a till, it locks again after 5 minutes without a touch. It has Dashboard, Reports, Menu, Floor plan, Team & roles, Devices & printers, Guests & loyalty, Bookings, Inventory, Taxes & fiscal, Settings and Audit log.
- Back office › Team & roles › Timesheets to correct clock-in and clock-out times, breaks and cash tips, and Tips to pay out the team's tips.
Only an owner can
- create roles or change what a role can do (managers see "You can see roles but not change them. Ask an owner.")
- change an owner's details or make someone an owner
- close a Sofrito Cloud account
Start of shift
- Clock in and sign in.
- In Back office › Devices & printers, check the tills, handhelds and kitchen displays show Online, and every printer shows Online. Print a test page on any printer that does not.
- Check a cash drawer is open with the right float.
- Read the day's bookings and the sold-out dishes, and brief the team.
End of the day
- Open Orders: every check should be paid or voided.
- Make sure the drawer is counted: Cash › Close drawer.
- Tap Cash › Close the day (Z). The window asks "Close business day …? Totals are locked and printed." and lists any Checks still open on this day: tap one to pay or void it. Then tap Close the day (Z). Sofrito prints the Z report and shows, for example, "Day 12 closed".
- Look at Over / short and at Reports for voids, comps and discounts.
- Pay out the day's tips if you pay them daily: Back office › Team & roles › Tips. See Pay out tips.
- Lock the till and clock out.
#Owner
Owns the account: sets up the restaurant, decides what each role can do and keeps the fiscal records in order. The Owner role always has every permission, and the restaurant always keeps at least one owner.
Your buttons
- Everything a manager uses.
- Back office › Team & roles › Roles and permissions: create roles and choose what each one can do. Permissions marked Manager can approve are the ones a manager can allow on the spot with their PIN.
- Back office › Taxes & fiscal: Compliance, Series & integrity, Day closes, Exports and Tax rates.
- Back office › Settings › Invoicing: the documents Sofrito issues and the details your tax authority asks for, where your country has them.
- Back office › Audit log: who did what, when, on which device.
- Back office › Settings › Cloud sync when the restaurant runs on Sofrito Hub, and Back office › Settings › Account to close a Sofrito Cloud account.
Only you can
- change roles and permissions
- make someone an owner or change an owner's details
- close a Sofrito Cloud account
Start of the day
- Check yesterday's close in Back office › Taxes & fiscal › Day closes.
- Open Taxes & fiscal › Compliance. Deal with any warning, such as a missing tax number or missing validation codes.
- On Sofrito Hub, check Settings › Cloud sync shows Everything is up to date if you link to Sofrito Cloud.
End of the day, week and month
- Check the day was closed and read the drawer differences.
- Read Reports and the Audit log for voids, refunds, discounts and drawers opened without a sale.
- Each month, download your tax file from Taxes & fiscal › Exports if your country has one. See Country notes.
- On Sofrito Hub, keep a copy of the backups away from the restaurant. See Sofrito Hub and working offline.
Troubleshooting and questions
This chapter lists the problems restaurants meet most often, grouped by area. Each problem starts with what you see, quoting the message exactly as Sofrito shows it, then explains why it happens and how to fix it. Staff on shift can fix most of them. Some need a manager, and a few need the person who installed Sofrito. The last section answers questions that owners often ask. In the back office, Guide at the top of every page opens the chapter of this guide about that page.
#Can't connect or pair
#"That code is invalid or expired."
Why: a pairing code works once and only for 15 minutes. The code was already used, has expired or was typed wrongly.
Fix:
- In Back office › Devices & printers, select Pair a new device.
- Choose what the device will be and select Create pairing code.
- On the new device, type the 6-character code within the time shown under it ("Expires in …"), or scan the QR code. If the back office says "This code has expired.", select Create a new code.
#"No Sofrito server answered at that address."
You see this in the Sofrito app on a phone, tablet or computer, after typing the server address. The full message adds: "Check that this device is on the restaurant Wi-Fi and the hub is running."
Why: the device cannot reach Sofrito Hub (or Sofrito Cloud) at that address.
Fix:
- Check the device is on the restaurant's staff Wi-Fi, not the guest Wi-Fi or mobile data.
- Check the hub computer is on and Sofrito Hub is running. It shows its addresses when it starts, for
example
http://192.168.1.20:7420. - Type the address again. If you type only the numbers (
192.168.1.20), Sofrito adds the port 7420 for you. - For Sofrito Cloud, tap Use Sofrito Cloud instead of typing an address.
#The QR code opens the browser, not the Sofrito app
Why: on a phone or tablet, the QR code opens the pairing page in the browser first.
Fix: tap Open in the Sofrito app on that page. If the app doesn't open, it isn't installed (or is out of date) on that device: install or update it, or tap Connect to use the browser instead.
#The browser cannot open the hub's address
Why: the device and the hub are on different networks, the router blocks devices from talking to each other, or the hub's address has changed.
Fix:
- Put the device on the same network as the hub.
- In the router, turn off "client isolation" (sometimes called "AP isolation") on the staff Wi-Fi.
- Give the hub computer a fixed address in the router (a DHCP reservation), so it keeps the same address after a restart.
- If you route between networks, devices must reach the hub on TCP port 7420.
#A screen shows "Can’t reach the server. Check the Wi-Fi." when it opens
The screen also shows Try again and Connect to another server.
Why: the device is paired, but it cannot reach its server.
Fix:
- Check the Wi-Fi and that the hub is running, then tap Try again.
- Only if the hub moved to a new address or was replaced, tap Connect to another server and tap again to confirm ("Tap again: this device will need pairing again"). Then pair the device again.
#A till or handheld went back to the Welcome screen
Why: the server no longer recognises the device. A manager revoked it in the back office, someone tapped Unpair this device or Leave the demo under More on it, or the device was connected to a different hub.
Fix: pair it again with a new pairing code (see the first problem above). Staff then sign in with their PIN as usual.
#A device opens as the wrong screen
Why: it was paired, or later switched, as another kind of device.
Fix: in Back office › Devices & printers › Devices, select the device and change Use this device as (POS terminal, Handheld, Kitchen display, Customer display or Pickup board). The screen switches over as soon as you save. On the device itself:
- On a kitchen display, press and hold the logo for 2 seconds, then tap Switch to point of sale. Or tap the settings button (top right), Use this screen as a point of sale, then Switch to point of sale.
- On a pickup board, press and hold the logo for 2 seconds.
- On a customer display, press and hold the restaurant's logo for 2 seconds, then tap Use this screen as a point of sale.
#The customer display shows the wrong orders, or none
Why: the display shows only the order open on the till it faces. It faces another till, or it hasn't been told which one yet ("Which till does this screen face?").
Fix: on the display, tap the right till. To change it, press and hold the restaurant's logo for 2 seconds and tap Choose another till, or change Faces the till in the display's settings in Back office › Devices & printers › Devices.
#Working offline
#Sofrito Hub: the internet is down
What happens: nothing changes for service. Tills, handhelds, kitchen displays and network printers talk to the hub over the restaurant network, not over the internet. If the hub is linked to Sofrito Cloud, changes wait on the hub (Back office › Settings › Cloud sync shows them under Waiting to upload) and go up by themselves when the internet is back. Your card terminal needs its own connection to approve cards.
#A device shows "Offline — reconnecting…"
The lock screen shows "Offline — reconnecting…" in red. Elsewhere, a red, crossed-out Wi-Fi symbol appears in the left-hand bar of the till, at the top of a phone, or next to the clock on the kitchen display.
Why: that device has lost its connection to the hub (or to Sofrito Cloud).
What happens: the device keeps trying by itself, every few seconds. When it reconnects it shows "Back online" and reloads the open orders. Until then, anything you try to send, pay or print fails after a while with "Can’t reach the server. Check the Wi-Fi." Dishes you tapped but did not send stay on the order on that device.
Fix:
- Check the device's Wi-Fi. Walk closer to the router if the signal is weak.
- Check the other devices. If they are all offline, the problem is the hub or the network: see below.
- Carry on from another device that is online. Send the waiting dishes as soon as the device reconnects.
#Sofrito Cloud: the internet is down
What happens: every device goes offline. Sofrito cannot send orders to the kitchen or take payments until the internet is back. Dishes tapped but not sent stay on each device's open order.
Fix: reconnect the router, or switch the restaurant's devices to a backup connection such as a mobile data hotspot. If your internet often fails, run Sofrito Hub in the restaurant instead: see Sofrito Hub and working offline.
#The hub computer is off or restarting
What happens: every device shows "Offline — reconnecting…" until the hub is back, then reconnects by itself.
Fix: switch the hub on and wait a minute. Never switch it off during service. Put the hub, the router and the network switch on a small UPS (a battery backup), so a short power cut does not stop service. When the desktop app runs the hub, quitting it while other devices are connected asks "Quit Sofrito?": choose Keep Sofrito open.
#Printing
When a printer stops working, every till and handheld shows a yellow warning in its own language, for example "Kitchen is offline" with the reason. The device that sent a job that didn't print also shows it in red, for example "Kitchen #12 didn’t print on Kitchen", with Reprint. In the back office, the problem shows under the printer's name in Devices & printers › Printers.
More › Printers on a till or handheld lists the printers with their status and the last print jobs (Print queue: Queued, Sending, Printed, Failed or Cancelled). A failed job shows why it didn't print, with Reprint. Tap a job to see what it printed, and Refresh to update the list.
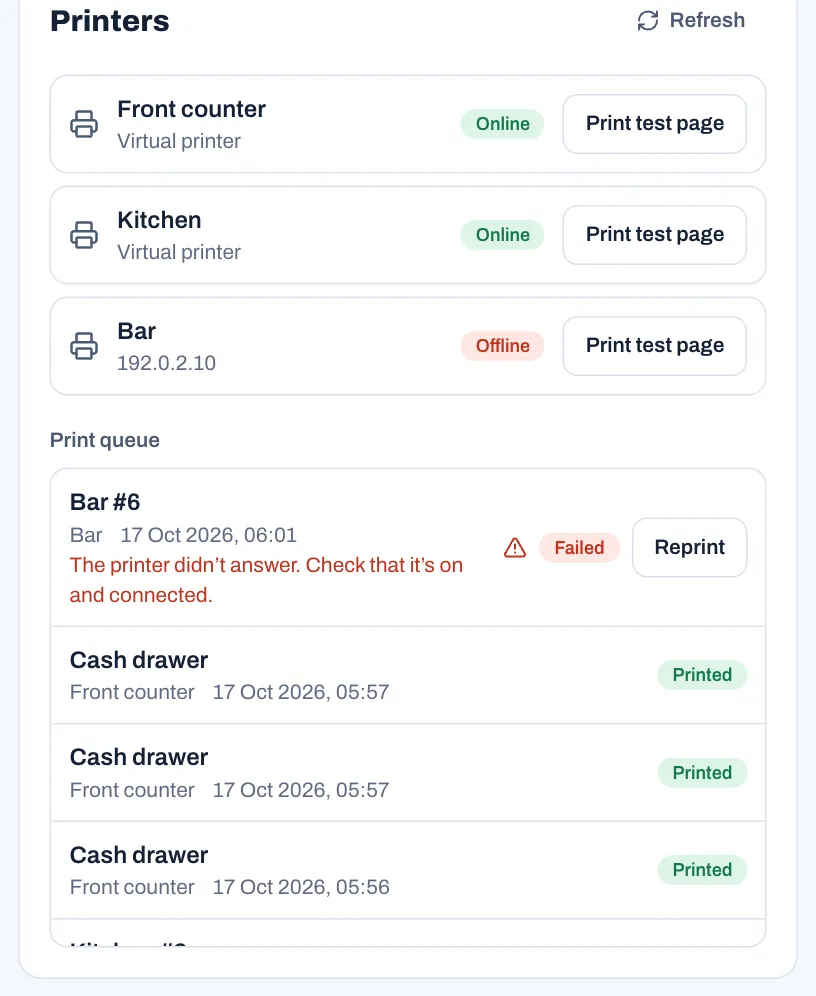
#A printer shows Offline
Under Offline you see the reason, for example "The printer didn’t answer. Check that it’s on and connected.", "The printer refused the connection. Check its address and port." or, from a Star printer, "Out of paper.", "Paper jam." or "The cover is open."
Why: Sofrito could not deliver a job. It tries each job three times, then marks the job Failed and the printer Offline. If the printer has a Backup printer, the job goes to the backup at once instead.
Fix:
- Check the printer is on, has paper, and that its lid is closed.
- Check its cable or Wi-Fi. Kitchen printers are more reliable on a cable.
- Check its IP address: print the printer's own self-test page (on most printers, hold the feed button while you switch it on) and compare it with IP address in the printer's settings.
- Select Print test page. As soon as a job prints, the printer shows Online again.
#Jobs go to the backup printer
Why: while a printer is Offline, its new jobs go to its Backup printer, so nothing is lost.
What happens: a minute later, Sofrito sends the next job to the printer itself again. As soon as one prints, the printer shows Online and gets its jobs back. To check it at once after you fix it, select Print test page: test pages always go to the printer itself.
#A ticket or receipt did not print
The till that sent it shows, for example, "Bar #6 didn’t print on Bar", with the reason and Reprint.
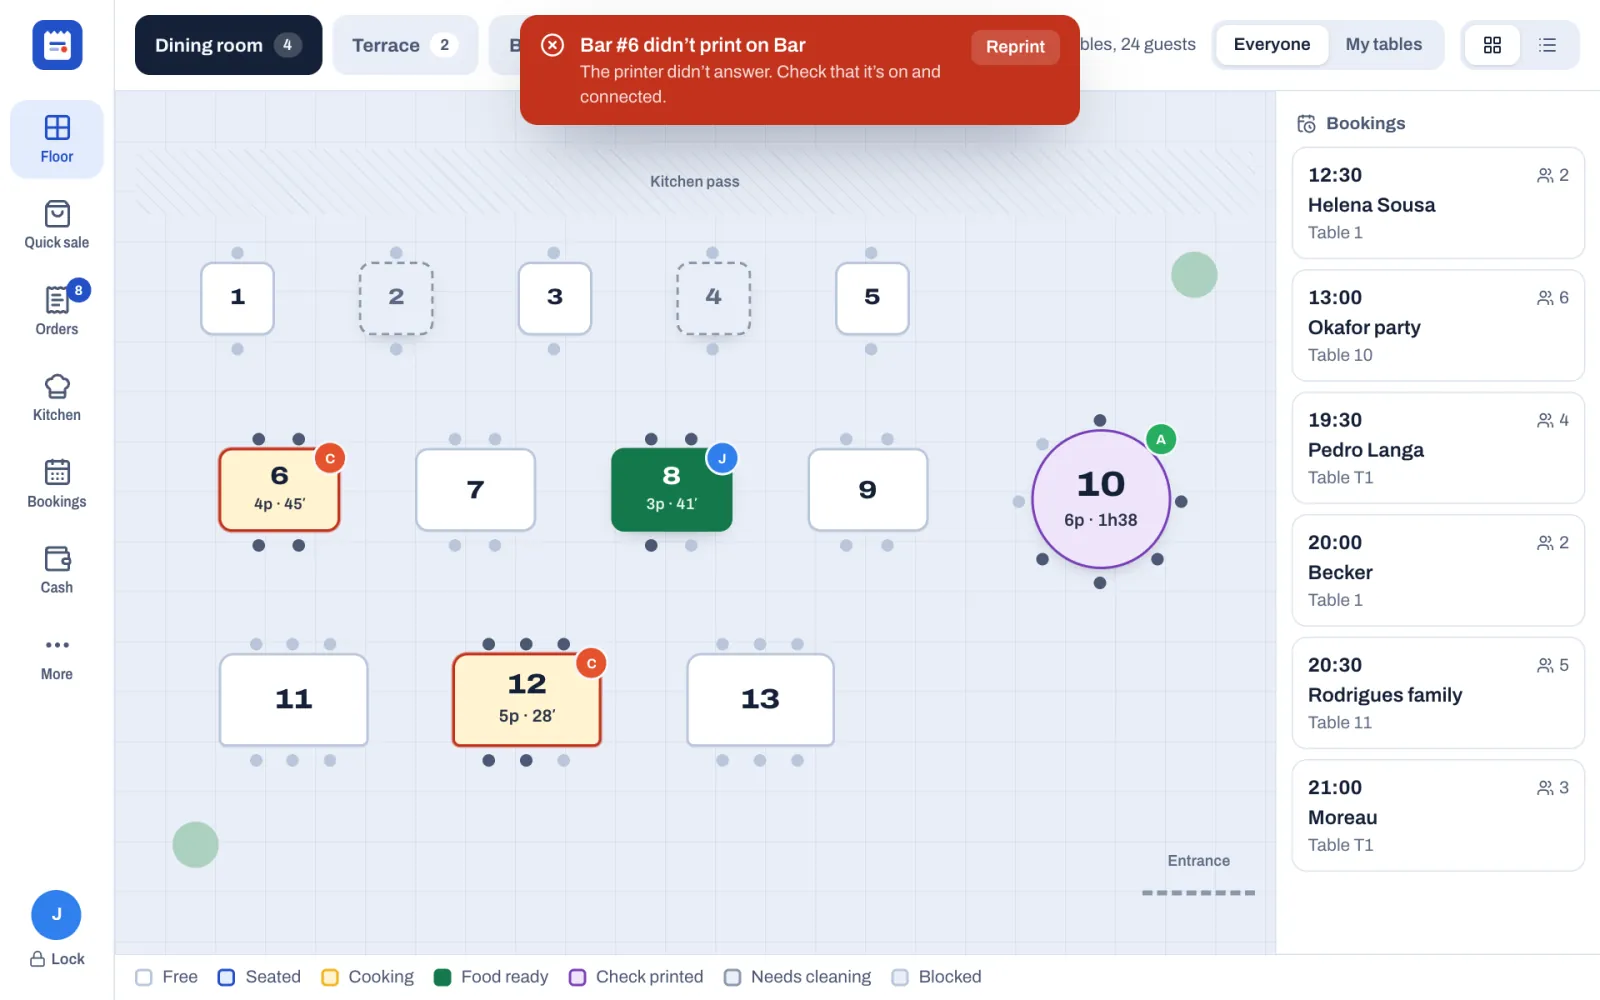
Why: the printer was off or unreachable, and Sofrito's three tries failed.
Fix:
- Fix the printer (see A printer shows Offline).
- Tap Reprint on the message, or find the job under More › Printers › Print queue and tap Reprint. The till shows "Sent to the printer again", and the failed job then shows Cancelled.
- If the printer can't be fixed during service, read the order to the kitchen from the till, or show it on a kitchen display.
- Set a Backup printer for each kitchen printer, so the next tickets have somewhere to go.
#"Not printed: the device or computer that prints it was off for too long."
Why: the job was for a printer built into a handheld, or for a printer that a computer prints to (a print bridge), and that device was off or out of range. A job that waited more than 15 minutes is not printed late.
Fix: switch the device or computer on, then tap Reprint on the job if it is still needed. To reprint a receipt, open the order under Orders › Closed and tap Reprint receipt.
#Print bridge problems
On the computer that prints for the restaurant, the Print bridge screen lists its Problems. You may see:
- "A print bridge needs the Sofrito desktop app": the computer is paired in a plain browser, which can't send to printers. Install the Sofrito desktop app, pair it as a print bridge with a new code, and tap Stop using this browser as a print bridge in the browser.
- "The desktop app can’t print from this page": update the Sofrito desktop app. If it is up to date, choose Sofrito › Connect to a different server… in its menu and connect to the restaurant's server again.
- "Not connected to the server. Print jobs wait until the connection is back.": check the computer's internet or network connection.
- On Sofrito Cloud, a job fails with "No print bridge picked it up." when no print bridge collected it within an hour. Check that the computer is on and Sofrito is open on it.
#Tickets only appear on the screen
The till shows a message such as "Sent to Kitchen", but nothing prints.
Why: the printer's connection is Virtual. A new restaurant starts with virtual printers, so you can use Sofrito before the printers arrive.
Fix: open the printer in Back office › Devices & printers › Printers, change How it connects (for example to Network with its IP address), save, then select Print test page.
#Accents or the euro sign print wrong
Fix: open the printer and change Character set. Try Western European with euro sign (CP858) or, for Portuguese, Portuguese (CP860). Save and print a test page after each change.
#The cash drawer does not open
Fix:
- Plug the drawer into the receipt printer's drawer port (marked DK).
- Open the receipt printer's settings and change Cash drawer connector from Pin 2 to Pin 5, or back.
- In Back office › Devices & printers › Cash drawers, check the drawer is opened by The terminal’s receipt printer and that this till's receipt printer is a real printer, not a virtual one. The drawer always opens from its own printer, never from a backup.
Staff without permission need a manager's PIN to open the drawer with No sale.
#Receipts from a handheld print in the wrong place, or not at all
Fix:
- In Back office › Devices & printers › Devices, select the handheld and check its Receipt printer. Restaurant default uses the main receipt printer.
- For a handheld with a printer inside (Senraise, Sunmi, or a paired Bluetooth printer), add that printer: Printers › Add printer, How it connects: Built into a device, then choose the Device. Leave How it prints on Find it automatically (recommended).
- To check that printer from the handheld itself, open the Sofrito app on it and tap More. Under Printers, Printer in this device says what Sofrito found ("No printer was found in this device." if nothing). Tap Print a test here. If it says, for example, "Receipts from this device print on Front counter.", a manager taps Use it for this device’s receipts.
#Taking orders
#"Already sent to the kitchen — void it instead."
Why: once an item is sent, you can no longer change its quantity or options.
Fix: tap the item, tap Void, choose a reason, and add the corrected item. Voiding a sent item needs a manager's PIN unless your role allows it.
#"A manager needs to approve this." on a colleague's table
Why: the check was opened by someone else, and your role doesn't have Change other people’s orders. Adding items, voids, discounts, moving, splitting and merging someone else's check need it. A check with nothing on it yet, such as one a host opened when seating the guests, doesn't: it becomes yours when you add its first items.
Fix: a manager types their PIN and taps Approve. If the table is yours from now on, ask the manager to hand it over to you: ••• › Hand over to…. Sending, printing the check and taking payment never need approval.
#A dish shows "Sold out", or "… is sold out."
Why: someone marked it sold out, on this device or another one. With stock tracking, a dish also shows Sold out when its stock reaches zero, and "Only 2 left." when you try to add more than there is.
Fix: press and hold the dish. Its details show whether it is on sale, and let you put it back on sale or, for a dish whose stock is counted, type how many are left. This needs the "Mark dishes as sold out" permission. Closing the day puts sold-out dishes back on sale by itself, unless the restaurant turned that off.
#"This order is already closed."
Why: someone paid or voided the order on another device.
Fix: go back to Floor or Orders. The closed order is under Orders › Closed.
#"Choose a reason."
Why: voids, comps and refunds ask for a reason. A manager can switch the questions off in Back office › Settings › Security.
Fix: tap one of the reasons, or type your own under Other reason and tap Confirm.
#Payments and cash differences
#"Open the cash drawer before taking cash."
Why: the restaurant asks for an open drawer before cash payments, and none can be opened from this device. The setting is Open the drawer before taking cash, in Back office › Settings › Cash. Usually, taking cash with no drawer open, or selling a gift card for cash, brings up the Starting cash window instead: count the drawer, type the amount and tap Open drawer, and the payment goes ahead. You see this message when the restaurant has no cash drawer set up. If the person taking cash cannot open drawers, they see "You don’t have permission to do this." when they tap Open drawer.
Fix: a manager or cashier taps Cash › Open drawer. If there is no drawer, add one in Back office › Devices & printers › Cash drawers › Add cash drawer.
#"Open the cash drawer before paying cash out."
Why: cash is going out of the drawer, for a cash refund or for tips paid From the cash drawer in Back office › Team & roles › Tips, and no drawer is open. On the till, a cash refund with no drawer open usually brings up the Starting cash window instead: "Count the cash in the drawer before the refund is paid out of it." You see this message when the restaurant has no cash drawer set up, or in the back office.
Fix: a manager or cashier taps Cash › Open drawer on a till, then pays the refund or the tips again. For tips, you can also choose With wages, which leaves the drawer alone.
#"Cash received is less than the amount."
Fix: type the amount the guest handed over, or tap Exact. If your restaurant rounds cash, the amount due includes a Cash rounding line.
#"That’s more than the … still to pay."
Why: a card or other non-cash payment cannot be more than the balance.
Fix: charge the balance. Put a tip under Tip, and use Other amount for part of the bill.
#"Enter the … reference."
Why: payment methods such as mobile money ask for the transaction number. The message names the method.
Fix: type the transaction ID from the guest's phone in Reference. A manager decides which methods ask for it in Back office › Settings › Payment methods (Ask for a reference).
#The card terminal declined the card
Sofrito does not talk to your card terminal. After Charge, it shows "Waiting for the card terminal…" and "Confirm once the terminal shows “Approved”."
Fix: if the terminal declines, do not tap Approved. Close the payment sheet or choose another payment method.
#A payment was recorded with the wrong method
Why: for example, a card payment was recorded as cash.
Fix: while the order is still open, tap Pay. Under Payments taken, tap Change method on the payment: Sofrito cancels it and sets the same amount up again, to take with the right method. A manager approves if your role can't void payments. If the order is already closed, a manager reopens it first (Orders › Closed › Reopen, reason "Wrong payment method"), changes the method, then taps Close order.
#A tax number or buyer name is refused
You may see:
- "That tax number is not valid." In Portugal, Sofrito checks the NIF's check digit. Check the number with the guest.
- "This invoice needs the customer’s tax number." In Spain, a bill above €3,000 needs a full invoice with the buyer's NIF.
- "Above … the receipt needs the customer’s name and address." In Portugal, above €1,000 before VAT, Invoice with NIF is switched on and can't be turned off.
Fix: turn on Invoice with NIF (the button uses your country's tax-number name) and fill in the tax number, Name / company, Address, Postcode and Town or city. See Country notes.
#Gift card messages
"Scan or type the gift card code.", "No gift card has this code." and "This gift card has only … left." come from the gift card itself. Check the code with the guest, or take the rest with another payment method. See Guests, loyalty and gift cards.
#The drawer is over or short
After Close drawer, Sofrito shows Expected, Counted and Over / short.
Why: the usual causes are:
- cash taken out of the drawer without a Pay out, for example to pay a supplier
- tips handed to staff from the drawer, instead of paid out in Back office › Team & roles › Tips
- a Cash drop made without recording it
- wrong change given
- a payment recorded with the wrong method (see above)
- cash collected on handhelds that was not handed in: Sofrito counts it in the open drawer
Fix:
- On Cash, read the drawer's Movements: Opening float, Cash sale, Refund, Pay in, Pay out, Cash drop, Tips paid out, No sale and the reasons given.
- Compare the card total under Today with your card terminal's report.
- Look at Back office › Reports › Exceptions and the Audit log for refunds, voids and drawers opened without a sale.
#PINs and access
#Wrong PIN, or "Too many wrong PINs. Try again in a moment."
On the lock screen, a wrong PIN makes the dots shake. After five wrong PINs in a row, that device stops taking PINs for 15 seconds, then longer after each further wrong PIN, up to 5 minutes. Other devices are not affected. Every wrong PIN is recorded in the audit log as "Wrong PIN entered".
Fix: wait, then try again slowly. If you have forgotten your PIN, a manager sets a new one in Back office › Team & roles: select your name and Reset PIN.
#"Kitchen can’t sign in on this device."
Why: a PIN only opens devices its role works on. The Kitchen role works on the kitchen display, which needs no PIN, so a Kitchen PIN doesn't open a till or a handheld. The message names the role.
Fix: kitchen staff can still clock in and out on the till with Clock in / out. If someone needs the till, an owner gives their role Use the POS or gives them another role.
#"Someone else already uses this PIN. Choose another one."
Why: PINs identify people, so each one must be different.
Fix: choose another 4-digit PIN.
#"A manager needs to approve this."
The till opens Manager approval.
Fix: a manager types their PIN and taps Approve. If the pad then shows "Wrong PIN.", the PIN was wrong. If it shows, for example, "João can’t approve this.", that person's role does not have the permission: ask a manager or owner. The pad closes after three wrong tries. Wrong manager PINs pause approvals on that device in the same way as wrong PINs on the lock screen.
#"You don’t have permission to do this."
Why: your role does not allow this action, and it is not one a manager can approve on the spot.
Fix: ask someone whose role allows it. An owner can change roles in Back office › Team & roles › Roles and permissions. See Quick cards for every role.
#"You are not assigned to this location."
Why: your profile only lets you sign in at some of the group's restaurants.
Fix: a manager adds this restaurant under Locations in your profile in Team & roles.
#"Your role can’t open the back office."
On a till, Back office asks for "Someone with back-office access enters their PIN." This message means the PIN belongs to someone whose role doesn't have Open the back office.
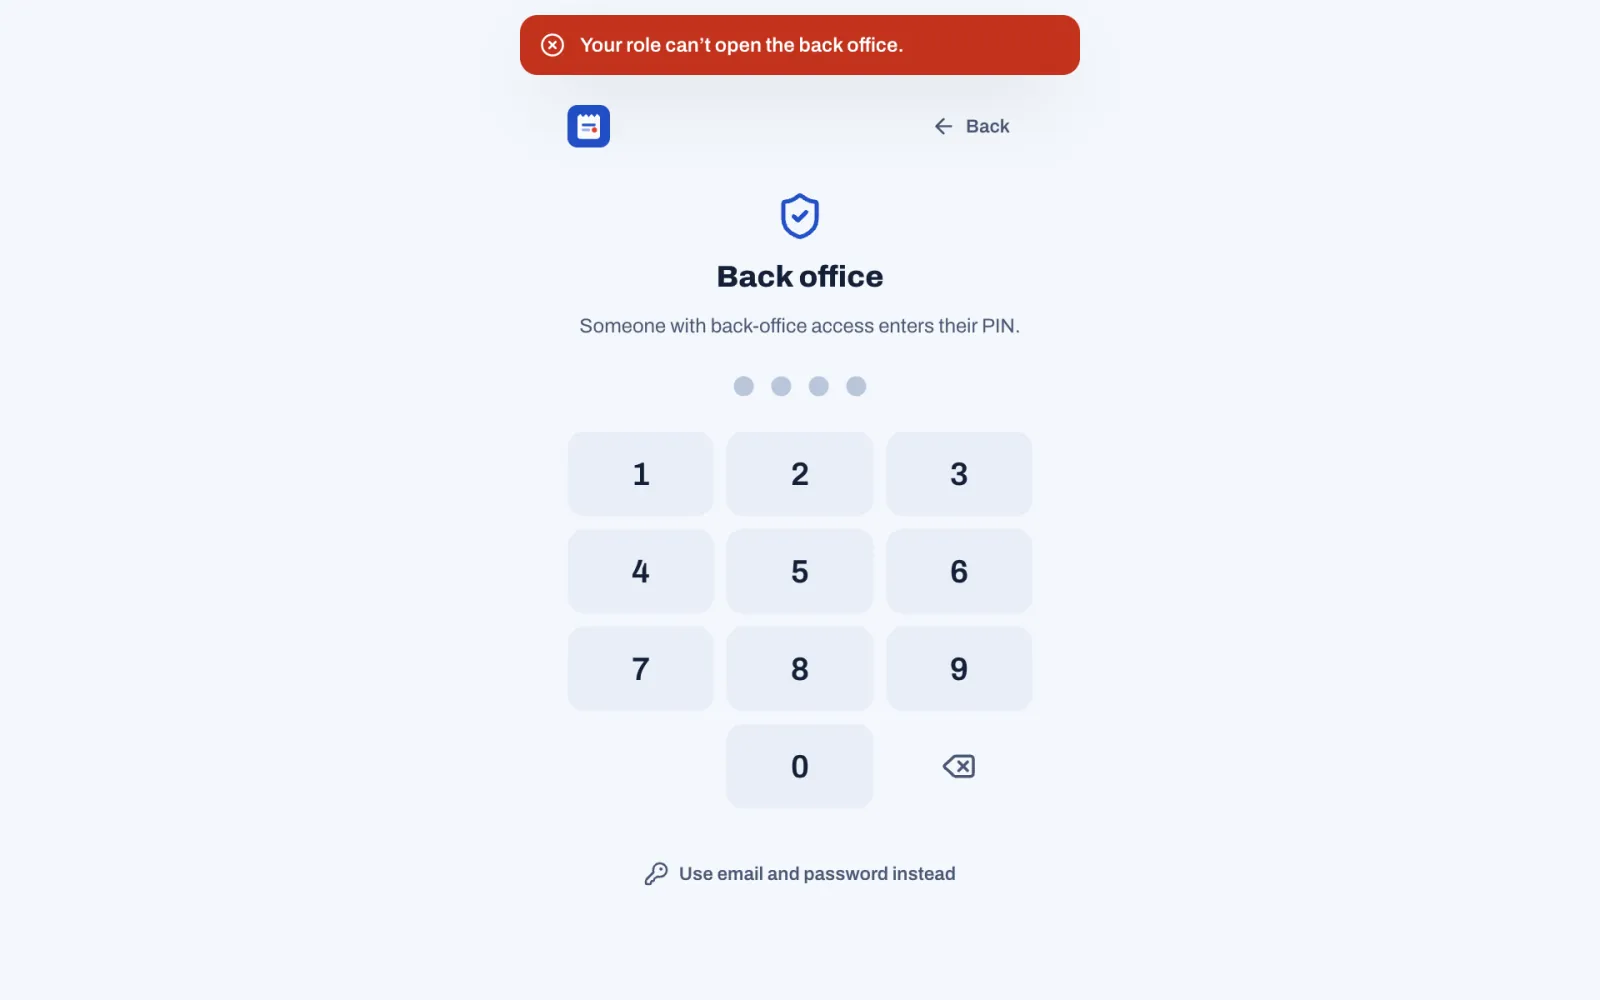
Fix: a manager or owner types their PIN, or taps Use email and password instead. You see the same message when you sign in with an email and password whose role can't open the back office.
#Back office sign-in problems
- "Email or password is incorrect." Check both. Sofrito has no password-reset email.
- The back office on a till asks for a PIN again: it locks after 5 minutes without a touch, when the till locks, and when someone selects Sign out. To stay signed in, use Sign in to the back office in a browser that isn't paired as a till.
Fix for a forgotten password:
- Sign in on a till with your PIN.
- Tap More › Back office. The back office opens as you.
- Open Team & roles, select your name, then Change password, and save.
An owner can also set a new password for a manager. Only an owner can change an owner's details.
#"Please sign in again."
Why: your session ended. It expired, or a manager revoked the device or turned off your sign-in.
Fix: tap Lock and sign in with your PIN again. In the back office, sign in again with your email and password.
#Changes to the team are refused
- "Only an owner can do this." Managers cannot change an owner's details or make someone an owner.
- "The restaurant needs at least one owner." Make someone else an owner first.
- "You cannot change your own role or switch off your own access." Ask another owner.
#Kitchen display
#A dish never reaches the kitchen
Why: one of these:
- The dish has no station. In Back office › Menu, the dish says "With no station selected, this dish is never sent to the kitchen."
- Its station has no printer and no kitchen screen shows it ("Tickets go nowhere").
- Print kitchen tickets is off in Settings › Kitchen, and no kitchen screen shows the station ("Tickets go nowhere" too).
- The kitchen display that shows the station is switched off. Its tickets wait on it all the same: after a day, Devices & printers marks the display Tickets wait on it and the station Screen not in use.
- The kitchen display shows other stations only.
- The server held the dish back (the hourglass) and has not sent or fired it yet.
Fix:
- In Back office › Menu, open the dish and choose its Stations, or Use the category’s stations.
- In Back office › Devices & printers › Stations, check Tickets print on and Show on kitchen screens. The list shows No screen shows it when no paired kitchen display shows the station.
- Switch the kitchen display on. If it is no longer used, revoke it in Devices & printers › Devices: the station's next tickets then go to its printers.
- On the kitchen display, tap All stations, or the station's button.
- Ask the server to tap Send or Fire on the order.
#Dishes show Served as soon as they are sent
Why: their station only prints. A station's tickets wait on a kitchen screen only when Show on kitchen screens is on and a paired kitchen display shows that station. Otherwise the ticket prints and closes at once, so nothing waits on the kitchen screen and nothing counts as late.
Fix: if the station should be on a screen, turn on Show on kitchen screens for it and choose it under Stations on this screen on a kitchen display. Orders sent after that wait on the screen.
#The kitchen display shows the wrong tickets
Fix: tap All stations, or tap each station this screen should show. The settings button (top right) also has Stations on this screen. A manager can set the same in Back office › Devices & printers › Devices.
#The kitchen display does not beep
Fix:
- Tap the screen once. A kitchen display that has just started stays silent until someone touches it.
- Check the device's volume.
- Check Back office › Settings › Kitchen › Sound for new tickets is on.
- The display only beeps for the stations it shows.
#A ticket disappeared
Why: someone bumped it, or it belongs to an earlier business day. Kitchen screens show only the current business day, and Close the day (Z) clears every ticket still open from that day.
Fix: tap Recall, find it under Recently bumped, and tap Recall next to it. With a bump bar, press R to recall the last ticket. Tickets that the day close cleared don't come back.
#The server is not told when food is ready
Fix: check Back office › Settings › Kitchen › Tell the server when food is ready is on. The chime and the message ("Table 6 is ready") go to the server who owns the order, on a device where they are signed in. Servers can also watch Kitchen on the till.
#The app won't start
#"Sofrito cannot start on this device"
This screen has a Try again button and, in small print, the technical reason.
If it says "Its browser engine (Android System WebView …) is too old":
- Open Google Play and update Android System WebView and Google Chrome.
- Restart the device and open Sofrito again.
Sofrito needs Android System WebView 111 or newer. You can see the version in the device's settings, under Apps, Android System WebView. A device too old to update cannot run Sofrito: see Plan your setup for the devices that work.
If it says "Something stopped it while it was starting":
- Close Sofrito and open it again.
- If it keeps happening, send a photo of the screen to whoever installed Sofrito. The small print tells them what went wrong.
If the small print says "The app did not start within 15 seconds.", the device is probably slow to reach the server. Check the Wi-Fi and tap Try again.
#"This screen stopped working"
Why: Sofrito hit a problem on that screen. "Nothing you entered before is lost."
Fix: tap Try again. If it happens again, tap Back to the start and tell your manager what you were doing.
#Sofrito Hub and backups
#Where the backups are
Sofrito Hub saves a copy of the restaurant every day at 04:00, restaurant time, in the backups folder inside
its data folder, as sofrito-YYYY-MM-DD.db. If the computer was off at 04:00, it saves the copy later that day,
once no order is open. It keeps the last 30 copies. When Sofrito Hub runs inside the desktop app, the data
folder is:
| Computer | Folder |
|---|---|
| Windows | %APPDATA%\com.lefamtech.mise.desktop\hub |
| Mac | ~/Library/Application Support/com.lefamtech.mise.desktop/hub |
| Linux | ~/.local/share/com.lefamtech.mise.desktop/hub |
A hub installed on its own uses the folder its installer chose. See For partners and installers.
The backups sit on the same computer as the hub. Copy them somewhere else regularly, or link the hub to Sofrito Cloud in Back office › Settings › Cloud sync.
#Restoring a backup
Restoring takes the restaurant back to the day of the copy: orders, payments and receipts made after it are lost, and receipt numbers after that point would be issued again. Do it only when the hub's database is lost or damaged, and talk to your Sofrito partner and your accountant first. The steps are in Restore a backup.
#Cloud sync shows "Needs attention"
Back office › Settings › Cloud sync shows "The last sync did not finish", with the reason, and adds "Sofrito tries again every few seconds."
Fix:
- Check the hub computer has internet, then select Sync now.
- If it keeps failing, the link may have been removed in Sofrito Cloud. Select Unlink (tap again to confirm) and link the hub again. Unlinking deletes nothing, on the hub or in the cloud.
#Linking the hub to Sofrito Cloud fails
Fix:
- Sign in to Sofrito Cloud, open Devices & printers and create a pairing code for a Sofrito Hub.
- On the hub's back office, in Settings › Cloud sync, type the Cloud address and that Pairing code, then select Link this hub within 15 minutes.
- If you see "That code is invalid or expired." or "Sofrito Cloud did not accept this code.", create a new code. If you see "Can’t reach …" or "… is not a Sofrito Cloud address.", check the cloud address and the hub's internet connection.
#Updating Sofrito Hub
Replace the program and its web folder with the new version, or update the desktop app, then restart the
hub. The database updates itself when the hub starts. Update outside service hours.
#Questions
#What happens if the internet goes down?
With Sofrito Hub, service carries on: orders, the kitchen, payments and printing all work over the restaurant network. With Sofrito Cloud, devices need the internet and go offline until it is back. See Working offline.
#What happens in a power cut?
Devices with batteries keep going, but the hub, the router and the printers stop. Put the hub, the router and the switch on a UPS. When the power comes back, devices reconnect by themselves.
#Can servers change each other's tables?
Not on their own. Anyone who can open orders can open any check, but a server who adds to, voids, discounts, moves or splits a check someone else opened needs a manager's PIN. A check with nothing on it yet, such as one a host opened, is the exception: whoever adds its first items takes it over. To let servers change each other's checks, an owner gives their role Change other people’s orders. Taking payment never needs it. On Floor, My tables shows only your own. Everything people change is recorded under their name.
#Who can see the day's takings?
In the back office, people whose role has "View reports" (managers and owners). On the till, the Cash screen shows today's totals to every role with "Print shift reports (X)", which includes servers, bartenders and cashiers. To hide them, an owner removes that permission from the role.
#How do I stop free drinks and big discounts?
Comps, voids of sent items and discounts above the limit need a manager's PIN, and Sofrito asks for a reason. Set the limit in Back office › Settings › Security › Discounts up to, and mark discounts that always need a manager with Needs a manager's PIN in Settings › Discounts. Read Reports › Exceptions each week.
#A member of staff has left. What do I do?
In Back office › Team & roles, select the person and select Archive (tap again to confirm). Their PIN stops working at once and their history stays in the reports. To block someone for a while instead, turn off Can sign in.
#A phone or handheld was lost or stolen.
In Back office › Devices & printers › Devices, select it and select Revoke access (tap again to confirm). It signs out at once and needs a new pairing code to connect again.
#Can I change or delete a receipt?
No. Sofrito never changes or deletes a legal document. To correct a sale, a manager refunds it (Sofrito issues a credit note) or reopens the order (Sofrito cancels the original with a credit note and issues a new document when it is paid again). See Voids, discounts, refunds and approvals.
#Why do sales after midnight count for the day before?
The business day ends at 04:00, so a late service belongs to the evening it started. Change the time in Back office › Settings › Language and region › Business day ends at.
#What happens to orders still open when I close the day?
Close the day (Z) lists the Checks still open on this day. Tap one to pay or void it. Or tap Close the day, move the open checks: the day closes, and the open checks move to the next business day, where they are reported when they are paid.
#I forgot to close the day yesterday. What now?
Tap Cash › Close the day (Z). The till says "Business day … was never closed. Close it before today’s." Close that day first, then close today when service ends.
#Which order does the customer display show?
Only the order open on the till it faces, chosen under Faces the till in its settings or on the display itself. After a payment it shows "Thank you!" for a few seconds, and between orders the welcome message.
#How do I leave the demo restaurant?
Sign in on a till as the demo's owner (PIN 1234), tap More, then under This is the demo restaurant tap Leave the demo and Tap again to leave. On a Sofrito Hub, this erases the demo, and the hub goes back to Set up a restaurant. On Sofrito Cloud, the device leaves the demo and is signed out of it. See Try the demo restaurant.
#Does Sofrito work with my card terminal?
Sofrito records card payments taken on any card terminal. You charge the amount on the terminal and tap Approved in Sofrito. The terminal itself is not connected to Sofrito.
#Is my data backed up?
On Sofrito Cloud, your data is stored and replicated by Cloudflare. On Sofrito Hub, the hub keeps 30 daily copies on its own computer: copy them elsewhere, or link the hub to Sofrito Cloud for a continuous copy off site.
#How do I get my data out?
Every report exports to a spreadsheet. Taxes & fiscal › Exports downloads your fiscal documents as CSV and, where your country has one, the SAF-T file. Guests & loyalty has Export CSV. To take everything at once, select Settings › Account › Everything, as CSV files: one ZIP file with the menu, orders, payments, team, time cards, guests, gift cards and stock. You need Export data for it.
#Is Sofrito approved by the tax authority in my country?
It depends on the country. Back office › Taxes & fiscal › Compliance shows what Sofrito does in yours and what is still missing. See Country notes.
#Can I use the tablets and printers I already have?
Usually, yes. Sofrito runs on Windows, Mac and Linux computers, iPads, iPhones and Android devices, and prints on almost any thermal receipt printer on the network, or built into a Sunmi or Senraise handheld. See Plan your setup and Devices, printers and stations.
Country notes
When you create a restaurant, you choose its country. Sofrito then sets up the currency, tax rates and tax categories, the name of the tax number, the documents it issues and how they are numbered, the payment methods, and the fiscal rules that seal each document. This chapter describes, country by country, what Sofrito does and what it leaves to you. It is for owners, managers and the people who install Sofrito.
Before you start
- Read Taxes, receipts and legal documents for how taxes and documents work in Sofrito.
#What every country gets
In every country:
- Legal documents can never be changed or deleted. A refund, or a paid order that a manager reopens, gets a credit note that refers to the original document ("Ref.: …").
- Each type of document has its own numbered series, one per year, with no gaps.
- Each document is sealed with a code that includes the previous document's code, so a missing or changed document shows. Back office › Taxes & fiscal › Series & integrity checks every series and says "Every document chain is intact" when all is well.
- The day close (Z report) freezes the day's totals and keeps a running grand total. Each close is sealed and linked to the one before.
- Every restaurant also gets a gift card payment method, besides the country's own methods. Selling a gift card is not a sale: tax is charged on the order the card pays for.
You can change every tax rate, tax category, payment method and receipt setting later. The country and the currency can't be changed once the restaurant is set up: the setup screen says "Choose with care".
Receipts print their labels in the restaurant's language when Sofrito has it: English, Portuguese, Spanish, French, German, Italian or Dutch. In other languages they print in English. To choose another, use Back office › Settings › Receipts › Receipt language. The document title, such as Receipt, follows that language too, except where Sofrito prints the titles the law uses: Portugal, Spain, France, Germany, Angola, Mozambique, Saudi Arabia and the United Kingdom. A new restaurant's receipt footer is a thank-you line in its language, for example "Grazie e arrivederci!" in Italy.
The tax category names below are the ones in Back office › Taxes & fiscal › Tax rates, in the language of the country's receipts. When you choose a dish's tax in Back office › Menu, each category shows the rates it applies, for example "Alcohol (20%)", followed by any order type taxed differently, such as "Takeaway 0%".
Each country also comes with a time zone. When you set the restaurant up on a device in that country, Sofrito uses the device's own time zone, for example the Azores, the Canary Islands or Manaus. Otherwise it sets the country's main time zone (for example New York for the United States). Check it in Back office › Settings › Language and region › Time zone before you sell.
#How to read the status
Back office › Taxes & fiscal › Compliance shows one of four statuses for your country, with what Sofrito does there and a list of checks. When you create a restaurant, the country list shows the same statuses with slightly different words.
| Status | When you create a restaurant | What it means |
|---|---|---|
| Built in | Fiscal rules built in | Sofrito implements the country's document rules itself. Complete the checks on the Compliance tab before you go live. |
| Partly built in | Fiscal rules partly built in | Sofrito numbers, chains and prints documents the way the law describes, but does not send records to the tax authority. |
| Needs a certified add-on | Certified add-on required | Sofrito prepares the records, but going live needs a certified device, provider or certificate that Sofrito does not include. |
| Standard receipts | Standard receipts | Sofrito issues numbered receipts in a tamper-evident chain. Check the local rules with your accountant. |
The Compliance tab also shows Country notes: the short legal notes behind each country pack, in the language of your back office (English, Portuguese, Spanish or French). The country list shows them too when you create a restaurant.
#At a glance
| Country | Currency | Status | Each sale is |
|---|---|---|---|
| Mozambique | MZN | Built in | Factura-recibo (FR) |
| Portugal | EUR | Built in | Fatura simplificada (FS), or Fatura-recibo (FR) above €100 before VAT |
| Angola | AOA | Needs a certified add-on | Factura/Recibo (FR) |
| Brazil | BRL | Needs a certified add-on | Recibo (RC) |
| Cape Verde | CVE | Needs a certified add-on | Recibo (RC) |
| Ghana | GHS | Needs a certified add-on | Receipt (RC) |
| Kenya | KES | Needs a certified add-on | Receipt (RC) |
| Nigeria | NGN | Standard receipts | Receipt (RC) |
| South Africa | ZAR | Standard receipts | Receipt (RC) |
| Austria | EUR | Needs a certified add-on | Beleg (RC) |
| Belgium | EUR | Needs a certified add-on | Ticket (RC) |
| Denmark | DKK | Standard receipts | Receipt (RC) |
| Finland | EUR | Standard receipts | Receipt (RC) |
| France | EUR | Needs a certified add-on | Ticket (RC) |
| Germany | EUR | Needs a certified add-on | Beleg (RC), or Rechnung (FT) above €250 |
| Ireland | EUR | Standard receipts | Receipt (RC) |
| Italy | EUR | Needs a certified add-on | Ricevuta (RC) |
| Netherlands | EUR | Standard receipts | Kassabon (RC) |
| Norway | NOK | Needs a certified add-on | Receipt (RC) |
| Poland | PLN | Needs a certified add-on | Receipt (RC) |
| Spain | EUR | Partly built in | Factura simplificada (F2), or Factura (F1) |
| Sweden | SEK | Needs a certified add-on | Receipt (RC) |
| Switzerland | CHF | Standard receipts | Beleg (RC) |
| United Kingdom | GBP | Standard receipts | Receipt (RC), or VAT invoice (FT) on request |
| Canada | CAD | Standard receipts | Receipt (RC) |
| Mexico | MXN | Needs a certified add-on | Recibo (RC) |
| United States | USD | Standard receipts | Receipt (RC) |
| India | INR | Standard receipts | Receipt (RC) |
| Saudi Arabia | SAR | Needs a certified add-on | Simplified tax invoice (RC) |
| United Arab Emirates | AED | Standard receipts | Receipt (RC) |
| Australia | AUD | Standard receipts | Receipt (RC) |
| New Zealand | NZD | Standard receipts | Receipt (RC) |
In countries with standard receipts, a document number looks like RC A2026/1: the document type, the series
(A and the year) and the number. Each document ends with a short check code such as #3F2A-9C01, taken from
its seal.
#Main markets
#Mozambique
Status: Built in.
Money: meticais (MZN). Prices include IVA. Sofrito does not round cash payments unless you set it in Back office › Settings › Taxes and rounding.
Taxes: IVA 16% (code NOR) on the tax categories Comida, Refrigerantes and Bebidas alcoólicas. Two 0% rates come ready: Isento (exemption code M01, "Isento nos termos do CIVA") and ISPC (sem IVA) ("Sujeito a ISPC — não liquida IVA"), with an ISPC (sem IVA) tax category for restaurants that pay ISPC instead of IVA.
Tax number: NUIT. Sofrito prints the number you enter but does not check it.
Documents:
- Every sale is a Factura-recibo (FR). When the guest gives a name and NUIT with Invoice with NUIT, they print on the same Factura-recibo. Without a buyer, the document says "Consumidor final". In Settings › Invoicing you can choose a Venda a dinheiro (VD) or a Factura (FT) instead.
- Each line shows the quantity, the unit price before IVA and the rate, as the country note asks.
- Refunds and reopened orders get a Nota de crédito (NC).
- Each till or handheld has its own series, numbered without gaps:
FR T12026/1is terminal T1, 2026, number 1.
Printed on every document: "Processado por computador", followed by your DAF authorisation when it is set ("Processado por computador · Autorização …"), and a verification code ("Cód. verificação" and eight characters) from the document's SHA-256 seal.
Payment methods: Numerário, Cartão (POS), M-Pesa, e-Mola and mKesh. The three mobile wallets ask for the transaction reference.
Monthly file: in Taxes & fiscal › Exports, the SAF-T (MOZ) file downloads the month's invoice data as XML (Download XML). The country note says the file goes through e-Declaração by the last business day of the following month, and that the AT has not published its template, so Sofrito builds it on the Portuguese SAF-T structure: validate it with the tax authority's validator before you submit it. The file needs your NUIT in Settings › Business details.
DAF authorisation: type its reference in Back office › Settings › Invoicing › DAF authorisation. The Compliance tab checks your NUIT, the DAF authorisation ("No DAF authorisation reference" until it is set, with Add in Settings), your last day close and the SAF-T (MOZ) file.
Check with your accountant:
- your DAF authorisation for computer-processed invoices, and how its reference must appear
- whether a Factura-recibo suits every sale, and what to issue to companies that ask for a Factura
- whether the SAF-T (MOZ) file is accepted as Sofrito produces it
- whether you pay IVA or ISPC. With ISPC, give your dishes the ISPC (sem IVA) tax category
- whether and how to round cash payments
#Portugal
Status: Built in. The country note says going live needs Sofrito's AT certificate (see below).
Money: euros. Prices include IVA. Tips are off unless you turn them on.
Taxes: IVA 23% (NOR), 13% (INT), 6% (RED) and Isento (ISE, exemption M07, "Isento artigo 9.º do CIVA"). The tax categories are Refeições e serviço de mesa (13%), Cafetaria, águas, sumos e néctares (13%), Refrigerantes e água tónica (23%), Bebidas alcoólicas (23%) and Bens à taxa reduzida (6%).
Tax number: NIF. Sofrito checks the NIF's check digit when you set up the restaurant and when a guest gives one ("That tax number is not valid."). Without a buyer NIF, the document says "Consumidor final".
Documents:
- Each sale is a Fatura simplificada (FS) up to €100 before VAT. Above that, Sofrito issues a Fatura-recibo (FR) by itself, which shows each line's unit price before VAT and its rate.
- Invoice with NIF prints the guest's name, NIF and address on the document. Above €1,000 before VAT, the switch stays on and the receipt needs the buyer's name and address ("Above this amount the customer's name and address are required.").
- Print check issues a Consulta de mesa (CM): a signed table check marked "Este documento não serve de fatura".
- Refunds and reopened orders get a Nota de crédito (NC).
- Each terminal has its own series for each document type and year:
FS T12026/1.
Printed on every document: four characters of the document's signature, the certificate mention ("Processado por programa certificado n.º …/AT"), the ATCUD just above the QR code, and the AT QR code.
Certification: the country note says going live in Portugal needs Sofrito's AT certificate. Sofrito signs documents with its producer key only when that key and its certificate number are set up on the server. Until then, every document prints "Programa não certificado pela AT. Documento sem validade fiscal." Read the bottom of a printed receipt to see which you have. The Compliance tab shows No software certificate number yet until the server signs documents, and Back office › Settings › Invoicing › Software certificate shows the number once it does.
ATCUD and series: the country note says every series must be communicated to the AT before its first document. In Taxes & fiscal › Series & integrity, under AT validation codes, create this year's (or next year's) series in advance: one for each document type on every till and handheld. Communicate each one to the AT (Portal das Finanças, e-Fatura, Séries) and type the validation code the AT returns with Add code. When a series has no code, the Compliance tab warns that "the ATCUD prints as 0-number, which AT does not accept", and so does the till's payment screen ("No AT validation code for this terminal's … series"). Once documents use a code, it can no longer change.
Payment methods: Numerário, Multibanco / Cartão, MB WAY (asks for the reference) and Cartão de refeição.
Monthly file: Taxes & fiscal › Exports › SAF-T (PT) file › Download XML: "Monthly invoicing file for AT (e-Fatura), due by the 5th of the following month." It needs your NIF in Settings › Business details. Validate it with the AT's validator before you submit it.
Madeira and the Azores: the country note gives Madeira's rates as 4%, 12% and 22%, and the Azores' as 4%, 9% and 16%. Change them in Taxes & fiscal › Tax rates, where each rate has a Region (PT, PT-MA or PT-AC), and set Back office › Settings › Invoicing › Tax region to Madeira (PT-MA) or Azores (PT-AC): the QR code and the SAF-T file use it. In the Azores, also check the time zone.
Check with your accountant:
- that your documents are certified, and the certificate number they print
- how and when to communicate your series, and the validation codes
- which category each dish and drink belongs to (13% or 23%)
- whether you send invoice data monthly with the SAF-T file or by other means
- the rates and tax region for Madeira and the Azores
#Angola
Status: Needs a certified add-on.
Money: kwanzas (AOA). Prices include IVA.
Taxes: IVA 14% (NOR), IVA 7% (RED) and Isento (ISE, exemption M00). Comida and Refrigerantes use 7% and Bebidas alcoólicas 14%. Sofrito's country note says: "Verify whether the 7% hospitality rate applies to your business; otherwise use 14%."
Tax number: NIF, not checked by Sofrito. Without a buyer NIF, the document says "Consumidor final".
Documents: a meal paid on the spot gets a Factura/Recibo (FR), with the buyer's NIF if given, and each line
shows its unit price before IVA and its rate. Refunds and reopened orders get a Nota de Crédito (NC). Each
terminal has its own series: FR T12026/1. Documents are signed and chained per document type and series.
There is no QR code and no ATCUD.
Validation: the country note says invoicing software must be validated by the AGT. Sofrito's AGT validation number and the key that signs documents are set up on the server. Until they are, each document prints four characters of its signature followed by "Programa não validado pela AGT. Documento sem validade fiscal.", and the Compliance tab shows No software certificate number yet. Once the server signs documents, they print "Processado por programa validado n.º" and the validation number instead. Sofrito does not send invoices to the AGT in real time. Its country note says that real-time electronic invoicing applies to large taxpayers since 1 January 2026, then to other VAT taxpayers in phases.
Payment methods: Numerário, Multicaixa, Multicaixa Express and Unitel Money. The last two ask for the transaction reference.
SAF-T (AO): Taxes & fiscal › Exports downloads the invoicing file in the SAF-T (AO) structure ("Export it whenever AGT asks for it."). It needs your NIF in Settings › Business details.
Check with your accountant:
- whether you may issue your sales documents from Sofrito today, given AGT validation and the e-invoicing calendar that applies to you
- which document type your sales need (Sofrito issues a Factura/Recibo)
- whether the 7% rate applies to your restaurant
- whether the SAF-T (AO) file is accepted as Sofrito produces it
#Brazil
Status: Needs a certified add-on.
Money: reais (BRL). Prices include tax. Tips are on, with a 10% button for the customary "serviço".
Taxes: one 0% rate, Simples Nacional (sem destaque) (code SN), on the tax categories Alimentação, Bebidas and Bebidas alcoólicas. The country note says the 0% rate is for restaurants in Simples Nacional, whose receipts don't show ICMS. Outside Simples Nacional, set your state's ICMS rates in Taxes & fiscal › Tax rates.
Tax number: CPF/CNPJ, not checked by Sofrito.
Documents: numbered receipts titled "Recibo" (RC A2026/1) in a SHA-256 chain, with the check code at the
bottom.
Payment methods: Dinheiro, Crédito, Débito, Pix (asks for the transaction reference) and Vale-refeição.
Not included: Sofrito does not issue NFC-e. Its country note says that each consumer sale must be authorised by the state SEFAZ, and Sofrito does not connect to an NFC-e provider.
Check with your accountant:
- how you will issue NFC-e for every sale, alongside Sofrito
- your tax regime (Simples Nacional or another) and the rates to set up
- how to treat the 10% serviço
- the time zone: Sofrito sets São Paulo time, unless you set up on a device in another Brazilian time zone
#Africa
#Cape Verde
Status: Needs a certified add-on. Money: escudos (CVE), prices include IVA. Taxes: IVA 15% (NOR) on Comida, Refrigerantes and Bebidas alcoólicas. Tax number: NIF. Payment methods: Numerário and Vinti4. Documents: numbered receipts titled "Recibo", in a SHA-256 chain.
Not included: the country note says that invoices are electronic documents sent to the DNRE platform (e-Fatura). Sofrito does not connect to e-Fatura.
Check with your accountant: your e-Fatura obligations.
#Ghana
Status: Needs a certified add-on. Money: cedis (GHS), prices include tax. Taxes: VAT 15%, NHIL 2.5%, GETFund 2.5% and a 1% tourism levy, all on Food & drinks and Alcohol. Tax number: TIN. Payment methods: Cash, Card, MTN MoMo and Telecel Cash (the last two ask for the reference). Documents: numbered receipts in a SHA-256 chain.
Not included: the country note mentions E-VAT electronic receipts for VAT-registered businesses. Sofrito does not issue them.
Check with your accountant: E-VAT, and whether each levy applies to your business.
#Kenya
Status: Needs a certified add-on. Money: shillings (KES), prices include tax. Taxes: VAT 16% and a 2% catering levy on Food & drinks and Alcohol. Tax number: KRA PIN. Payment methods: Cash, Card and M-Pesa (asks for the reference). Documents: numbered receipts in a SHA-256 chain.
Not included: the country note says that every sale must be transmitted to the KRA through eTIMS. Sofrito does not connect to eTIMS.
Check with your accountant: eTIMS, and whether the catering levy applies to you.
#Nigeria
Status: Standard receipts. Money: naira (NGN), prices include tax. Taxes: VAT 7.5% and a 5% consumption tax on Food & drinks and Alcohol. The country note says Lagos State levies the 5% consumption tax on restaurant sales: remove it where it does not apply. Tax number: TIN. Payment methods: Cash, Card and Bank transfer.
Check with your accountant: which taxes your state charges.
#South Africa
Status: Standard receipts. Money: rand (ZAR), prices include VAT. Taxes: VAT 15%. Tax number: VAT No. Payment methods: Cash, Card, SnapScan and Zapper (the last two ask for the reference). Tips: 10%, 12% and 15% buttons.
The country note says tax invoices above R5,000 need full buyer details. Sofrito does not ask for them by itself: use Invoice with VAT No. when a guest needs a tax invoice.
Check with your accountant: what your tax invoices must show.
#Europe
#Austria
Status: Needs a certified add-on. Money: euros, prices include tax. Taxes: USt 10% on Speisen and 20% on Alkoholfreie Getränke and Alkoholische Getränke. Tax number: UID. Payment methods: Cash and Card. Documents: numbered receipts titled "Beleg", in a SHA-256 chain.
Not included: the country note says receipts must be signed by a registered signature unit and carry the RKSV QR code. Sofrito does not connect to one.
Check with your accountant: RKSV.
#Belgium
Status: Needs a certified add-on. Money: euros, prices include tax, cash rounded to €0.05. Taxes: TVA 12% on Plats (6% for takeaway and delivery), 21% on Boissons sans alcool and Boissons alcoolisées. Tax number: BTW/TVA. Payment methods: Cash and Card. Documents: numbered receipts titled "Ticket", in a SHA-256 chain.
Not included: the country note says restaurants with significant food turnover must use a certified cash register system (GKS/SCE), and that Sofrito is not one.
Check with your accountant: whether the certified cash register system applies to you.
#Denmark
Status: Standard receipts. Money: kroner (DKK), prices include tax, cash rounded to 0.50 kr. Taxes: Moms 25% on Mad, Alkoholfri drikkevarer and Alkoholiske drikkevarer. Tax number: CVR. Payment methods: Kontant, Kort and MobilePay (asks for the reference).
Check with your accountant: your receipt and cash register rules.
#Finland
Status: Standard receipts. Money: euros, prices include tax, cash rounded to €0.05. Taxes: ALV 14% on Ruoka and Alkoholittomat juomat, 25.5% on Alkoholijuomat. Tax number: ALV-nro. Payment methods: Käteinen, Kortti and MobilePay (asks for the reference).
Check with your accountant: your receipt rules.
#France
Status: Needs a certified add-on. Money: euros, prices include tax.
Taxes: TVA 20%, 10% and 5.5%. The tax categories are Restauration (10%), Boissons sans alcool (10% / 5,5% à emporter), Boissons alcoolisées (20%) and Produits alimentaires à emporter (5,5%).
Tax number: N° TVA. Payment methods: Espèces, Carte bancaire and Titre-restaurant.
Documents: Ticket (RC), Facture (FT) and Avoir (NC). Tickets are chained with SHA-256 and each prints a short "Signature".
Closings: besides the day close (Z), Sofrito makes monthly and yearly closes, under Taxes & fiscal › Day closes › Monthly and yearly closes. The first day close of a month seals the month before, and the first of a year seals the year before, each with its period total and the perpetual grand total. A month waits until every day of it with sales has its Z. Once a month is sealed, its days can no longer be closed: "This month is already closed, so its days can no longer be closed."
Not included: the country note says you need an NF525 certificate or the publisher's attestation, and that Sofrito has neither. It also says Sofrito does not keep the technical event log or the signed periodic archives.
Check with your accountant: NF525 or the attestation, and your closings. The country note also says a restaurant note is mandatory from €25 including tax.
#Germany
Status: Needs a certified add-on. Money: euros, prices include tax. Tips: 5%, 10% and 15% buttons.
Taxes: MwSt 7% on food and 19% on drinks, in the tax categories Speisen (7%), Getränke (19%) and Alkoholische Getränke (19%).
Tax number: USt-IdNr. Payment methods: Bar, Karte and EC-Karte.
Documents: Beleg (RC), or Rechnung (FT) above €250 including tax, and Gutschrift (NC).
Not included: the country note says every transaction must be signed by a certified TSE, and Sofrito does not connect to one: every receipt prints "TSE: nicht verbunden (Demo)", and the Compliance tab shows "No TSE connected". It also says tax audits expect a DSFinV-K export, which Sofrito does not produce.
Check with your accountant: the TSE, receipt and DSFinV-K rules, before you trade.
#Ireland
Status: Standard receipts. Money: euros, prices include VAT. Taxes: VAT 9% on Food, 23% on Soft drinks and Alcoholic drinks. Tax number: VAT No. Payment methods: Cash and Card. Tips: 10%, 12.5% and 15% buttons.
Check with your accountant: which rate applies to each dish and drink.
#Italy
Status: Needs a certified add-on. Money: euros, prices include tax. Taxes: IVA 10% on Cibo, Bevande analcoliche and Bevande alcoliche, with 22% for drinks sold for takeaway or delivery. The country note says food and drink served at the table are 10%, and drinks sold to take away 22%. Tax number: P.IVA. Payment methods: Contanti and Carta. Documents: numbered receipts titled "Ricevuta", in a SHA-256 chain.
Not included: the country note says daily takings (corrispettivi) must be transmitted through a Registratore Telematico (RT). Sofrito does not connect to one.
Check with your accountant: the RT, and which rate applies to each item.
#Netherlands
Status: Standard receipts. Money: euros, prices include tax, cash rounded to €0.05. Taxes: BTW 9% on Eten and Frisdranken, 21% on Alcoholische dranken. Tax number: BTW-nr. Payment methods: Contant and Pin. Documents: receipts titled "Kassabon".
Check with your accountant: your receipt rules.
#Norway
Status: Needs a certified add-on. Money: kroner (NOK), prices include tax, cash rounded to 1 kr. Taxes: MVA 25% on Mat, Alkoholfrie drikker and Alkoholholdige drikker, with 15% for food and soft drinks sold for takeaway or delivery. Tax number: Org.nr MVA. Payment methods: Kontant, Kort and Vipps (asks for the reference).
Not included: the country note mentions the cash register rules (kassasystemloven): a SAF-T Cash Register export and a producer declaration. Sofrito provides neither.
Check with your accountant: the cash register rules.
#Poland
Status: Needs a certified add-on. Money: złoty (PLN), prices include tax. Taxes: VAT 8% on Jedzenie, 23% on Napoje bezalkoholowe and Napoje alkoholowe. Tax number: NIP. Payment methods: Gotówka, Karta and BLIK (asks for the reference).
Not included: the country note says restaurants need an online cash register connected to the Central Repository (CRK). Sofrito does not connect to one.
Check with your accountant: the online cash register.
#Spain
Status: Partly built in: Sofrito numbers, chains and prints documents the way the law describes, but does not send records to the AEAT. Money: euros, prices include IVA.
Taxes: IVA 21% (G) and 10% (R). The tax categories are Hostelería (10%), Bebidas (10%), Bebidas alcohólicas en sala (10%), which uses 21% for takeaway, and Tipo general (21%).
Tax number: NIF, not checked by Sofrito. Payment methods: Efectivo, Tarjeta and Bizum (asks for the reference).
Documents:
- Each sale is a Factura simplificada (F2), up to €3,000 including IVA.
- When the guest gives a NIF, or above €3,000, Sofrito issues a Factura (F1), which needs the buyer's NIF ("This invoice needs the customer’s tax number.").
- Refunds and reopened orders get a Factura rectificativa (simplificada) (R5) when the original was simplified, or a Factura rectificativa (R1) when it was a full invoice.
- Each kind of document has its own yearly series, so numbers look like
F2-T2026-000001, with F1, R5 and R1 in their own series. - A Factura (F1) shows each line's unit price before IVA and its rate.
Printed: the AEAT QR code at the top of every ticket, with "QR tributario:" above it. Sofrito doesn't print the VERI*FACTU mark, because only a system that sends each record to the AEAT may print it. All the records of the installation form one SHA-256 chain.
Not included: Sofrito does not send the records to the AEAT. The country note says VERI*FACTU applies from 1 January 2027 for companies and 1 July 2027 for others, and that the Basque Country (TicketBAI) and Navarra have their own systems, which Sofrito does not connect to.
Check with your accountant: your VERI*FACTU obligations and date, and the rules in the Basque Country and Navarra. In the Canary Islands, also check the time zone.
#Sweden
Status: Needs a certified add-on. Money: kronor (SEK), prices include tax, cash rounded to 1 kr. Taxes: Moms 12% on Mat and Alkoholfria drycker, 25% on Alkoholhaltiga drycker. Tax number: Momsreg.nr. Payment methods: Kontant, Kort and Swish (asks for the reference).
Not included: the country note says you need a certified cash register with a control unit, registered with Skatteverket. Sofrito does not connect to one.
Check with your accountant: the control unit and registration.
#Switzerland
Status: Standard receipts. Money: francs (CHF), prices include tax, cash rounded to 0.05. Taxes: MWST 8.1% on Speisen, Alkoholfreie Getränke and Alkoholische Getränke, with 2.6% for food and soft drinks sold for takeaway or delivery. Tax number: MWST-Nr. Payment methods: Bar, Karte and TWINT (asks for the reference). Documents: receipts titled "Beleg".
Check with your accountant: your receipt rules.
#United Kingdom
Status: Standard receipts. Money: pounds (GBP), prices include VAT. Tips: 10%, 12.5% and 15% buttons.
Taxes: VAT 20% and 0%. The tax categories are Food (hot / eat-in 20%), Cold takeaway food (0%) (20% when eaten in), Soft drinks (20%) and Alcohol (20%).
Tax number: VAT No. Payment methods: Cash and Card.
Documents: receipts (RC) that print your VAT number. The country note says a receipt that shows your VAT number can serve as a simplified VAT invoice for sales up to £250. When a guest asks for a VAT invoice, staff turn on Invoice with VAT No. at payment and add the guest's name and address: Sofrito issues a VAT invoice (FT) that shows each line's unit price before VAT and its rate. A restaurant set up with an earlier version of Sofrito titles it "Invoice".
The country note also says a discretionary service charge is commonly 12.5%, and that tips and service charges must be passed to staff in full (Employment (Allocation of Tips) Act 2023).
Check with your accountant: which dishes are standard-rated or zero-rated, and how you share tips.
#Americas
#Canada
Status: Standard receipts. Money: dollars (CAD). Prices exclude tax: tax is added at payment. Cash is rounded to $0.05. Tips: 15%, 18% and 20% buttons, worked out on the total before tax.
Taxes: HST 13% on Restaurant food, Beverages and Alcohol. The country note says this is Ontario's rate: in other provinces, set your province's HST, or GST plus provincial sales tax, in Taxes & fiscal › Tax rates.
Tax number: GST/HST No. Payment methods: Cash and Debit / Credit.
Check with your accountant: your province's taxes. Also check the time zone: Sofrito sets Toronto time, unless you set up on a device in another Canadian time zone.
#Mexico
Status: Needs a certified add-on. Money: pesos (MXN), prices include IVA. Taxes: IVA 16% on Comida, Refrescos and Bebidas alcohólicas. Tax number: RFC. Payment methods: Efectivo, Tarjeta and Transferencia (SPEI). Tips: 10%, 15% and 20% buttons. Documents: numbered receipts titled "Recibo", in a SHA-256 chain.
Not included: the country note says CFDI 4.0 invoices are issued through an authorised PAC: on request, and as a periodic global invoice for sales to the public. Sofrito does not connect to a PAC.
Check with your accountant: CFDI and your PAC.
#United States
Status: Standard receipts. Money: dollars (USD). Prices exclude tax: tax is added at payment. Tips: 18%, 20%, 22% and 25% buttons, worked out on the total before tax.
Taxes: one Sales tax rate of 8.875% on Prepared food, Beverages and Alcohol. The country note says rates depend on the state, county and city: set your combined rate in Taxes & fiscal › Tax rates.
Tax number: EIN. Payment methods: Cash, Credit / Debit and Gift card.
Check with your accountant: your combined sales tax rate. Also check the time zone: Sofrito sets New York time, unless you set up on a device in another US time zone.
#Middle East and Asia
#India
Status: Standard receipts. Money: rupees (INR). Prices exclude tax.
Taxes: CGST 2.5% and SGST 2.5% on Restaurant service (5% GST). The Alcohol (state excise / VAT) category has no rate.
Tax number: GSTIN. Payment methods: Cash, Card and UPI (asks for the reference).
Check with your accountant: your GST rate and the state taxes on alcohol.
#Saudi Arabia
Status: Needs a certified add-on. Money: riyals (SAR), prices include VAT. Taxes: VAT 15%. Tax number: VAT No. Payment methods: Cash and Card.
Documents: Simplified tax invoice (RC), Tax invoice (FT) and Credit note (NC). Every document carries the ZATCA QR code from phase 1: seller name, VAT number, time, total and VAT.
Not included: the country note says Sofrito does not support phase 2 (the XML invoice, cryptographic stamp and reporting to ZATCA). The QR code setting in Settings › Receipts stays on.
Check with your accountant: your ZATCA phase 2 date.
#United Arab Emirates
Status: Standard receipts. Money: dirhams (AED), prices include VAT. Taxes: VAT 5% on Food & drinks and Alcohol. The country note says restaurants in Dubai hotels also charge a municipality fee: add it in Taxes & fiscal › Tax rates if it applies to you. Tax number: TRN. Payment methods: Cash and Card. Tips: 10% and 15% buttons.
Check with your accountant: VAT and any municipality fee in your emirate.
#Oceania
#Australia
Status: Standard receipts. Money: dollars (AUD), prices include GST, cash rounded to $0.05. Taxes: GST 10%. Tax number: ABN. Payment methods: Cash and Card.
The country note says a public-holiday or weekend surcharge can be set up as a service charge, in Settings › Service charges.
Check with your accountant: your GST setup. Also check the time zone: Sofrito sets Sydney time, unless you set up on a device in another Australian time zone.
#New Zealand
Status: Standard receipts. Money: dollars (NZD), prices include GST, cash rounded to $0.10. Taxes: GST 15%. Tax number: GST No. Payment methods: Cash and Card.
Check with your accountant: your GST setup.
Glossary
This glossary explains, in alphabetical order, the words you meet on Sofrito's screens and in this guide. Words in bold are the ones the app shows.
#0–9
86: kitchen slang for sold out; a dish marked Sold out cannot be ordered until someone puts it back on sale.
#A
ADD-ON: the banner on a kitchen ticket for dishes added to a table the kitchen is already cooking for.
All day: the panel on the kitchen display that counts how many of each dish are still to cook.
Allergens: the 14 EU allergens you mark on each dish, which Sofrito shows on the till, on kitchen tickets and on the kitchen display.
Allergies: what a guest can't eat, kept on their guest profile; Sofrito shows them in red on the check and on every kitchen ticket for their order.
API key: a key that lets your own software read data from Sofrito or send it orders and menu changes, created in Settings › API access.
Approval: a manager typing their PIN on someone else's device (Manager approval) to allow an action that person's role does not allow.
Area: a part of the floor plan, such as Dining room, Terrace or Bar, shown as a tab on Floor.
AT validation code: in Portugal, the code the tax authority (AT) gives each document series once you communicate the series; you add it in Taxes & fiscal › Series & integrity.
ATCUD: in Portugal, the code printed on every document, made of the series' AT validation code and the document number.
Audit log: the back-office record of who did what, when, and on which device, including who approved it.
#B
Back office: the part of Sofrito where managers and owners set up the menu, team, devices, taxes and settings and read the reports, in a browser or from More › Back office.
Backup printer: a printer that takes over another printer's jobs while that printer is offline, until it prints again.
Bar tab: an order type for drinks at the bar, kept open under the guest's name until they pay.
Bartender: the role for staff who serve drinks and run tabs, with the same permissions as a server.
Booking: a reservation for a party at a date and time, managed in Bookings.
Break: time off during a shift, started from the time clock under More: an Unpaid break comes off the hours worked, a Paid break doesn't.
Bump: to clear a ticket from the kitchen display once its food has gone out.
Bump bar: a small keypad next to the kitchen display, where keys 1 to 9 bump tickets and R recalls the last one.
Business day: the trading day Sofrito counts sales in, which ends at 04:00 by default so that late service counts for the evening it started.
#C
Card terminal: the separate machine that takes card payments; Sofrito records the payment when you tap Approved.
Cash drawer: the till's cash box, opened with a starting float and counted when it is closed.
Cash drop: taking cash from the drawer to a safe during a shift, recorded with Cash drop, without a reason.
Cash rounding: rounding cash payments to the smallest coin in use, such as 5 cents, while card payments are never rounded.
Cash tips: tips guests leave in cash outside a payment, which staff keep and declare when they clock out, under Cash tips for this shift.
Cashier: the role for staff who take payments and look after the cash drawer.
Category: a group of dishes, such as Starters or Drinks, shown as a tab on the till, whose dishes take its colour, course, stations and tax.
Certified add-on: a certified device, provider or certificate that some countries require and that Sofrito does not include.
Check: the guest's bill for a table or order, which Print check prints before payment.
Clock in / out: recording the start and end of your shift with your PIN, on the lock screen or under More.
Cloud sync: the link that copies a Sofrito Hub's data to Sofrito Cloud and brings back changes made there.
Comp: giving a dish on the house; it shows as On the house on the check and still counts in the reports.
Compliance: the tab in Taxes & fiscal that shows what the law asks of your restaurant and what is still missing.
Consulta de mesa: in Portugal, the signed table check (CM) that Sofrito issues when you print a bill before payment.
Consumidor final: the words Sofrito prints in Portugal, Angola and Mozambique on a document with no buyer.
Counter: an order type for orders taken and paid at the counter.
Country pack: everything Sofrito sets up for your country: currency, taxes, documents, payment methods and fiscal rules.
Course: a stage of the meal, such as Drinks, Starters, Mains or Desserts, so dishes reach the kitchen at the right time.
Credit note: the document that cancels all or part of a sale, such as a refund, and refers to the original document.
Customer display: a screen facing the guest that shows the order open on the till it faces and the total, then "Thank you!" once they have paid.
#D
DAF authorisation: in Mozambique, the authorisation from your Direcção de Área Fiscal to issue invoices by computer, whose reference Sofrito prints on every document once you enter it in Settings › Invoicing.
Dashboard: the first page of the back office, with today's sales, orders, guests, payments and top dishes.
Day close: closing the business day with the Z report, which locks the day's totals; checks still open can move to the next business day.
Delivery: an order type for food delivered to the guest.
Demo restaurant: Mesa Viva, a sample restaurant with three weeks of service history that you can open to try Sofrito.
Desktop app: the Sofrito app for Windows, Mac and Linux, which can also run Sofrito Hub on the same computer.
Device: any till, handheld, kitchen display, customer display or pickup board paired with your restaurant.
Dine in: an order type for guests eating at a table.
Discount: a reduction on one dish or the whole order, chosen from the restaurant's list or typed in.
#E
ESC/POS: the command language that almost every thermal receipt and kitchen printer understands, and that Sofrito prints in.
Exceptions: the report of voids, comps, discounts, price changes, refunds, voided payments, reopened orders, pay-outs and drawer openings, with who did them and who approved them.
Expected: the cash that should be in the drawer, which Sofrito works out from the float, cash sales and recorded movements.
Expo: the person at the pass who checks dishes before they go out; in Sofrito, a kitchen display that shows All stations can do this job.
#F
Fire: sending a course that was held back to the kitchen, with the Fire button and the course name, for example Fire Mains.
Fiscal document: a legal sales document, such as a receipt, invoice or credit note, which can never be changed or deleted.
Fixed IP address: an address set in the router that never changes, so devices can always find the hub and the printers.
Float: the cash in the drawer at the start of a shift, typed as Starting cash.
Food ready: a table whose food is on the pass, waiting to be taken out.
#G
Gift card: a prepaid card your restaurant sells or tops up on the till under More › Gift cards, and accepts as a payment method; selling one is not a sale, so tax is charged on the order it pays for.
Grand total: the running total of what the receipts charged since the first day close, carried on every Z report.
Guest: a person with a profile in Guests & loyalty, whose orders, visits and loyalty points Sofrito keeps.
#H
Hand over: giving an open order to another member of staff with Hand over to….
Handheld: a phone or small device that servers carry to take orders and payments at the table.
Hold: saving dishes on an order without sending them to the kitchen yet, with the hourglass Hold button; they show Held until someone taps Fire.
Host: the role for staff who greet guests and look after bookings and the waitlist.
House account: a guest's account that you charge now and they pay later, up to a credit limit; payments towards it are taken in the back office.
Hub: short for Sofrito Hub.
#I
Inventory: the back-office pages for stock, recipes, suppliers and purchase orders.
Invoice: a sales document with the buyer's name and tax number, which you ask for with Invoice with and your country's tax-number name (for example Invoice with NIF).
Invoice-receipt: an invoice that also proves payment (Fatura-recibo or Factura/Recibo), the usual sales document in Angola and Mozambique, and in Portugal above €100 before VAT.
Invoicing: the section of Settings with the documents Sofrito issues, what your tax authority gave you, the lines printed on every document, and training mode.
#K
Kitchen: the role for cooks, who use the kitchen display and can mark dishes sold out.
Kitchen display: a screen in the kitchen that shows the tickets for its stations, where cooks start, ready and bump them.
Kitchen ticket: the dishes one station must prepare for an order, printed or shown on the kitchen display.
#L
Labels: a printer role that prints a sticky label for each item of a takeaway or delivery order.
Late: a kitchen ticket older than the late time (20 minutes by default), shown in red.
Location: one restaurant in your Sofrito account; a group can have several.
Lock screen: the screen where staff clock in and sign in with their PIN, which the till returns to when you tap Lock or leave it untouched.
Loyalty points: points that guests with a profile earn on paid orders and spend as a discount later.
#M
Manager: the role that runs the shift, approves voids, comps and discounts, closes the day and uses the back office.
Merge checks: joining two open checks into one.
Mobile money: a payment by phone, such as M-Pesa, MB WAY or Pix, for which staff type the transaction reference.
Modifiers: the options added to a dish, such as how it is cooked or "NO onion", some of which change the price.
Monthly and yearly closes: in France, the seals Sofrito puts on each month and year of day closes; the first day close of a month seals the month before.
#N
NIF: the tax number in Portugal, Spain, Angola and Cape Verde, printed on documents and checked by Sofrito in Portugal.
No sale: opening the cash drawer without a payment, for example to give change for a note.
No-show: a booking whose guests never came.
NUIT: the tax number in Mozambique.
#O
On the pass: food that is ready and waiting to be taken to the table.
Open price: a dish whose price staff type each time they sell it.
Order: everything one table, tab or counter guest asks for, from the first dish to the payment.
Order number: the number Sofrito gives each order, called out at the counter and printed on tickets, which starts again every business day by default.
Order type: what kind of order it is: Dine in, Takeaway, Delivery, Bar tab or Counter.
Over / short: the difference between the cash you counted and the cash expected when you close a drawer.
Owner: the role that holds every permission, including changing what each role can do.
#P
Pairing code: a 6-character code from the back office that connects a new device to your restaurant, once, within 15 minutes.
Partner: a company that sells, installs or supports Sofrito for restaurants.
Pass: the counter between the kitchen and the dining room where finished dishes wait to be taken out.
Pay in: putting extra cash into the drawer outside a sale, for example more change.
Pay out: taking cash out of the drawer outside a sale, for example to pay a supplier.
Payment method: a way to pay, such as cash, card, mobile money or a voucher, shown as a button on the payment screen.
Permission: one thing a role allows, such as "Apply discounts".
Pickup board: a screen guests can see, with the order numbers being prepared and ready to collect.
PIN: your personal 4-digit code for signing in, clocking in and approving.
Price level: a second set of prices for the same dishes, for example on the terrace or during happy hour.
Print bridge: a computer in the restaurant, running the Sofrito desktop app and paired as a print bridge, that sends print jobs to network printers the server can't reach itself; Sofrito Cloud needs one for them.
Print queue: the list of recent print jobs on More › Printers, with whether each one printed; a job that failed shows why, with Reprint.
Promo code: a code staff type in the order's Discount window, under Promo code, to apply the discount that has it.
#Q
QR code: the square code printed on documents so they can be checked; it carries the document's tax details, and it is required in Portugal, Spain and Saudi Arabia.
Quick sale: the bottom-bar button that starts an order without a table.
#R
Reason: the explanation staff choose for a void, comp, discount, refund or cash movement.
Recall: bringing a bumped ticket back onto the kitchen display, within 30 minutes of bumping it by default.
Receipt: the document a guest gets after paying.
Refund: giving money back on a paid order, for which Sofrito issues a credit note.
Reopen: opening a paid order again to correct it, for which Sofrito cancels its document with a credit note.
Reserved: a table held for a booking, shown with the booking time.
Role: a set of permissions, such as Server or Manager, given to people on the team.
Rush: marking an order's tickets as urgent on the kitchen display.
#S
SAF-T: the standard file of invoicing data that some tax authorities ask for, which Sofrito exports for Portugal, Angola and Mozambique.
Sample data: the sample dishes and team a new restaurant can start with, removed in one step with Remove sample data, or archived once something has been sold with them.
Seal: the code that ties a document or day close to the one before it, so that any later change shows.
Seat: a guest's numbered place at a table (S1, S2…), with Shared for dishes for everyone, so each dish goes to the right person.
Send: sending the dishes added to an order to the kitchen and bar.
Series: the numbered sequence of one type of document for a year, and in some countries for one till.
Served: food that has been taken to the table.
Server: the role for staff who take orders at the table, send them to the kitchen and take payment.
Server address: the address a device uses to reach Sofrito Hub or Sofrito Cloud, such as
http://192.168.1.20:7420.
Service charge: an extra amount added to the bill, such as 10% for large groups, which can count as a tip.
Simplified invoice: a short invoice without the buyer's details, allowed for smaller amounts, such as the Fatura simplificada in Portugal and the Factura simplificada in Spain.
Sofrito Cloud: Sofrito running on the internet, so the restaurant needs only its devices and an internet connection.
Sofrito Hub: Sofrito running on a computer in the restaurant, so service carries on without internet.
Split check: dividing one check into several by moving dishes onto new checks.
Split evenly: dividing a payment into equal parts, with ÷2 to ÷6.
Star CloudPRNT: a way for Star printers to collect their jobs from Sofrito Cloud over the internet, without a hub.
Station: a place that prepares food or drinks, such as the kitchen or the bar, which each dish is sent to; when no kitchen display shows a station, its tickets only print.
#T
Table states: what the floor plan shows for each table: Free, Seated, Cooking, Food ready, Check printed, Needs cleaning, Blocked or Reserved.
Takeaway: an order type for food the guest takes away.
Tax category: a group such as Food or Alcoholic drinks that decides which tax rate applies to a dish, sometimes with a different rate for takeaway.
Tax included / added: whether menu prices already include tax, as in most countries, or tax is added at payment, as in the United States, Canada and India.
Tax number: the business's tax identification number, called NIF, NUIT, VAT No., EIN or another name depending on the country.
Till: the main point-of-sale terminal, usually a touch screen at the counter or bar.
Timesheets: the back-office list of everyone's shifts, breaks, hours and labour cost, from their clock-in and clock-out.
Tip: money a guest adds for the staff when paying.
Tip pool: with Pool tips on in Settings › Tips, each day's tips shared by the hours each person worked, and paid out in Team & roles › Tips.
Training mode: a setting in Settings › Invoicing (Issue training documents) that puts documents in a separate series marked as not valid for tax, shown as on or off on the Compliance tab.
TSE: in Germany, the certified security module that must sign every transaction, which Sofrito cannot connect yet.
#U
Unpair: disconnecting a device from the restaurant, after which it needs a new pairing code.
UPS: a battery that keeps the hub, the router and the network switch running through a short power cut.
#V
VERI*FACTU: Spain's system for invoicing records; Sofrito chains the records and prints the AEAT tax QR code on every ticket, but not the VERI*FACTU mark, because it doesn't send the records to the AEAT.
Virtual printer: a printer that shows its tickets on the screen instead of printing them, for demos and training.
Void: cancelling a dish or a whole order before payment, which needs a reason and usually a manager once the kitchen has it.
VOID ticket: the red ticket the kitchen gets when a server voids a dish it already has; on a kitchen display it stays until a cook taps Got it.
Voucher: a meal voucher or paper ticket accepted as payment.
#W
Waitlist: the list of walk-in parties waiting for a table, with the wait you quoted them.
WebView: Android System WebView, the part of Android that runs the Sofrito app, which must be version 111 or newer.
#X
X report: the shift report (Shift report (X)) that prints the business day's takings so far without closing the day.
#Z
Z report: the day-close report (Close the day (Z)) that locks and prints the business day's totals.